I have found little information for commissioning a Schneider Electric Lexium MDrive Stepper Motor and integrating it into a Siemens solution, so I decided to write about how I did it.
Commissioning the MDrive Stepper Motor with the Schneider TCP Configuration Utility
The software required for commissioning the drive is available for download on the Schneider Motion website. The software that I needed was the Lexium LMDxE TCP Configuration Utility Version 1.2.0.6 that includes the PROFINET configuration part.
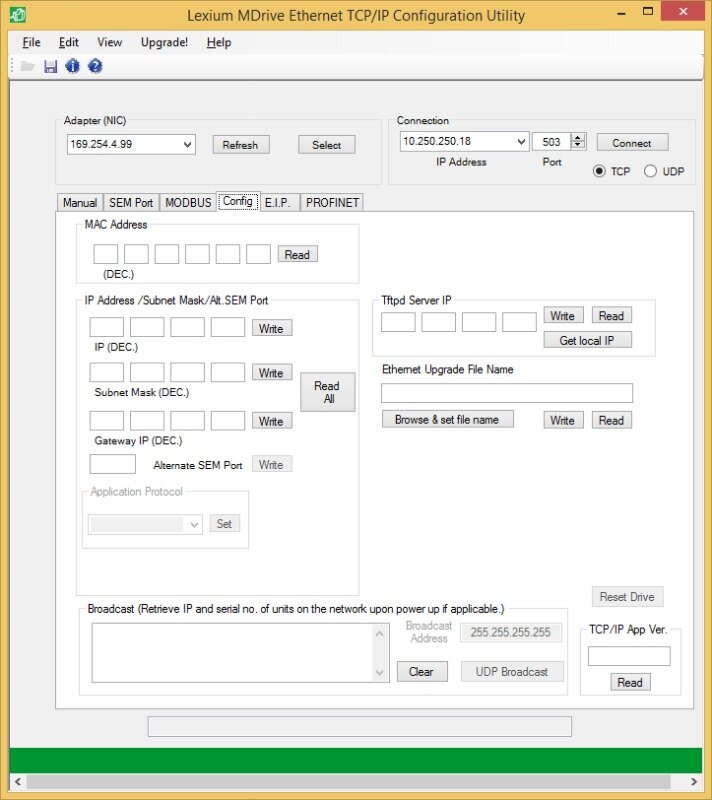
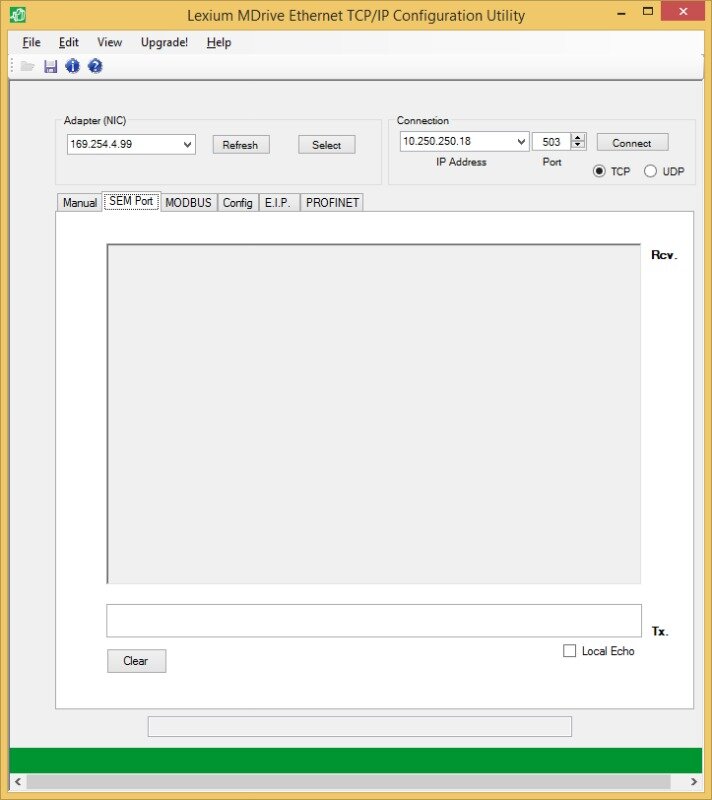
When you first open the Utility, you will see the Config screen. This is where you will need to select your computer’s adapter, and then you can read the MAC and IP Addresses from the drive. Once you connect to the drive, use this screen to set the drive’s IP Address as you wish to use it.
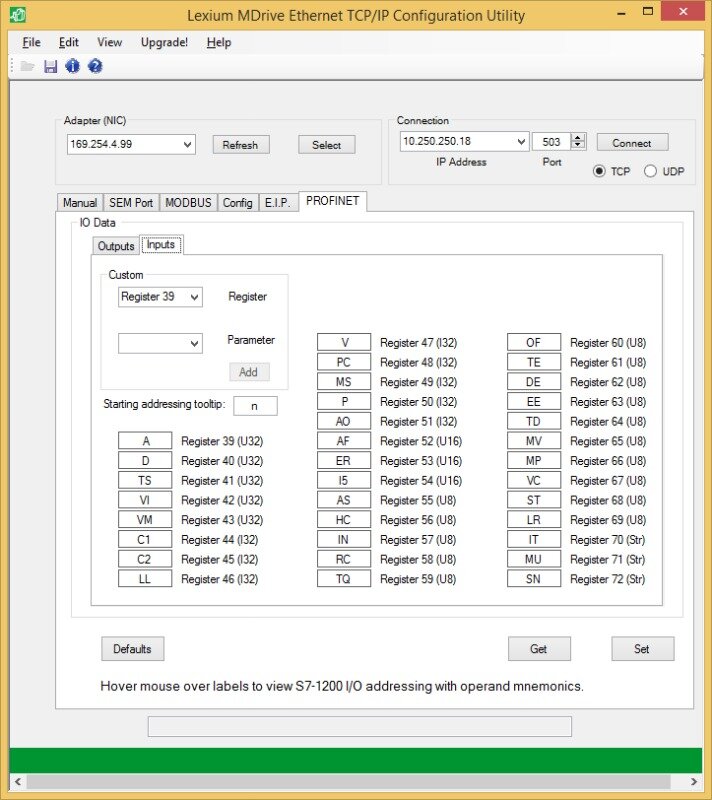
The PROFINET screen allows you to set up the input and output Registers for controller and drive communication.
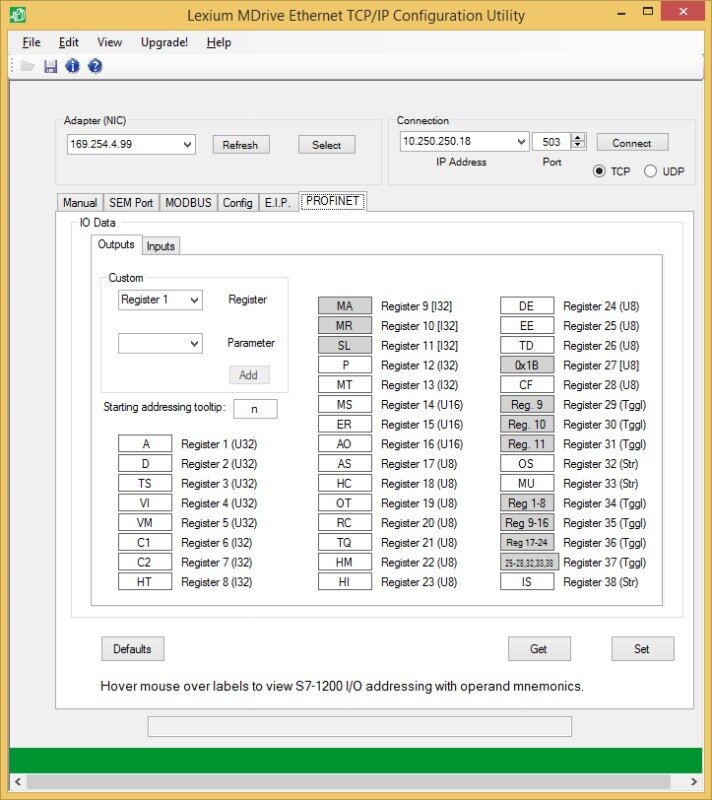
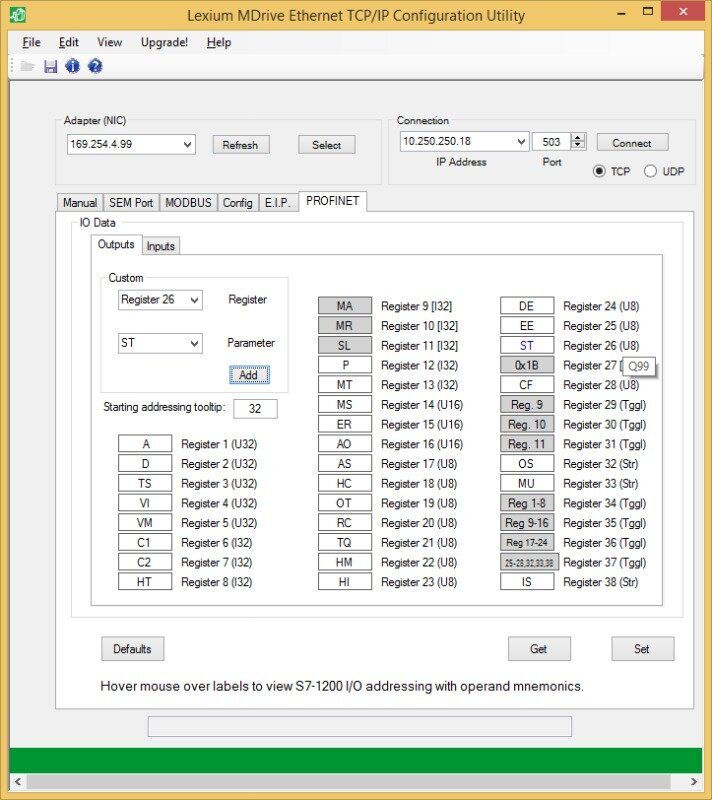
I used all the default parameters for the Inputs and all but two for the Outputs. My application called for an encoder, which enables stall detection. However, the Stall Flag and the Stall Factor parameters were not in the default parameters so I had to add them in place of unused parameters.
The SEM Port screen allows you to send commands to the drive, read parameters from the drive, and set drive parameters. There are some drive parameters that cannot be set from the PLC (direction for example) or are cumbersome (configuring inputs and outputs), so this is the best screen to perform these tasks. Sending commands to the drive is a good way of verifying functionality of the motor before installing it into your application.
IMPORTANT: Write “SAVE” to the drive after setting parameters so that you do not lose them when motor power is cycled.
Setting up the Siemens Project for Motion Control
Integration with Siemens requires installing the GSD file and adding it to your Hardware Configuration. The MDrive object allows for 128 bytes of both input and outputs, and you can see how I used them below.
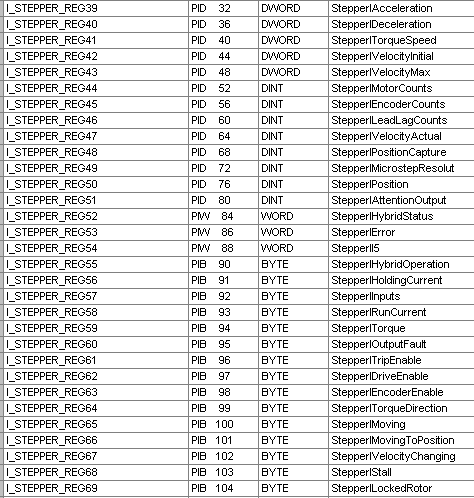
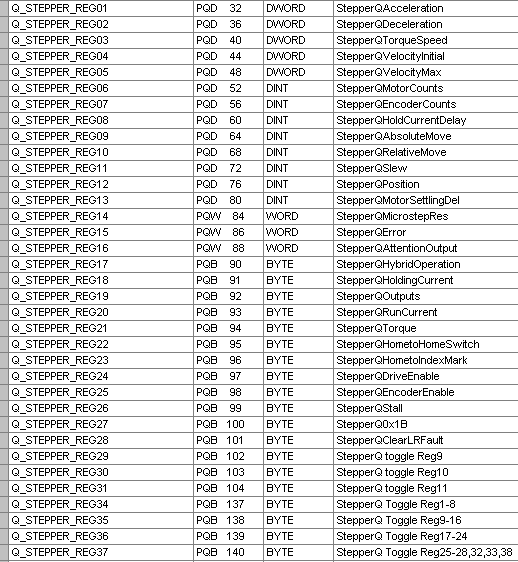
I found that 128bytes of both inputs and outputs was more than I needed for motion control in my application. Schneider Motion has documented the parameters well, so I will discuss some aspects that are not explicitly explained by the documentation.
Toggle Parameters
The parameters are usually sent to the Stepper motor when they are changed. For example, if you want to run the motor at a certain velocity, you send a speed to the Slew Register, and if you want it to stop, you send the Slew Register the value zero. If you are performing an Absolute Move and you want the motor to stop, you can again send a zero value to the Slew Register. However, if that register is already set to zero then the motor won’t stop, which is why you would need to use the Toggle Registers. In this case you would send a signal to Register 31 to toggle the Slew Register when the Slew Register is set to zero.
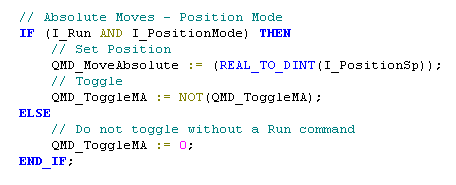
I have found that the best way to reliably send commands to the motor is by using the Toggle Registers. In the SCL code below I have an example of using the Toggle Registers. You will see that I compare the acceleration I read from the drive to the acceleration that I sent to the drive. If they are different, I set the toggle bit for the acceleration Register. Once the accelerations match, I reset the toggle bit (without resetting the other toggle bits) so that I can trigger the change the next time the accelerations differ. The motor waits for the rising edge of a toggle bit.

In my application it was necessary to change speeds and positions during moves, so I repeatedly toggled the motion commands (Move Absolute, Move Relative, and Slew) while my motor was in motion. In the example below, I check if I am running in position mode and I constantly send the position setpoint to the motor. The toggle bit automatically toggles until I am no longer running in position mode so I only have to worry about updating the position.
Resetting Errors and Faults
When the motor faults, the error is displayed with the Error Code parameter. Most faults can be cleared by sending “0” to the Error Code parameter. However, the Locked Rotor and Stall parameter faults require additional resetting. When the Locked Rotor fault occurs, it is necessary to send “1” to the Clear Locked Rotor parameter. When the Stall fault occurs, it is necessary to send “0” to the Stall parameter.
Quick Tip: I found the Stall Factor parameter was set too low for my application so once I set it higher the erroneous stall faults stopped occurring.
Learn more about DMC's Motion and Siemens PLC services.