Mapping Physical Keys in B&R Automation Studio
The ability to map physical buttons is a crucial element of fully utilizing B&R's Power Panel platform. Physical keys are a great way of making an HMI more user-friendly and robust.
This article details the procedure to map physical keys in B&R Automation Studio.
High Level Overview
- Physical button pressed on the HMI
- Virtual key is triggered
- Triggered virtual key performs action or sets variable
- Variable can be used as a trigger for other actions within the program
Procedure
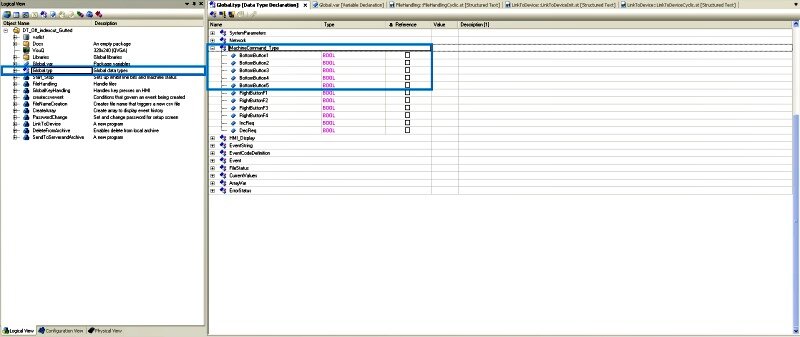
- To begin, we need to create the variables that will hold the state of each button (to be used in a program).
- Add a global type that contains all the buttons as BOOL's. These will be the datapoints that will be set high or low depending on which button is pressed.
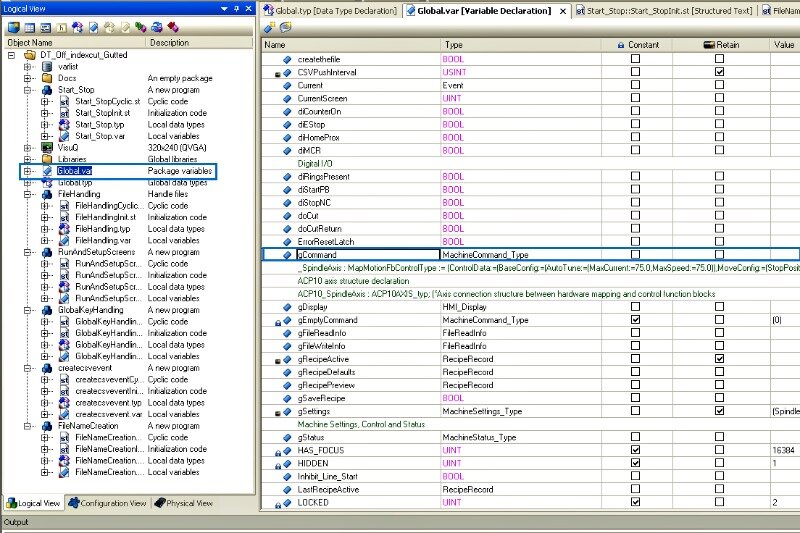
- When creating a global type, make sure to create a variable that references that data type. While it is not necessary to create a global type, it is generally a good organization practice.
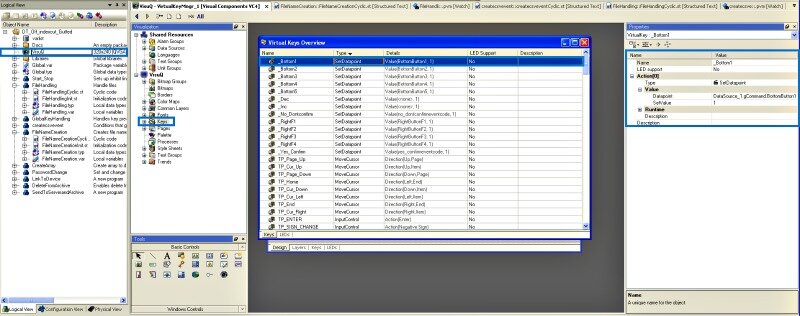
- Next, we need to create virtual keys that will set the value of the variables we created in part one.
- Navigate to the HMI setup (Logical View > Visu), and create a new virtual key for each button. The virtual keys overview can be brought up by double clicking the keys button.
- To add a virtual key, simply right click and select "Add Virtual Key". Create a new virtual key for each button.
- After creating each key, select the created key to bring up the Properties window on the right side of the screen.
- From here, set the type of the button (Action > Type) to SetDatapoint.
- Under Datapoint (Action > Value > Datapoint), select the variable that was created in step one.
- As a side-note, if you do not plan on using the button to change anything within a program, and simply would like to change the visible page upon button press, you can skip step one, and set the type of the button to ChangePage.
- Finally, we need to configure the physical buttons to control the virtual keys we created in part two.
- Navigate to key mapping for your panel (Configuration View > Double click 4PP065.0351-P74). This will bring up the Power Panel and the key mapping for each of its keys.
- If you are unable to open this window, make sure the Visu window is closed. In Automation Studio, only one Visual Components editor can be opened at the same time.
- To map the physical keys, simply select the key you wish to map.
- Under the properties on the right side of the screen, you are able to select the virtual key you created in part two.
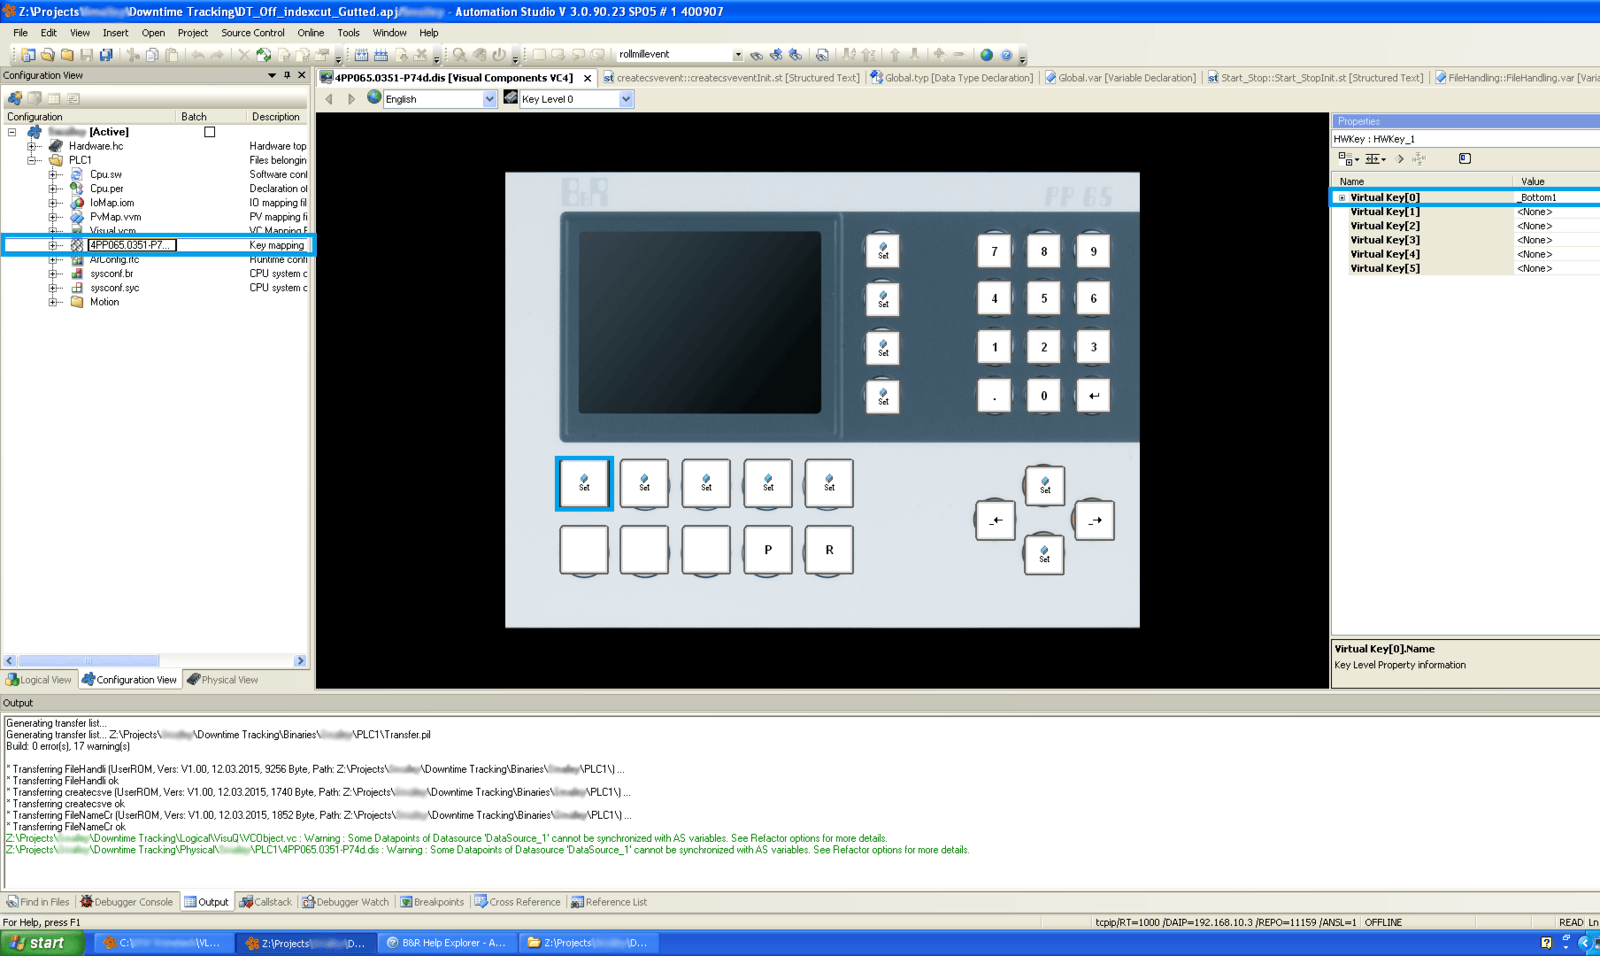
- Your keys are mapped! From here, you can use the variables in part one to control different functions within your program, or use the virtual keys in part two to directly perform an action.
Learn more about DMC's B&R Automation Studio services.
Comments
There are currently no comments, be the first to post one.