Welcome back to “Getting Started with WinCC OA”! If you aren’t familiar with the series’ previous topics, it’s recommended that you read the respective installments before proceeding:
In part 3 of the “Getting Started with WinCC OA,” we’ll investigate OA’s panels and how to create and use them. Panel creation and usage are essential as panels serve as the foundation for SCADA object development and subsequent scripting.
What are Panels?
Panels are the environment in which a developer creates SCADA screens and objects.
Creating a Panel
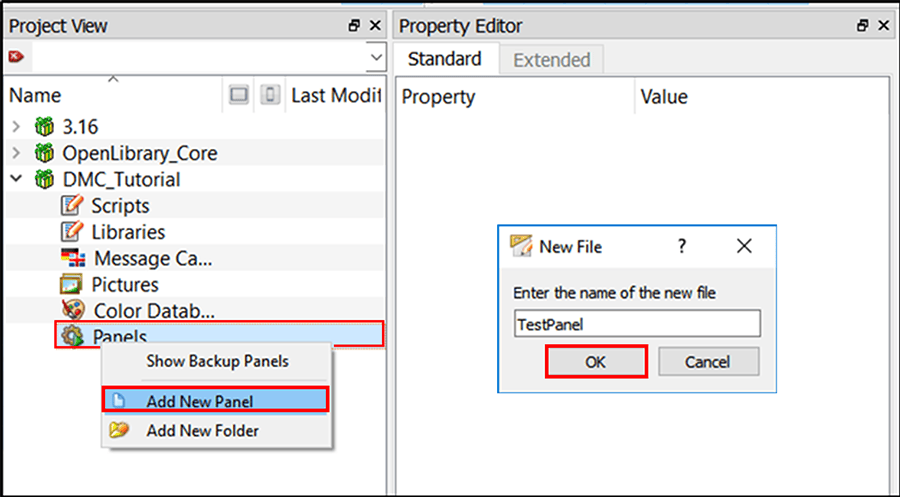
To create a panel, simply right-click the panel icon in the Project View tree, select “Add New Panel,” name the panel, and click “OK.”
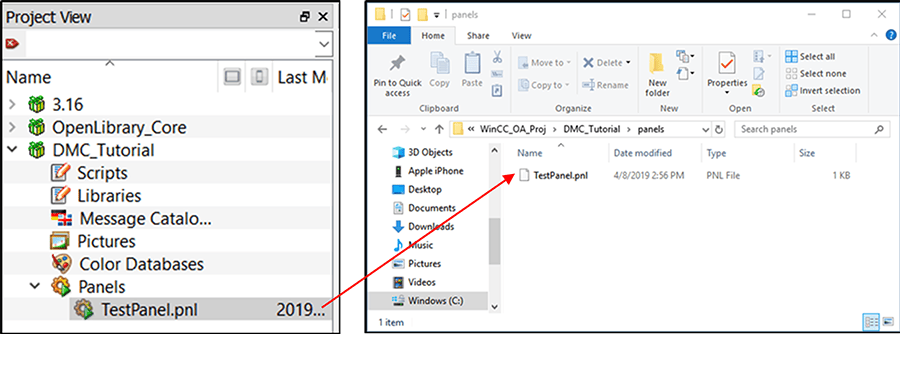
The new panel will now appear in both the Project View tree and your OA project’s panel folder.
Adding Objects
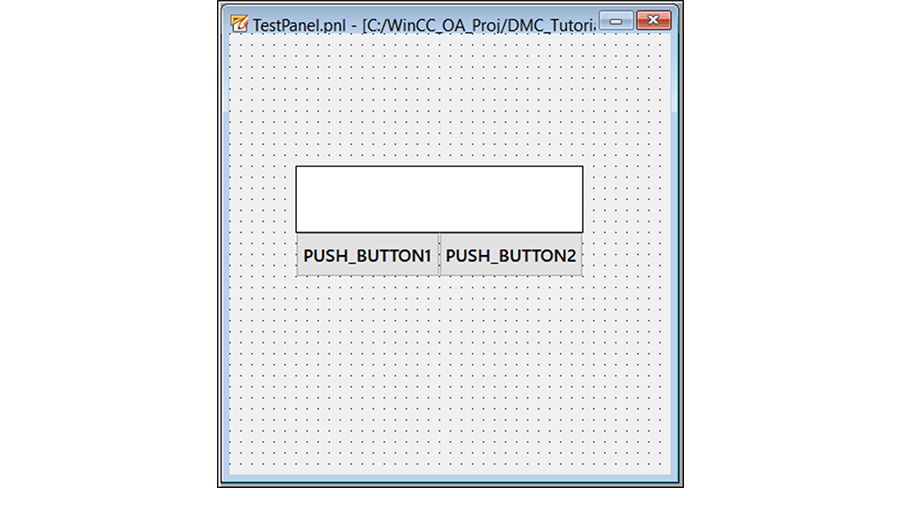
An object is the most basic visual element of our SCADA system. Objects range from rectangles and text to push buttons and combo boxes. To add an object, select any object from the “basic objects” section of the toolbar and then “draw” the selected item within a panel.
In the example below, I have created a rectangle and two push buttons.
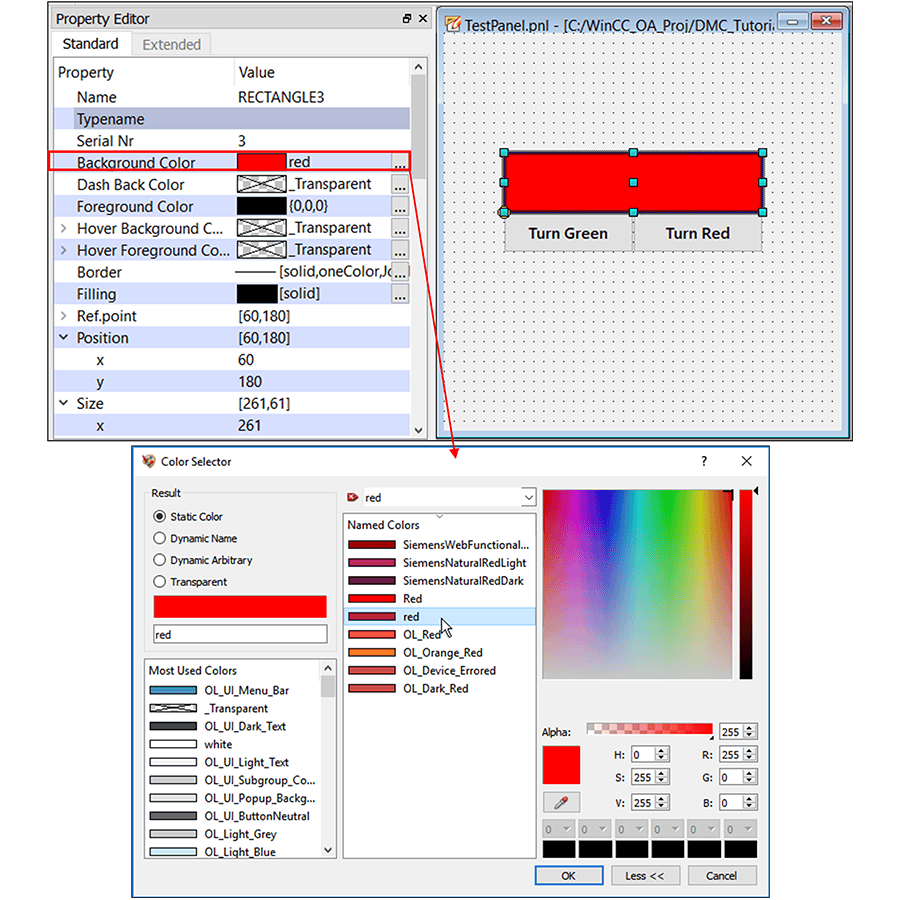
Properties
Every panel and object has a set of properties that defines its individual attributes. To access these attributes, click on the panel or object and look under the Property Editor. From there, you may modify properties for the selected object.
Common properties can include (but are not limited to):
- Name
- Background color
- Foreground color
- Label/text
- Position
- Size
- Enabled
- Editable
- Rotation
- Visible
In the example, we’ve modified the buttons’ Label and the rectangle’s Background Color.
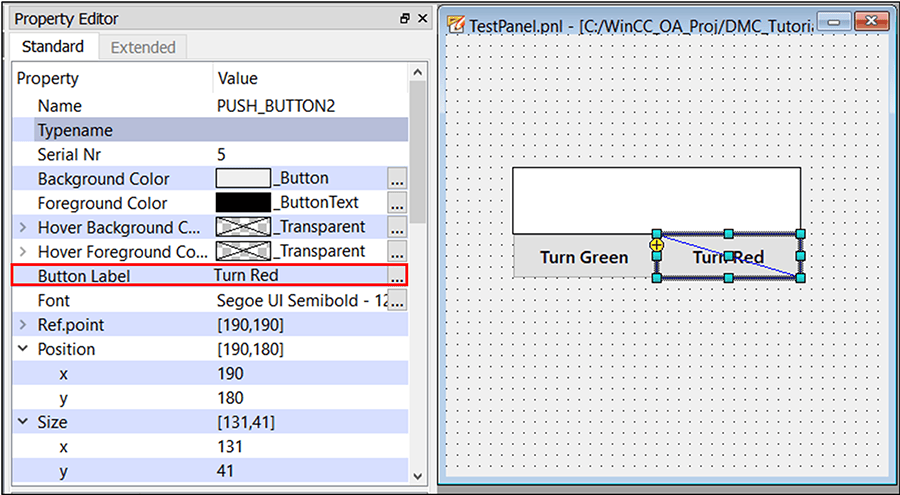
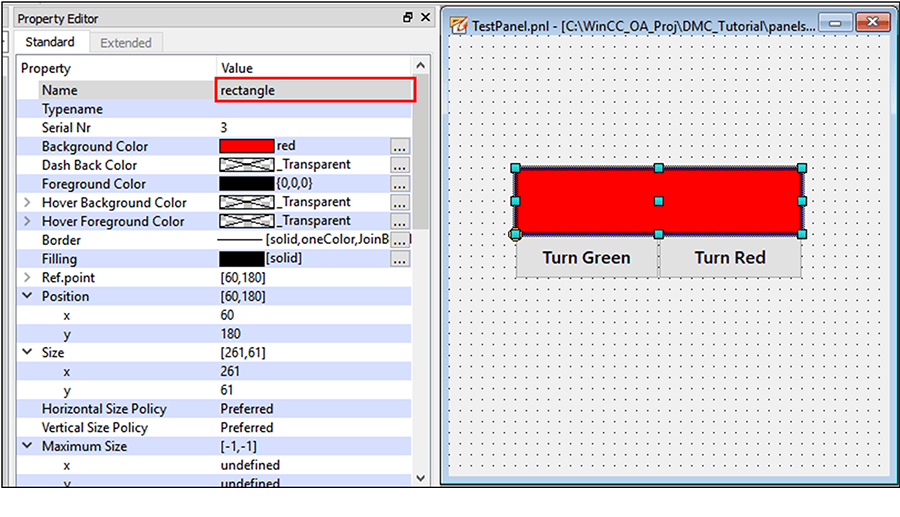
In addition, it’s best practice to change an object’s name from the default name to something clear and descriptive. For example:
- Rectangle object = “rectangle”
- “Turn Green” button = “turnGreenButton”
- “Turn Red” button = “turnRedButton”
Scripting
We’ve created a panel, added objects, and modified the objects’ properties. Great! But how do we get those buttons to do things? What if I want to change my object properties during runtime? What are the items on the bottom half of the Property Editor that say “ScopeLib” and “Initialize”? I will address the answers to these questions in the next exciting installment of “Getting Started with WinCC OA.”
Topics to look forward to in this series:
Contact DMC to get started on your next WinCC project and learn more about our Siemens SIMATIC WinCC Programming as well as our WinCC Open Architecture Development.