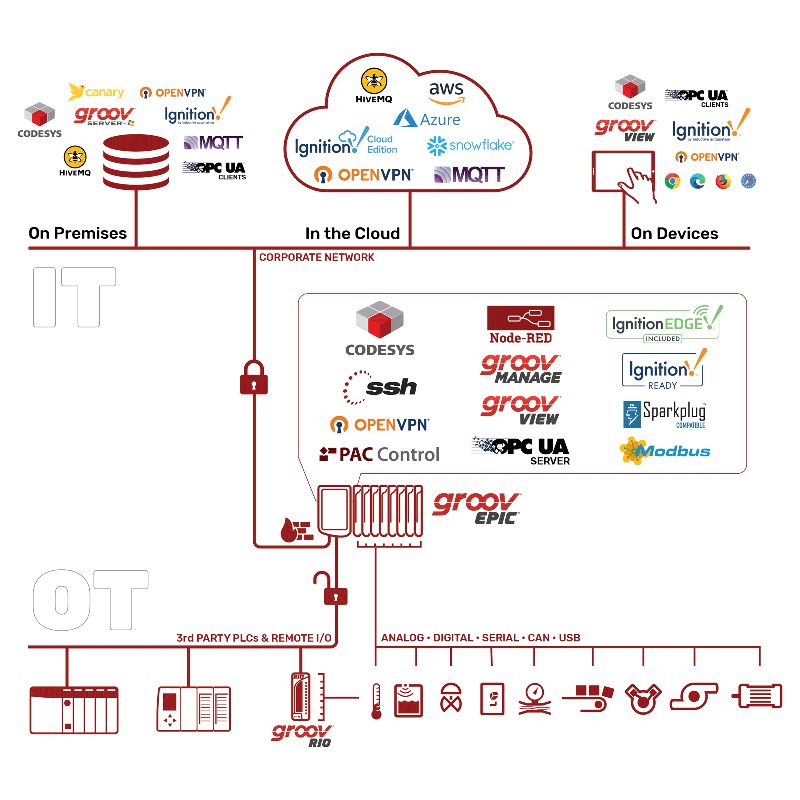
Opto 22’s groov EPIC (Edge Programmable Industrial Controller) is more than just a modern PLC. With an embedded Linux operating system, the groov EPIC processor supports a wide array of platforms for programming, visualization, and more at the network’s edge.
For an overview of the groov EPIC and its features, check out the rest of this blog series.
Here are just a few ways developers can interact with the groov EPIC processor:
- CODESYS (Runtime Engine license included) and PAC Control programming environments
- Custom programming in C, C++, Python, Java, etc. by leveraging the EPIC’s Linux operating system
- Local Ignition Edge instance (license included) for visualization & data acquisition across the network
- Optional full Ignition gateway with additional license cost
- Node-RED flow configuration
- Built-in groov Manage & groov View webpages for quick & intuitive configuration & data visualization
With this impressive list of tools and features that ship with the groov EPIC processor, the task of selecting which to use for a given project can feel daunting. In this blog series, we will dive into a few of these options and have you ready to set up your first groov EPIC in no time!
Our Hardware Setup
For this demo, we will be using the following groov EPIC processor and IO modules.
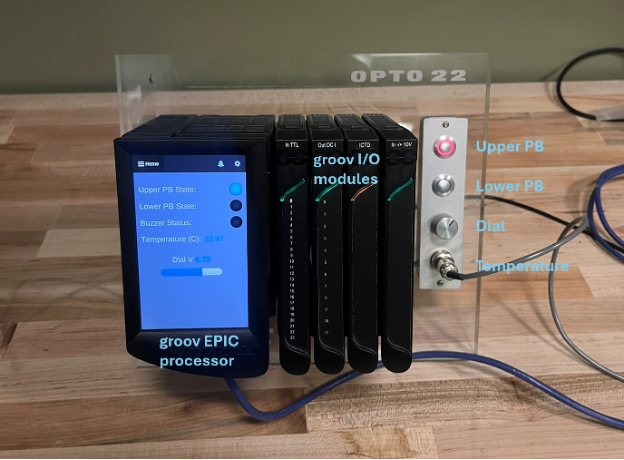
GRV-EPIC-PR2 Processor
The GRV-EPIC-PR2 is Opto 22’s second generation groov EPIC processor, complete with onboard Ignition Edge 8, Linux operating system, and CODESYS runtime engine. The processor comes with a built-in high resolution touch screen and HDMI port for easy connection to an external monitor.
IO Modules
- IACDCTTL-24 Digital Input module, connected to the two push buttons shown in the above image
- ODCI-12 Digital Output module, connected to a buzzer
- IICTD-12 Temperature Probe Analog Input module, connected to the thermocouple shown above.
- IV-24 Voltage Analog Input module, connected to the analog potentiometer dial shown above
OPC UA Server Options on groov EPIC
With all the various features and programming environments available on the groov EPIC, determining the correct option for interacting with local I/O as well as distributed devices can be overwhelming. In this blog series, we’ll focus on a few different OPC UA servers that can be hosted locally on the EPIC to interact with local I/O and PLC program tags. Before we jump into our setup, here is a quick breakdown of some of the OPC UA server options on the groov EPIC and the appropriate use-case for each.
Ignition OPC UA Server
The Ignition OPC UA server comes with the included Ignition Edge module and is enabled by default once Ignition Edge is enabled on the EPIC. This server can be configured from the Ignition Edge gateway and is useful when communicating with network devices, such as other PLCs, from the groov’s Ignition Edge application. This OPC UA server was not used in this demo, as we did not connect to any external network devices from the groov EPIC.
Groov EPIC OPC Server
The groov EPIC OPC server is the second OPC server that is hosted on the EPIC. This is configured from the groov Manage web server and allows clients to read and write to the EPIC’s local I/O directly. Part 2 of this blog series will focus on using this server to interact with the EPIC’s I/O from Ignition Edge.
CODESYS OPC Server
In addition to Ignition Edge, the groov EPIC also comes with an onboard CODESYS controller that can be enabled from groov Manage. To use Ignition Edge as a front-end HMI for this CODESYS controller program, an OPC server must be configured on the CODESYS controller. This server then may be connected to the local Ignition Edge gateway, allowing PLC program tags to be read & written to from Ignition. This setup is detailed in part 3 of this blog series.
Navigating the groov Manage Webserver
Out of the box, the groov EPIC comes with an impressive and sleek webserver that can be used to easily perform basic configuration and monitoring of the device and its I/O. This webpage can be accessed from a PC over the network as well as directly from the groov EPIC’s onboard touch screen, although some functionality is available only from a PC.
IO Monitoring & Control from groov Manage
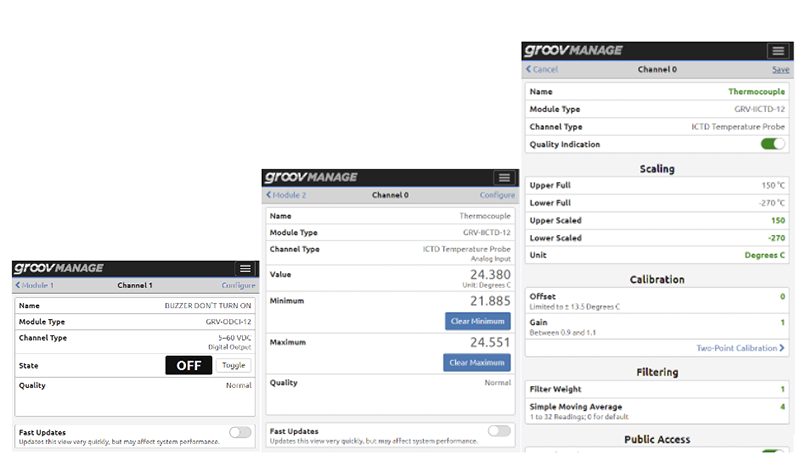
The I/O section of the groov Manage webpage contains an intuitive interface to monitor, control, and configure I/O points. This useful tool can make commissioning and I/O checkout a breeze on any size system. Without any external software, users can quickly:
- Set a name & units for each I/O point
- Configure scaling, gain, and offset for analog values
- Monitor the state of inputs
- Modify output values
- Configure external access ability for each I/O point
- And more!
The “batch operations” functionality even allows for some of these operations to be completed in bulk for many channels at once.
System Configuration from groov Manage
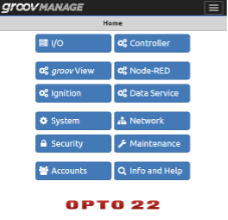
The groov Manage webpage is a one-stop shop for configuring network settings, security, users, and more. The Data Service tab includes configuration for MQTT and OPC UA server. The Ignition, Node-RED, and groov View tabs allow you to quickly enable & launch each service on the groov EPIC processor. The Controller tab provides the ability to start, stop, and diagnose CODESYS and PAC applications running on the controller. Furthermore, the Info and Help tab contains links to a variety of useful support guides.
Using groov View as an Onboard UI
Opto 22’s groov View is a no-code tool that can be used to quickly develop custom user interfaces to display on the groov EPIC’s onboard touchscreen, in addition to a network PC. Groov View can pull in tags from the groov EPIC’s own I/O or connect to several external data sources including OPC UA servers & Modbus devices. To get started, navigate to groov View from the groov Manage webserver and click the link to open groov View. This will open the home page of your groov View project.
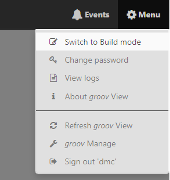
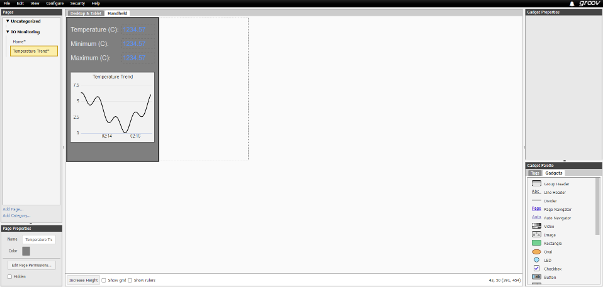
This HMI can be configured by switching to Build mode from the top-right corner Menu button. From Build mode, UI elements called “gadgets” can be dragged onto pages, linked to tags and organized with ease.
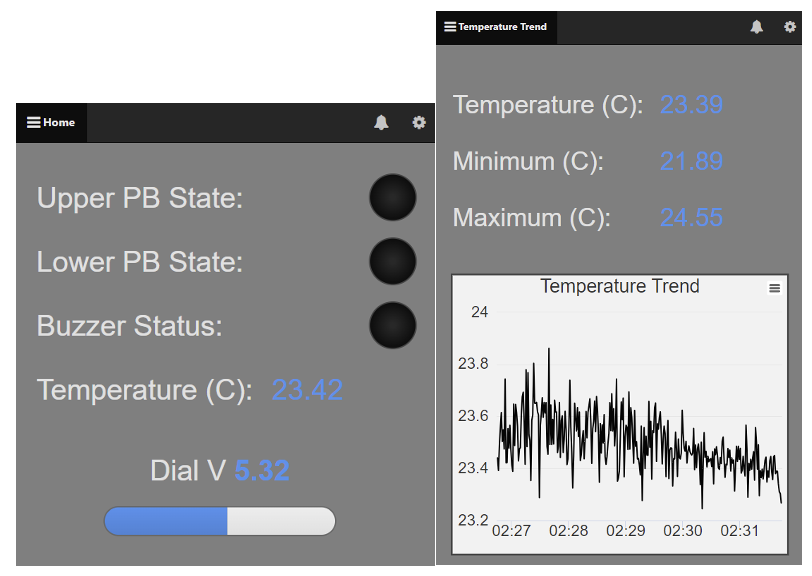
Each page developed with groov View has both a Desktop/Tablet and Handheld size, to facilitate use from a PC/tablet or from the groov EPIC’s onboard touch screen. Navigation between pages is also built into groov View, making development a breeze. In minutes, you can have a custom application on the groov EPIC’s onboard screen that combines critical I/O points with external OPC UA or Modbus tags.
Check out part 2 of the Opto 22 groov EPIC series to learn how to use CODESYS and Ignition Edge with groov EPIC.
Ready to take your Automation project to the next level? Contact us today to learn more about our solutions and how we can help you achieve your goals.


