This blog will provide an overview of configuring the Ignition Edge instance that ships with your groov EPIC.
For an overview of the groov EPIC and its features, check out the rest of this blog series.
Setting up Ignition Edge on groov EPIC
The groov EPIC GRV-EPIC-PR2 model ships with a license for onboard Ignition Edge version 8. This can be enabled from the groov Manage web server under http://<EPIC address>/manage/local/ignition. Toggle on “Enable Ignition Edge” and click save. It will take a few minutes for the gateway to start.
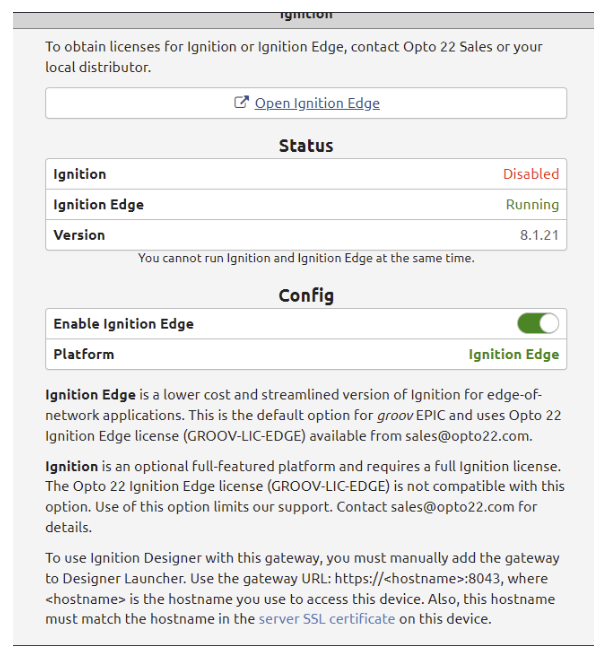
Once Ignition Edge has been enabled, simply click the “Open Ignition Edge” link and follow the prompts displayed to configure your Edge gateway.
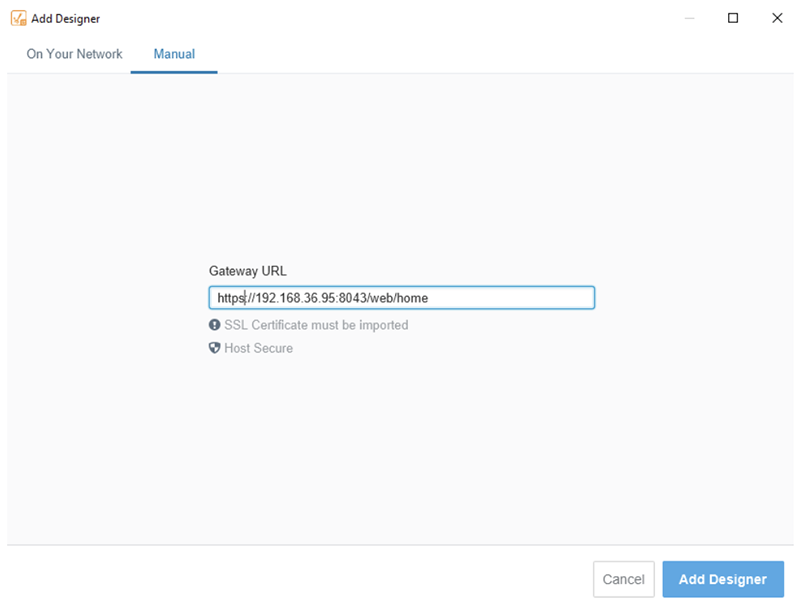
Once your gateway is configured, you can add its designer in the Ignition Designer Launcher application by manually entering the gateway URL. From here, you are ready to create your first groov EPIC Ignition Edge project.
Configuring the groov EPIC OPC UA Server
Open the groov Manage webserver from a PC connected to the groov EPIC. From here, follow the instructions below to configure the OPC UA server.
1. Enable public access for all desired I/O.
a. Navigate to “I/O”, select an I/O point and click “Configure” in the top-right.

b. Under “Public Access” turn on “State (Read)” and “Writable” then click “Save.”
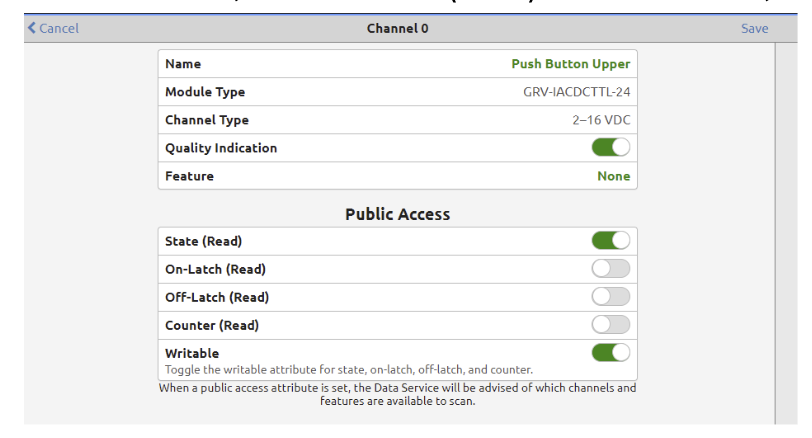
c. Repeat the above steps for each desired I/O point. Alternatively, save time by configuring many I/O points at once under I/O > I/O Services > I/O Batch Operations.
2. Configure data service
a. In groov Manage, navigate to “Data Service” and click “Configure” in the top right.
b. Under “Scanned Devices”, click “Add Local PAC Controller.”
c. Configure desired settings (ensure OPC UA Server is on) and save.
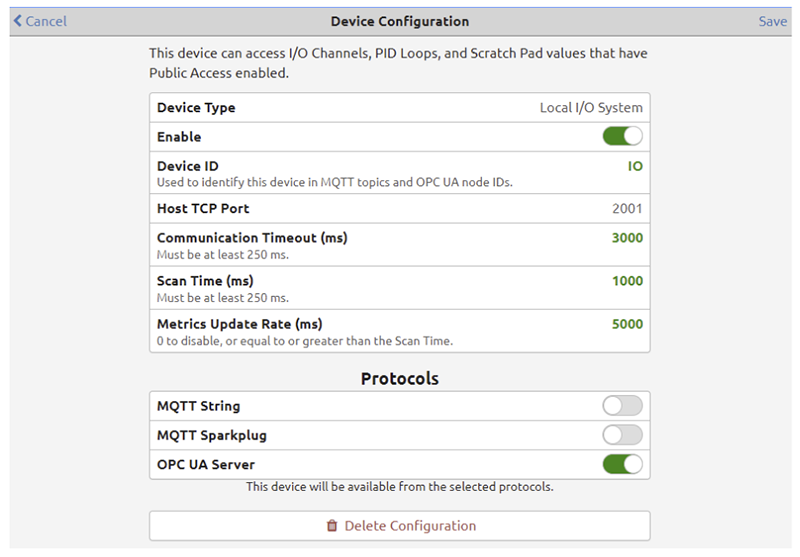
d. Navigate back to the Data Service configuration page and add an OPC UA server. Set the following settings.
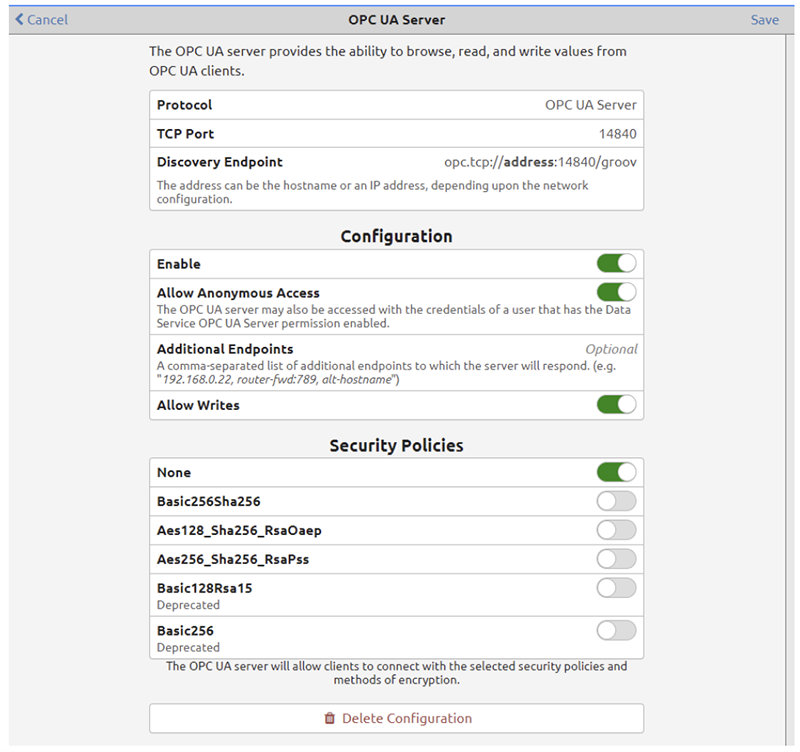
e. Return to the Data Service status page and enable Data Service Runtime.
Connecting the groov EPIC OPC UA Server to Ignition
Now that we have an OPC UA server configured, we will next connect this to our local Ignition Edge gateway.
1. In the Ignition Edge gateway, navigate to Config > OPC Connections.
2. Click “Create new OPC connection.”
3. Copy the Discovery Endpoint from your previously configured OPC UA server into the “Endpoint URL” field.
4. Follow the remaining configuration prompts to set up your connection.
5. Give your connection a name and click “Save Changes.”
Once this connection is configured, you should be able to see your new OPC UA connection under Config>OPC Connections with a Status of “Connected.” You can now browse OPC UA tags from the Ignition designer and add your groov EPIC I/O tags to your Ignition project.
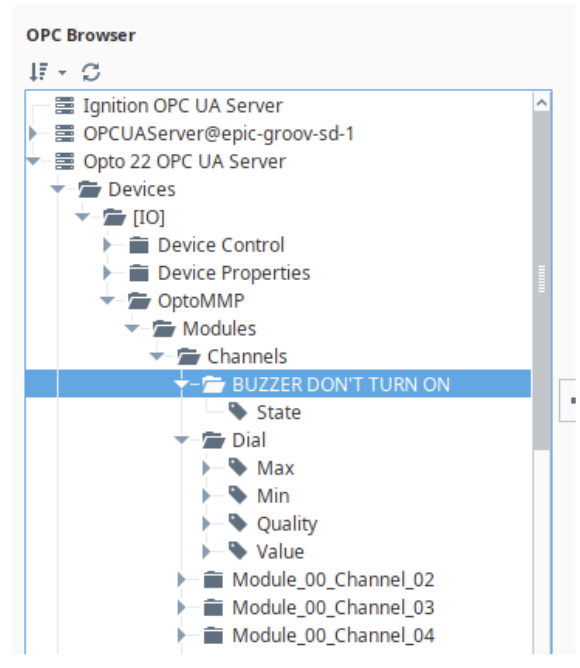
From here, Ignition Edge screens can be easily developed to monitor and control the EPIC’s local I/O. In our demo setup, we monitor these I/O tags directly on the Main screen, as shown below.
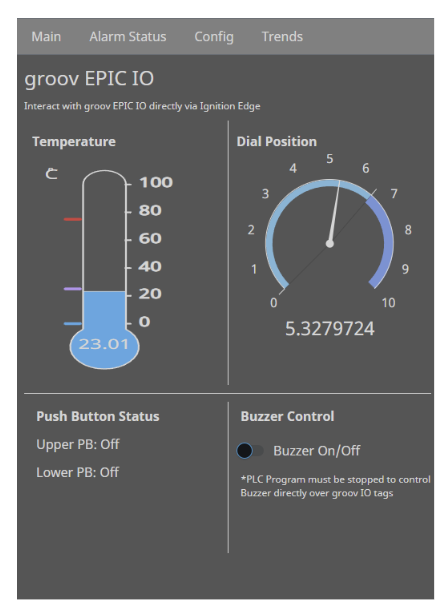
Ignition’s powerful scripting capabilities may be used to implement control logic directly, without a need for a PLC program. For the next part of this demo, however, the CODESYS controller onboard the EPIC was leveraged. In part 3, we will explore using CODESYS and Ignition Edge together on a groov EPIC.
Ready to take your Automation project to the next level? Contact us today to learn more about our solutions and how we can help you achieve your goals.


