SQL Server Compact Edition is a compact relational database produced by Microsoft for applications that run on mobile devices and desktops. Embedding these databases into a Windows application in a portable file-oriented format can be very useful.
While working on a recent Windows application, DMC wanted to add an extra layer of security to our application by protecting our SQL CE database files with a password. Although the process of creating a “.SDF” file from an existing database is simple, there are a few additional steps that are required when adding password protection.
After finding no good resources on this process anywhere on the internet, I decided to document the process here.
This walkthrough will use the SQL Server Compact Toolbox for Runtime 4.0 which can be downloaded here.
Step 1: Create an empty, password protected .SDF file
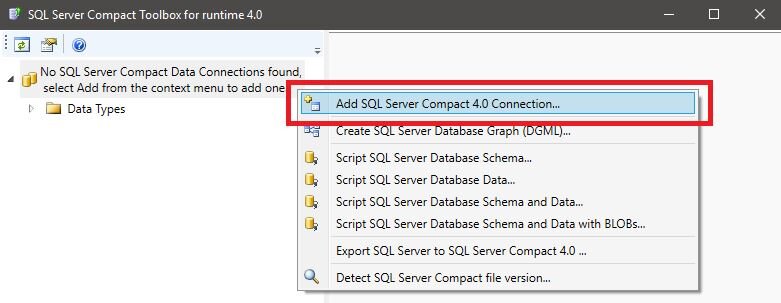
Right click on No SQL Compact Data Connections Found and select Add SQL Server Compact 4.0 Connection…
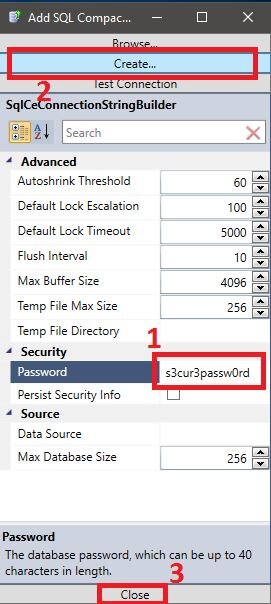
A small window will pop up where you will enter your desired password. After your password has been entered, click Create at the top of the window where you will you will name your new .SDF file.
Finally, click Close at the bottom of the window in order for your new empty .SDF to be created.
Your password protected .SDF file will now appear on the left-hand side in the main window of the toolbox.
Step 2: Export your existing SQL Server Database to a .SQLCE file.
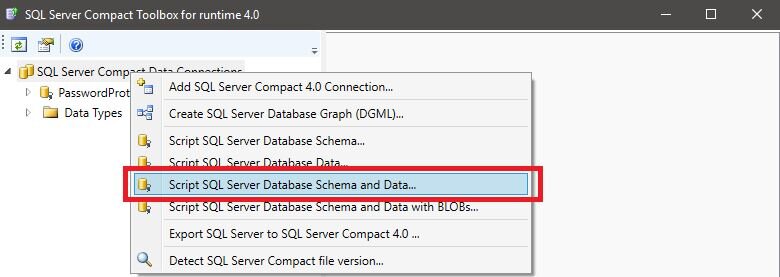
Right click on SQL Server Compact Data Connections and select Script SQL Server Database Schema and Data…
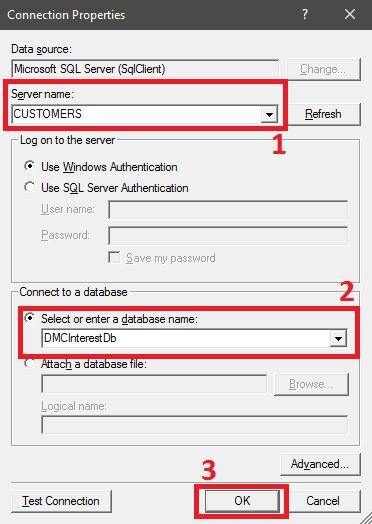
A window will popup that requires you to enter information to connect to your existing SQL Server DB.
Enter the server name and select the database name from the drop-down menu.
Finally, click Ok and name your new .SQLCE file.
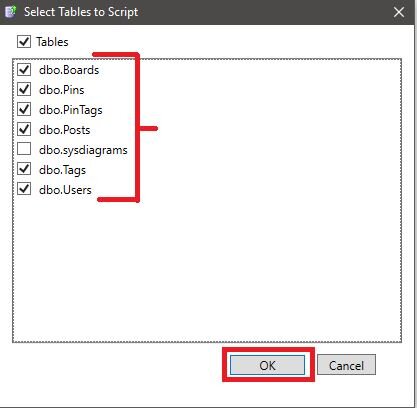
In the next popup, select the tables from your existing database which you want to export by clicking the appropriate check boxes. This will vary based on your application.
Step 3: Move the exported data into your new password protected SDF.
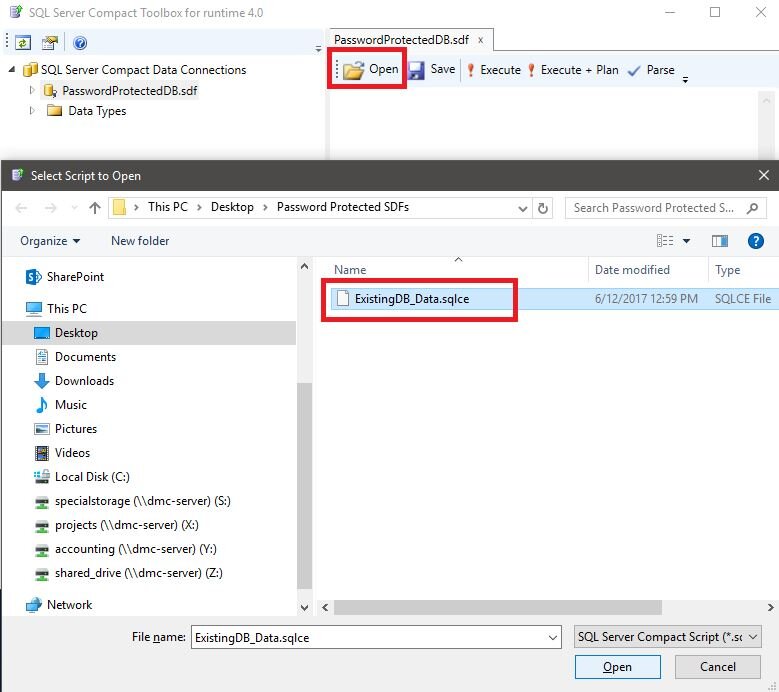
Next, right-click on your new password protected DB that has been created on the left side of the toolbox and select Open SQL Editor”.

An editor will open up on the main part of the screen.
Select Open and navigate to the location of the .SQLCE file you just created.
Once this step is completed, you will see text commands opened in the main window.
Click Execute and wait for this operation to complete. Once completed, you will be able to verify the operation was successful by expanding Tables in the left-hand side tree view and checking that the correct tables have been added.

SQL Server Database has now successfully been moved into a password protected .SDF file!
As a final note, when using this in your Windows application you must enter the .SDF’s password. Microsoft provides information about how to accomplish this here.
Learn more about DMC's Custom Software & Hardware development services.