Machine learning has been one of the most popular buzz terms in technology lately, and it projects to be one of the most widely used technologies in the AI space going forward. In a nutshell, machine learning involves feeding a model (the machine) data and having the model recognize patterns in the data (the learning). As the model gains access to more data points, it adapts and predicts future results and decisions for future similar scenarios.
Microsoft Azure Machine Learning Studio is one of the platforms for creating predictive analytics models using machine learning. Azures cloud platform allows users to develop and initiate modeling without the need for hefty onsite computers. Its ability to access much of the Azure ecosystem, as well as the ease of use of its web interface, make Azure ML Studio an excellent option for quickly setting up your first machine learning experiment.
ML studio provides users with the following components to create machine learning projects:
- Data Sources
- Experiments
- Trained Models
- Web Services
- Notebooks
A simple machine learning project can be made using these components and configured with a few clicks.
Data Sources
ML studio features numerous data source options, many of which integrate with Azure.
- Blob storage
- SQL Database
- Cosmos DB
- Web URL via HTTP
- Hive Query
- Local File
For this project, I needed past weather and climate data; I used data from the national centers for environmental information website. I will be using a .csv file with a file structure like the one below:
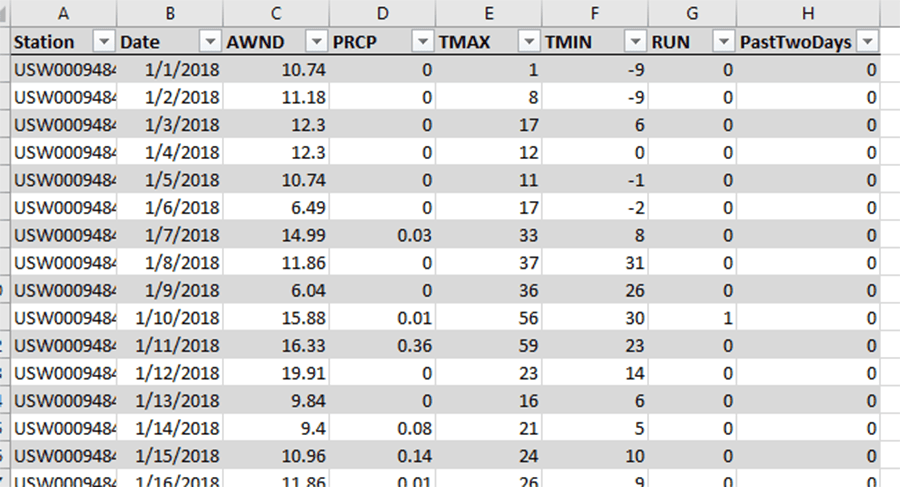 Sample rows of the dataset
The Experiment
In my free time, I enjoy running, but I don't have a lot of time in my day, so I set up this experiment to look at my average runs per week and predict the likelihood that I will run in the future.
To build the experiment, users drag, drop, and connect machine learning operations into a working model. The experiment map I made below lets us look at the components I used to create this experiment.
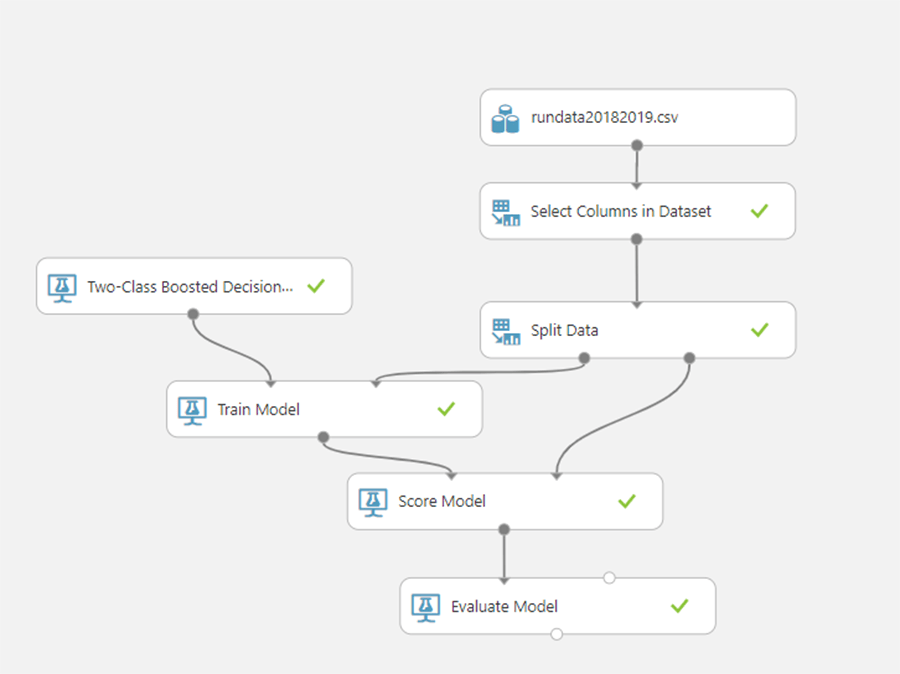 The canvas of the entire experiment
RunData20182019.csv
This is my dataset, uploaded from my local computer. Includes data on weather by day, and if I ran, or not.
Select Columns in the dataset
If there are any columns in your dataset that you know will not help predict a result, you can remove them from future calculations. In the screenshot below, I am selecting precipitation, average wind speed, max and min temperature, and if I ran or not on a given day. I also added a calculated column, that indicates if I ran the preceding two days, as I usually don’t run three days in a row. This factor is unrelated to the weather but heavily influences my results. I excluded the name of the station and the date because those won’t yield much information about the weather itself.
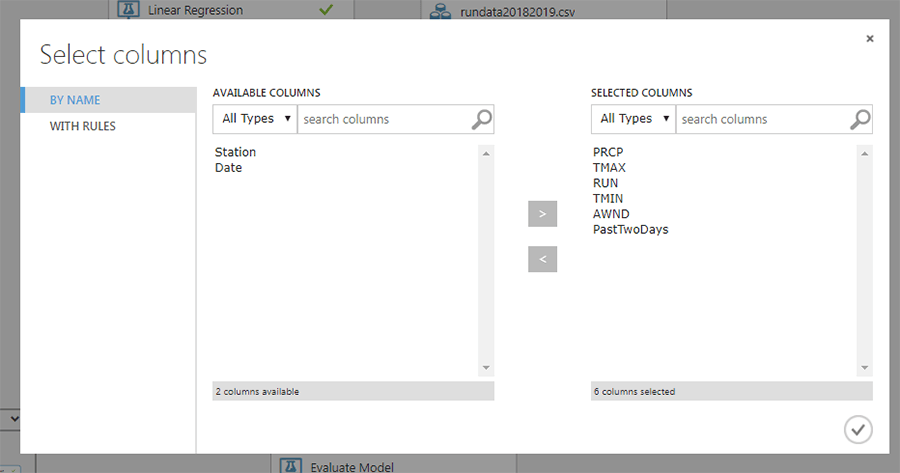 Excluding columns Station and Date from model
Split Data
After the dataset is trimmed down to only the necessary features, I use the split data block to divide the data into a training set and a testing set. When the model runs, it will detect patterns in the training set, and then apply the patterns to the testing set, to see if there was a good fit of the model used.
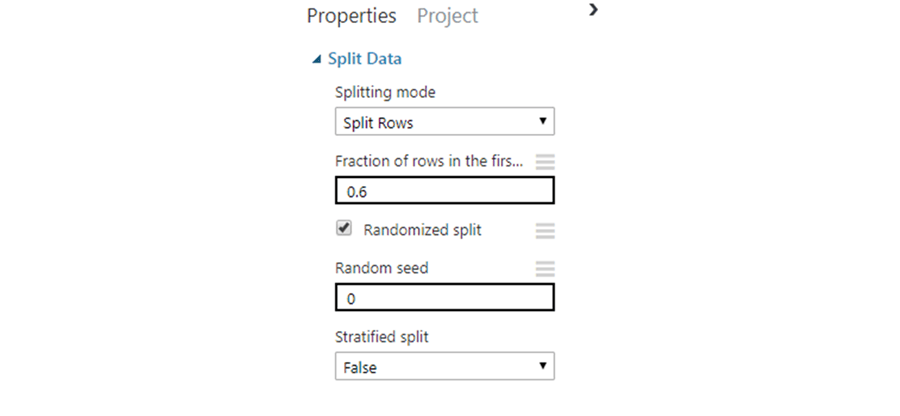 Splitting the dataset into a training set and testing set
Two-Class Boosted Decision Tree
For this algorithm, I’ve chosen to use the Two-Class Boosted Decision tree. I elected to use this model as it is a fast and reliable algorithm for predicting on which day each class belongs. Since my dataset was small, I was not worried about it being one of the more memory intensive approaches. In setting up the model, I left the default properties as is.
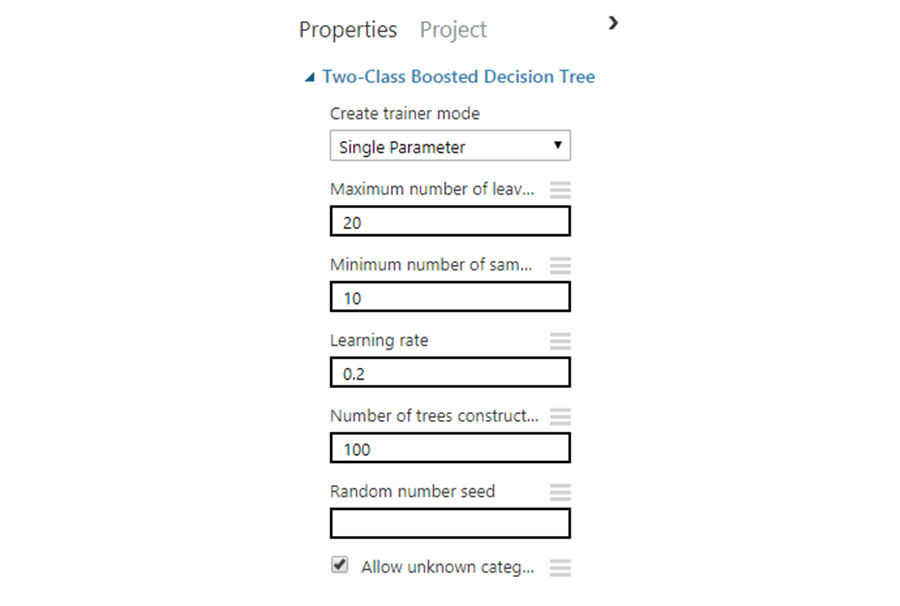 Settings for the Two-Class Boosted Decision tree
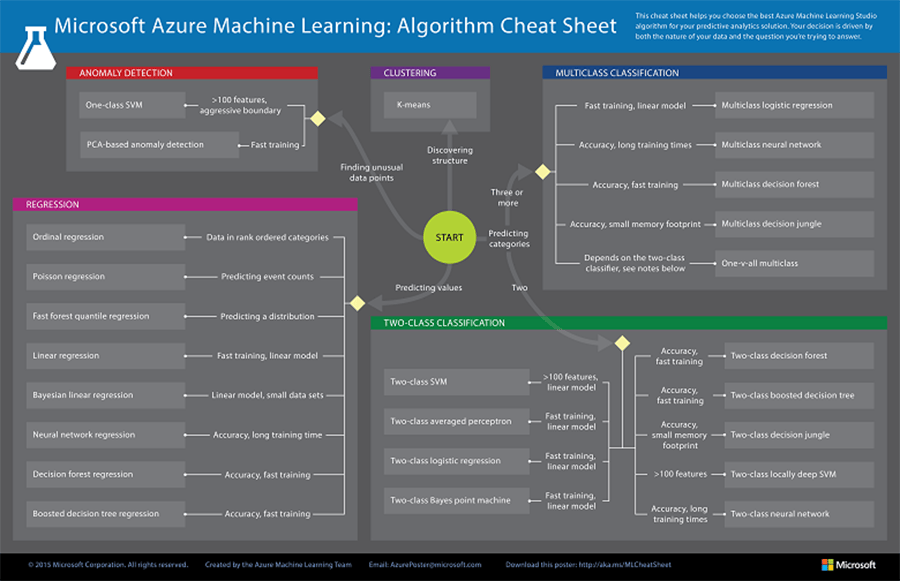 Summary of ML algorithms provided by Microsoft
Train Model
After selecting the algorithm, the next step was training the model. Here, selecting the desired output column is the only configuration step needed. Since I was predicting, “will I run?” I chose the “Run” column.
 Train model interface for selecting the output column
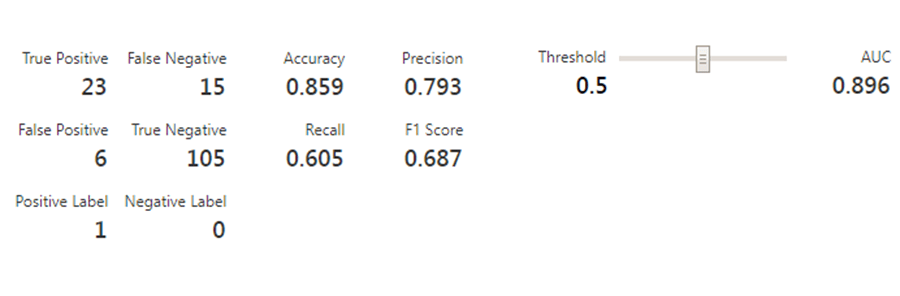
Score and Evaluate Model
Now that training and testing within the model are complete, let’s evaluate it! There 149 data points in the testing set, with 38 days that I went for a run. The model reported with 85.9% accuracy, with a tendency to say I won’t run more often than I will. For the first attempt with a simple model, I am happy with these results.
The Results
After creating an initial experiment, I can go a few ways with Azure ML. I can try to further fine tune my model, by testing other algorithms or even adding in different algorithms for improved feature selection. Once I am fully satisfied with the model, Azure makes it easy to create a web service that will allow a user to query and classify new data points instantly. Microsoft provides sample code for querying the service in C#, R, and python. Using ML Studio and the auto-generated web service, you can have a business ready machine learning model up and running in no time!
Find out more about DMC's Machine Learning and Microsoft Azure Cloud Solutions