This is the second part in a series for creating an app capable of utilizing data on both SharePoint and Azure. This guide will walk you through creating a simple application that will store data on Azure SQL Server and where users will interface with the app on a SharePoint page. The result will be a functional vacation request form.
Before starting this tutorial, please refer to my previous blog to setup the connection between SharePoint and Azure by creating a Provider-hosted app.
Requirements
Create an Azure SQL Server Database
When creating a new application, I typically start with the model. To create a new SQL Server Database, perform the following steps:
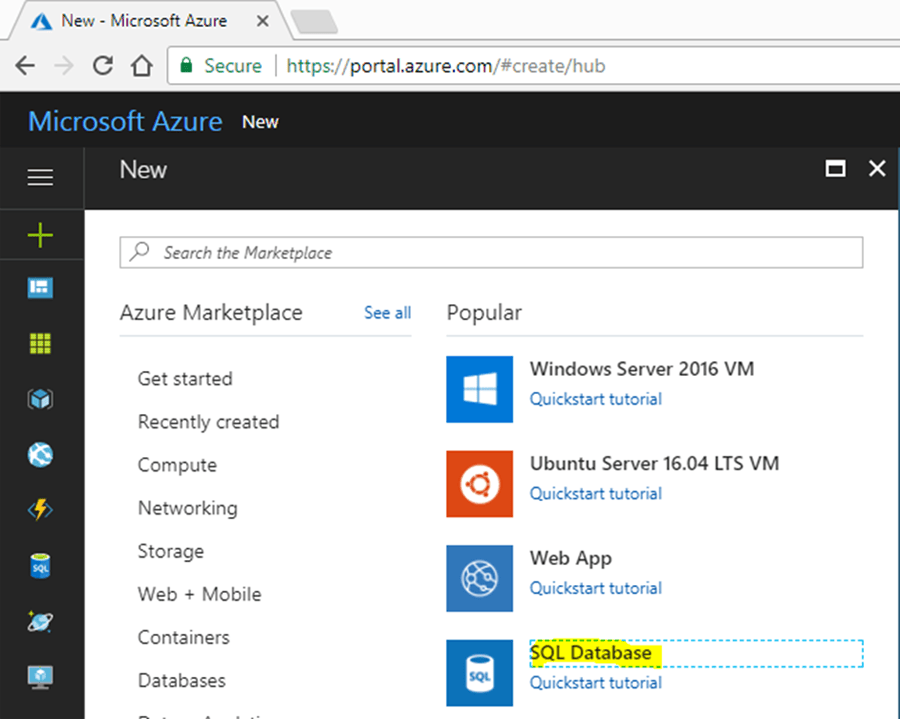
- Navigate to the Azure portal.
- Click Create a resource --> databases --> SQL Databases.
- Complete the form and click Create. Your SQL Database will now be provisioned in the background.
If you have any questions about the setup options, refer to the OuickStart tutorial.
Connect to the Azure SQL Database
The next step in our model creation process is to connect to our new database. Perform the following to connect to the database:
- Launch SQL Server Management Studio (SSMS)
- Server type: Database Engine
- Server name: YourServerName.database.windows.net
- Authentication: SQL Server Authentication
- Provide the admin username and password associated with the SQL server specified in the previous section.
- Click Connect
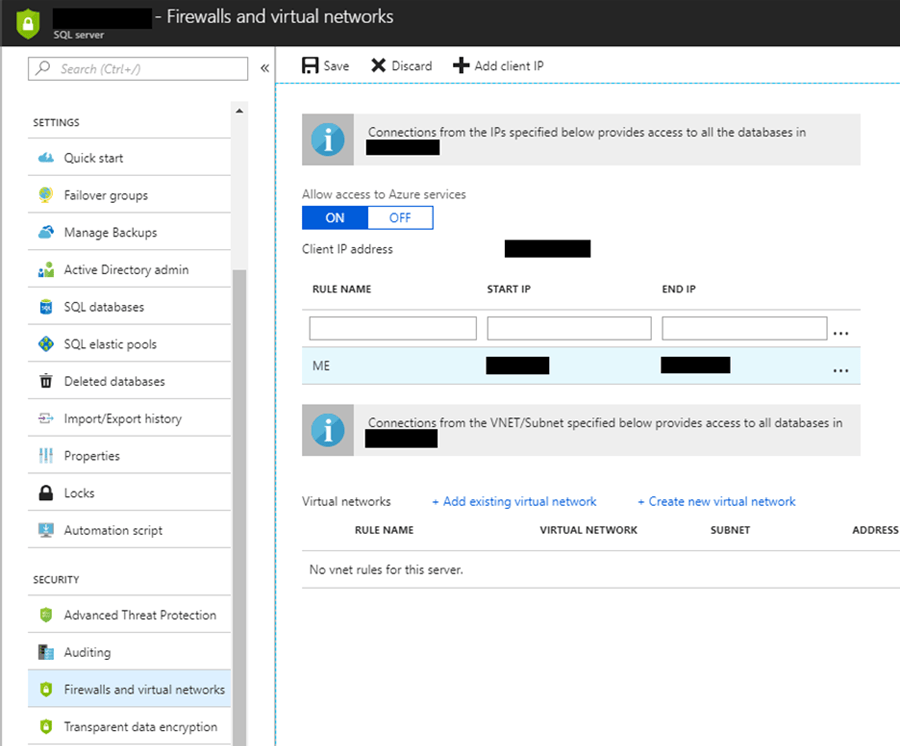
If you receive the message “Cannot open server ‘xxxxxxxx’ requested by the login. Client with IP address 'xxx.xxx.xxx.xxx' is not allowed to access the server” follow these steps:
- On the Azure portal, navigate to the specified SQL Server
- Under Security, click Firewalls and Virtual Networks
- Add a new rule with the IP address from the error message
- Click Save
- Attempt to connect to the server again through SSMS
Upon connecting to your SQL Server, you should first create a user that will be used by our Provider-Hosted App.
- In the Object Explorer, first expand the SQL Server and then expand Security
- Right-click Logins and select New Login...
- On the new window, replace the text with:
- Click Execute to run the command.
- Ensure the message windown displays Command(s) completed successfully.
- In the Object Explorer, expand the Databases folder.
- Right click your database and select New Query.
- On the new window, replace the text with:
- Click Execute to run the command.
- Ensure the message window displays Command(s) completed successfully.
Now we have a user with read and write access to our new database. Later we will configure our app to connect to this database by utilizing this login.
Create the Vacation Request Table
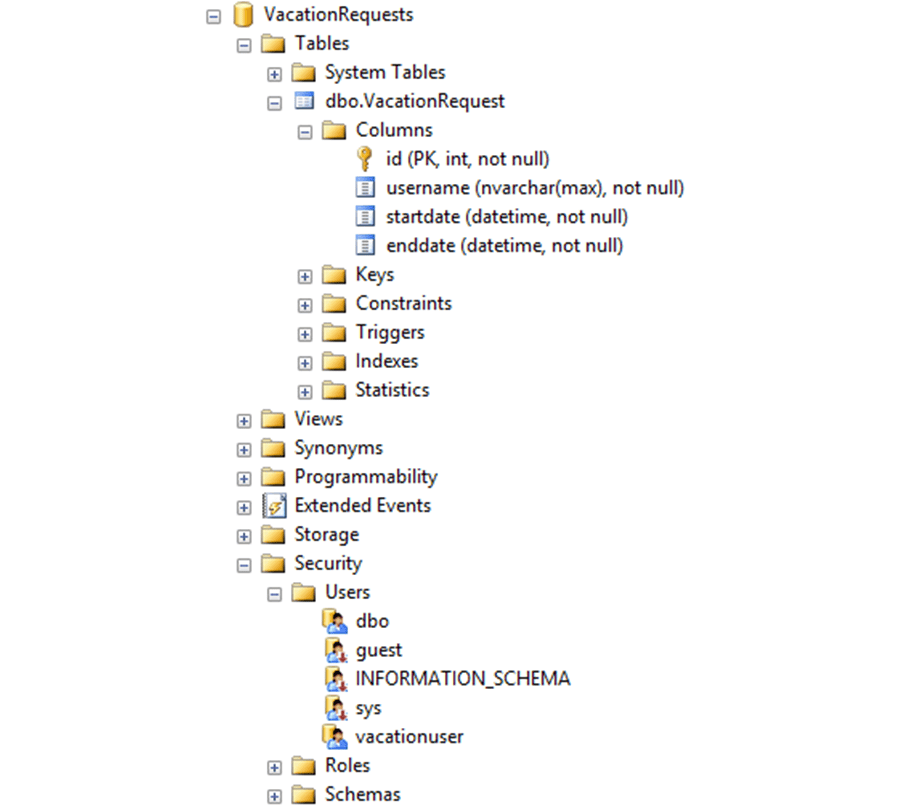
Next, we will configure the table to hold our vacation requests. Similarly to the section above, we will use SSMS to create the table. If you’ve closed the window from the above step, right-click Your database and select New Query. Paste the following into the window:
Click execute and verify the message Command(s) completed successfully is displayed. If you refresh the object explorer pane, you should see the below table definition:
SharePoint App Enhancements
In the previous tutorial in this series, we created a simple ‘hello world’ app. We’ll now make improvements to create a user interface. The first step will be to setup our connection to the database (model).
- On the Web project, right-click the Models folder, and select Add --> New Item…
- Expand the Visual C# node, select the Data node, and choose ADO.NET Entity Data Model.
- Give your model a name and click Add.
- Choose EF Designer from database --> Next.
- Click New Connection…
- Select Microsoft SQL Server, then select Continue.
- Enter your server name mydb.database.windows.net.
- Set Authentication to SQL Server Authentication.
- Enter the credentials for the vacationuser we created earlier.
- Check Save My Password.
- Click Test Connection, and verify Test Connection Succeeded is displayed.
- Under Connect to a Database, select our Vacation Request database.
- Click OK.
- Select Yes, include the sensitive data in the connection string.
- Click Next.
- Select your preferred entity framework version, then click Next.
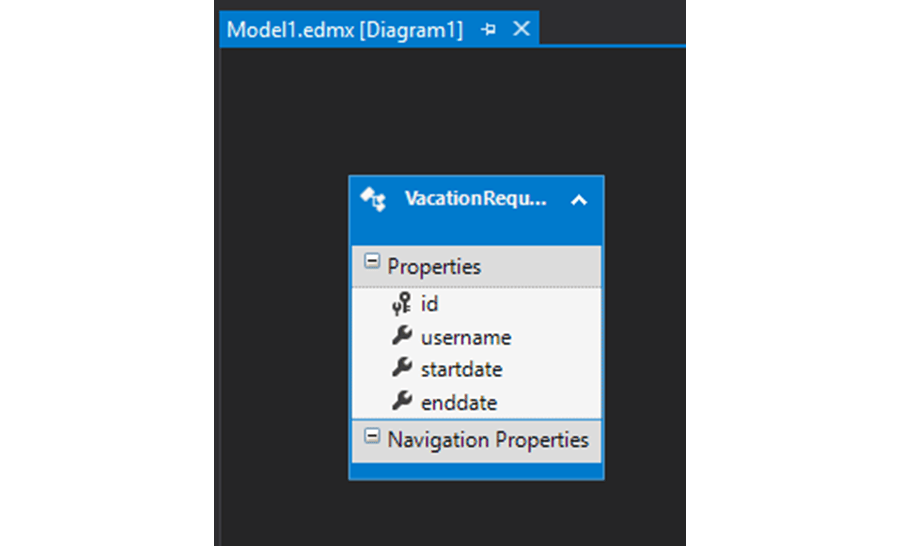
- For Which database objects do you want to include in your model?, expand Tables, then dbo, and check for VacationRequest.
- Click Finish.
The next step is to setup our view with a form to submit vacation request data. To accomplish this, open the solution in Visual Studio and edit the file WebProject/Views/ClientWebPart1/Index.cshtml.
Replace the body content with:
	<h2>Vacation Request Form</h2>
	<form method="post">
		<label for="startdate">Start Date</label>
		<input type="date" name="StartDate" />
		<label for="enddate">End Date</label>
		<input type="date" name="EndDate" />
		<input type="submit" value="Submit"/>
	</form>
When the user hits submit, this will post the form to the web server. We can handle this request in the controller WebProject/Controllers/ClientWebPart1Controller.cs. Replace the file with the following:
using Microsoft.SharePoint.Client;
using SharePointAddIn1Web.Models;
using System;
using System.Web.Mvc;

namespace SharePointAddIn1Web.Controllers
{
	public class ClientWebPart1Controller : Controller
	{
		public ActionResult Index()
		{
			return View();
		}

		[HttpPost]
		[SharePointContextFilter]
		public ActionResult Index(VacationRequest vacationRequest)
		{
			user spUser = null;

			var spContext =
SharePointContextProvider.Current.GetSharePointContext(HttpContext);

			using (var clientContext = spContext.CreateUserClientContextForSPHost())			{
				if (clientContext != null)
				{
					spUser = clientContext.Web.CurrectUser;

					clientContext.Load(spUser, user => user.Title);

					clientContext.ExecuteQuery();
				}
			}
			using (var vacationModel = new VacationRequestEntities())
			{
				vacationModel.VacationRequests.Add(new Models.VacationRequest
				{
					username = spUser.Title,
					startdate = vacationRequest.StartDate,
					enddate = vacatonRequest.Endate
				});
				vacationModel.SaveChanges();
			}
			return View();
		}

    }

	public class VacationRequest
	{
		public DateTime StartDate { get; set; }
		public DateTime EndDate { get; set; }
	}
}
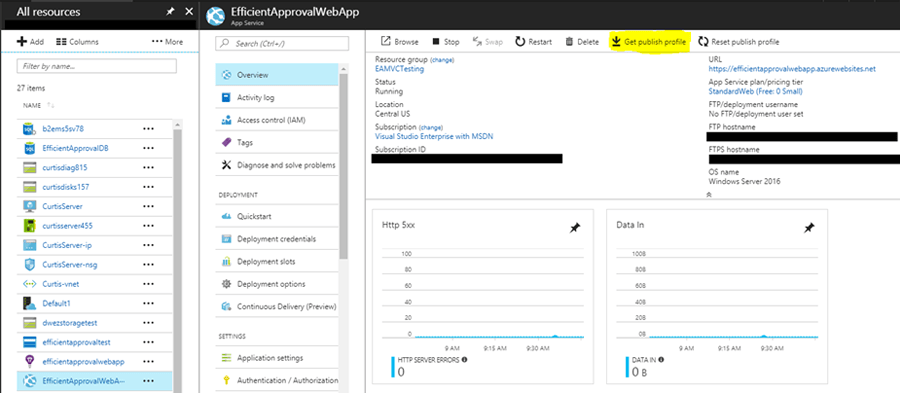
Get the Publish Profile
After your new app has been provisioned, the next step is to obtain the publish profile. We will use this to deploy our web application changes.
Select your newly created web app
In the Overview tab, click Get Publish Profile. This should download a .PublishSettings file to your computer.
Deploy application
Now that we’re finished coding our application, it’s time to deploy our web application to Azure. To accomplish this, perform the following:
Right-click SharePoint Add-in --> Publish.
Click Deploy your web project.
A dialog should open on the Preview tab. Change to the Connection tab and verify the connection works by clicking Validate Connection.
Ensure the other data is entered correctly and click Publish.
The web project may take a few minutes to deploy. You should see details about the deployment progress in the output window.
Application testing
Now we can navigate back to the SharePoint page created in the previous tutorial. The UI should now display our form and look like this:

Enter a start and end date, then click submit.
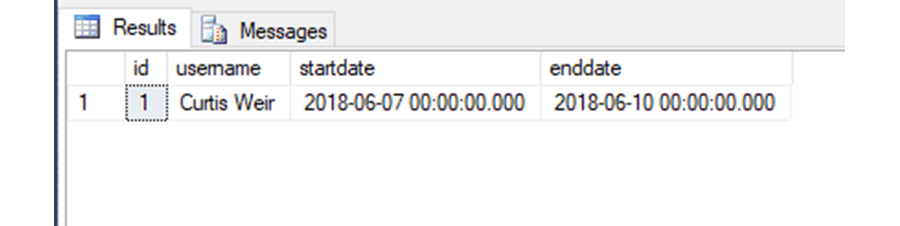
Now, if we navigate back to SSMS, we can query the table for our new record. Right-click dbo.VacationRequest, then click Select Top 200 Rows. A new window should appear with the following:
Conclusion
Our provider hosted app is now capable of writing to an Azure SQL Server Database. From here, you can create additional controllers, views, and webparts to extend the capabilities of your provider hosted app. Some examples could include adding a dashboard to display vacation requests, or you could establish an approval process for administrators to view and approve vacation requests.
Find out more about DMC's SharePoint and Microsoft Consulting Services.