Version control systems are the backbone of any good software development process, so it helps to be familiar with them. At DMC, we typically utilize GitLab and Subversion (SVN)—but occasionally, I’ve had to squash commits together to have a cleaner history.
This guide provides a high-level overview of how to utilize the Git interactive rebase to squash and reword commit messages, without diving into the many intricacies of Git.
What I’m Using:
Scenario:
We have a feature that we branched off our main feature branch with four commits ahead that we want to squash down into one commit. We also want this one to have a meaningful name so that we can see exactly what we did when we view the history.
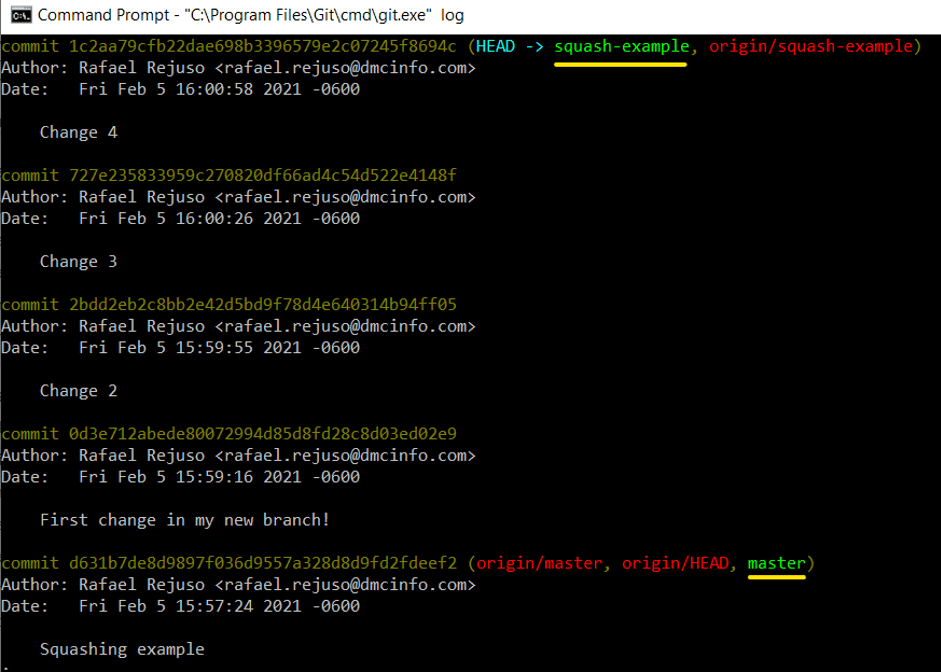
Note: the branch is called squash-example
Tip: If you make a mistake, typing in :u undoes the last change you did in Vi Improved (Vim).
Step 0 – Update and Backup (Optional)
Make sure you have the latest versions of both branches by doing a git fetch and git pull.
If you aren’t comfortable with the Git interactive rebase yet, I suggest making a backup. You can do this by simply creating a new branch based on the one we want to squash. You can do this with git checkout command in your command prompt as shown below:

Step 1 – Check Out the Branch You Want to Squash
First, do a git status to verify you are in the correct branch. We can then begin the interactive rebase process in two ways. First, we can specify the number of commits we want to rebase from our current state:
git rebase -i HEAD~<x>
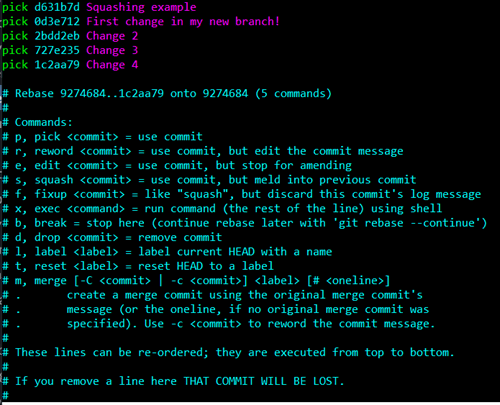
For our example, we’ll replace ~<x> with git rebase -i HEAD~5 to show us the last five commits.
The second way is to specify the sha1:
git rebase -i <commit-sha1>
Doing so will display all the commits after the specified sha1.
Step 2 – Rename the Commit We Want to Keep
First, press S to enter insert mode. Anything marked as "pick" will be kept as a commit in the history. In our case, we want to keep the very first item, which is the commit where we branched off from our master branch.
In insert mode, replace pick with reword to mark the commit we want to rename.
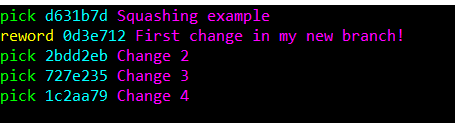
Once that is marked, you will be brought to a follow-up edit screen to replace the name of the commit, which will be covered in Step 4. If your main goal is to rename a commit, you can skip to Step 4 now, otherwise, we’ll cover the command for squashing in the following step.
Step 3 – Select the Commits to Squash
Like in text editors, you can highlight a chunk of text in Vim and replace them simultaneously.
Hit ESC to exit insert mode, then press CTRL + SHIFT + V to enter visual block mode and highlight all the picks that we want to squash. Press C to confirm our selection.
Type in squash then hit ESC, and it should replace all the picks to squash.
Step 4 – Save Changes
You can hit ESC and enter :x to save and exit the editor. This should bring you to the rewrite commit message screen where you can edit it one last time:
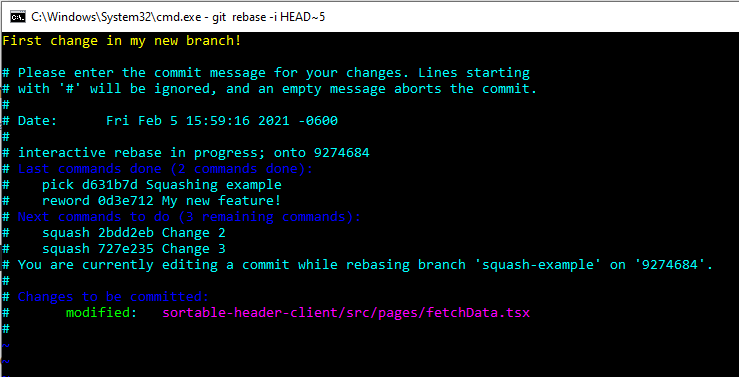
Again, we can repeat :x to confirm the reword and save our rebase. If you’re only looking to rename a commit, then you can stop here. However, we can see that the editor is now telling us our next command is ‘squash’—which allows you to edit commit messages.
Step 5 – Squash and rewording commit messages
When we squash, we can change the overall commit message either by editing them or commenting them out. Once we edit it, we save it again with :x
In this first example, I do not comment out any commit messages:
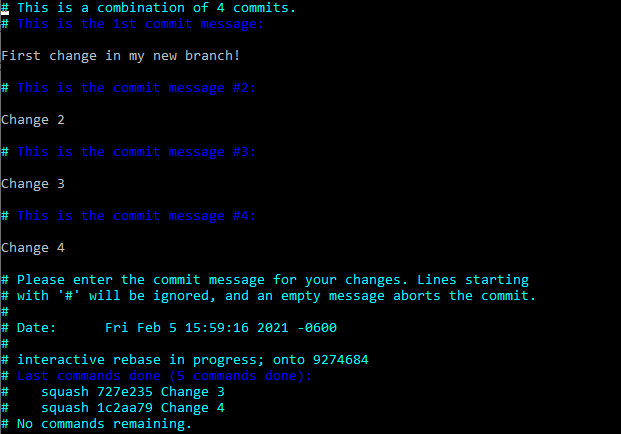
The log looks something like this:

On this screen, I comment out the other changes so they do not show up in the commit message:
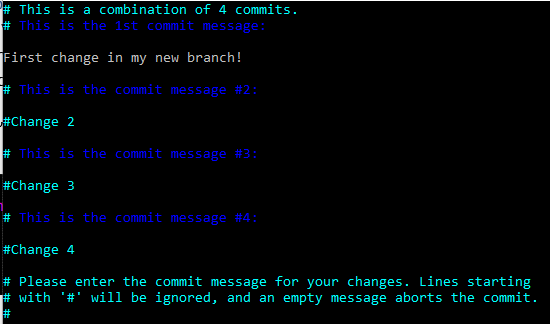
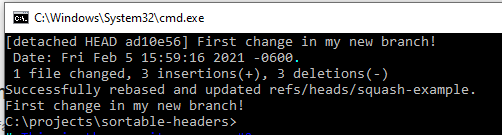
After saving, you should see a message like this:
Step 6 – Force Push
The last thing we want to do is run the command:
git push --force
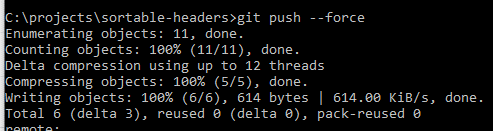
This pushes up our changes and overwrites the history in the remote repository.
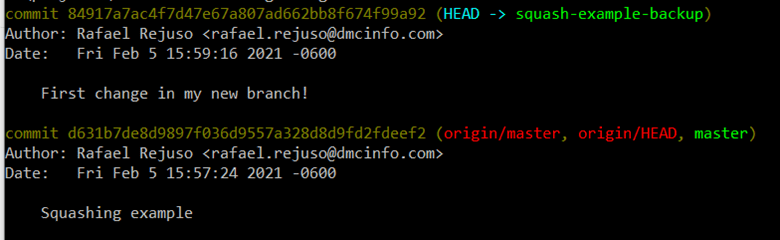
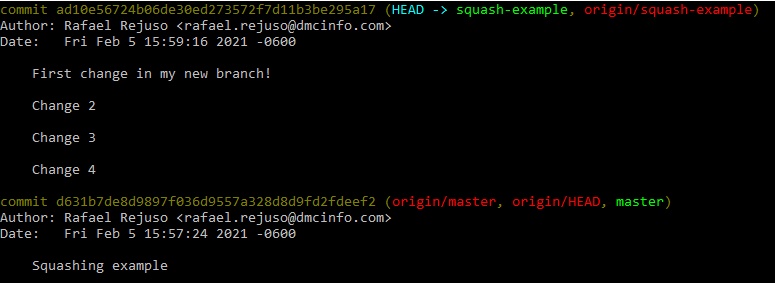
Step 7 – Verify That Everything Matches Up.
We can again check git log and see that instead of four commits, we only have the one.
That should cover the bare minimum as clearly and quickly as possible for squashing commits and applying a rewrite. Having a well-maintained and readable history allows for easier development down the line, so taking a few moments to make commits look clean is something you definitely want to do.
Learn more about DMC's Application Development expertise and contact us for your next project.