One problem we run across on a fairly regular basis is the process of creating a single document which differs only slightly. Often times, this is a contract for a business that has standardized services. They want to generate a contract with the contact information of a new client, but all of the rest of the content is identical between contracts. One fantastic way to accomplish this is by using list metadata to populate fields in a document with Microsoft Word's Quick Parts.
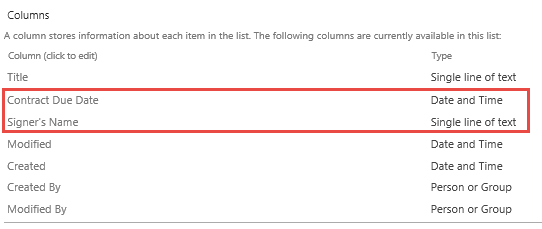
Step one is to set up site columns for your document. In this case I've only set up a few fields, but you can feel free to use as many as you like. The reason for needing a list and a document type is that in using this solution I've, for security purposes, created a list where my templates will live to prevent the inadvertant editing of a contract template.

The first thing to do is to set up two document libraries: "Contract Templates" and "Active Contracts".

Feel free to name these libraries as you please, but it's important that you add the content types you've created to the document libraries.
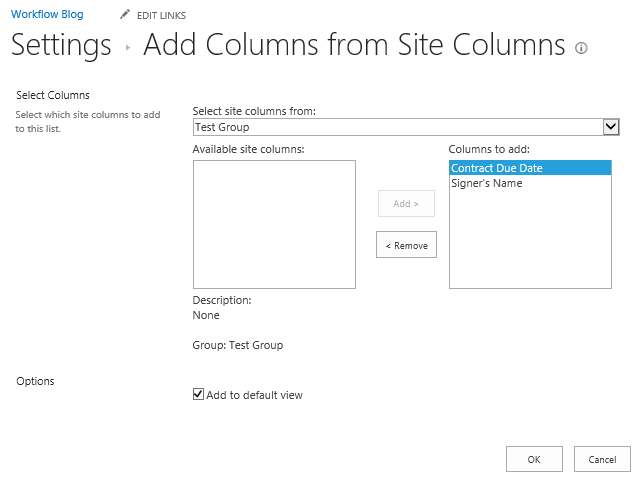
Next create a contract generation list, which I've named "Contract List." In this list add the site columns as well as any fields which might assist in tracking, such as an expiration date. This list will allow for easy reporting and grouping, but most importantly, if certain metadata is required content, that metadata can be enforced here, whereas it would not be possible to do so in the document creation.
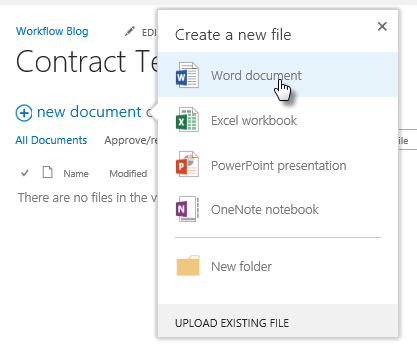
Next you need to create a template. To do this you need to create a new document directly from the library; this ensures that the metadata are listed in the document information panel.
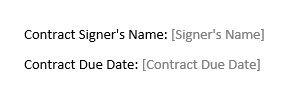
Once here, you can copy in the contract and start adding your quick parts. Wherever you want your metadata to appear, you insert a quick part. You can then test it out by modifying the metadata and opening the document.

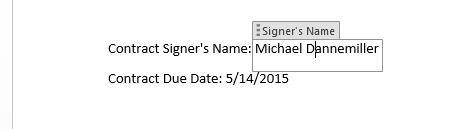
Once the quick parts have been added, the finished product will look like this:
The last step, now that you've set up your libraries and templates, is to actually generate the document. For this you'll need to create a new list workflow against the "Contract List." In this list you must begin by copying the template from the first library to the second.

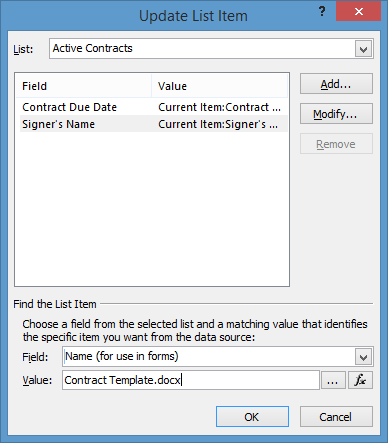
Next, you update the metadata in the newly created item to the matching data from the Contract List to the Active Contracts field.
When you open the document in the Active Contracts library you'll see that the places where you've added quick parts are now being assigned by the document library's metadata.
How can you improve this?
- Modify the workflow such that any future changes to the metadata from either the list view or the library view reflect in both lists
- Require approval in the Contract List before a contact is created
- Add an expiration reminder
- Color code the documents
- Create multiple templates, and use document metadata to determine which template to use
To learn more about DMC's Microsoft Consulting Services click here. To learn more about working with DMC to implement your own Contract or document generation solution, please contact us.