In the January 2019 features for Flow, Microsoft announced the new Word Online connectors that give users two new actions.
1. Populate a Microsoft Word template
2. Convert a Word document to PDF
To demonstrate this new functionality, I am going to create a Flow that triggers when an item is created in SharePoint, populates a Word Document template using the item metadata, and saves the document to a document library in SharePoint as both a Word Document and a PDF.
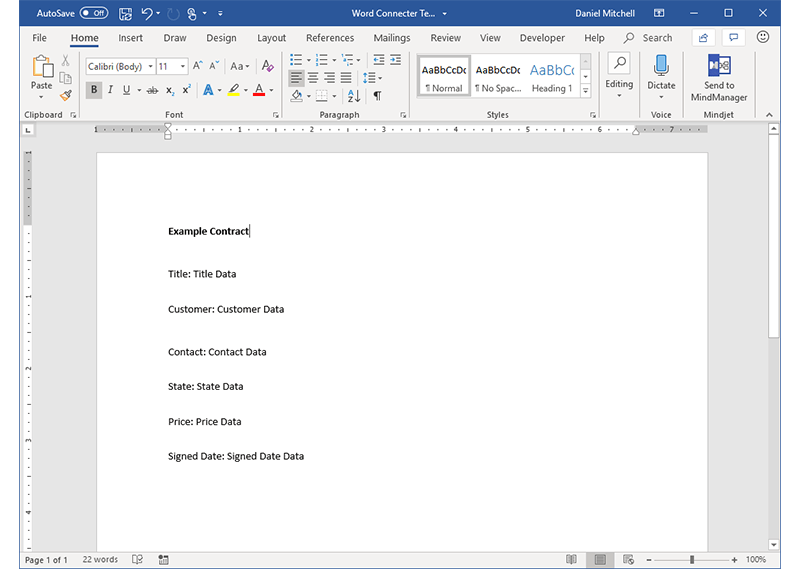
My list item, document library, and word template file will have the following fields:
- Title
- Customer
- Contact
- Amount
- State
- Signed Date
Create a Word Document Template
I have already created the list and document library so we will begin by creating the Word Document template.
Open Word and create all the fields we want to be filled out in the document.
Next, go to the “Developer” tab. If you don’t have the developer tab available, right click on the Home tab and select “Customize the Ribbon”.
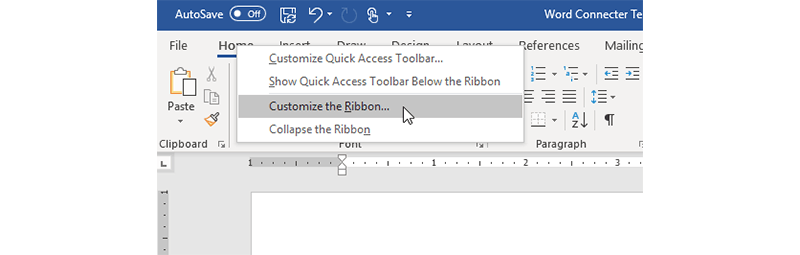
From the popup that appears make sure that “Developer” is selected from the list of available tabs and select OK.
We will now add the content controls to the Word document.
For each data field highlight the text you want to use as the content control and select Plain Text as Content Control which is the “Aa” button in the controls section.
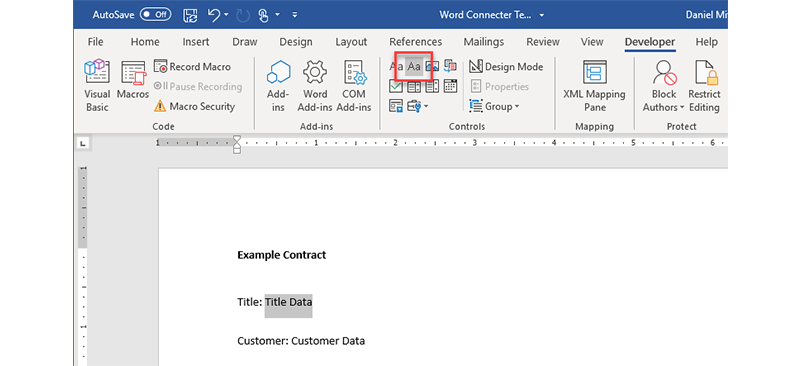
The text selected as the content control should now have a box around it when you hover over it.
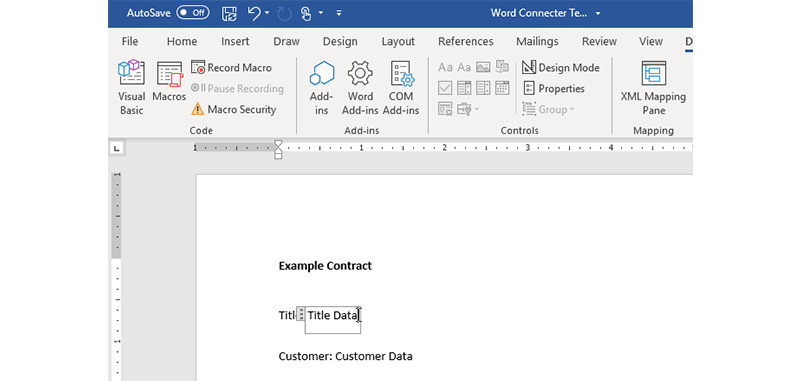
Do this for all the fields in the template and save the file as a .docx (NOT a .dotx template file) in SharePoint or OneDrive.
Create a Flow
Next, we will begin creating our Flow.
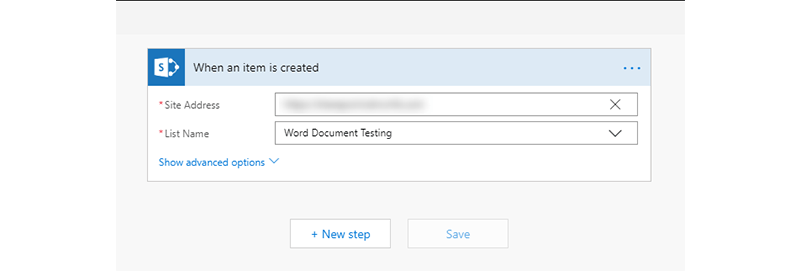
Begin by setting the trigger for the flow as “When an item is created”.
Set the site address and the name of the list that items are being created to.
Populate the Template
Now we will populate the template we created.
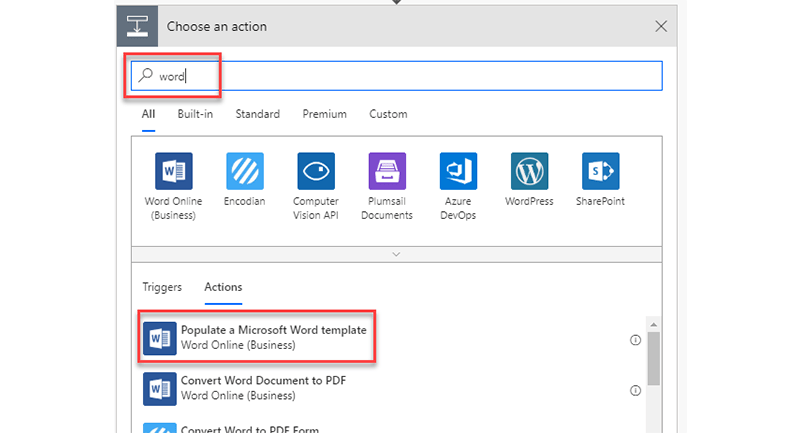
Select “Next step” and enter “word” in the Choose an action search box.
Select “Populate a Microsoft Word template” from the list of actions.
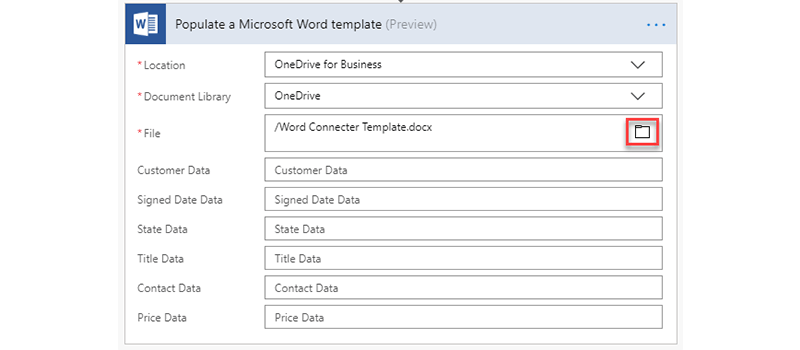
Choose the location and document library that the template is saved in. I saved my template in OneDrive so for the location I selected “One Drive For Business”, for Document Library I selected “One Drive” and then select the template created earlier by selecting the folder icon on the right-hand side of the file input and choosing the template file.
You will now see all the content controls you entered in your template file listed.
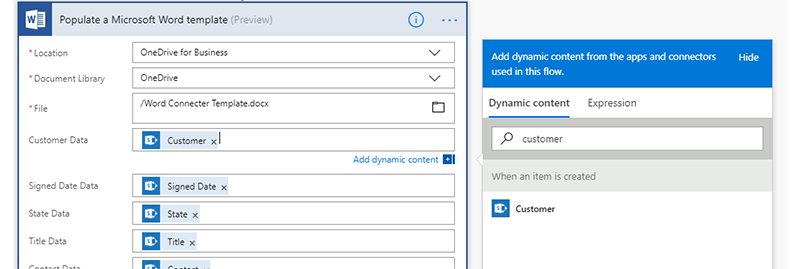
Next, we will use the dynamic content controls to populate data from our list item into the word template content controls we set up earlier.
Go through and use the dynamic content selector to add list item data into the template for all fields.
Create the File
Now that our template is populated, we are ready to create our file.
Create the next step, enter “create file” in the Chose an action search box, and select the “Create file” SharePoint action.
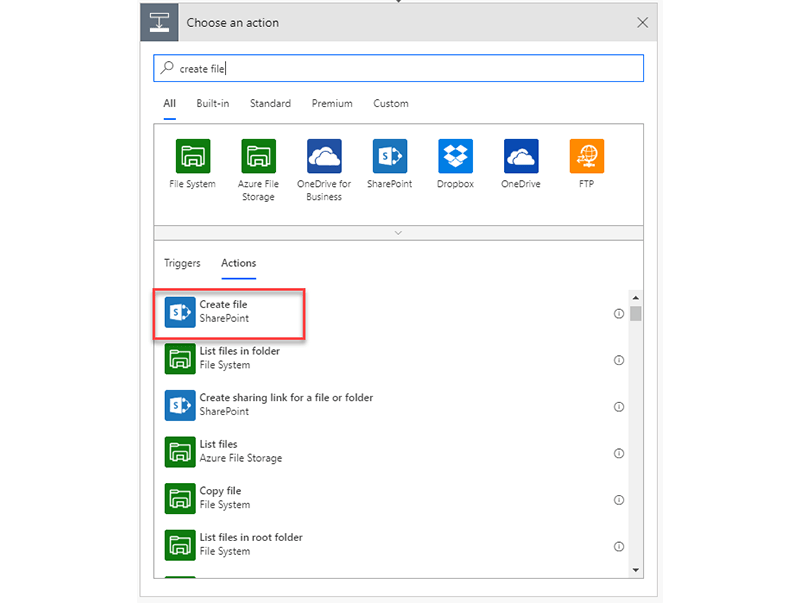
Enter the site address of the document library you want to save the document in.
For folder path, enter the document library you are saving the file in. You can also select a specific folder within the library.
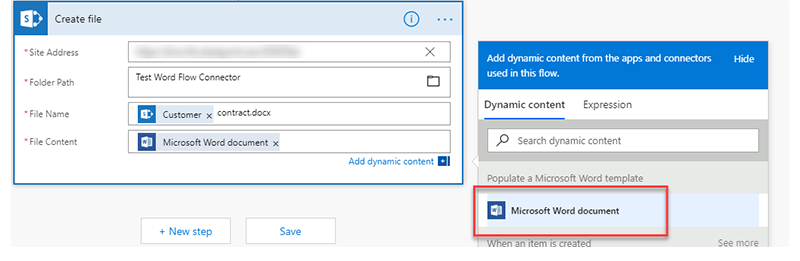
I prefer to create the file name with dynamic content, so I set it as “Customer Name” Contract.docx.
It is important that you add the file extension within the file name, otherwise you will not be able to open the file.
For File Content select “Microsoft Word Document” from the dynamic content options. This will bring in the content from the populated template in the previous step.
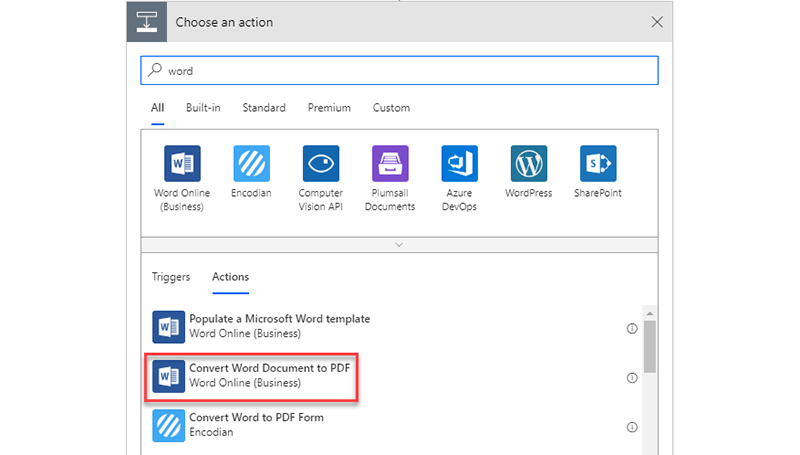
Save the Document as PDF
Now if we want to save the document as a PDF instead, we can use the Convert Word Document to PDF action.
To do this add another step, enter “word” in the choose an action search box, and select “Convert Word Document to PDF”.
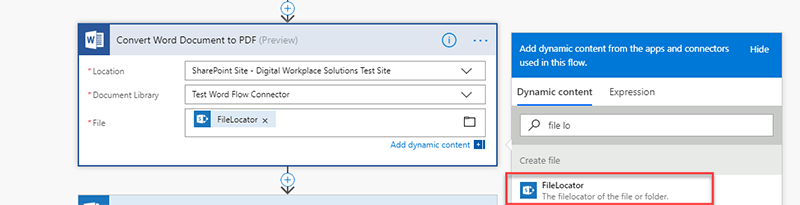
Enter the site the library is located on, select the document library, and select “FileLocator” from the Create File step within dynamic content.
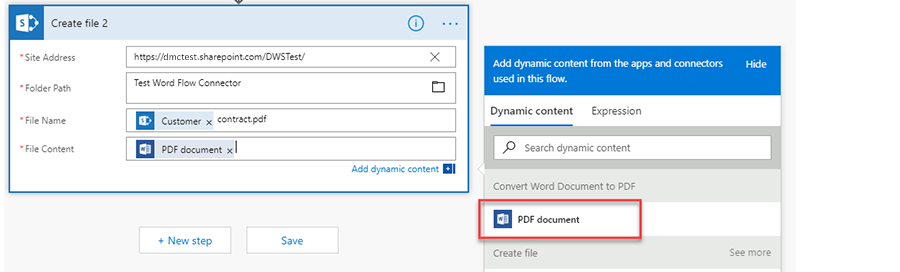
Next, we will add another “Create File” step.
The only difference this time is to make sure we put the .pdf extension on the file name and select the “PDF Document” dynamic content for the file content.
Test the Flow
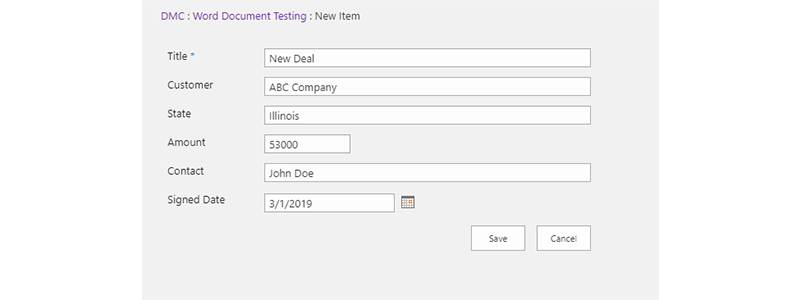
Now we’ll test the Flow. Create an item in the list that triggers the flow.
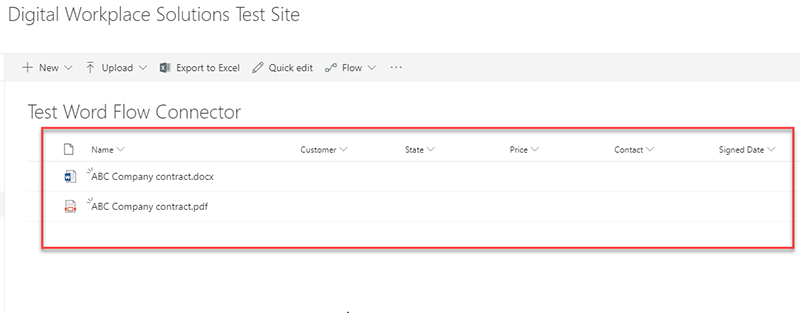
We can now see that we have both a Word Document and a PDF in our document library.
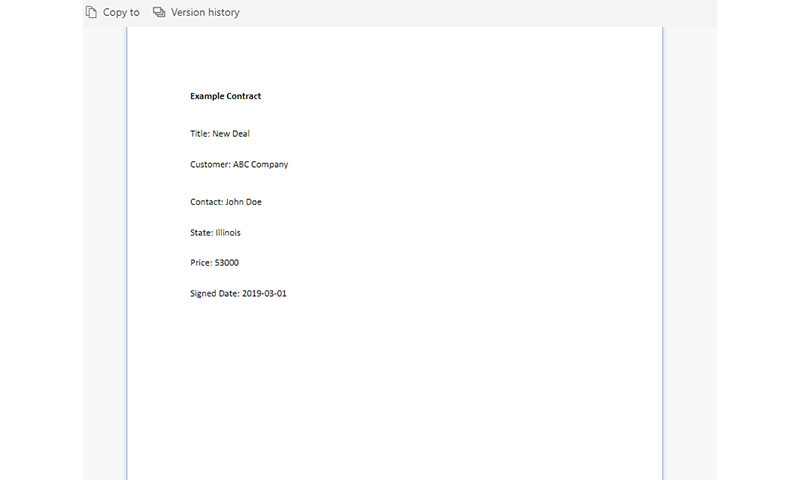
If we open one of the documents, we can see that the fields we entered on the list item are correctly feeding through to the document.
Enter the Document Metadata
Before we finish, we need to enter the document metadata.
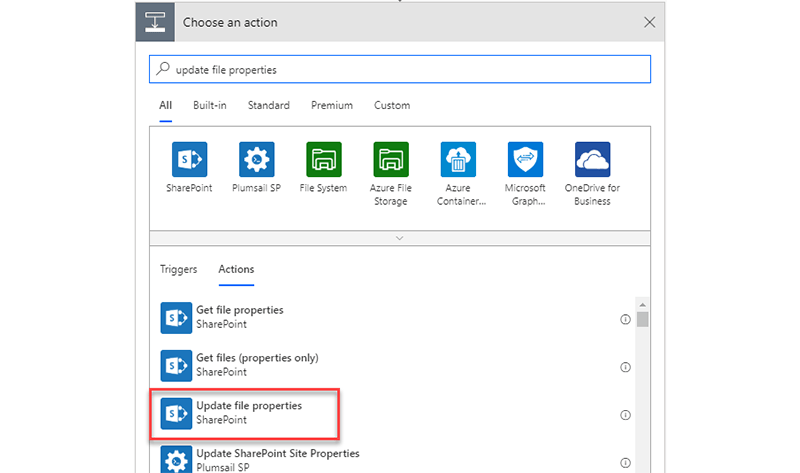
Navigate back to the Flow, create a new step, enter “Update File Properties” in the choose an action search box and select the SharePoint “Update File Properties” action.
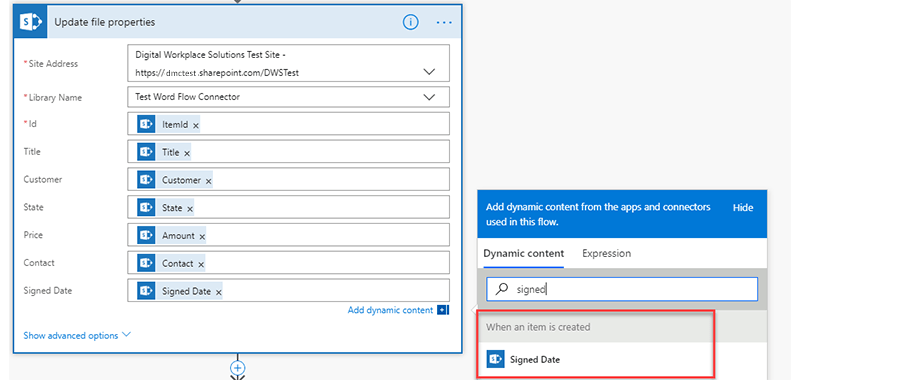
Enter the site address, document library name, and select “ItemId” from the dynamic content selector to select the Id of the document created earlier in the Flow.

Now enter all the file properties using the dynamic content selector. For this example, we will only add metadata for the PDF document.
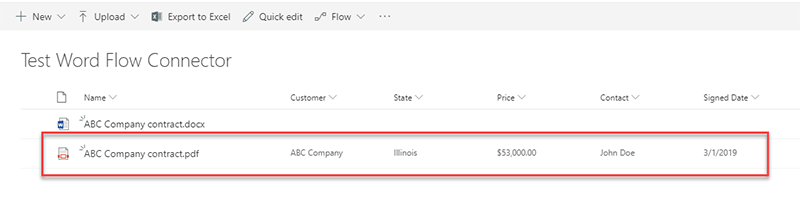
If we run the flow again, we can see that the metadata of the pdf document has correctly populated.
Contact us today to get started on your next Microsoft Flow project.
Learn more about DMC's Flow and PowerApps Solutions.
Learn more about DMC's Digital Workplace Solutions Services.