Many products feature USB to facilitate communication between various devices, to transfer files easily, support hardware peripherals or add other features. While working on embedded systems, we have developed a variety of devices that utilize USB in these ways.
The ease of implementation of USB largely depends on the hardware and software infrastructure that the microcontroller manufacturer provides. As of release 5.12.0, ARM Mbed OS began supporting USB device for several targets. This provides a nice layer of abstraction between the various manufacturers’ USB implementations and the USB class code. There are a variety of USB classes that are supported by default: USB MSD, USB HID, and USB Audio.
In this blog, I’m going to try out this new USB device support and create a USB Mouse out of an old joystick.
Setting up the Project
I want to test out the USB HID class which will allow the device to interface with the PC as a USB mouse. I am going to start by creating a basic ARM Mbed OS project. If you have never done that before, take a look at this guide.
For this project, I am using a NUCLEO_F429ZI development board which is one of the supported targets for using mbed’s USB device. I set the target in my project by using the command “mbed target NUCLEO_F429ZI”. Make sure that your compiler is also set correctly according to the compiler that you have installed.
For the test, I am going to copy-and-paste the example main from the file mbed/usb/device/USBHID/USBMouse.h.
#include "mbed.h"
#include "USBMouse.h"

USBMouse mouse;

int main(void)
{
  while (1)
  {
      mouse.move(20, 0);
      wait(0.5);
  }
}
Try and compile the project by running “mbed compile.” If you successfully build this project, then you are ready for the next steps. If not, make sure the target you are using is supported by ARM Mbed OS’s new USB device.
Note, not all of the targets with hardware USB support Mbed’s USB device abstraction! Also, make sure you have the latest version of ARM Mbed OS in your project.
Running a Quick Test
Load the compiled program onto your target development kit. I am using a NUCLEO which has a STLINK on-board, so the development kit shows up as a drive when I plug it in. Just drag-and-drop the compiled “_your_project_name_.bin” onto the drive to program.
To test the USB HID device, plug in the User USB port to the PC in addition to the debugging port which is needed for power. On your PC, you should see that a new USB device is detected. Once setup, your PC’s cursor should slowly move across your screen in 0.5-second steps.
We are now ready to bring in the retro hardware to complete our USB device!
Adding Some More Hardware
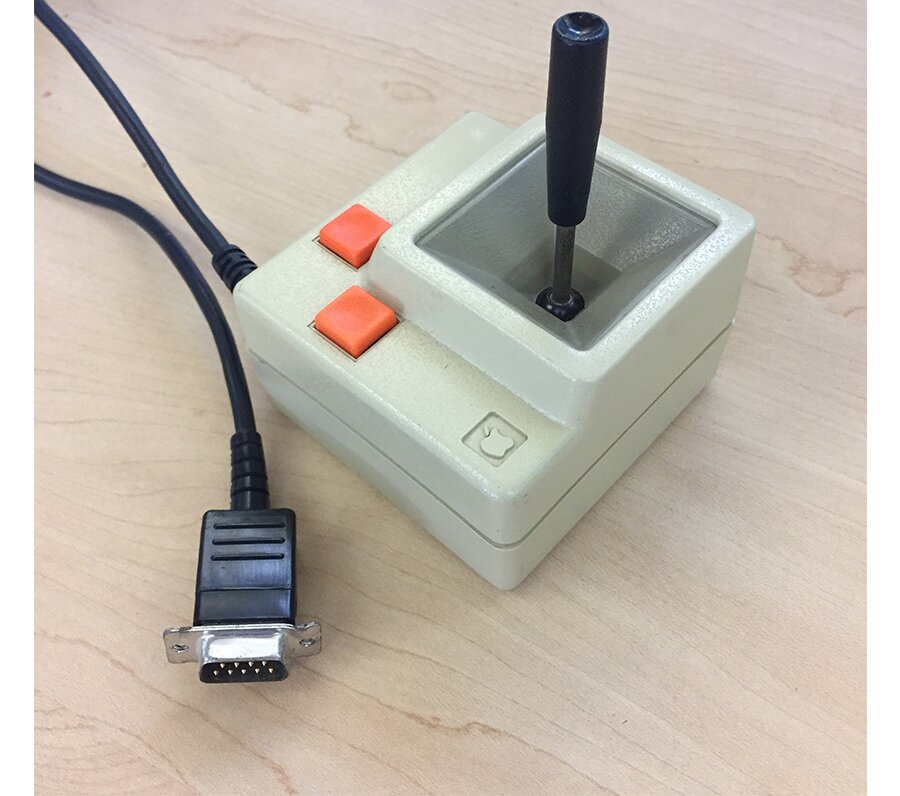
I have an old Apple Joystick IIe that I want to use as a USB joystick; so I need a custom USB adapter. The joystick electronics are very simple. There are two pushbuttons with pull-down resistors and two variable resistors, one for each axis, with one side tied to V+.
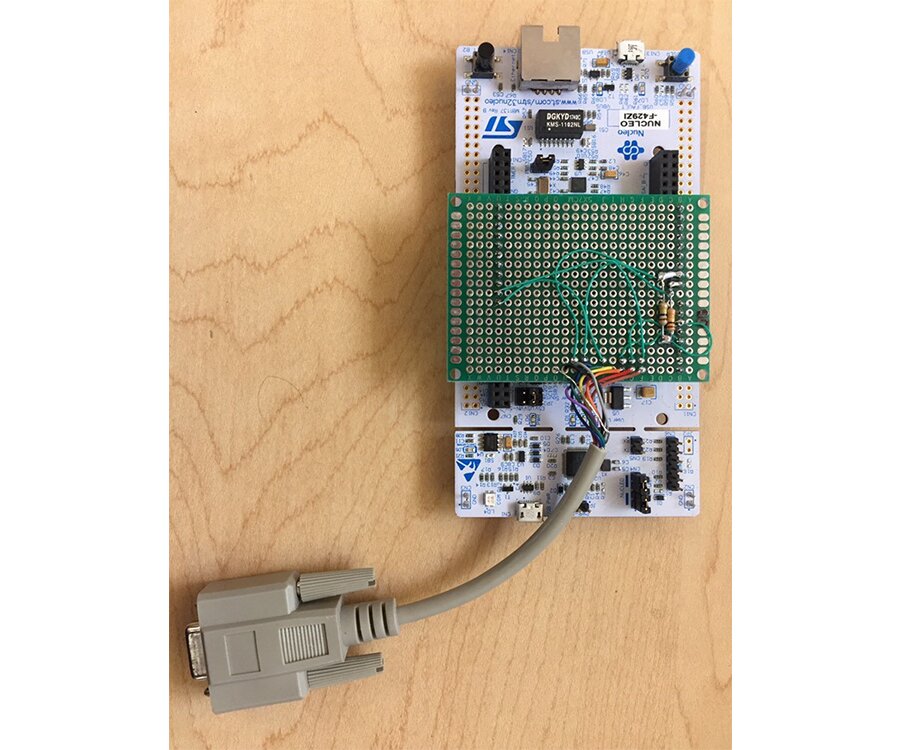
To interface to the joystick, I connect 3.3 V on the NUCLEO to the V+, connect the GND on the NUCLEO to the joystick ground, connect the push-button outputs to digital inputs on the NUCLEO, and connect each axis output to a NUCLEO analog input with a 100 K ohm resistor to ground.
I pulled all of this together quickly with a small prototyping board. The connector itself is just half of an RS232 serial cable.
Now, with a bit of firmware, we can get this retro joystick to operate with any modern OS.
The code below is what I quickly put together to read the analog inputs of the joystick, read the button presses, and send corresponding USB Mouse events. When using one of the various supported USB device classes, Mbed can substantially decrease the required development time.
#include "mbed.h"
#include "USBMouse.h"

USBMouse mouse;

AnalogIn ainx(A0);
AnalogIn ainy(A1);

DigitalIn right_button(D6);
DigitalIn left_button(D7);

int main()
{
	float x = 0;
	float y = 0;

	bool prev_right_button = true;
	bool prev_left_button = true;

	const float mid_x = ainx.read() * 100.0;
	const float mid_y = ainy.read() * 100.0;

	while (1)
	{
		// Update the X, Y position
		y = ainy.read() * 100.0;
		x = ainx.read() * 100.0;

		float x_move = x - mid_x;
		float y_move = y - mid_y;

		if (x_move < 0)
			x_move = 2 * x_move;
		if (y_move < 0)
			y_move = 2 * y_move;

		if ((abs(x_move) > 4.0) || (abs(y_move) > 4.0))
		{
			mouse.move(-1 * x_move, -1 * y_move);
		}

		// Update the button presses
		bool current_right_button = right_button;
		bool current_left_button = left_button;

		if (prev_right_button != current_right_button)
		{
			if (current_right_button)
			{
				mouse.press(MOUSE_RIGHT);
			}
			else
			{
				mouse.release(MOUSE_RIGHT);
			}
			prev_right_button = current_right_button;
		}

		if (prev_left_button != current_left_button)
		{
			if (current_left_button)
			{
				mouse.press(MOUSE_LEFT);
			}
			else
			{
				mouse.release(MOUSE_LEFT);
			}
			prev_left_button = current_left_button;
		}

		wait_ms(10);
	}
}
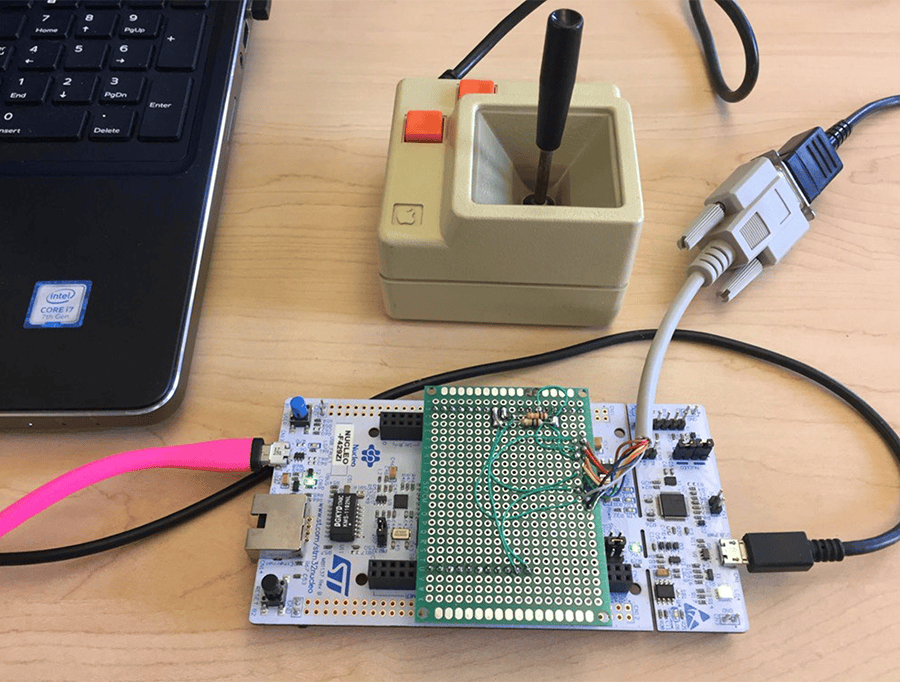
Testing it Out
Plug it into the PC and try out this retro joystick working with a modern machine!
This is a great way to get a simple USB device going, but often a product will require more customization or non-supported USB class. If this is the case for you, come talk to our embedded development and programming group to see what solution makes sense for you!