One of the fastest-growing SCADA/HMI platforms today is Inductive Automation's Ignition. In addition to the well-known Vision visualization module, Ignition also contains Perspective, a web-friendly visualization module that works in any web browser—even on mobile!
Although most Ignition functions work the same across Perspective or Vision, there are some necessary adjustments to work better in a web-friendly environment. This multi-part blog will serve as a guide to setting up dynamic Perspective screens that take full advantage of its new powerful features.
To begin this series, we'll focus on starting a Perspective view and creating bindings to tags and properties. We will then use binding transforms to display that information in the correct format.
Creating a Perspective View and Label Object
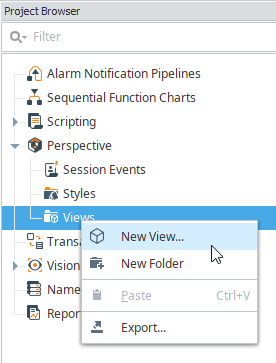
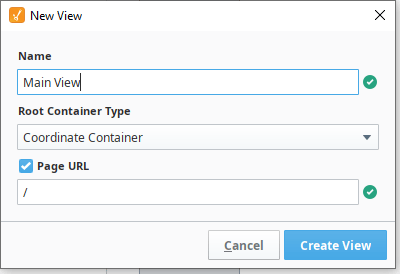
The first step of working with Perspective is creating a view. Views serve the same purpose as Vision windows, but they can also be embedded in other views to act like Vision templates. In the project browser, find Perspective/Views and select New View. Give your view a name and keep the container type as a Coordinate Container.
When you open your view, the screen layout will switch to the Perspective view layout. The menu toolbar (1), project browser tree (2), and tag browser (3) are in their usual positions and the central designer panel shows the current view (4). However, the right side of the layout is a bit different. Instead of the Vision property editor in the bottom left, there is the Perspective property editor on the right side. There is also the Perspective component toolbox, which may need to be unhidden by pressing its button.
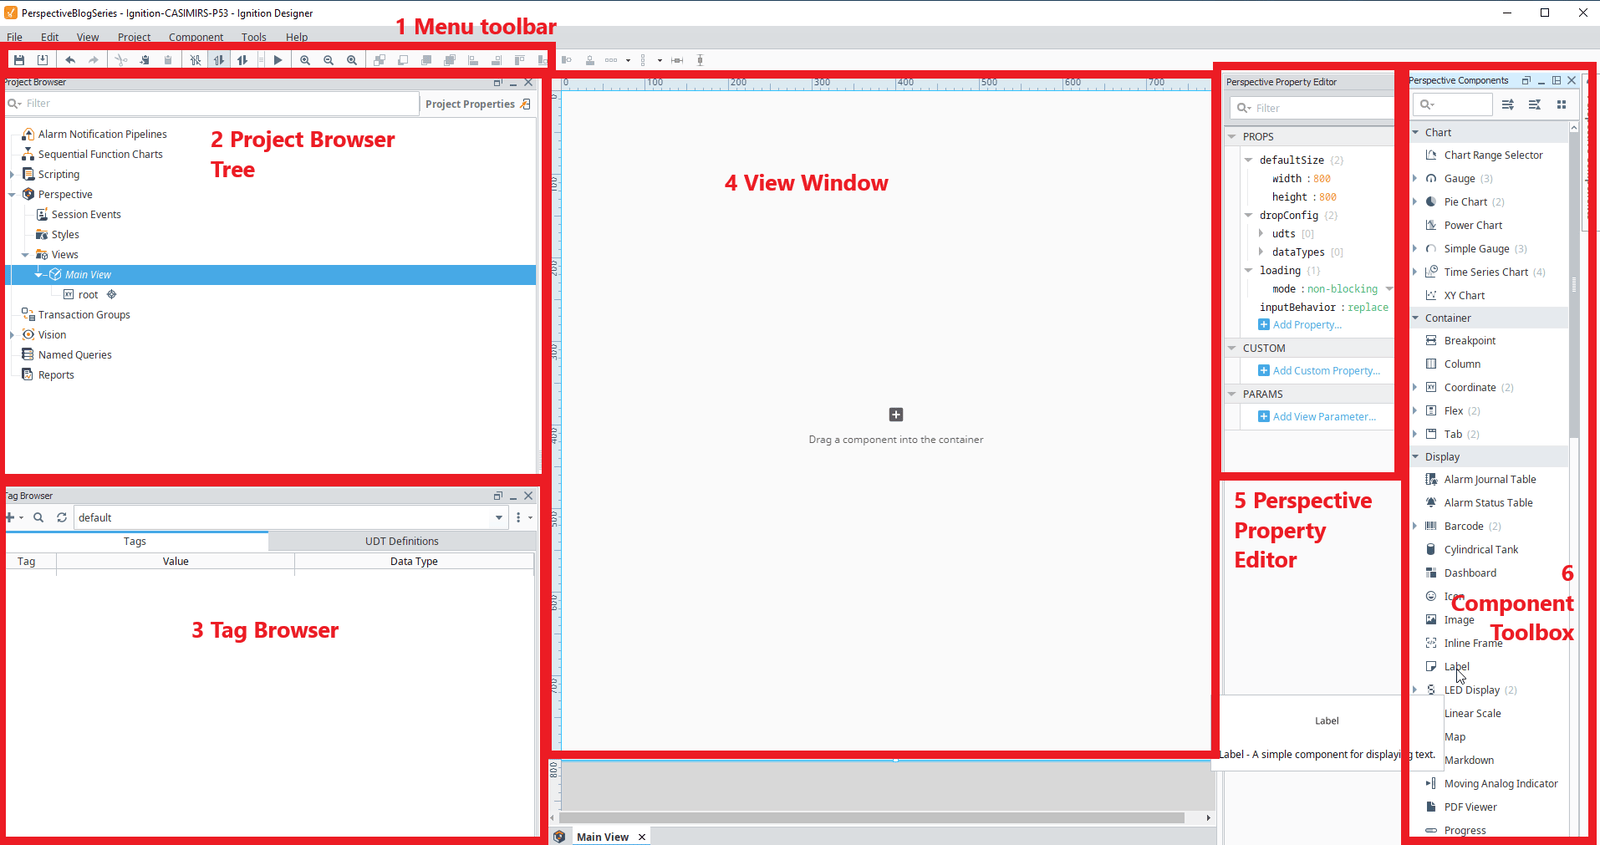
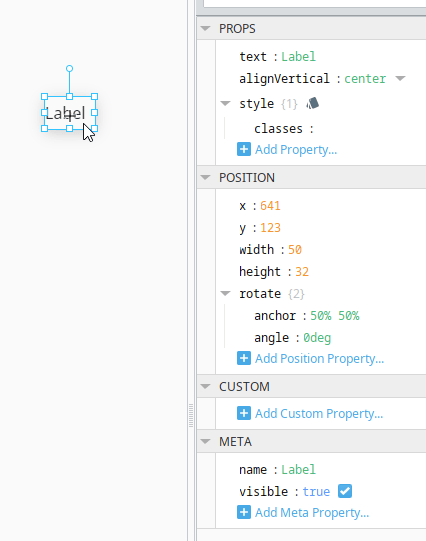
First, create three label objects by dragging them from the toolbox to the view window. When you click on a label, the property editor will show all the properties of that object. Nearly all the properties can be edited, but for now, note the object name in the meta category and the text property that determines what text is displayed.
Creating a Property Binding
Tag Binding
On the first label, we will create a tag binding to map the "text" property to a numeric tag.
To create a binding, hover your mouse over the left side of the property, then click when you see the greyed-out chain symbol. This will open the Edit Binding Popup.
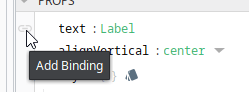
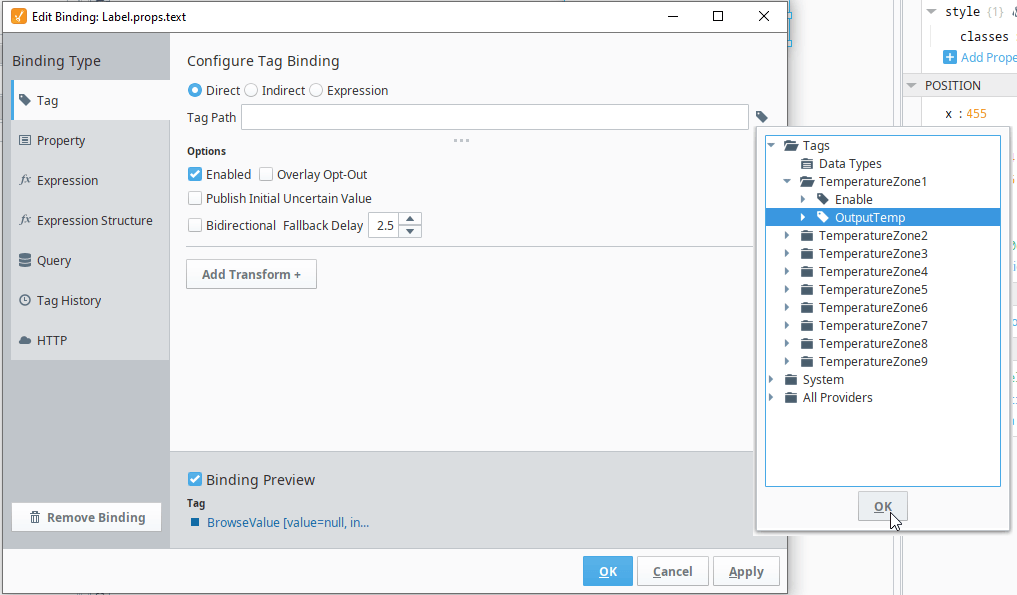
To create a tag binding, select Tag as the binding type, then click the tag button to the right of the Tag Path input box. This will open a list of tags on the current gateway. I have configured a few sample tags already, but you can use any tags available on your gateway. Find the desired tag in the tag tree and click Ok to bind to that tag.
Property Binding
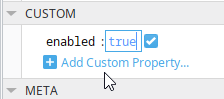
On our second label, we will create a custom boolean property then bind the "text" attribute to that property.
Select the second label and add a custom property with the blue Add Custom Property button in the property editor. Name it "enabled" and set its value to true.
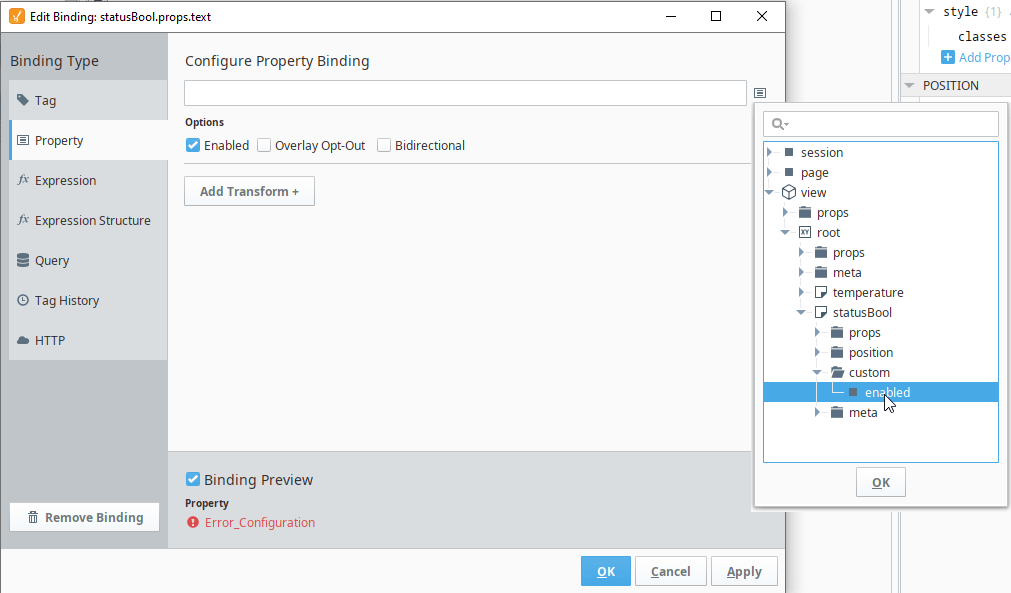
You can bind to this custom property just as easily as a tag binding. Add a binding to the text property, then select Property as the binding type and click the button to the right of the input box to open the property tree. Find your custom prop in view > root > {label name} > custom > enabled, then click Ok to add the property binding.
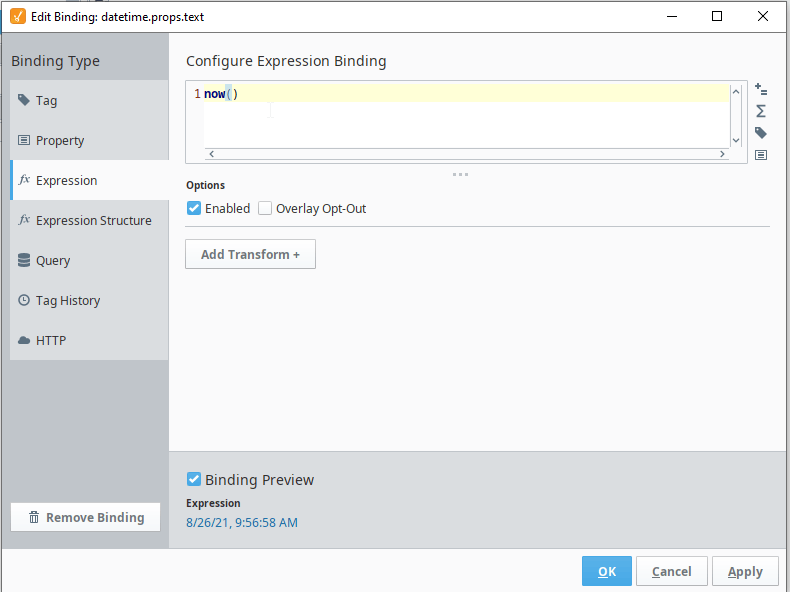
Expression Binding
On our third label, we will create an expression binding, which can use Ignition's Expression language to accomplish a wide variety of calculations.
Create another label and add another binding to the text property. Select the Expression binding type. Type "now()" to return the current date and time, then click Ok to apply the binding to the label.
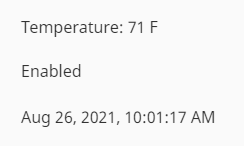
The three labels you've created are now bound to a tag, a property, and an expression. However, these raw values (shown below) are not always what you want to display on your screen. To turn these bindings into more human-readable text, you can use binding transforms.

Using Binding Transforms
Binding transforms take the results of a binding, then manipulate the value to become more useful for your application. This section will show you how to use expression, map, and format transforms.
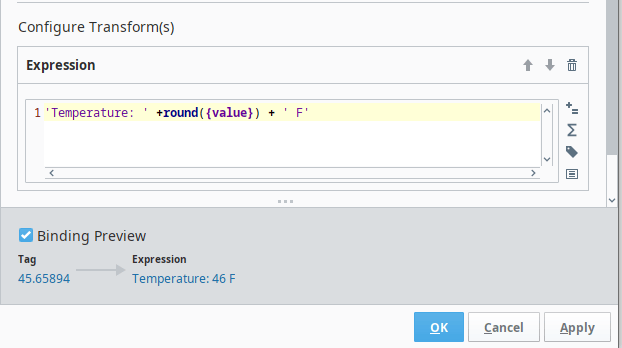
Expression Transform
Open the binding on the first label's tag transform and click Add Transform, then select an expression transform. This transform lets you use the binding value as the input to an expression function. Type
'Temperature: ' round({value}) + ' F'
to round the value to the nearest integer and add the label before and after it. You can look at the binding preview at the bottom of the popup to see how your value will be transformed.
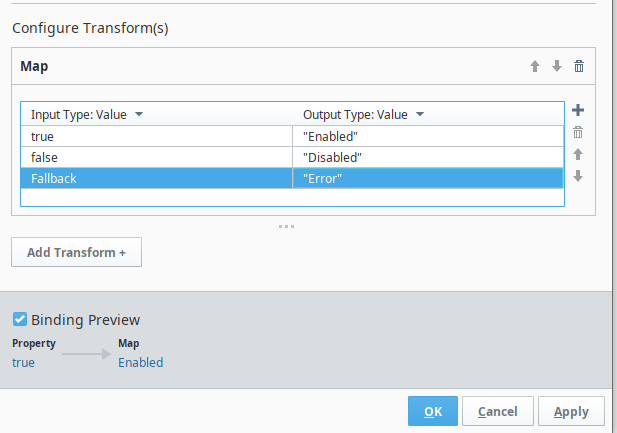
Map Transform
We will use a map transform to change the enable/disable boolean to show enabled/disabled as text. Open the boolean property binding and add a Map Transform. Click the plus icon to add new maps for "true" and "false", then type in the desired text for true and false. The map transform also works for integers and even ranges of numbers!
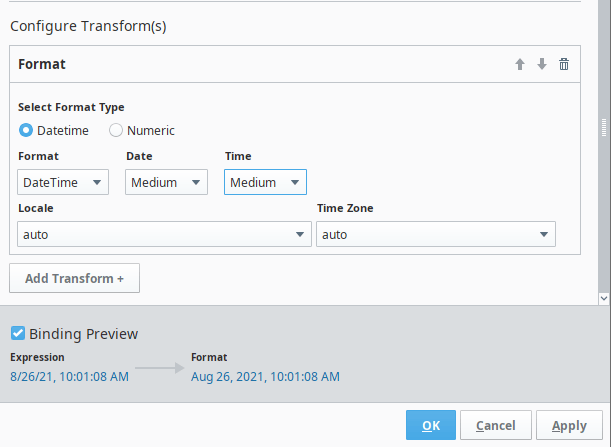
Format Transform
The format transform is used to display numbers and dates in your desired format. Open the datetime expression binding and add a Format Transform. Select the datetime type and choose your desired datetime format. The preview will show how the date will be displayed on the label.
After we have applied our bindings and transforms, the labels now show tag data in an easy-to-read format.
Learn more about DMC's Ignition expertise. Contact us to get started on your next HMI, SCADA, or MES project.