Adding logic to upgrade NI VeriStand Custom Device versions allows the functionality of a Custom Device to be modified without having to delete and re-add a Custom Device in a System Definition File. This can save a developer time and frustration when working with complicated systems.
How to Add Logic for Upgrading CD Versions
Implementing a basic version of this functionality will require creating two VIs and updating the Custom Device XML.
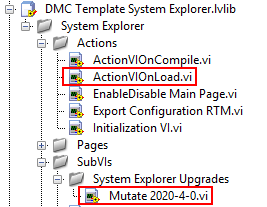
1. ActionVIOnLoad.vi
2. Mutate Version.vi
a. You can keep adding more Mutate VIs as the Custom Device continues to evolve.
3. Update Custom Device XML
Implement the “ActionVIOnLoad.VI”
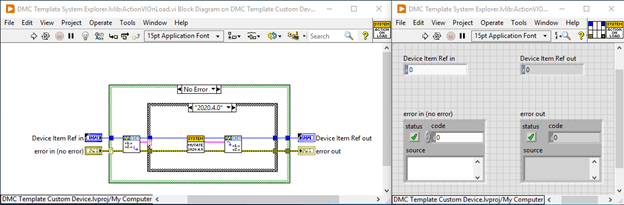
The ActionVIOnLoad executes when NI VeriStand loads a custom device item into memory. Therefore, we can use this VI to check if a new version of a Custom Device has been created. If so, we can implement whatever code is required to update the old version to a new version. An example of a change would be adding or deleting channels, but can really be anything you can fit into your VI.
The first step is to create an instance of the “ActionVIOnLoad.vi” in the Custom Device System Explorer
1. Custom Device API.lvlib:NI VeriStand - Get Custom Device Version.vi
a. Make sure the Custom Device XML version is updated when you build new versions of the Custom Device.
2. Mutate VERSION.vi (See next section).
a. You will typically write a new Mutate VI each time you release a new version of the Custom Device.
3. Custom Device API.lvlib:NI VeriStand - Set Custom Device Version.vi
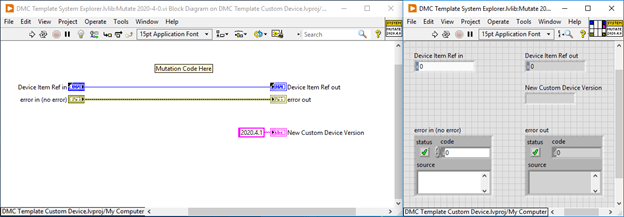
Implement “Mutate Version.VI”
This VI is responsible for making the updates from one version to another. This VI should also return the new version of the Custom Device.
Update the Custom Device XML
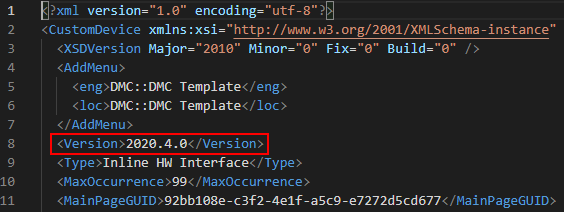
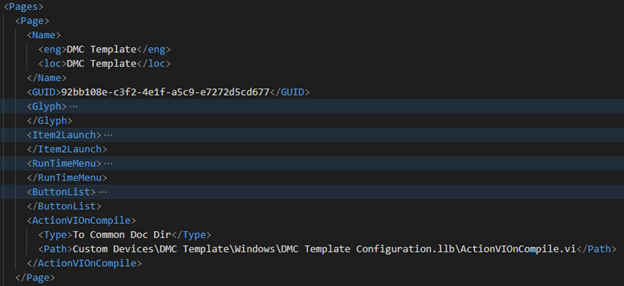
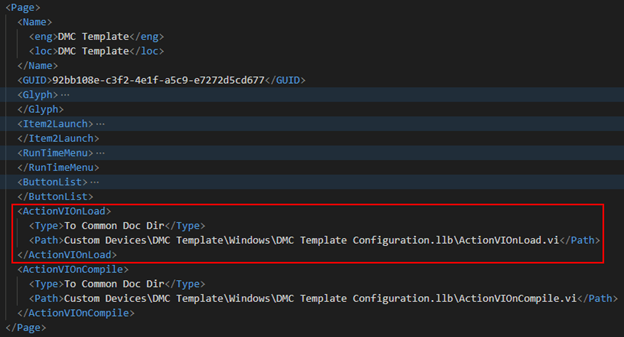
The Custom Device XML file must be updated to know that the ActionVIOnCompile.vi has been implemented.
1.Add the <ActionVIOnLoad> tag to the Main Page definition.
NOTE: Remember to add this code to both Enabled/Disabled page definitions if that functionality is enabled.
[Add link to ENABLE/DISABLE BLOG POST HERE]
CAUTION: The <ActionVIOnLoad> must be added before the <ActionVIOnCompile>.
Before:
After:
Check out these related blog posts:
How to Configure EnableDisable Custom Device Functionality in NI VeriStand
How to Install the “NI VeriStand Custom Device Wizard”
Learn more about DMC's partnership with National Instruments.