Built-in functionality from the Report Generation Toolkit (RGT) is an awesome way to get started programmatically manipulating Word using LabVIEW. This tutorial will demonstrate how to further customize your report's formatting by creating VIs.
The result of this tutorial is a PDF programmatically generated by LabVIEW:
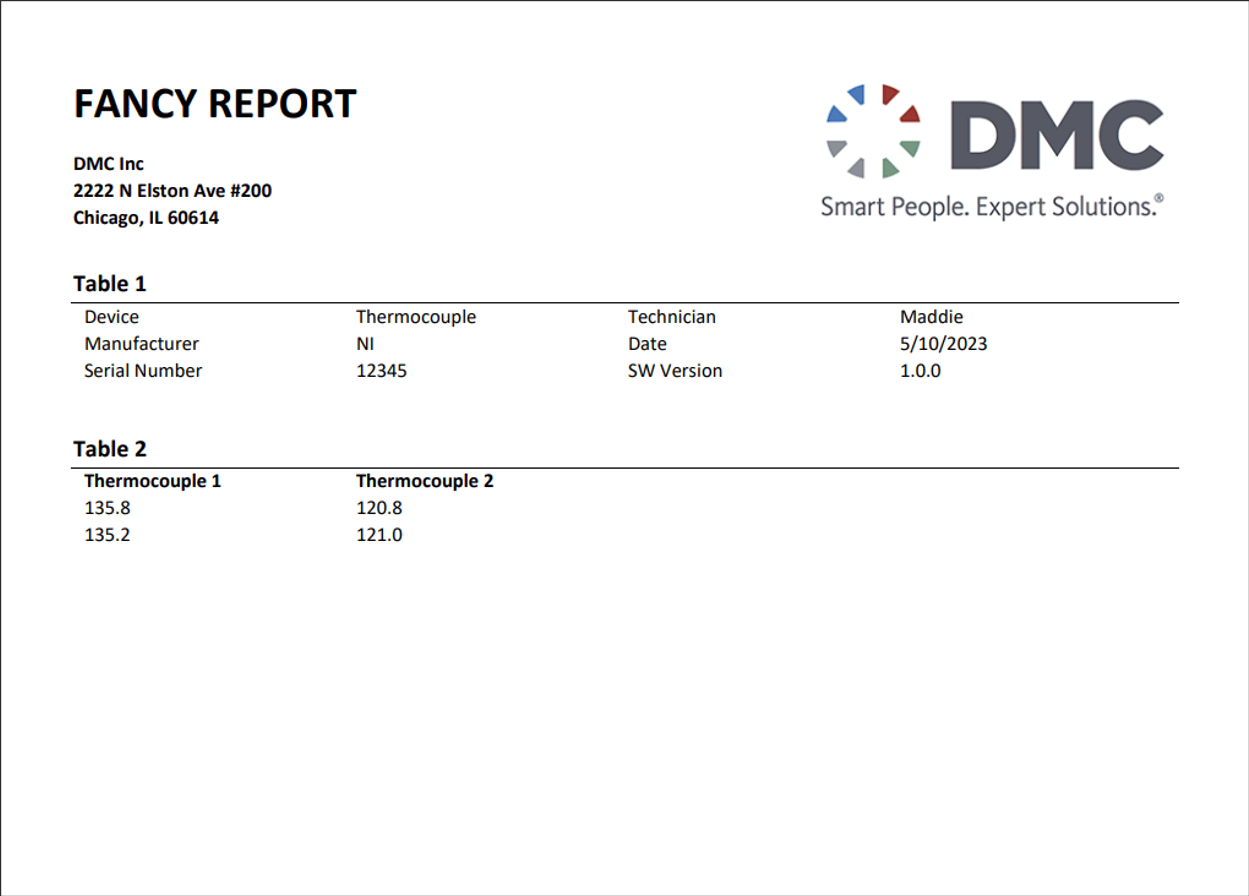
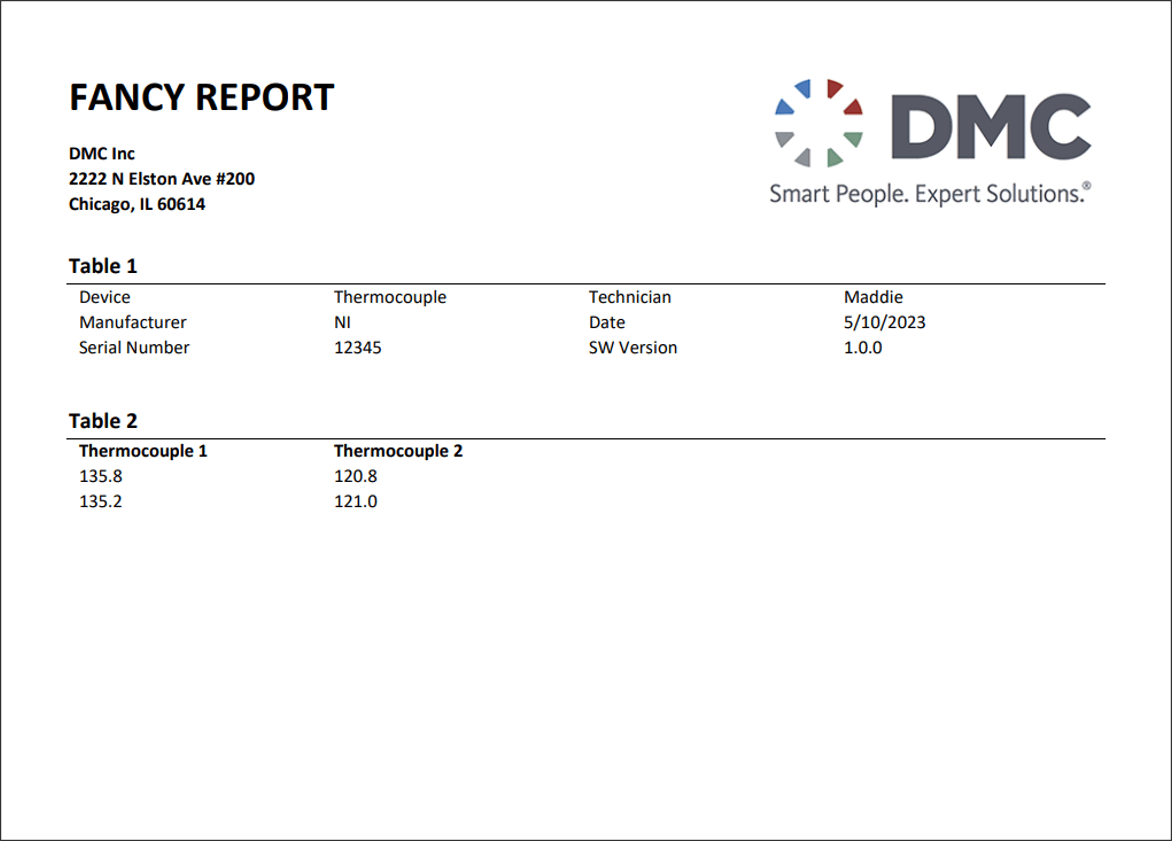
Template Report
To start, create a template Word document that will serve as the base for all reports you make. Anything that will be consistent across reports should be included here. This eliminates the need to programmatically add these attributes every time you create a report. In this example, the consistent information is the document header, the DMC logo, and the table names.

Basic Report Using Built-in VIs
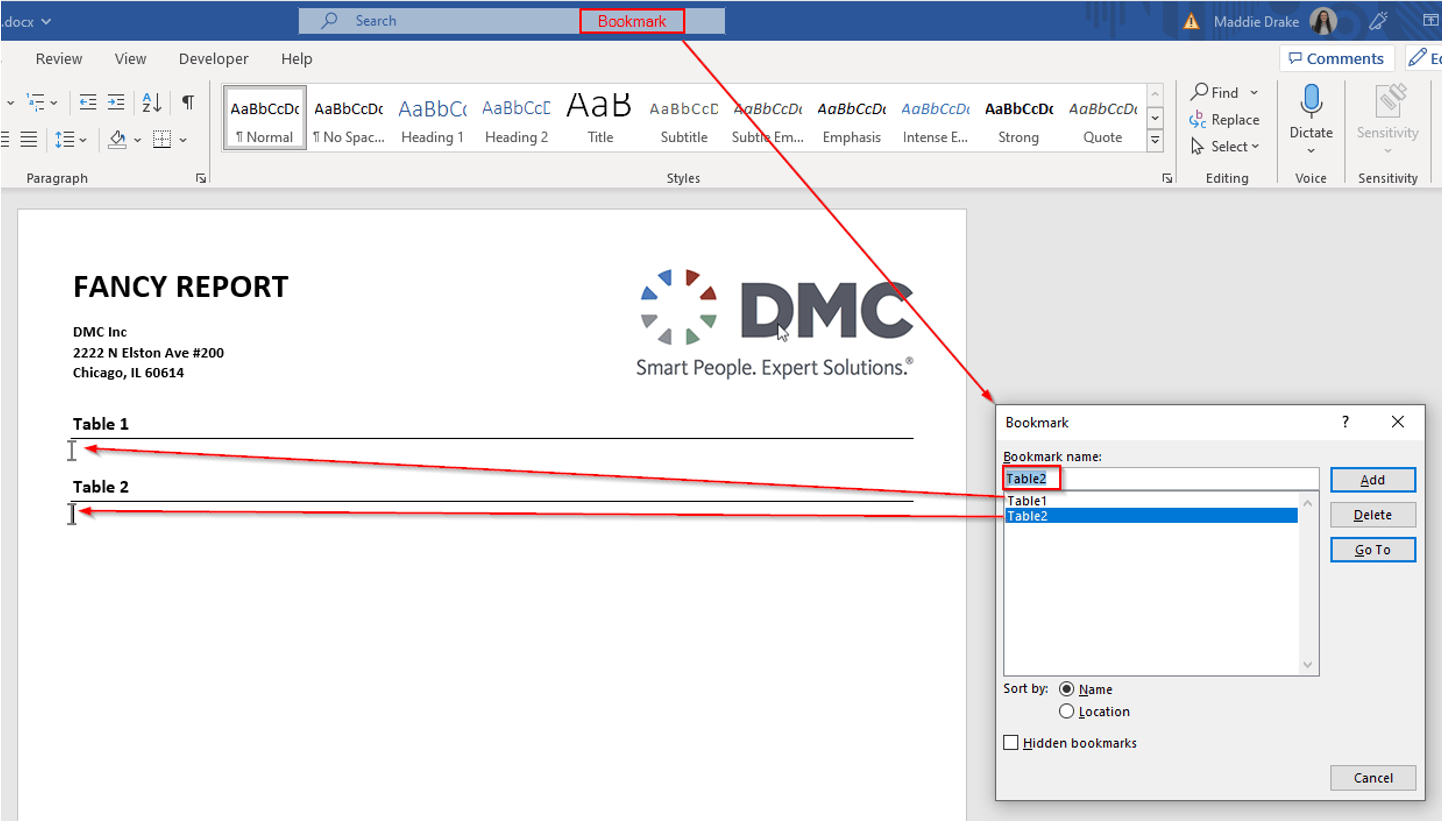
To add a table to this document, use the “Append Table to Report” VI provided by the RGT, but, first, you must add bookmarks to the template document in Word. You can achieve this by clicking the spot where you want to add a bookmark and typing “Bookmark” into the search bar. In my example, I added two bookmarks (Table1 and Table2) where I wanted tables inserted.
After that, the “Append Table to Report” VI can be used in conjunction with other NI RGT VIs to write to the bookmarks. The following code is what I used to achieve this:
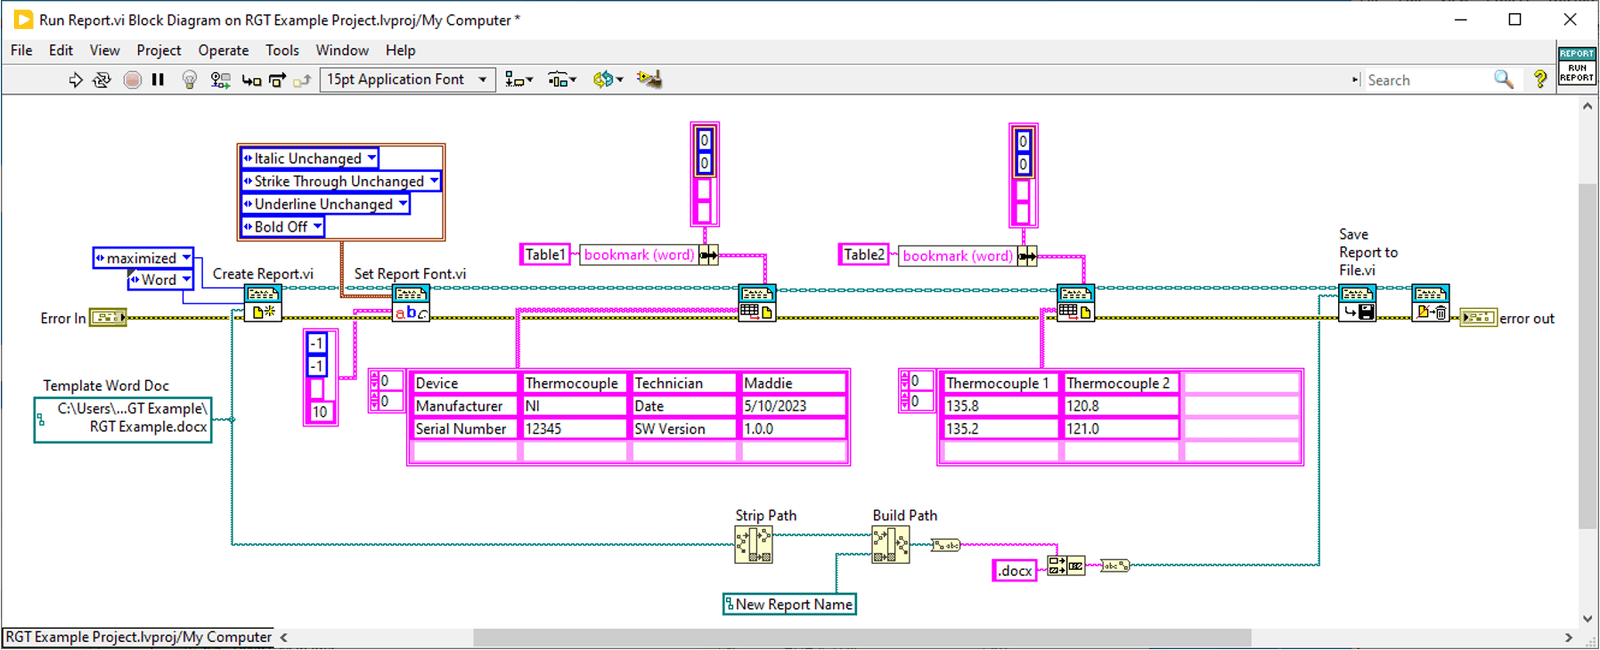
The result of running this code is shown below.
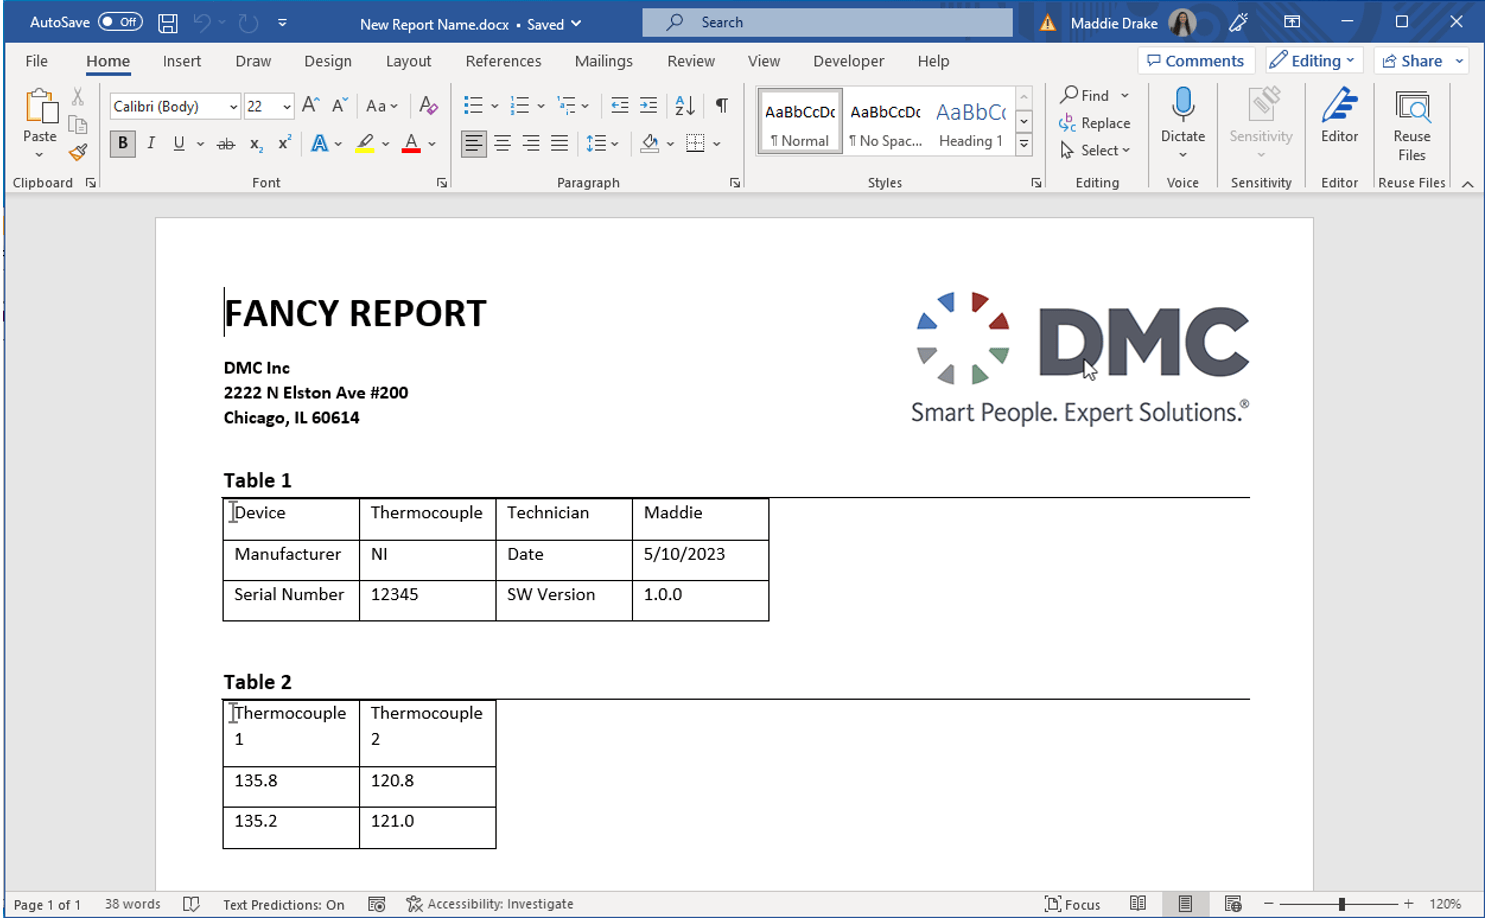
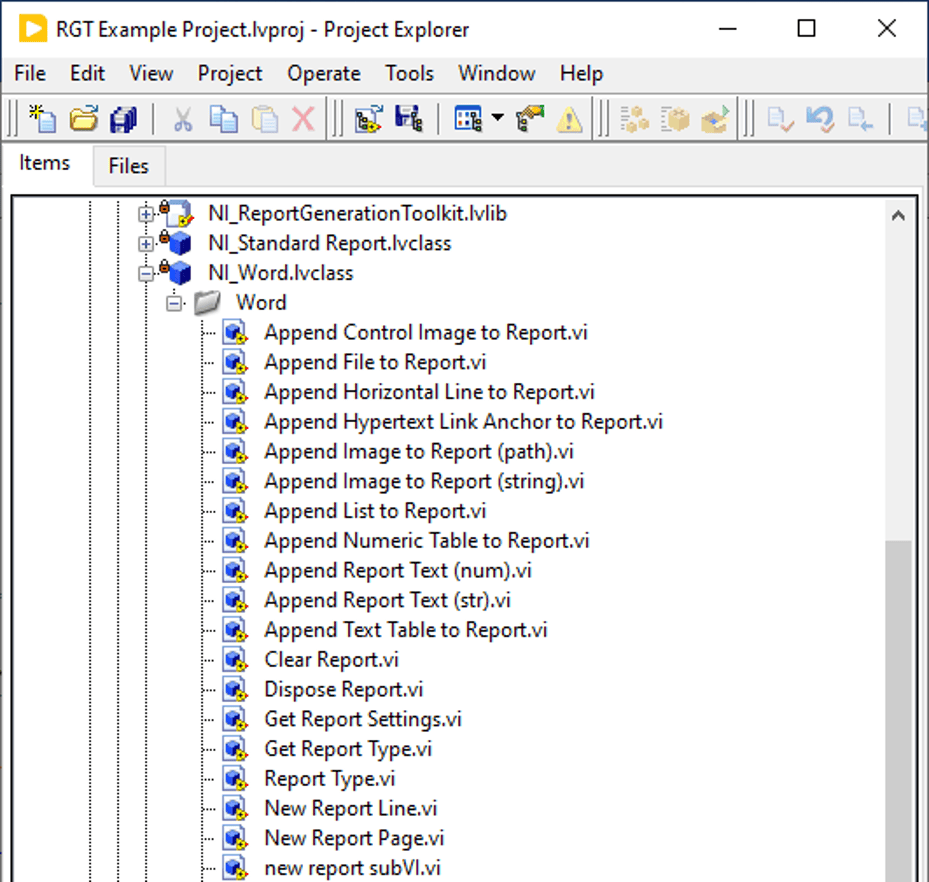
LabVIEW successfully inserts tables where the bookmarks are placed, but they are not formatted. To add formatting, find VIs that are provided in the “NI_Word” class (pictured below). If you can’t find what you’re looking for in that class, you can create custom formatting VIs. Learn how to do this in the next section.
Customizing Formatting Functionality
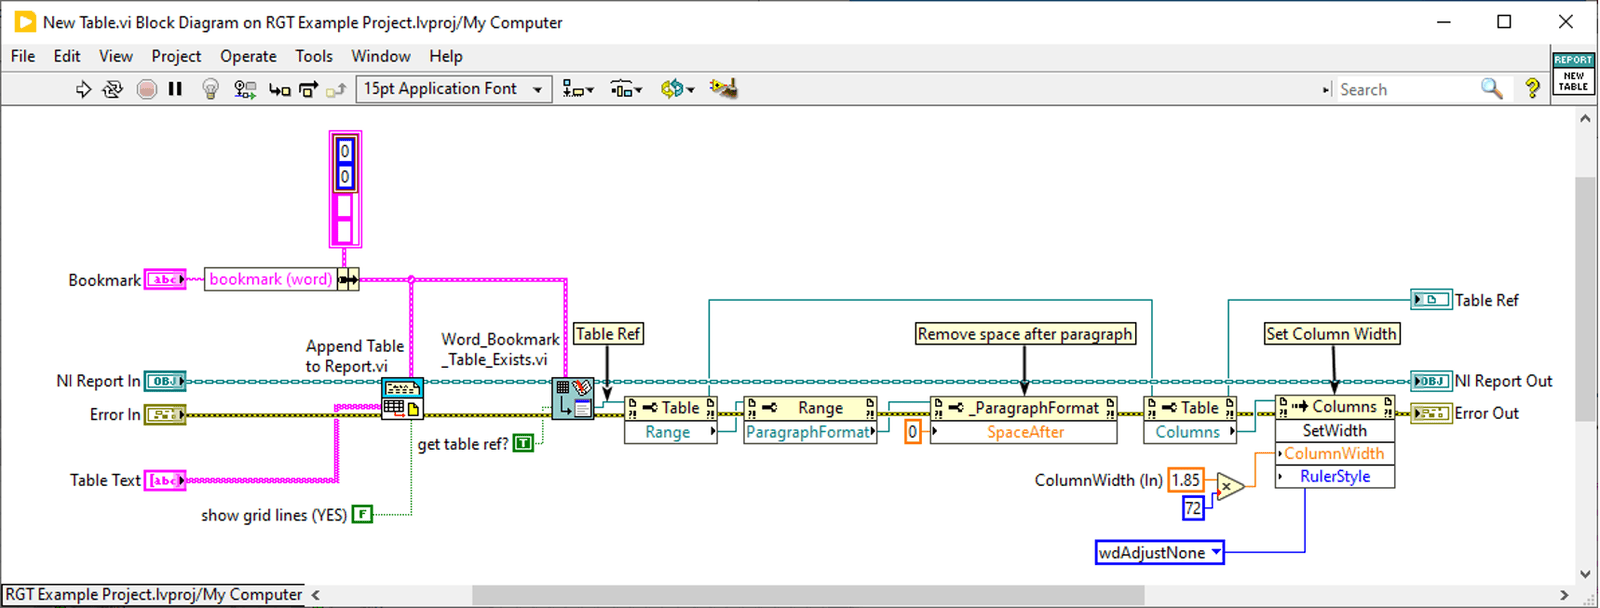
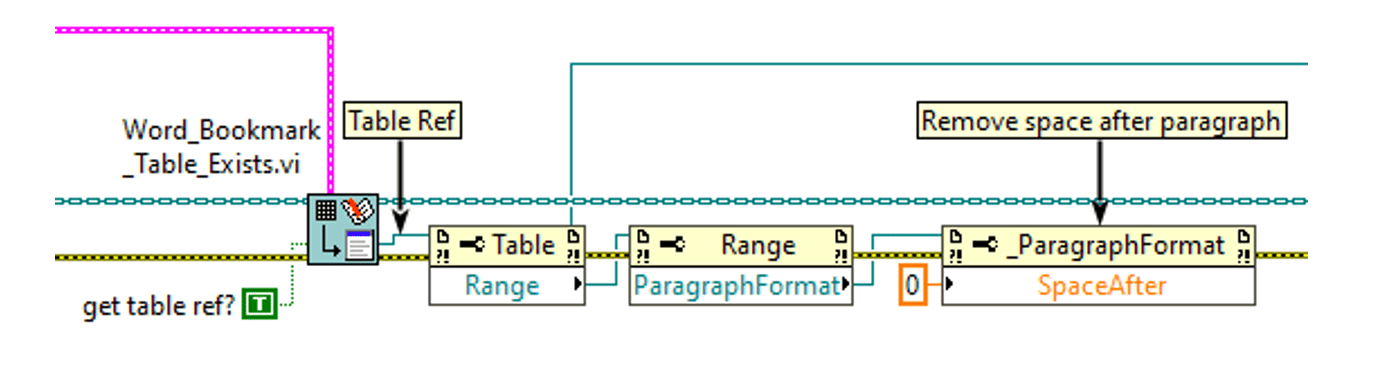
If you want functionality that isn’t provided in the RGT toolkit, you can build your own custom VIs. You can do this by utilizing the power of VBA using property nodes in LabVIEW. In this example, I will show you how to format these tables using a “New Table” VI I made.
In this VI, the same “Append Table to Report” VI is used to paste in table data. After that, I find the reference to the table that was just pasted in using the “Word_Bookmark_Table_Exists” VI. Once you have the reference, you can use property nodes to manipulate the table. In the example below, the code is removing the space after each paragraph and setting the column width.
This VI will get called in the main VI.
How to Figure Out Which Property Nodes to Use
You may be asking yourself how to figure out which property nodes to use. After all, when you wire the table reference to a property node, there are many options to choose from.
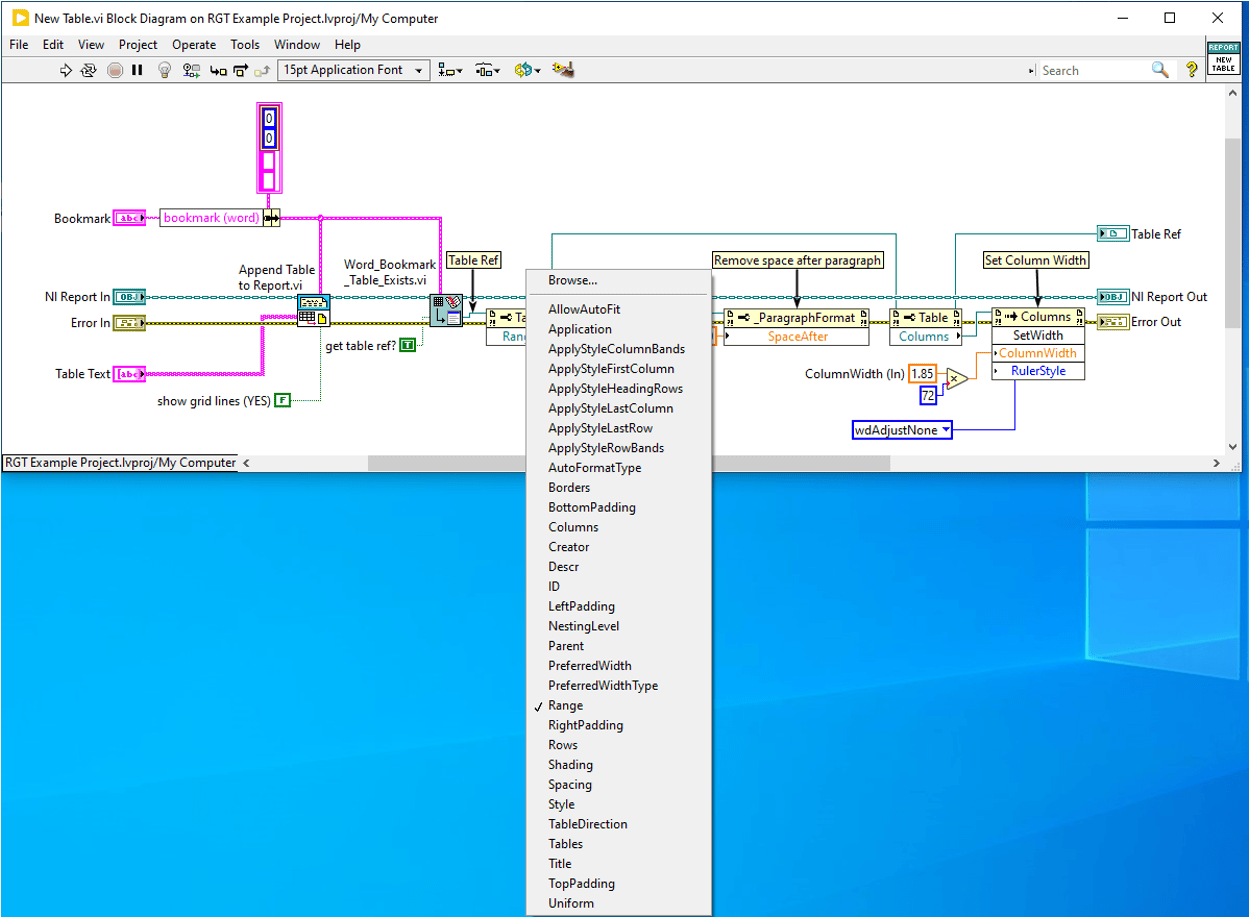
You can figure out what combination of property nodes to use by checking the VBA language reference. For example, if you want to format the amount of space you have after text, you can search “How to remove spacing after text in VBA.” This will bring you to the “SpaceAfter” property in VBA, which allows you to remove spaces using the lines of VBA code below.
ActiveDocument.Range.ParagraphFormat.SpaceAfter = 0
Notice how the property nodes in the New Table VI are identical to the VBA code.
Custom VIs + Built In VIs
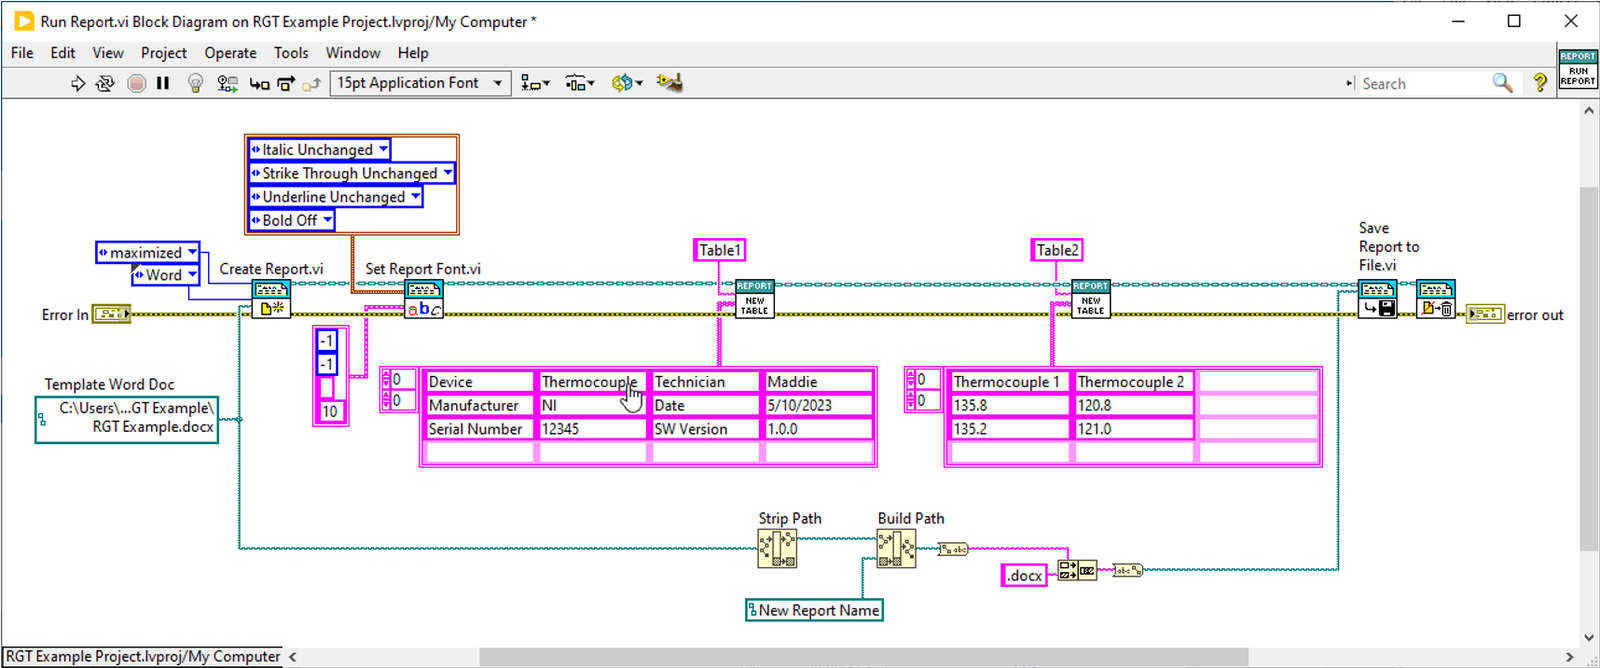
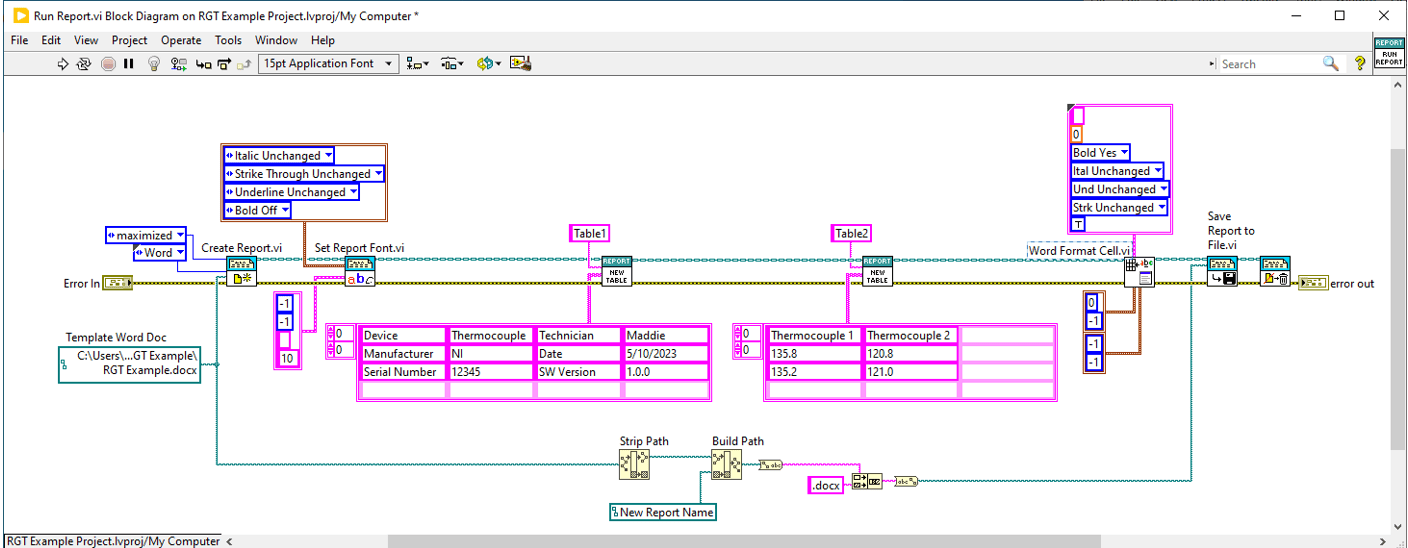
Custom VIs can be used in conjunction with built in VIs. A built-in VI was added after the custom VI in the Main VI to bold the first row of the second table (see code below). The RGT VIs will remember the last table that was edited and manipulate only that one. The first table will not have any text bolded in this example.
Exporting as a PDF
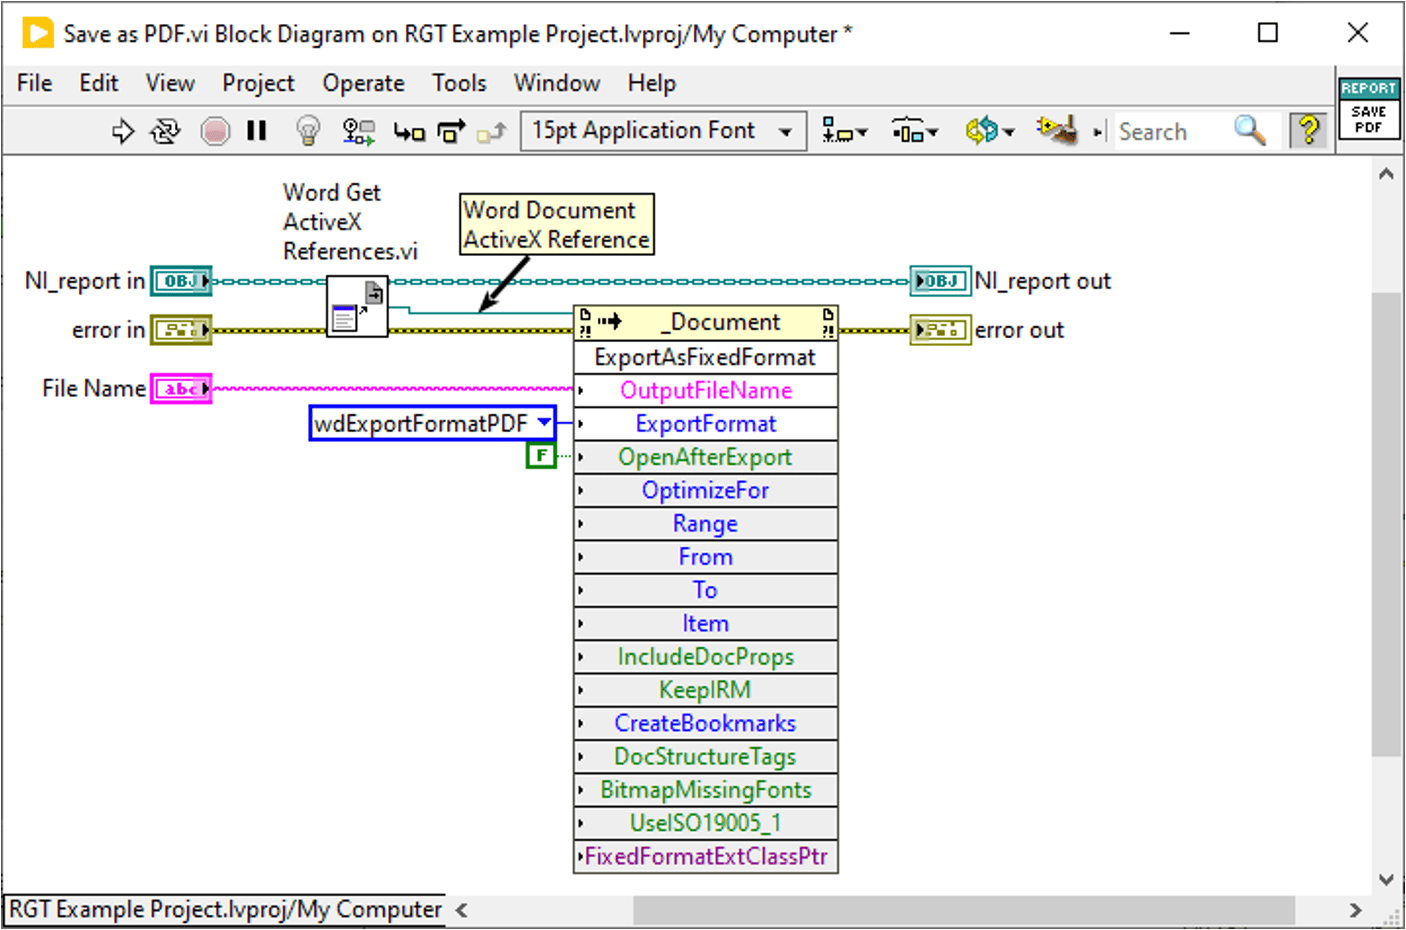
To put custom VIs into practice once again, we will walk through an example of saving the report as a PDF. Instead of retrieving the table reference like we did in the last custom VI, the ActiveX Reference for the Word document is retrieved using the “Word Get ActiveX References” VI. The reference is wired to an invoke node where it commands the VI to export the document as a PDF.
Conclusion
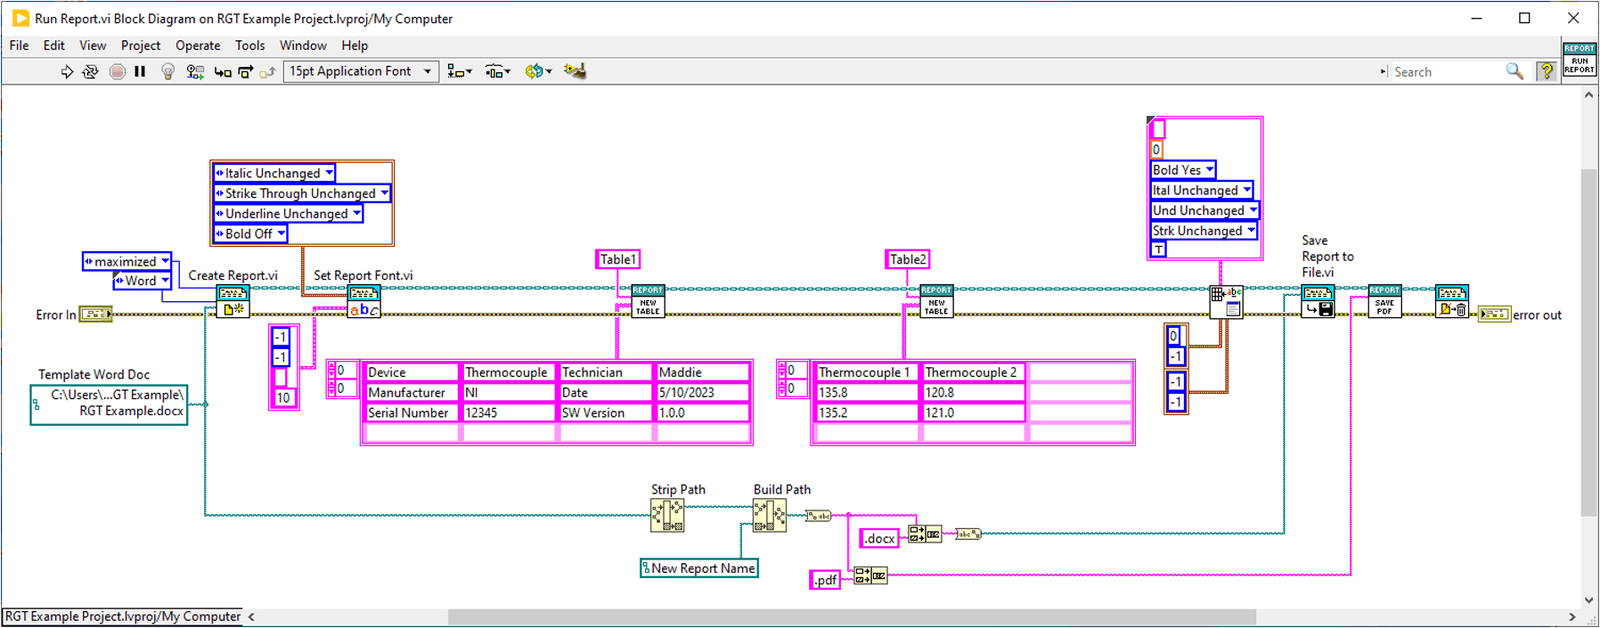
You can use the report generation toolkit to create custom functionality and piece it together to achieve a beautiful, dare I say, fancy report. In the screenshot below, all of the code described in previous sections is amalgamated to obtain the desired functionality.
This produces a PDF that is formatted with more customization than reports produced using only RGT VIs.
The default VIs for NI RGT are a great way to quickly save and format data to Word. Using these in conjunction with custom code gives you endless programming possibilities.
Learn more about DMC's LabVIEW Programming services and contact us today for your next project.