In today's digital era, ensuring the security of your industrial automation systems is crucial. User login systems play a vital security role by controlling who can access sensitive data and manage processes.
Siemens TIA Portal V18 and WinCC Unified offer effective solutions for setting up user logins, increasing the safety of your operations as a result. In this guide, we’ll walk you through the process of adding local users, runtime rights, and protecting your HMI features in a few simple steps.
Setting Up Users and Rights
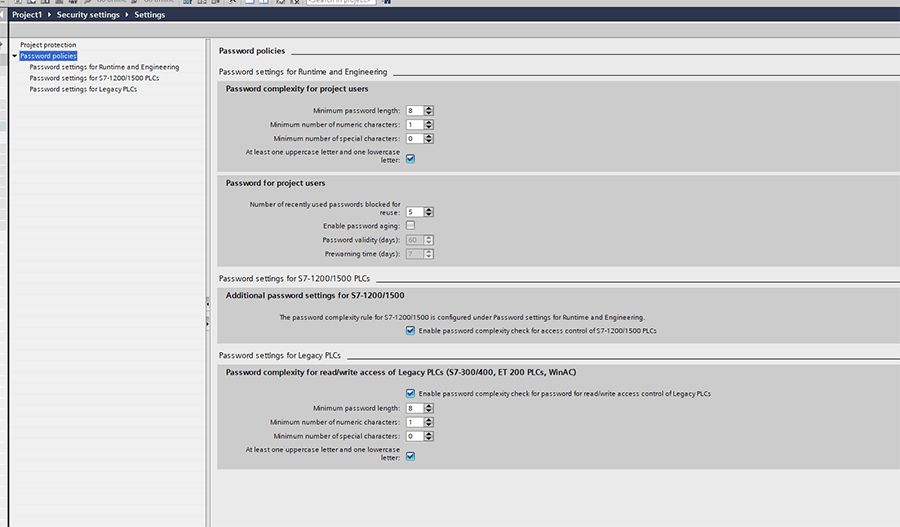
The first step is to set up the user profiles for your project. You can set specific rules for password complexity under ‘Security settings’ > ‘Settings.’
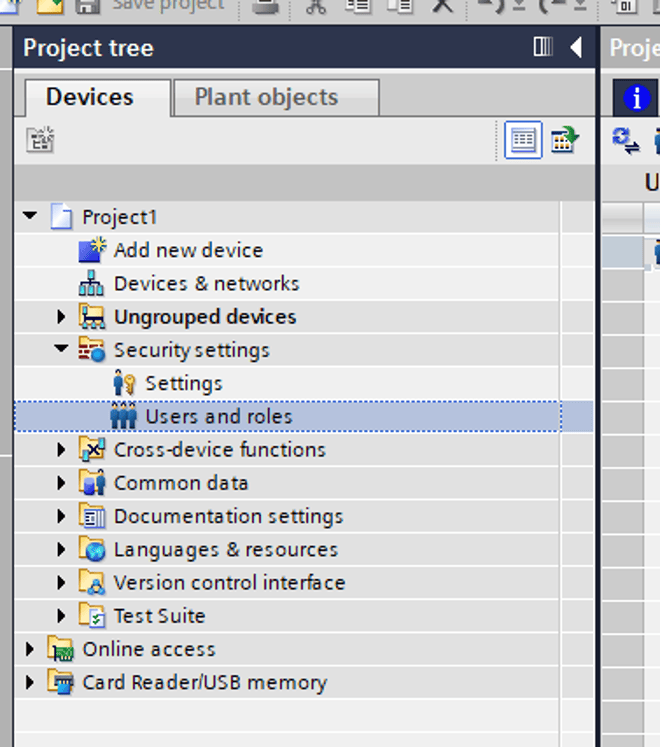
Next, navigate to ‘Security settings’ and then to ‘Users and roles.’
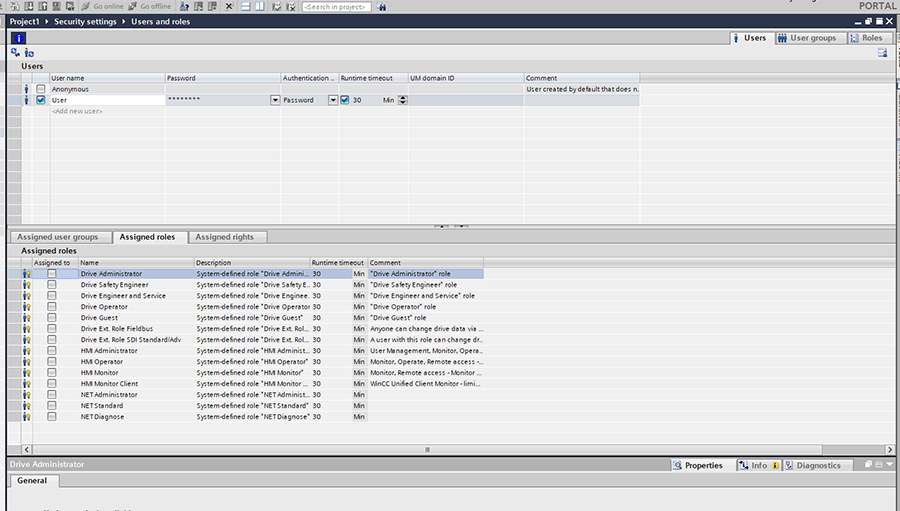
In the ‘Users’ tab you can create a new local user profile. To do this, you will need to click on ‘<Add New User>’ and then ‘Add new local user.’ Next, you can enter in a ‘User name’ and ‘Password.’ Here you can also define a timeout, which will automatically log the user out after a certain amount of time. This is also where you will assign roles to each listed user, but we'll return to this after setting up some roles.
Assigning Roles
Next, let’s go over ‘Roles’ and ‘Rights.’ Each role is comprised of a set of selected rights. ‘Runtime rights’ are what we will reference while programming protected or user restricted features on the HMI.
To create and name your own custom rights, navigate to the ‘Roles’ tab and then to the ‘User-specific runtime rights.’ Here you can create new rights with custom names and descriptions.
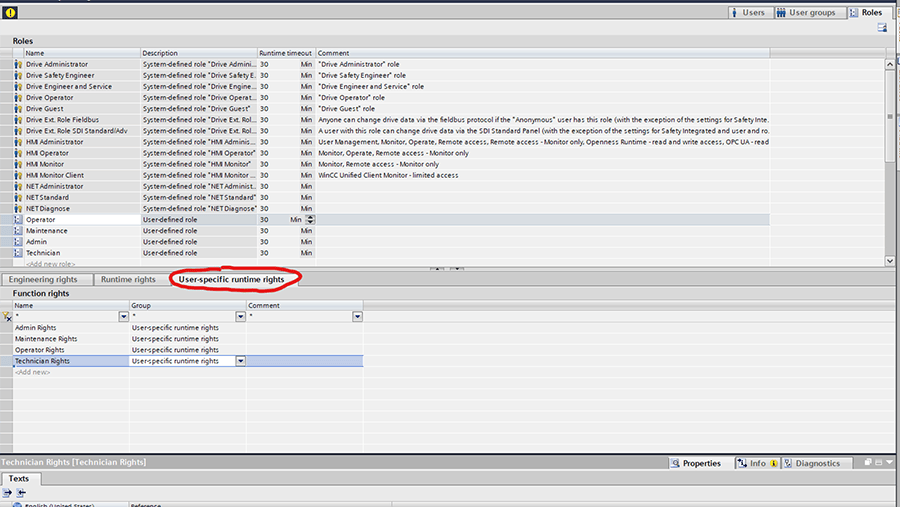
As an example, I have created 4 levels of rights and users as shown above: ‘Admin,’ ‘Maintenance,’ ’Technician,’ and ‘Operator.’ Admin will have the highest level of rights, followed by Maintenance, then Technician, and finally Operator with the lowest level of rights.
To set up the roles for our example setup, return to the ‘Runtime rights’ tab, and then click on ‘Operator’ in the Roles window. This screen will show the HMIs and PLCs available in the project.
For this example, we will set up the runtime rights for the WinCC Unified SCADA device by clicking on the drop down, selecting the device, and then selecting the custom runtime right we created earlier: ‘Operator Rights.’ Since ‘Operator’ has the lowest level of rights, we will only check ‘Operator Rights’ for the ‘Operator’ role.
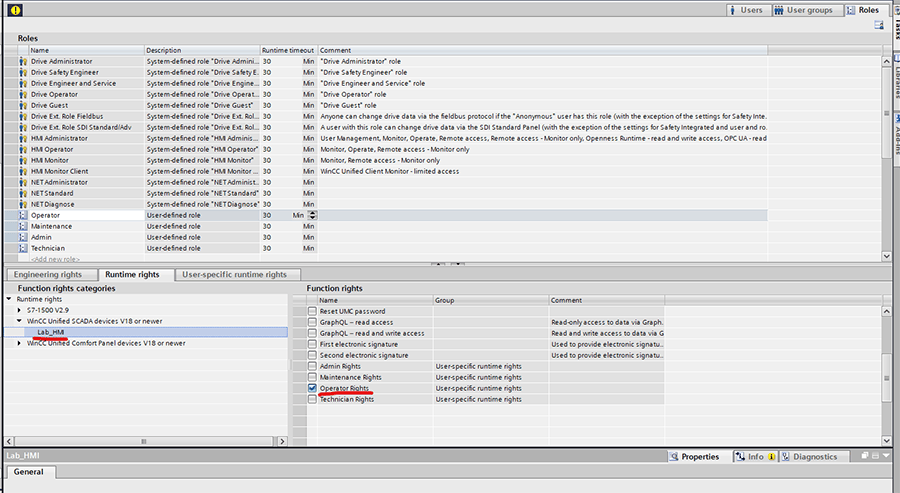
For the other 3 roles, we will assign the rights as shown below:
Technician – Operator Rights, Technician Rights
Maintenance – Operator Rights, Technician Rights, Maintenance Rights
Admin – Operator Rights, Technician Rights, Maintenance Rights, Admin Rights
When set up this way, a feature that needs to be protected by a user login can be sorted according to the permission hierarchy rules we defined earlier.
The ‘Admin’ user can access anything protected by one of our custom rights, but the ‘Operator’ user can only access those protected by ‘Operator Rights.’ There are many other system defined rights available in which you can also assign to your custom roles if needed.
Creating User-Restricted HMI Features
Next, we will go through how to reference these roles while programming protected features on the HMI. In the example below, we want to restrict the ability to interact with the I/O Field to the Admin user. Navigate to the ‘Security’ dropdown and select ‘Admin Rights’ for the Authorization field.
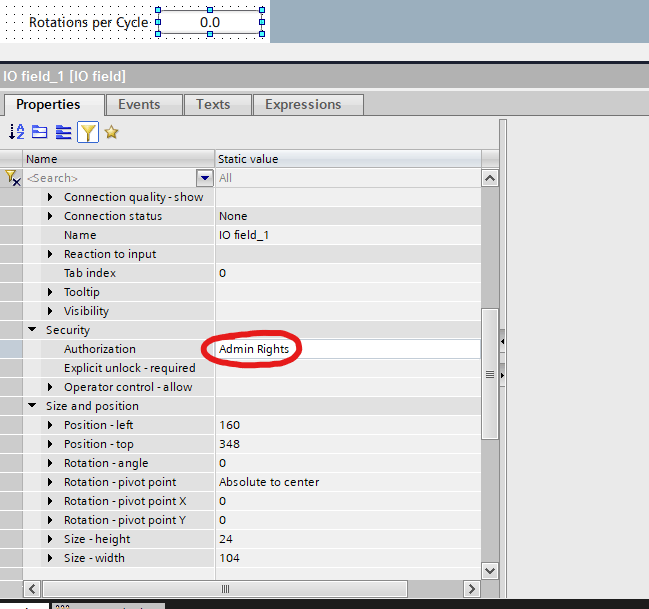
This will limit interaction with this IO Field to the Admin user only. If you wanted a different level of access, you could choose from any of the other rights available to tailor the access to your needs. This setting is available for most other objects available in WinCC Unified. For anything that you want to restrict with a user login, you can set an Authorization level here.
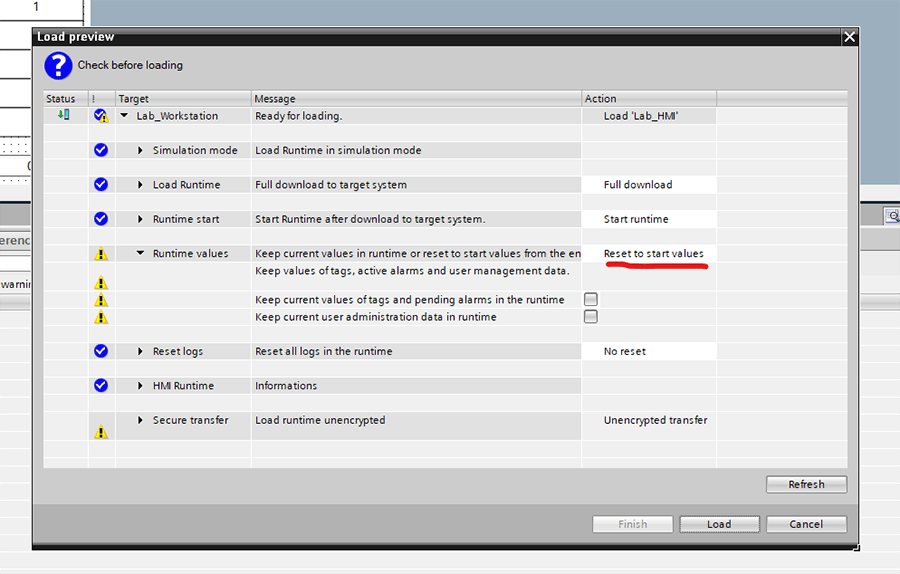
Downloading User information to HMI
After you’ve made user or role changes it is important to set the dropdown below to 'Reset to start values.' This ensures that your changes get updated in runtime.
That’s it! Your basic user login setup is complete. By following the steps outlined in this guide, you can establish user authentication mechanisms tailored to your equipment’s requirements.
Learn more about our Siemens WinCC programming services and contact us for your next project.