Although the NI Report Generation Toolkit has its cons—namely, dependencies—it can be very particularly useful to programmatically save, create, and/or print a clean report in MS Word or MS Excel.
The purpose of this blog is to share some tips, tricks, and places to take caution when creating an MS Word report from a template file (.dot). This template file, which whenever opened will automatically create a new .doc file to preserve the original template, will be used as a starting canvas to which you can insert text and graphics.
To start, create a new word template file (.dot). LabVIEW will use this template to create a new document (.doc) and programmatically populate pre-defined bookmarks with data.
Bookmark locations are selected by highlighting text (this will be replaced when data is inserted) or by the current location of the cursor. Select Insert>Bookmark, and choose a name for the bookmark location. Note: Word does not like spaces in the names of its bookmarks.
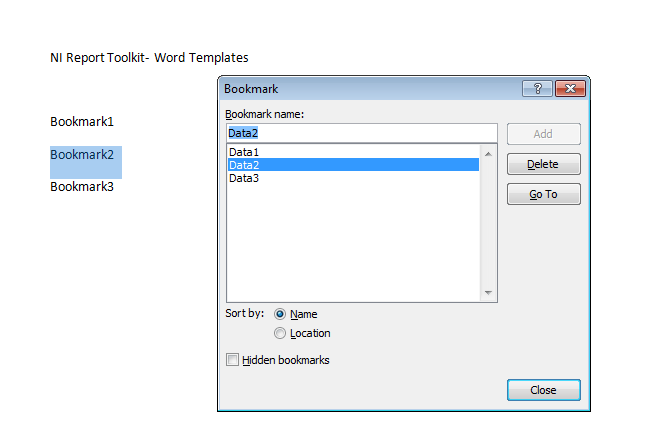
Figure 1: Creating bookmarks in MS Word
Either text or graphics can be inserted as data into the bookmark locations. The VI snapshot below shows an example of doing both.
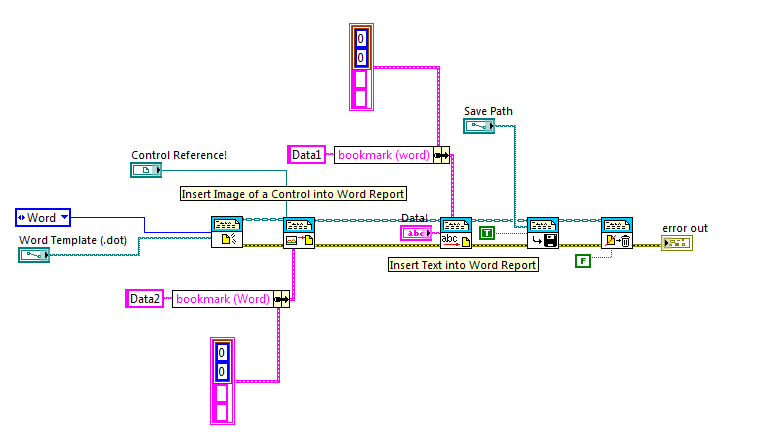
Figure 2: Using NI Report Generation Toolkit to create an MS Word report file
Under the Data2 bookmark, an image a control will be inserted using its control reference. Graphs, tables, and charts are obvious choices. One trick I found when wanting to fuse multiple controls/indicators into one image, was creating a separate tab control with clones of each control/indicator and using the tab control’s reference as the export image.
Under the Data1 bookmark, the string specified by ‘Data!’ will be inserted into the bookmark.
One common error code is Error 41110, which derives from a bookmark referenced in LabVIEW not existing in the Word template.
Before building the executable, it is crucial that the LVClass and NIReport.llb folders are added as folder snapshots to the project and selected as ‘always included’ in the project build specifications. Both are found here:
C:\Program Files (x86)\National Instruments\LabVIEW 2011\vi.lib\Utility
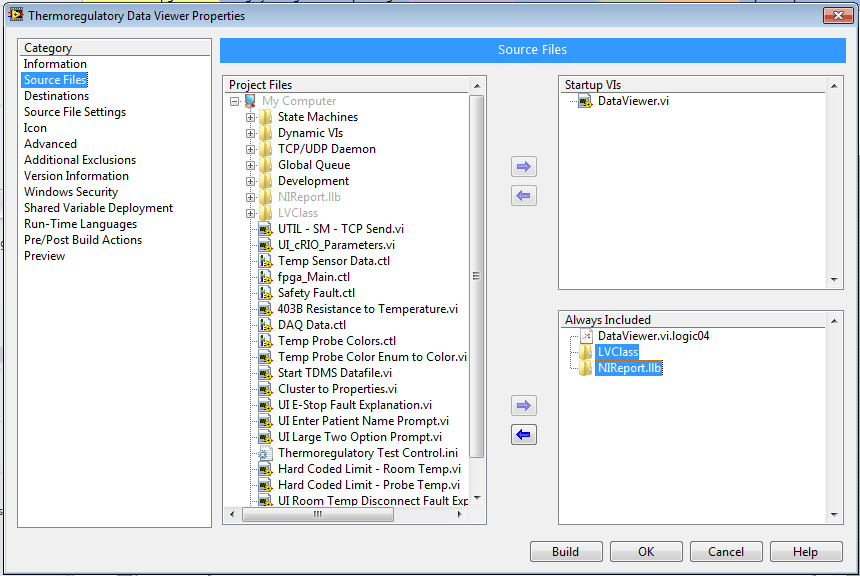
Figure 3: Include the LBClass and NIReport.llb in the LabVIEW build
Without either of these folders, it is likely that the executable will be broken, you will encounter a build error, or error 7 will occur during the run time when running any VI’s from the Report Generation Toolkit.
Other Considerations: Using Print Report.vi
One frustrating issue I have encountered using NI Report Toolkit’s Print Report.vi was a mysterious LabVIEW crash (see Figure 4) when running an executable on a customer’s dated test stand machine. This happened while no error was seen when running the program on my W7 machine (where I built the .exe).
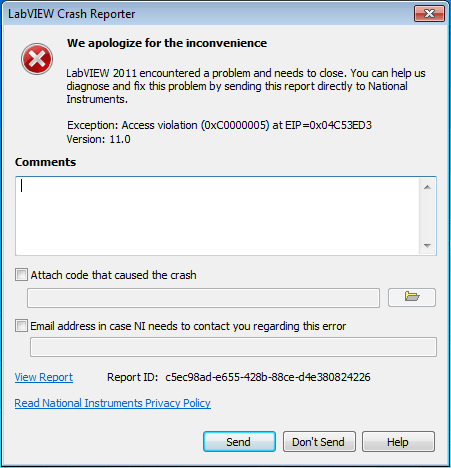
Figure 4: LabVIEW crash
The program was attempting to print an Excel report, similar to the block diagram below. Ultimately, I painstakingly narrowed down the program crash to Print Report.vi and decided to do some searching on NI.com (in hindsight, I wish I would have done this sooner).
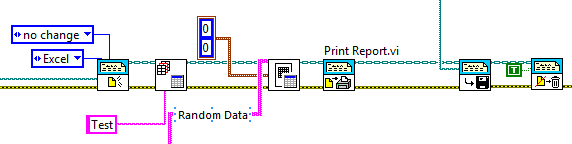
Figure 5: Be cognizant of MS Office year on build and target PC’s
Similar developers had encountered the same problem. The root cause, and ultimately the fix, was not in the program, but determined by the version of MS Office Suite installed on the computer which built the .exe and how it compares to the version of MS Office installed on the target PC. In many cases, if the target PC is running MS Office 2003 or earlier, and the program is built on a PC with MS Office 2007 or newer, this bug is seen.
Possible solutions to these issues are either upgrading the target PC’s MS Office to anything newer than 2003 or building the .exe on a PC with the same version of MS Office as the target.
Learn more about DMC's Data Analysis, Data Mining, and Reporting expertise.