It can sometimes be a challenge to create good looking User Interfaces in LabVIEW – or at least UIs that don’t look like they were built in LabVIEW. One of the easiest ways to make your UIs look a little flashier is to add custom buttons with a consistent theme. I find myself doing this fairly often – especially if I’m trying to make my LabVIEW application match the theme of an existing non-LabVIEW application.
The good news is that it is incredibly simple to create custom buttons. In fact, you can do so in just a few button clicks. For example, let's pretend we’re trying to create a flashy media player… something with icons similar to an iPad application. For starters, you will need to find some images to use as decals for your buttons. There are many sites with royalty free clip art that offer some great icons. I’ve found some good stuff on http://www.clker.com/, http://www.iconfinder.com/, and http://www.iconarchive.com/. Try to find a good, consistent set of icons for your application that all have the same basic theme to them. If you can find *.png files, even better, as they will allow transparent backgrounds.
Here are a set of icons I found for our example from iconarchive.com:


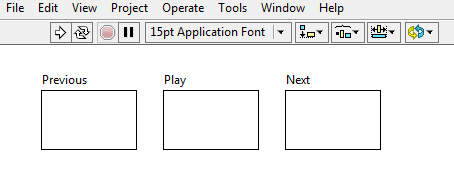
Great! Now that we have our icons it's time to create some custom buttons. Open LabVIEW and the VI (Virtual Instrument) to which you would like to add your custom buttons. Begin by adding three buttons from the Classic palate. I like to use these buttons as there isn't much shading and it’s often easier to color the edges to make the button edges blend in with the background.
Now, let’s modify our Next button. To do so, select the button so that it’s highlighted. From the LabVIEW toolbar’s “Edit” menu, select “Customize Control…” This will open up a new VI with just a front panel containing only your control. This is where we can make all of our modifications. To start with, from the toolbar’s “Edit” menu, select “Import Picture to Clipboard.” Now we can select the image we want to overlay on our button. Select OK to load it to the clipboard.
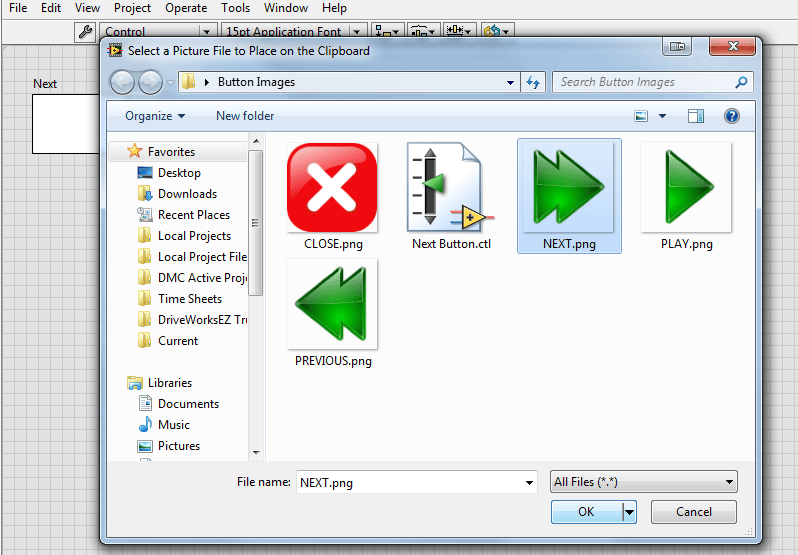
Next, apply the image we just selected as a decal. To do so, right click on the button and select “Import Picture from Clipboard” and choose “Decal.”
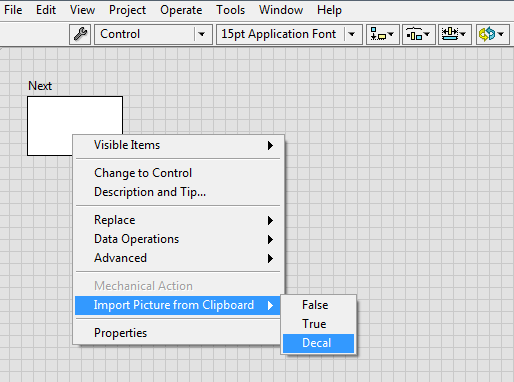
Chances are, it didn’t magically appear exactly where you wanted it or at exactly the right size. No problem. Click the little wrench icon on the toolbar to enter “Customize Mode.” Now you can adjust the icon size and position, as well as the text position (if needed), button size, etc. I modified the button size to be slightly larger than my decal, hid the label, and used the color picker to paint the edges of the button white to make it blend in with my white background. After making the changes, be sure to apply them to update your control in your VI. Now here’s the best part: you can save this control and anytime you need to use it, you can add it from the palate.
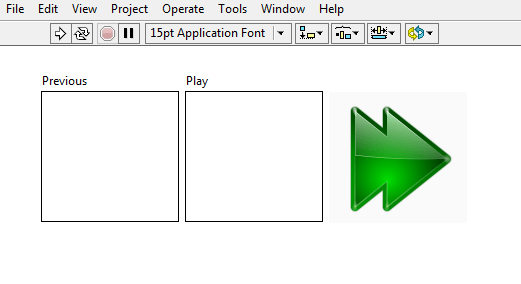
After modifying the next button, here’s the front panel of my VI.
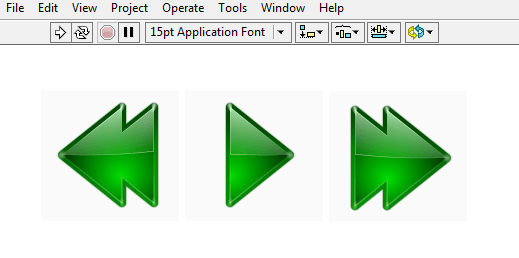
After repeating the process for the other two buttons, we have a very nice set of buttons that look nothing like the standard LabVIEW buttons.
Hopefully this has been helpful! Good luck coding!
Learn more about DMC's LabVIEW expertise.