One of our core business areas here at DMC is Embedded Development, where we assist customers in bringing their ideas into a functional device.
Typically, these projects are done in a staged approach where an initial prototype is designed and built. This prototype can then be used to secure funding for additional stages of design, as well as ensure the product meets all of the requirements.
For this type of rapid design and prototyping, we often utilize the Arduino platform.
What's Up With Arduino?
Arduino's come in a variety of configurations targeted at various Performance, IO, and Communication Requirements, so there is usually a model that has already been tried and tested that would work for your specific application. Arduino also provides a free IDE and C style programming language that allows you to start running custom code within a matter of minutes.
However, once your program starts to stretch beyond a few hundred lines of code, or across more than a handful of files, the IDE can start to become cumbersome and difficult to work with, especially if you're used to more advanced IDE's or text editors. After dealing with the annoyances of the Arduino IDE for years, I've finally upgraded to a more user-friendly option: Visual Studio Code.
What is VSCode?
Visual Studio Code, or VSCode, is an open source, lightweight, extensible text editor, that is designed and supported by Microsoft, and runs on Linux and Mac in addition to Windows. The extensibility allows you to write extensions to customize VSCode to best suit your needs, and programming language.
With a broad user base, there are a lot of free extensions already available, including an extension to support Arduino programming without ever leaving the VSCode editor. VSCode is designed to handle multiple folders and files within the editor and utilized Microsoft's IntelliSense auto-completion tool to help speed up your programming and reduce typos.
Using VSCode for Arduino Projects
To start using VSCode for your Arduino projects, follow the steps below.
Step 1 - Download and Install Drivers
VSCode uses the drivers that are installed with the Arduino IDE, so we need to download and install that first.
- Download the IDE for your OS from https://www.arduino.cc/en/Main/Software.
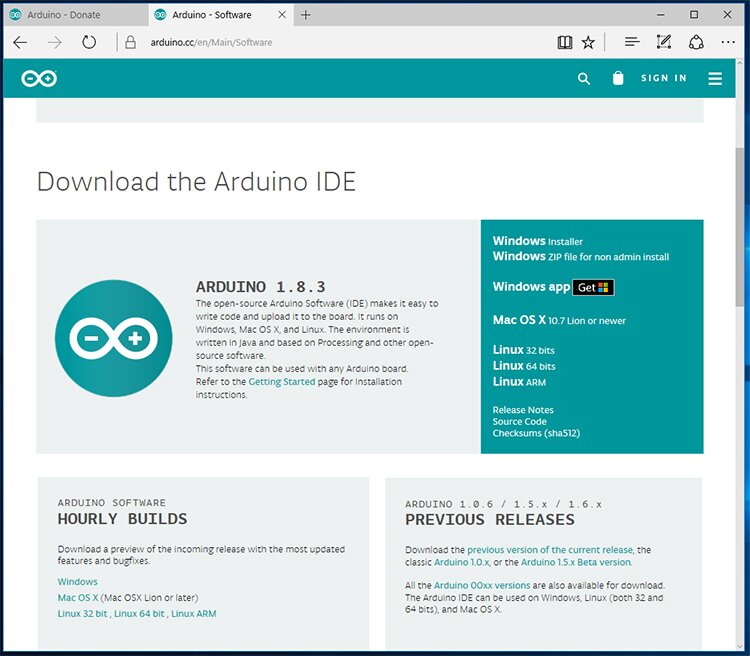
- After the download is complete, run the installer, leaving all the default selections and options.
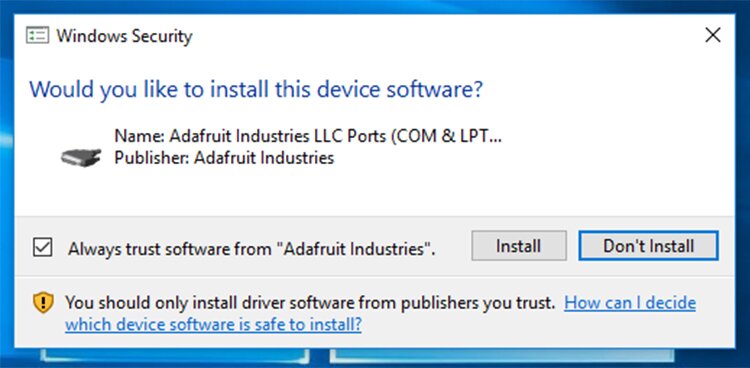
- Be sure to install the COM port and USB drivers if prompted.
Step 2 - Download VSCode
- While the Arduino IDE is installing, download VSCode from https://code.visualstudio.com/Download.
- After the download is complete, run the installer.
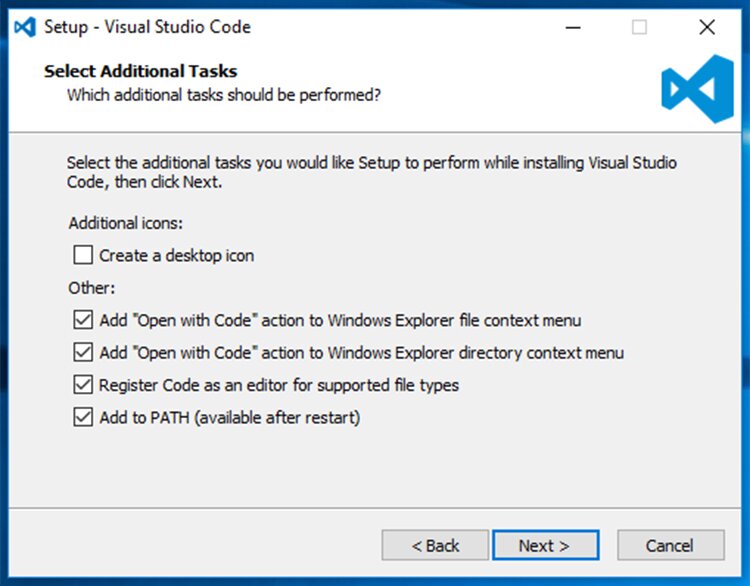
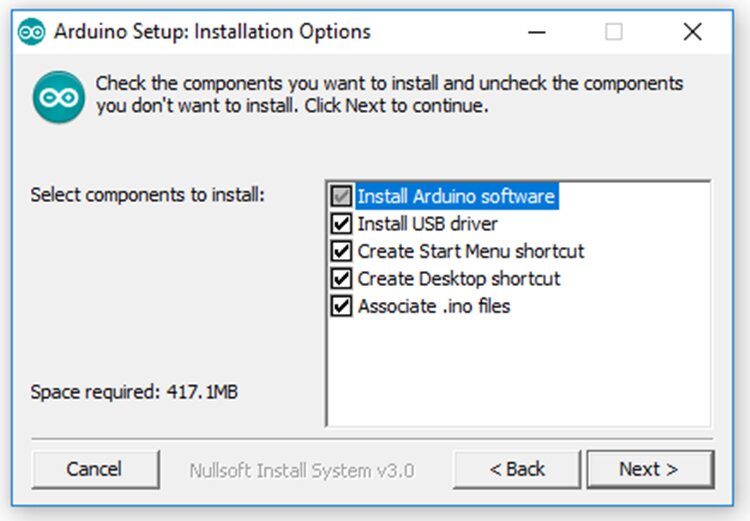
Next Steps
I recommend the following configuration for the additional tasks during the install.
- Once installed, Launch VSCode.
- Click the Extensions button on the left side of the editor, (or Ctrl+Shift+X) to display the extension marketplace.
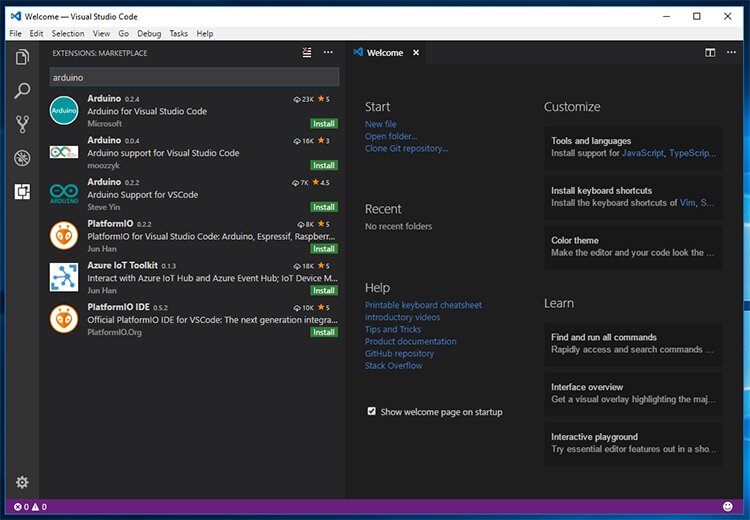
- Type Arduino in the search bar, to filter the extensions to only those related to the Arduino platform.
- There are a few extensions available for Arduino, but I prefer the one supported by Microsoft.
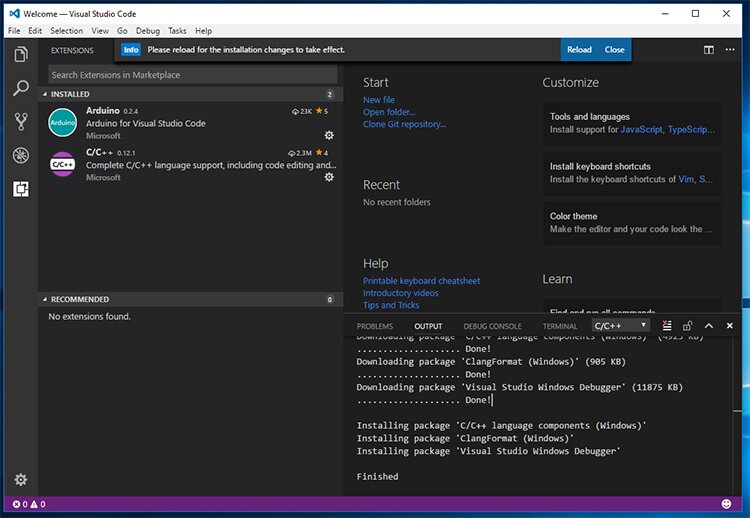
- Click the Install button and when prompted allow installation of dependencies.
- Click the Reload button to relaunch VSCode with the Arduino extension enabled.
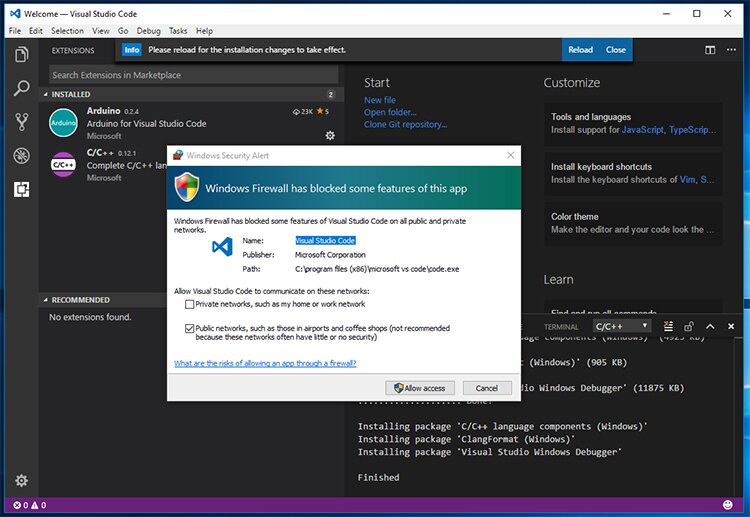
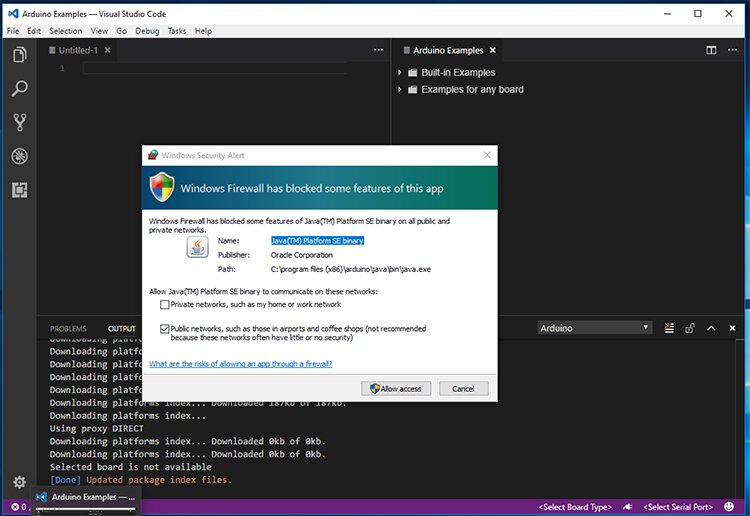
- Depending on your firewall settings, you may be prompted to give VSCode firewall access.
Programming in VSCode
One more Reload and now, we're set to start programming. To make sure everything installed properly, we'll start by opening up the example Blinky.
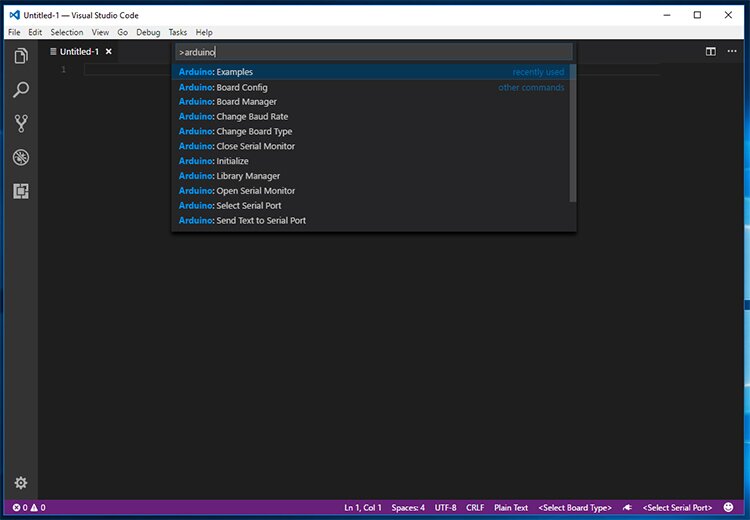
Open VSCode's Command Pallet with Ctrl+Shift+P. Once the command palette is open, you can start typing to filter all the options or to search for useful commands.
-
Open the Command Pallet and type Arduino, and select Arduino:Examples in the results list.
- In the new pane to the right, select Built-in Examples>>01.Basics>>Blink. By default, this will open a new VSCode window, with the Blink sketch and a Blink.txt help file listed in the explorer pane on the left.
- Select Blink.ino from the explorer pane to open the sketch in the editor.
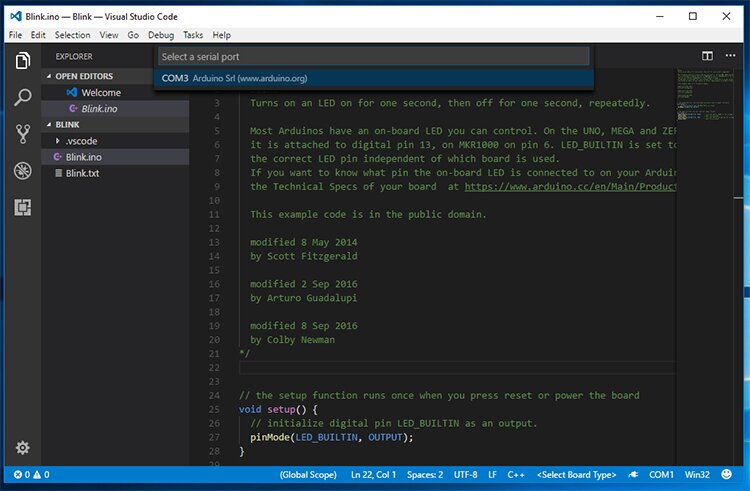
- Connect your Arduino board to your computer, and then, in the bottom bar of VSCode, you can specify the COM port for your Arduino and the board type.
- Clicking COM opens a small selection window at the top of VSCode that should display your connected Arduino.
- Clicking <Select Board Type> opens a new pane on the right where you can select the board type. If various configurations are available for your board, then you need to specify those as well. I'm using the Arduino Mega with the ATMega-2560.

- Open the Command Pallete again (Ctrl+Shift+P) and type Arduino:Upload (Ctrl+Alt+U) to upload the Blink sketch to your Arduino. You should see LED13 start blinking about once per second.
Now you're all set to start writing new Arduino sketches in VSCode and enjoy the features of a more advanced text editor. Learn more about DMC's Embedded Development and Embedded Programming or Contact Us to get started on a project today.