It’s not uncommon for DMC to develop applications for flexible test stands with interchangeable devices. With these test stands, the type of data acquired can change at a given time, so it makes sense to pair it with a user interface that adapts to these variations.
We recently completed a project to develop a flexible UI, and this blog will give a high-level overview of how to create your own dynamic UI.
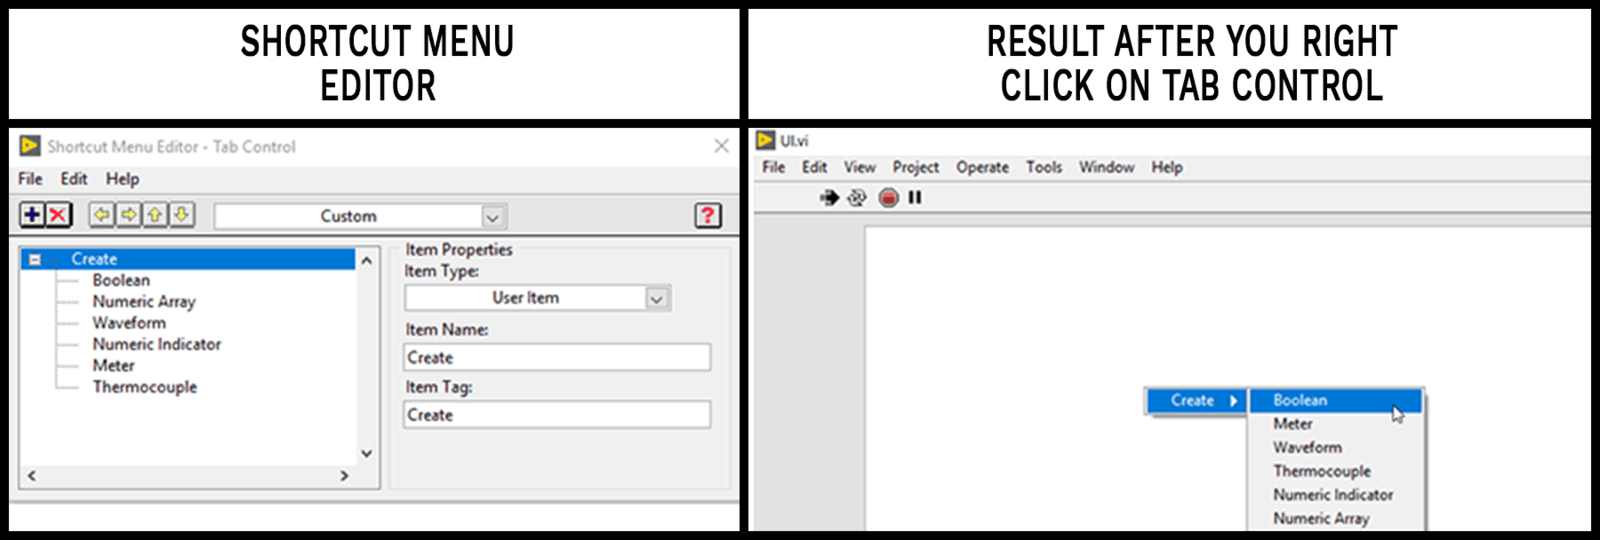
Step 1: Utilize Tab Controls for Your UI Foundation
First, create a tab control and add a shortcut menu to add indicators to the front panel during runtime.
To create a shortcut menu, right click on tab control and select Advanced > Run Time Shortcut Menu > Edit Items. Here, you can add all the indicator names.
Step 2: Create Subpanels for Every Potential Device
The number of subpanels you have invisible on the front panel at the start of the program limits the number of indicators you can have on the screen since you cannot programmatically add a subpanel at run time. In this example, there is a maximum of 20.
Every indicator (Boolean, Meter, etc.) is a class in the project; that inherits from the Indicator class. These classes are reusable and, so you can have X instances of a Boolean class.
Choosing an indicator from the menu causes a previously hidden subpanel on the UI to appear that holds it. A separate array of indicator classes keeps track of the reference to the child class created.
BLOCK DIAGRAM OF THE TOP LEVEL

Step 3: Insert Indicator into Sub Panel
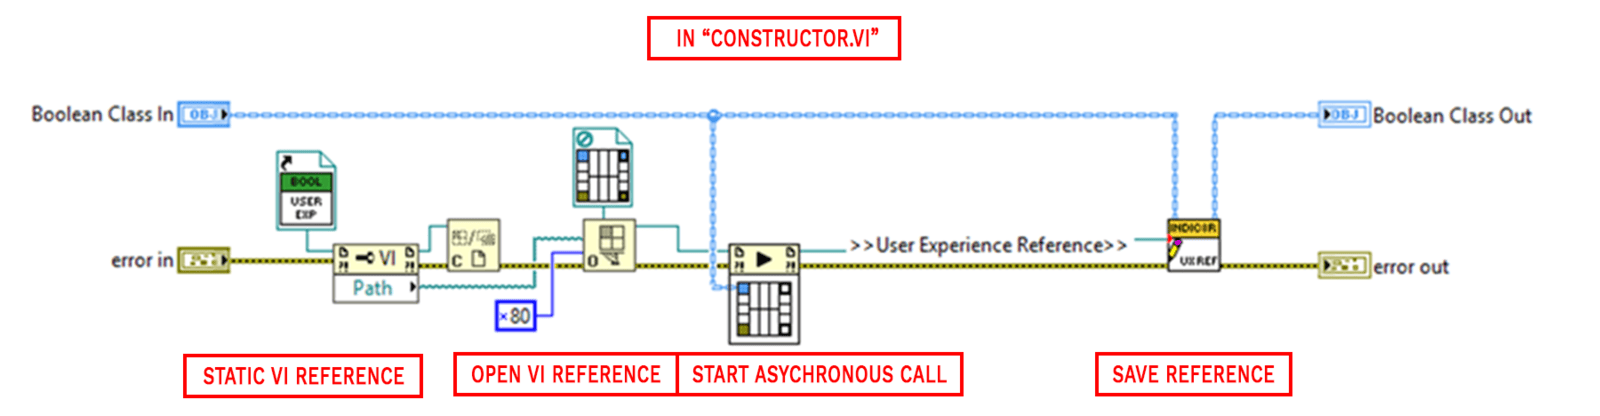
In every Indicator child class, there is a User Experience.vi. This VI contains the interface that gets put into the subpanel, and the user sees on the front panel.
To display the User Experience.vi, it is called asynchronously and placed into the subpanel once an indicator is selected from the shortcut menu.
The User Experience VI reference is a variable in the class private data of the indicator class and is saved so that it can be referenced in the next step.
To insert the User Experience.vi into the subpanel, you need to first find an unoccupied subpanel. In this step, you will insert the user experience VI and make it visible.

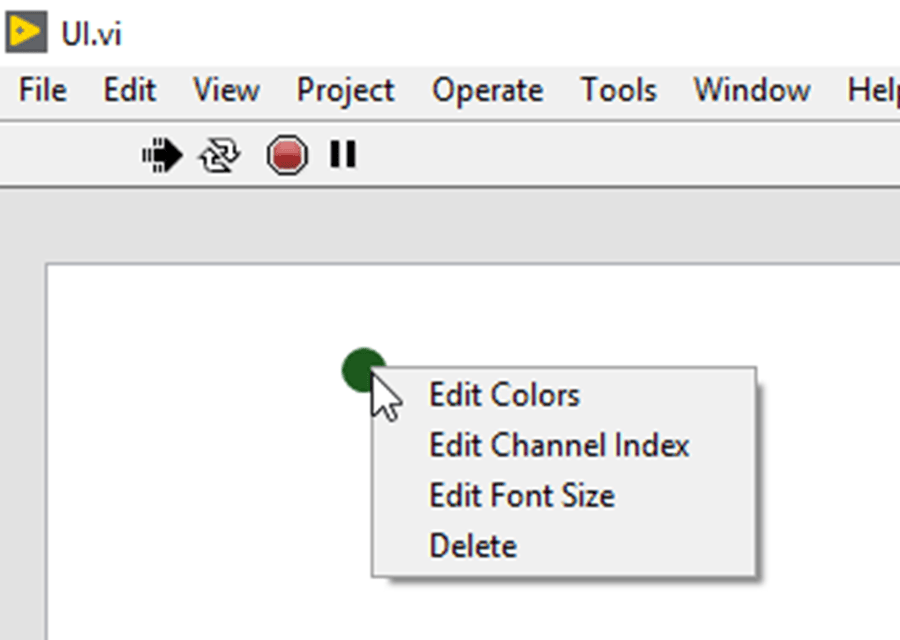
Step 4: Customizing the Indicators
The User Experience.vi also has a shortcut menu set up to allow you to edit the indicator’s parameters. The User Experience.vi will run continuously using a while loop, until Delete is chosen from the shortcut menu.
There is also a Boolean variable called stop? in the class private data of the parent Indicator class that signifies the user wants the indicator deleted. If this variable is ever true, the user experience while loop will stop running. Handle other features, such as editing colors and text of the indicator in the User Experience VI.
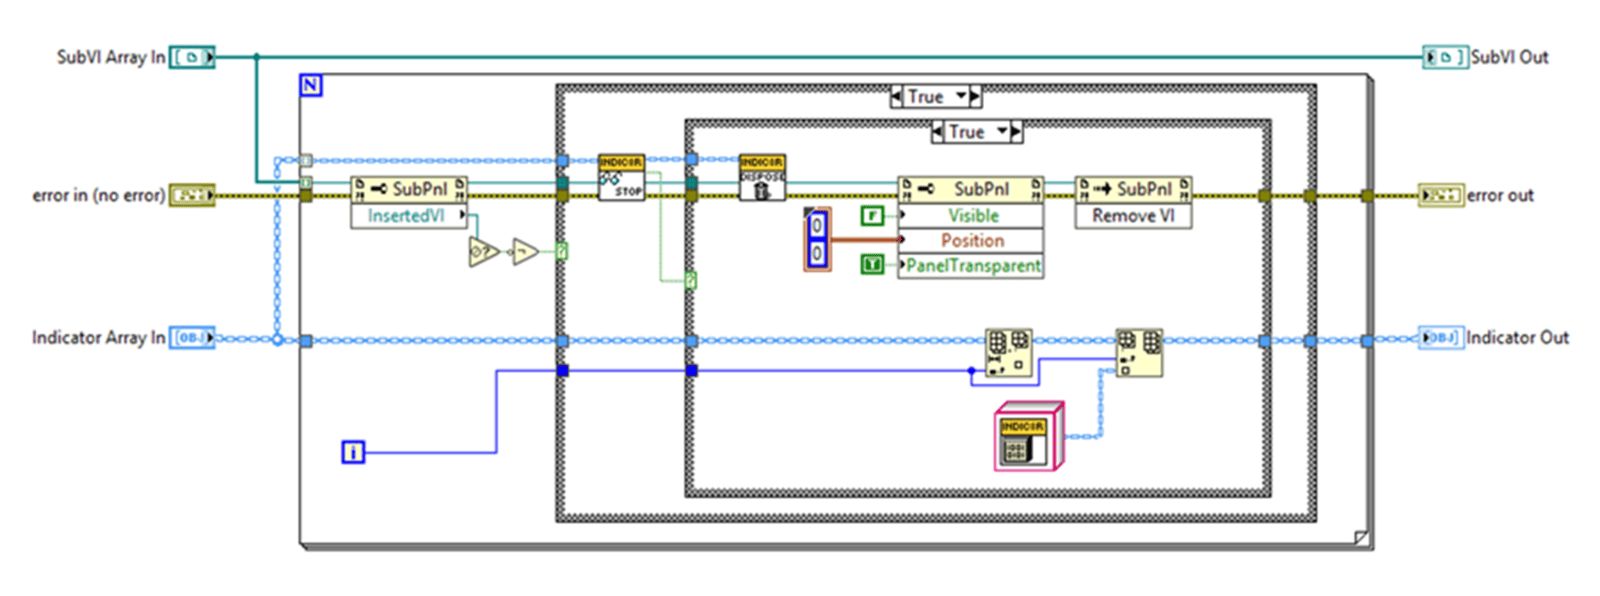
Step 5: Deleting the Indicator from Front Panel
Check if an indicator needs to be deleted in Timeout of the event structure in the top level VI, which periodically calls the Check Delete VI.
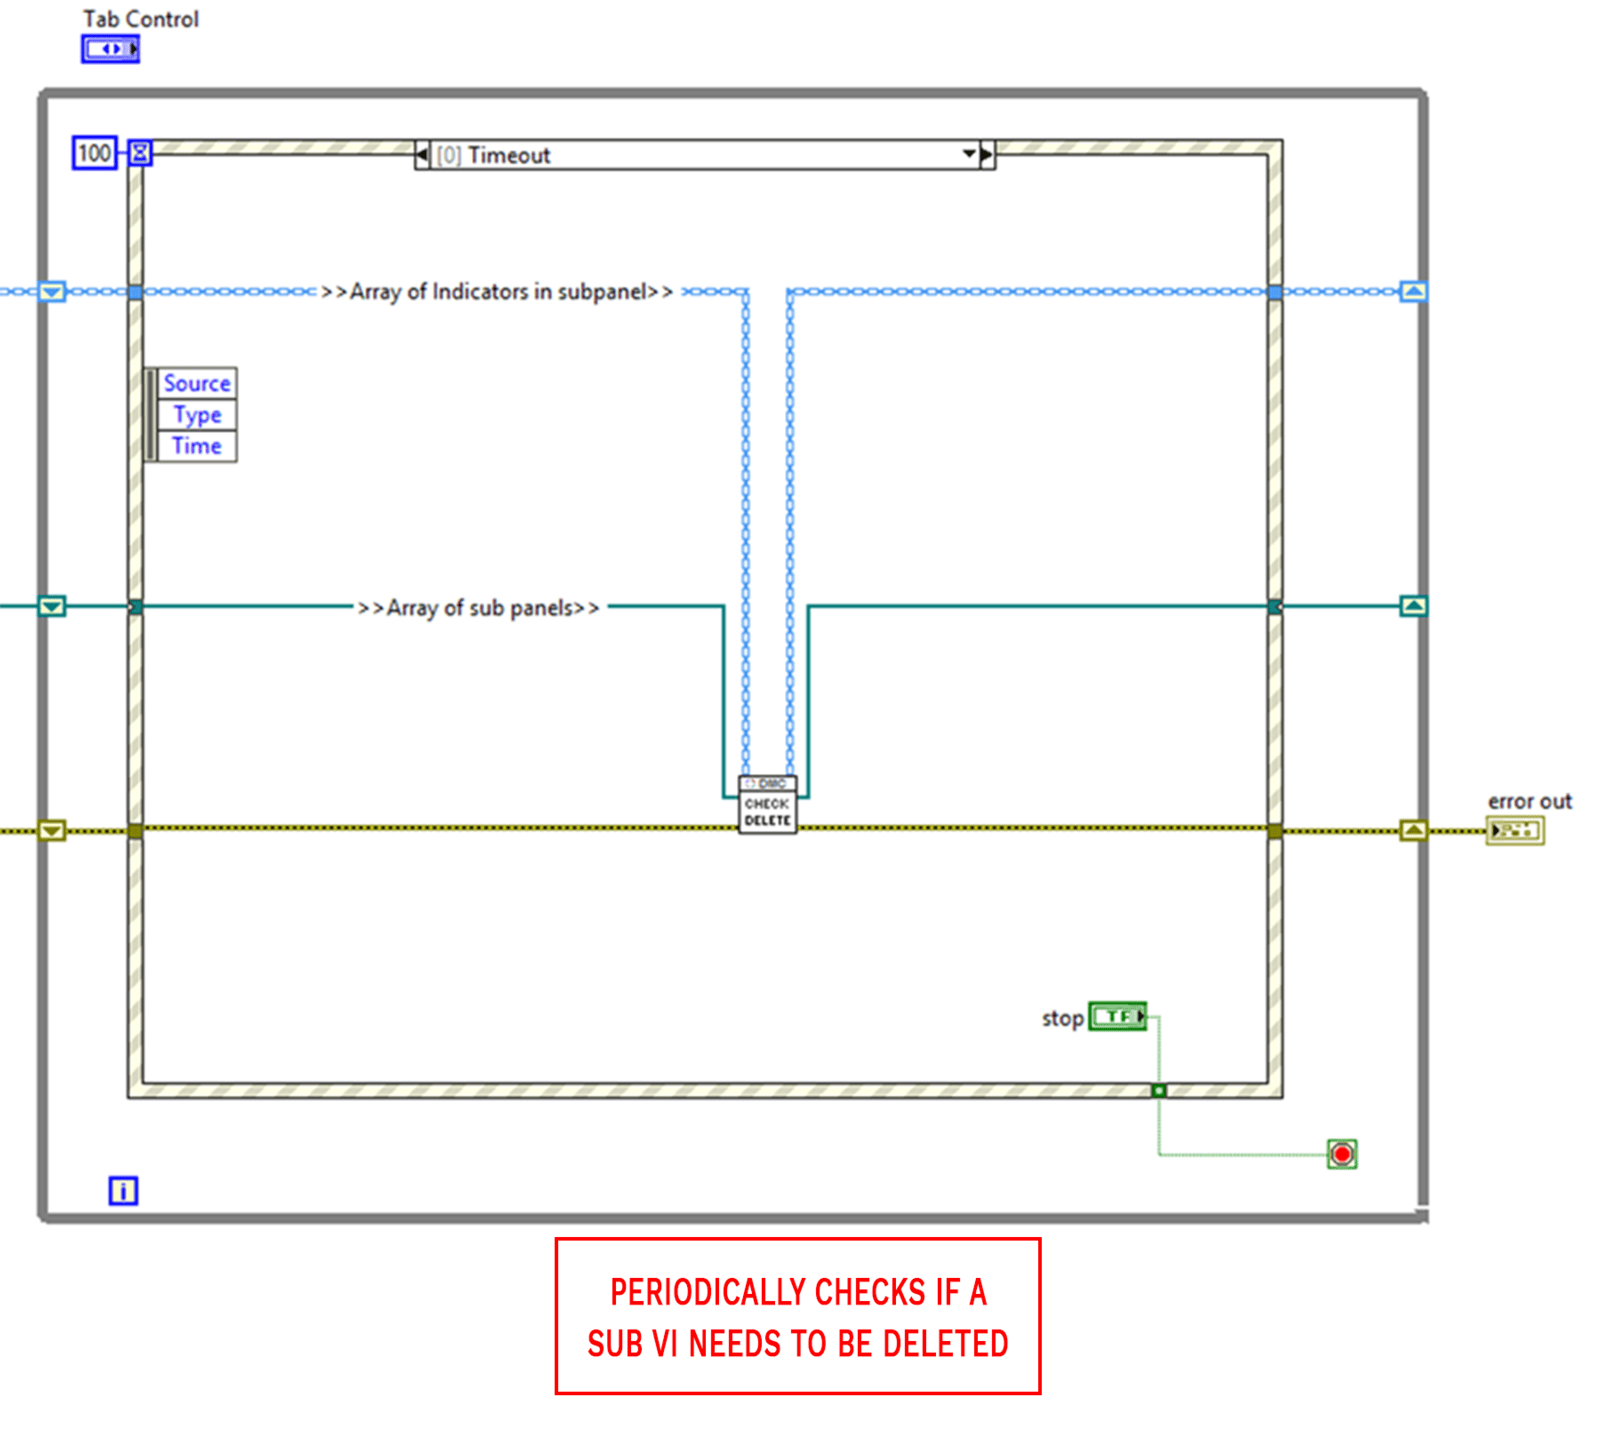
The Check Delete VI checks all the subpanels to see if there is a sub VI inside it. If there is, the program checks a Boolean value in the Indicator class private data to see if the user wants the indicator deleted.
If the Boolean is true, the panel is set invisible, the sub VI removed, as well as removing the indicator from the indicator array.
CHECK DELETE.VI
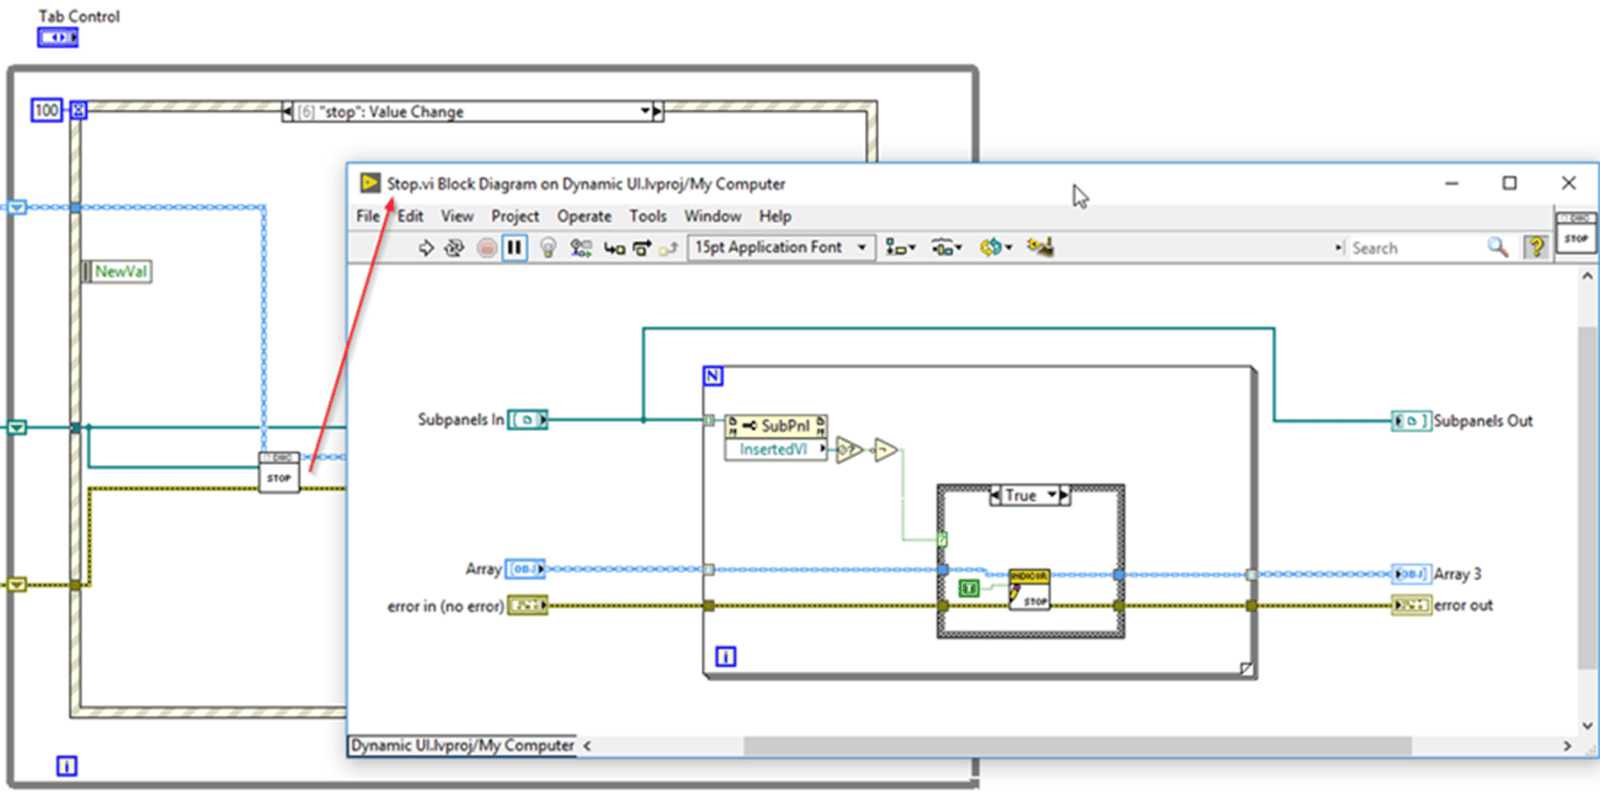
Step 6: Stop the Dynamic UI from Running
When the user wants to stop the application from running, an event in the top-level VI sets all the Indicator stop? variables to true. This variable then gets read in the User Experience VI and stops all the running sub-VIs.
Step 7: El Fin
This dynamic user interface setup can be used to drop different indicators across a front panel while a LabVIEW program is running. This functionality could be customized to be used to monitor different inputs of a system quickly and flexibly.
Conclusion
If you follow these steps, you should have a functioning dynamic UI. Leave questions or comments about this walkthrough in the comments below.
Learn more about DMC’s Test & Measurement services or contact us to get started on a project today.