Rockwell Automation's Application Code Manager enables users to customize and import libraries into new or existing projects. Based on how you create the library, several different options will be available when importing that help structure the library to fit its needed application.
In part two of this blog series, I will walk you through importing and customizing a library with Application Code Manager.
For more on creating a library, check our part one of this blog series: Rockwell Library Designer: Creating, Customizing, and Publishing a Library.
Create a Project in Application Code Manager
Now that we have our own Library let’s try to import its contents into a project.
To do this, let’s create a second project, but use a different controller and I/O modules. For this example, our new project was set up with:
Controller Selection
| Controller |
1756-L83E |
| Revision |
Rev 28 |
| Chassis |
10 slot chassis |
| Slot |
Slot 0 |
I/O Module Selection
| Module |
1756-OF4 Analog Output |
1756-OF4 Analog Output |
| Slot |
Slot 1 |
Slot 2 |
| Data |
Valve Actual Position output on Ch3Data |
Valve Position Signal on Ch3Data |
Instead of creating a new project in Logix Designer, let’s open the Application Code Manager.
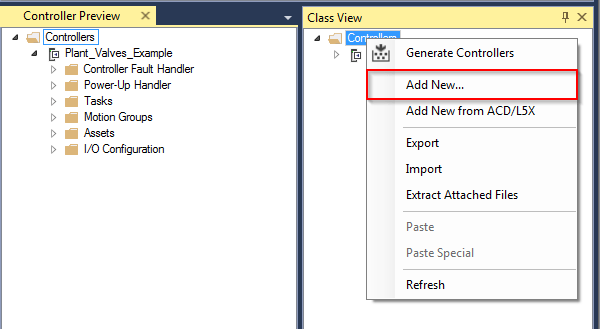
Step One: To create a new project in ACM, right-click on Controllers, and click Add New, and select your controller type.
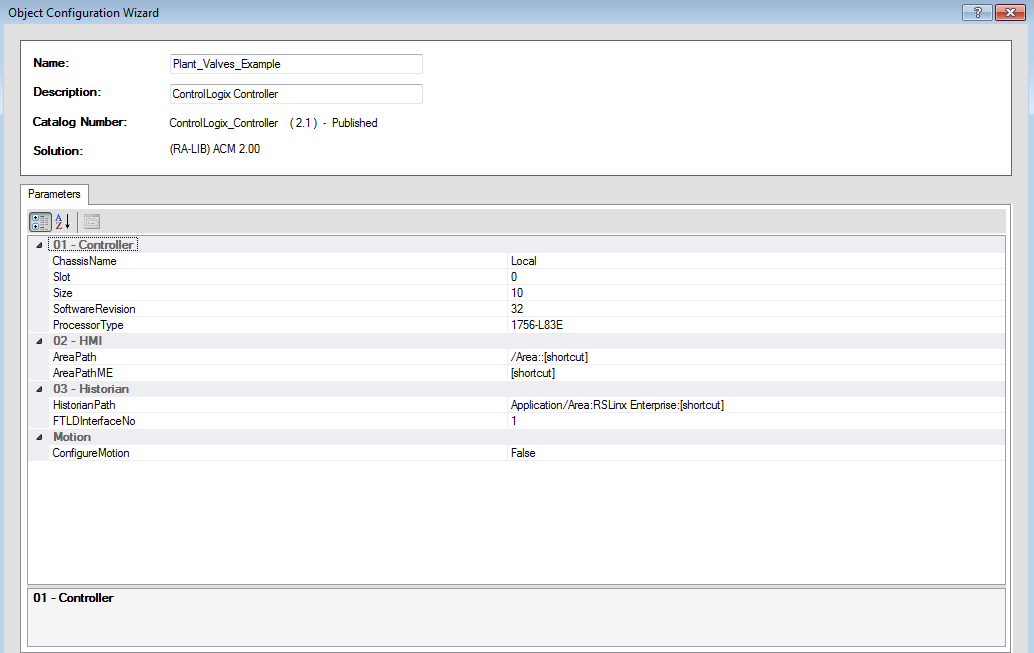
Step Two: Select your controller type from the list, and then customize it on the next screen. We are using the 1756-L83E with a 10-slot chassis for this example.
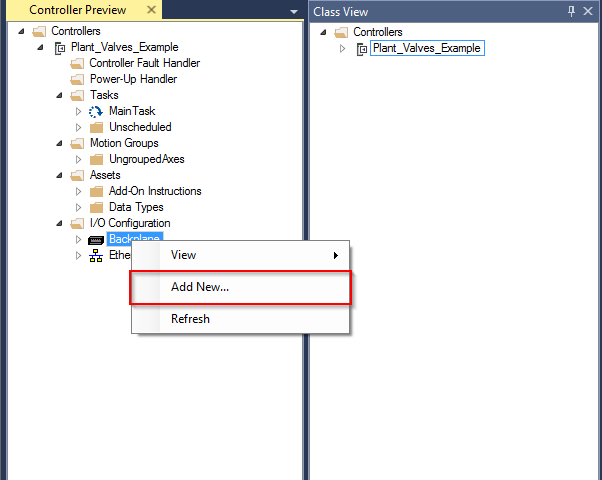
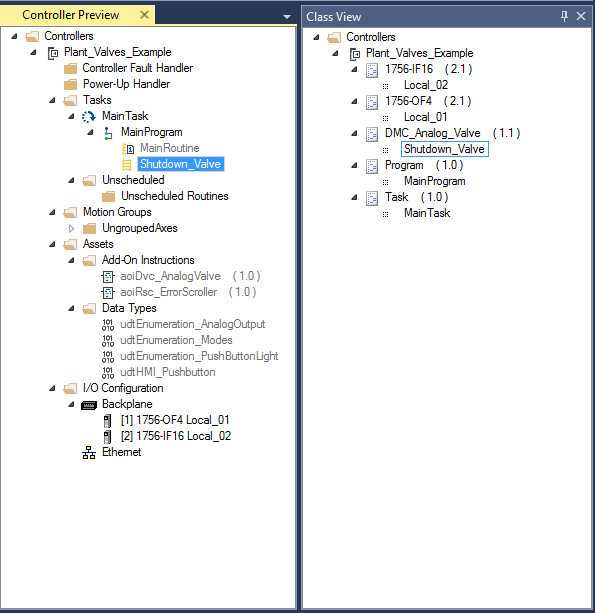
Step Three: The Controller Preview and Class view will then be populated. Let’s add our I/O now by right-clicking the Backplane and selecting Add New.
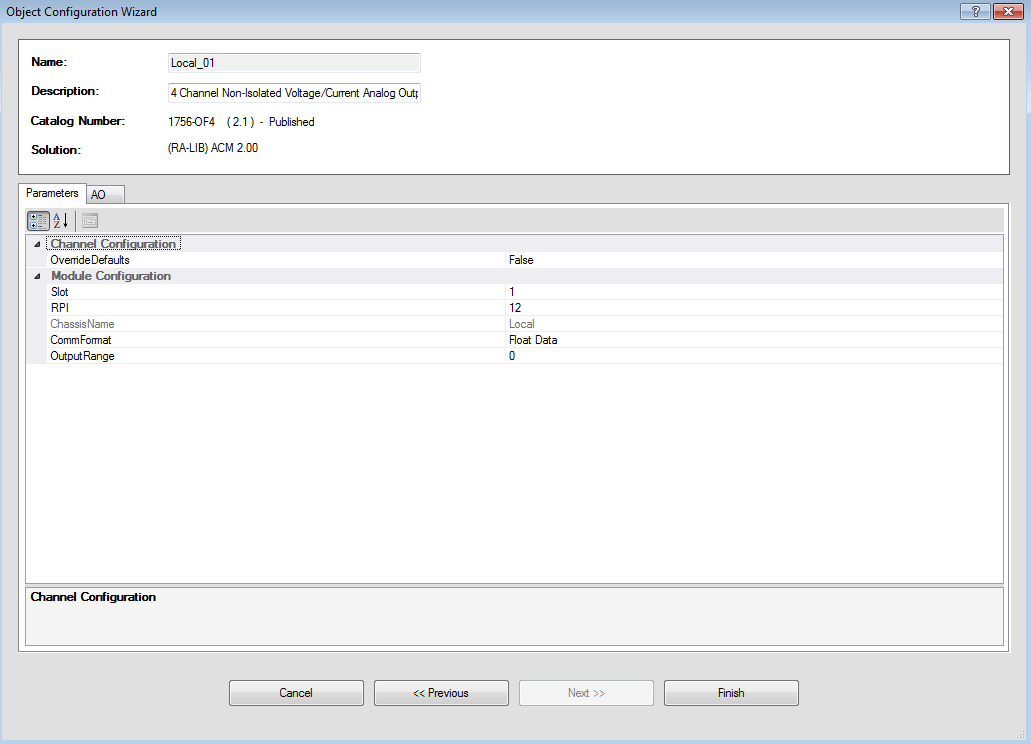
Step Four: Find the Analog Input and Output modules in the list (1756-OF4 in slot 1 and 1756-IF16 in slot 2 for this example) and add them to the project.
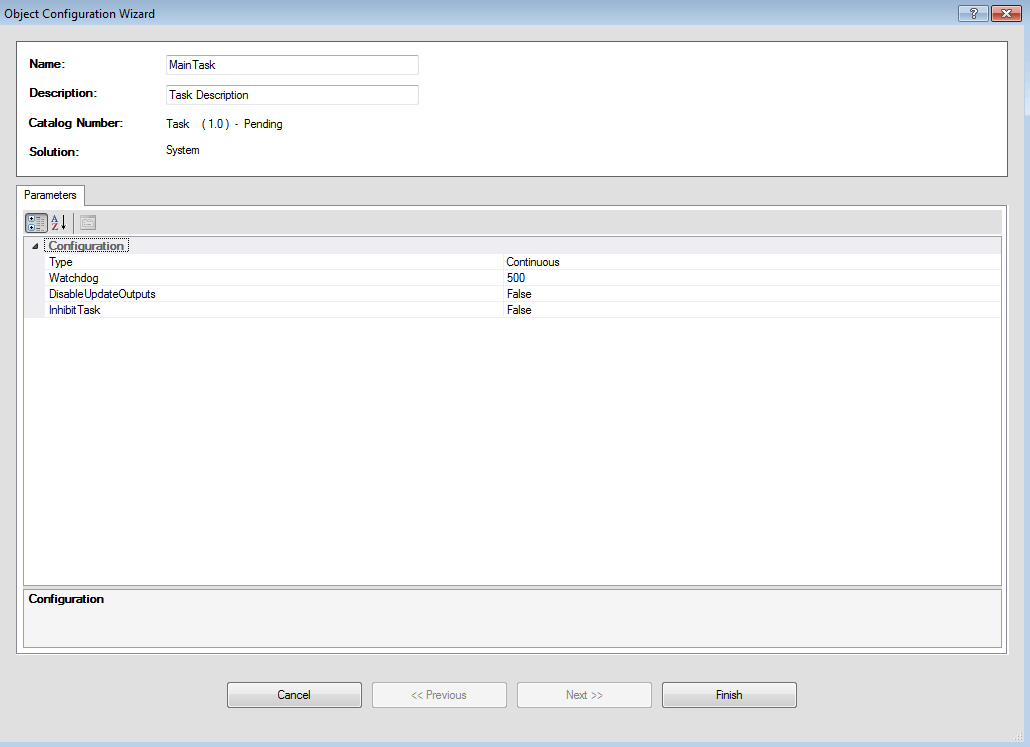
Step Five: Right-click on Tasks and create a new continuous MainTask.
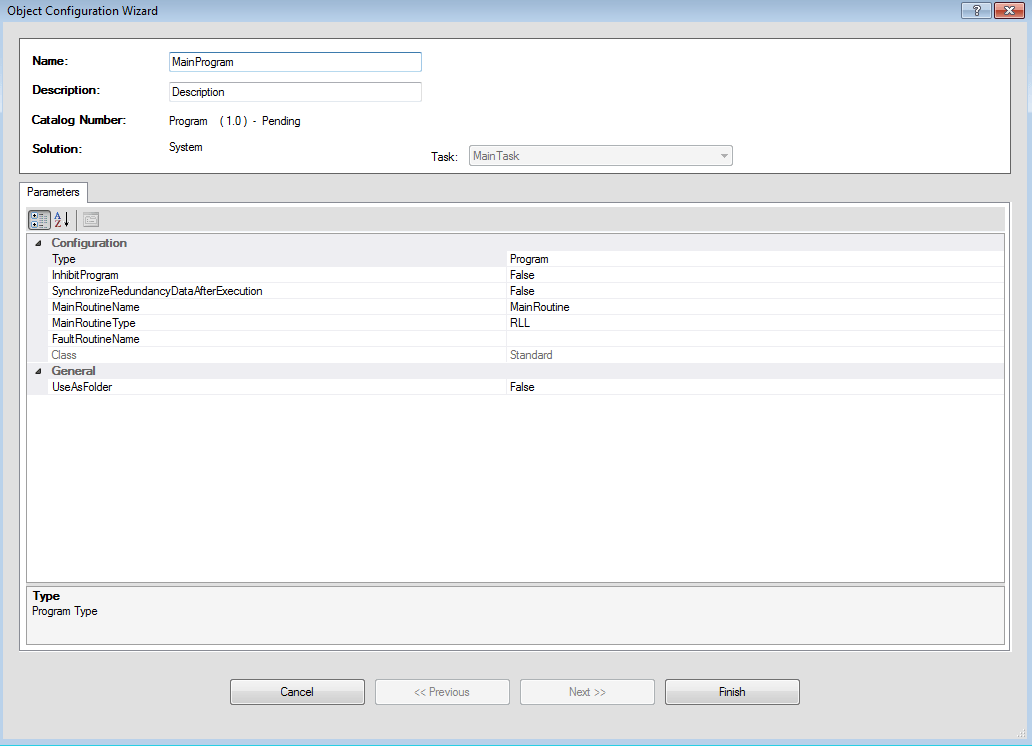
Step Six: Right-click on MainTask and add a new MainProgram.
Now that we have our Controller, I/O, Task, and Program, we can import our Valve object from the library.
Use a Library in ACM
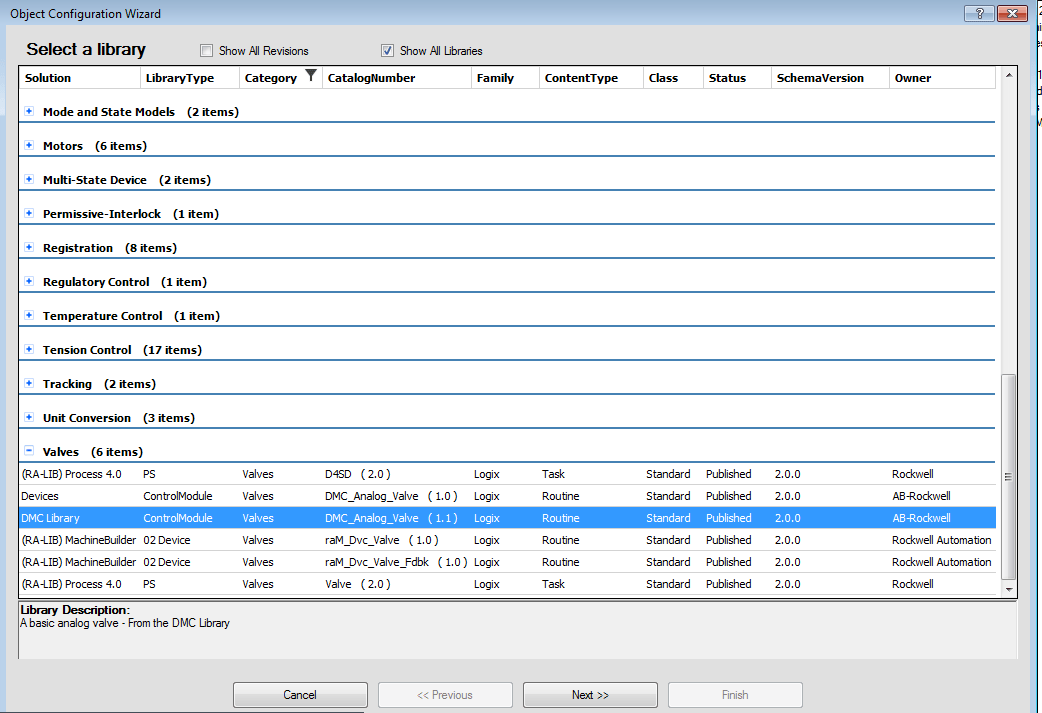
Step One: To Import our library routine, right-click on MainProgram, and select Add New. Doing so will bring up a list of libraries that you can sort in whatever way you want. Find the library you just created, then hit next.
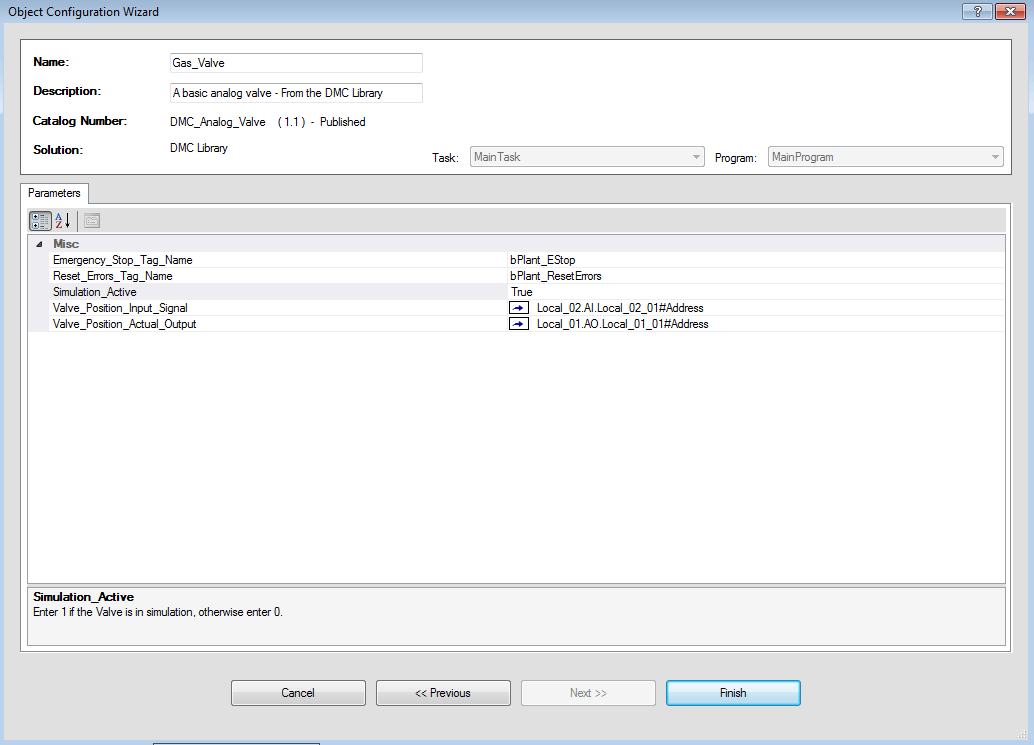
Step Two: This will bring you to the configuration wizard for the object.
- Name: The name of the object. Since we configured the library to use {ObjectName} as the valve tag name and the routine name, whatever you enter here will also become the valve tag name, as well as the routine name. This one will be named “Shutdown_Valve.”
- Description: Becomes the {ObjectDescription} substitution in the library. We did not use this anywhere, so it will not have any effect on the project.
- Parameters: These are the parameters we defined when creating the library. As shown, the user can enter their own tag names for the Estop and ResetErrors tags, can specify if the valve is in simulation or not, and can select their input and outputs from the I/O list.
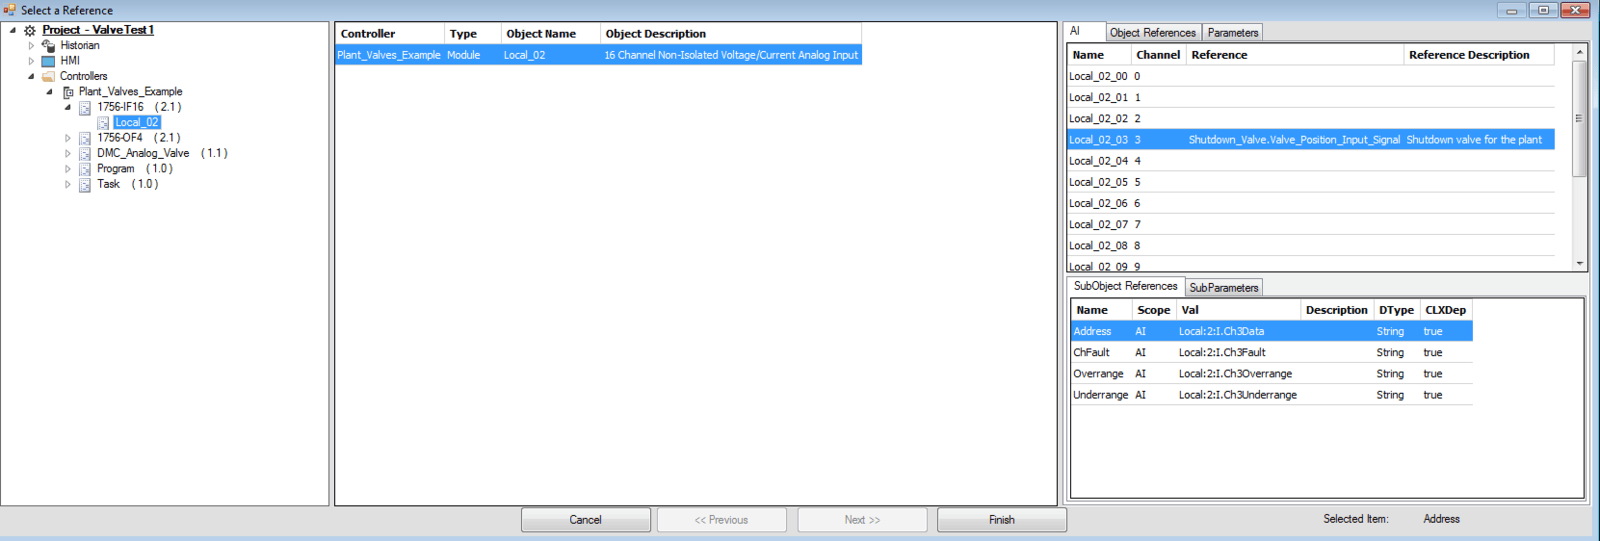
Step Three: When selecting AI/AO slots, you must select a SubObject Reference to get the I/O tag correctly. See the image below.
Once you have finished configuring the Library, hit Finish, and it will import into your project.
Transfer from ACM to Logix Design
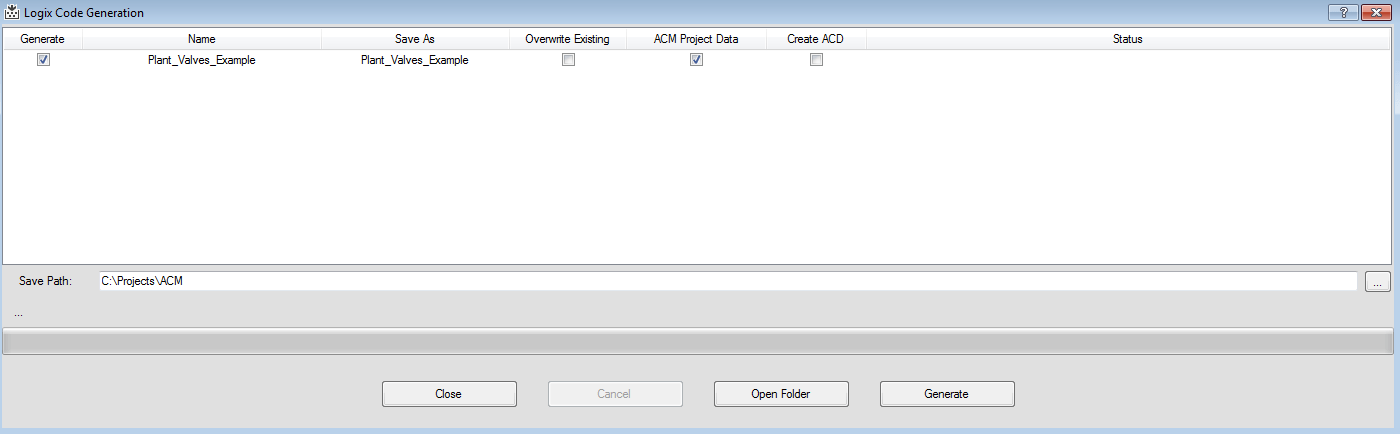
Step One: Now that our project is complete, we can import it to Logix Designer. To do this, right-click your controller (in this example, Plant_Valves_Example), and select Generate Controller. We will create the ACM Project Data, which is the L5X file.
Step Two: After the code generates, hit Open Folder to find your .L5X file.

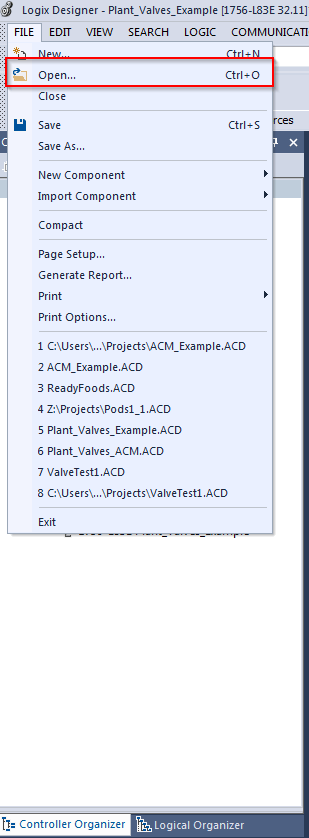
Step Three: To import this into Logix Designer, open Logix Designer, go to File > Open, and select the generated L5X file.
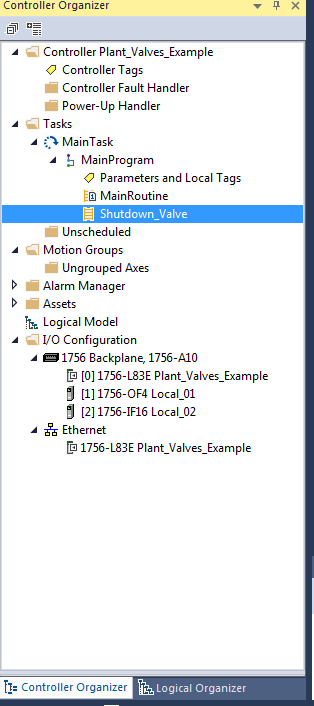
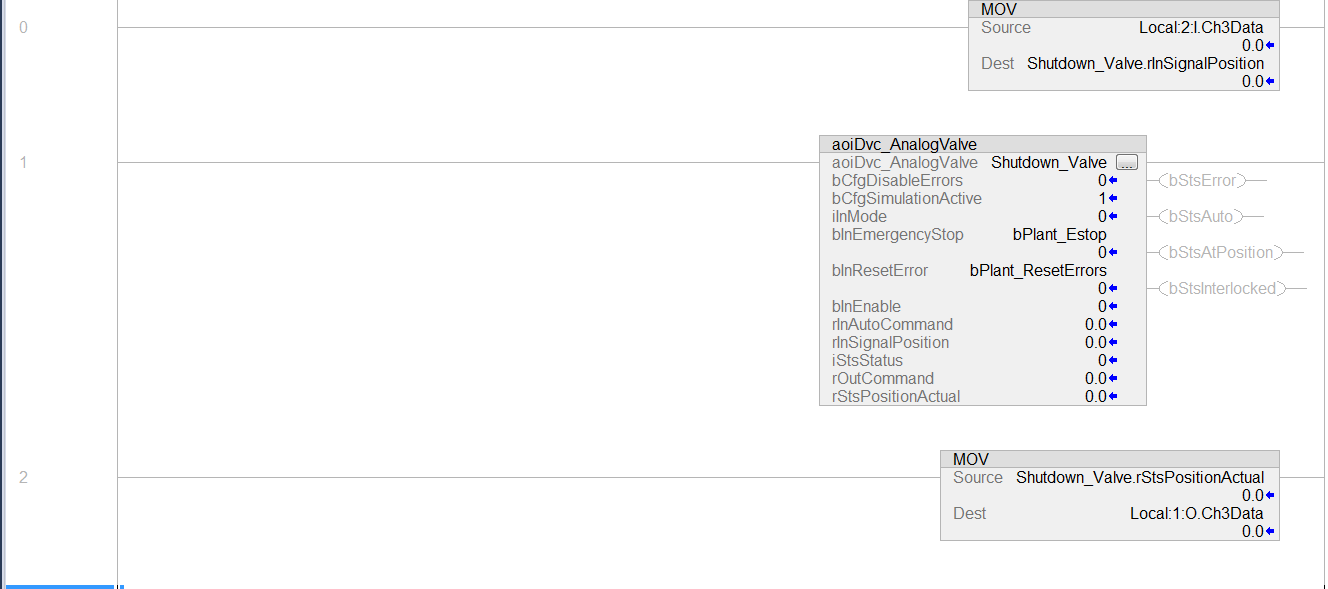
And now, we have a fully created project, including our Library Valve!
Note the routine name – Shutdown_Valve, which was the Objectname we specified in ACM.
Our valve controller tag is also named Shutdown_Valve as well.

The Local Estop and ResetErrors tags also match what we specified when importing the library in ACM.

And finally, the routine logic also matches up with what we specified. The input and outputs match what you specified in the configuration of ACM, and the bCfgSimulationActive tag is set to true as well!
Importing a Second Valve
We have imported an entire project from ACM, but what if we only want to import a second valve into our existing project?
Step One: Start by going back to ACM, and import our Valve library a second time (right-click MainProgram, add new, then select our valve library again).
Step Two: Call this second valve Gas_Valve. It will use the same Estop and ResetErrors tags and will also be in simulation mode, but it will be a CH1Data for the Analog Input and Analog Output.
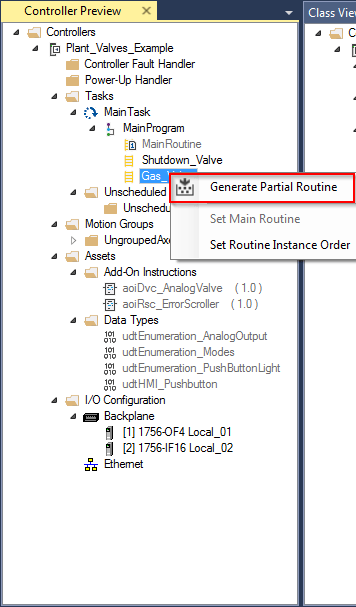
Once it has been imported, you will see a new routine in the controller preview.

Step Three: Now, in order to export just the routine, right-click Gas_Valve, and select Generate partial Routine. This will only export the data needed for the Routine.
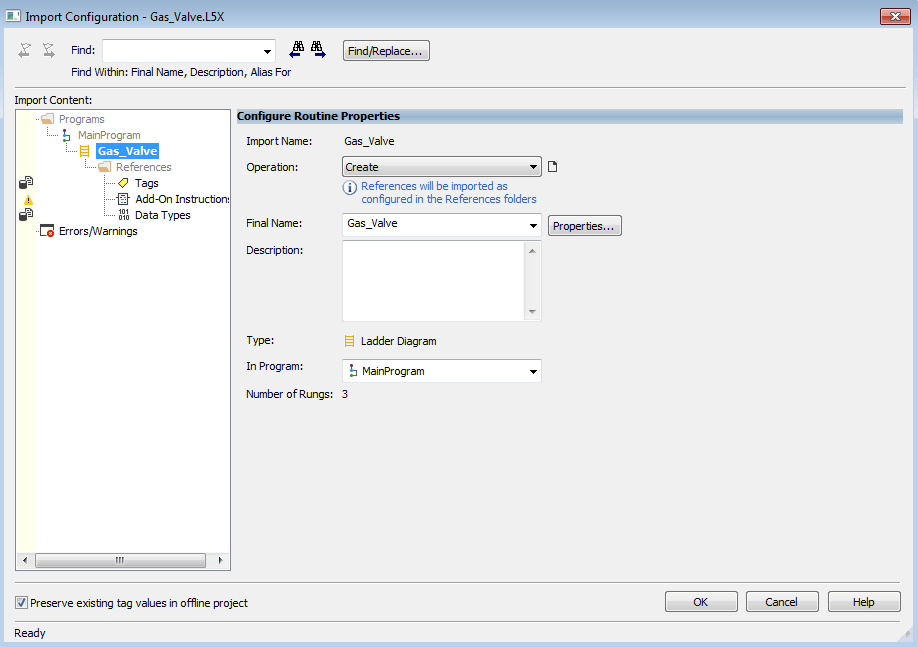
Step Four: Once the code has finished generating, return to our Logix Designer Project, right-click MainProgram, Add, then Import Routine.
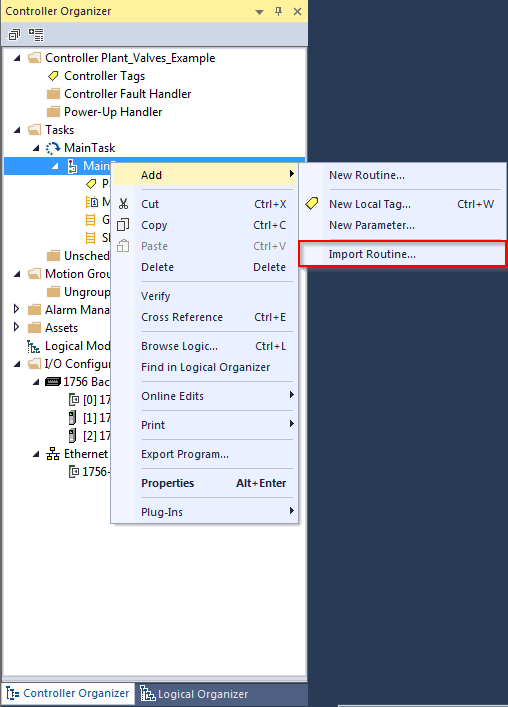
Step Five: Select the Gas_Valve L5X to import.
Note in the tags section, that a new Gas_Valve tag will be created, but the Estop, ResetErrors, and I/O tags do not need to be modified.
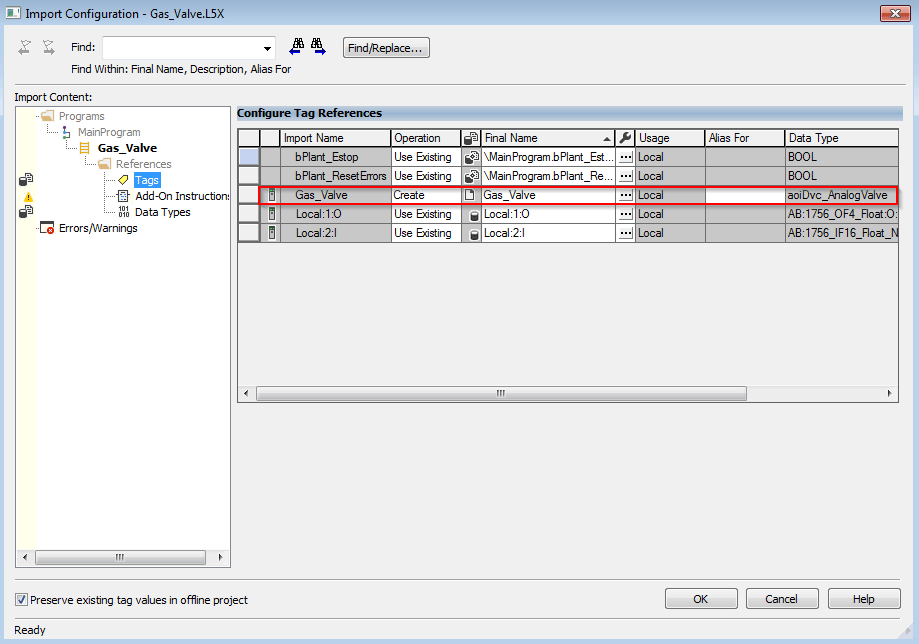
Add-On instructions and Data types should also be kept as Use Existing as they will not have changed.
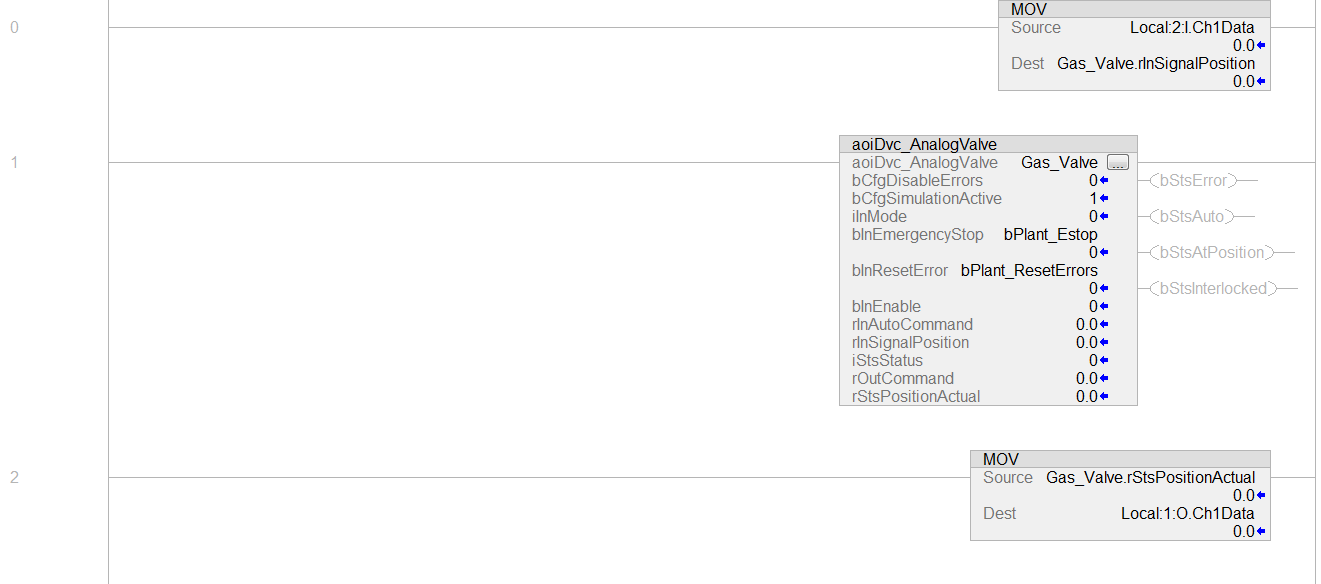
Step Six: Once you have verified the import settings, hit ok, and a new Gas_Valve routine will be created.
This routine also matches the configuration we chose: Ch1Data for input and output, simulation mode active, and the same two local tags for the Estop and Reset Errors.
Conclusion
The Library Designer and Application code manager allow the creation of customizable and re-usable code without too much . Understanding their capabilities could be the next step in quickly creating modular and configurable solutions for Allen-Bradley PLCs. Being able to quickly pull in programs, routines, tags, and other elements for common devices such as valves and VFDs could greatly reduce programming time projects in many different industries.
Learn more about DMC's Allen Bradley PLC Programming services.