FANUC HandlingPRO is great for visualizing tool paths and planning installation locations. It allows you to import computer-aided design (CAD) models and even run simulated robot programs. This is especially helpful for avoiding potential interference issues in tight environments.
Here are my top five tools and suggestions to get you started with HandlingPRO:
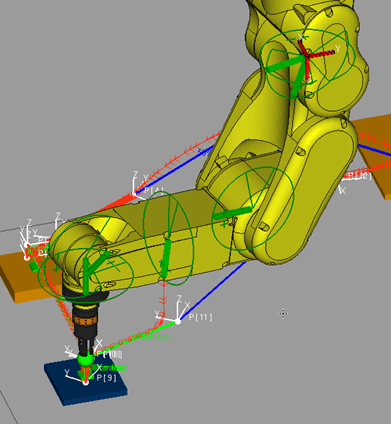
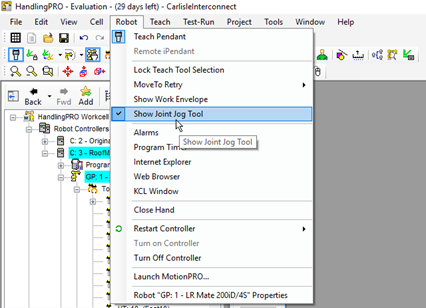
Joint Jog Tool
This tool gives you handles that you can use to move the robot joints, but more importantly, it shows the limits of the robotic arm movements. Sometimes, it’s difficult to understand which joint is at its maximum and is causing you to reach a position limit.
To enable this tool, navigate to Robot > Show Joint Jog Tool.
Fine Joint Position Control
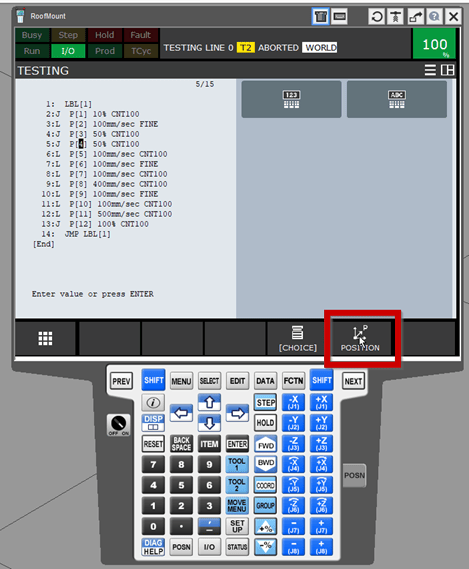
Moving the robot arm around with the joint jog tool is great for getting a broad understanding of the robot movement. If you want to dial in the movements to the millimeter, you should use the teach pendant.
To do so you should click the position button on the bottom right half of the screen.
Next, enable the teach pendant by clicking the ON/OFF switch on the left so that it's in the ON position.
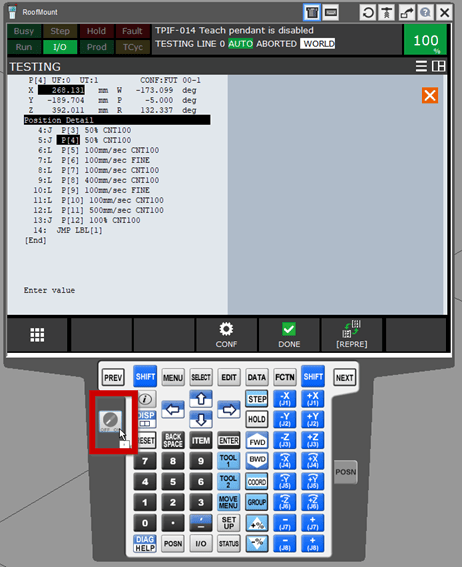
Note: The teach pendant-enabled switch will turn off when testing your programs and inhibits many of the editing tools, make sure that this is ON whenever developing on the teach pendant.
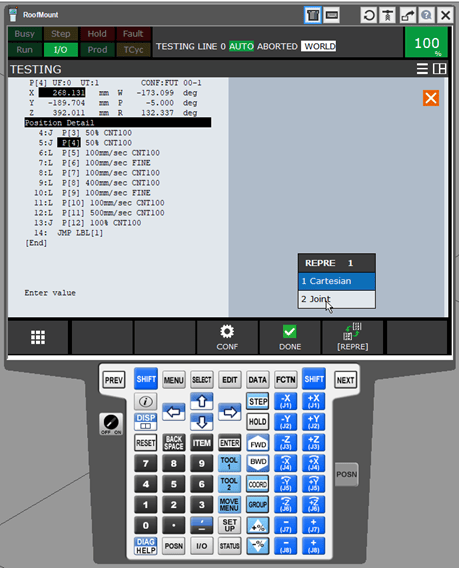
Now that the teach pendant is on, you can either jog the robot with reference to the tool tip in the XYZ plane (or XYZ angles) using the blue button on the right of the teach pendant, or you can press the REPRE button on the bottom right to switch to the second mode (Joint Position Control). In this mode, you can jog each one of the individual joints by, again, using the blue buttons on the right of the teach pendant.
Change Views
You can change your rotational axis by left-clicking anything in the window and can even select different surfaces of an object. Right-click to then rotate around that.
Move to Toolbar
With this toolbar, you get access to a bunch of helpful tools such as move to surface or move to points that you have set up in your program.

To enable the move to toolbar, click this button:

Fanuc Tutorials
Lastly, Fanuc includes some helpful eLearn Training through tutorials. Some of these are built into the Help documentation and you can find them under the help tab.
Learn more about DMC’s Robotic Integration and Automation and contact us today to get started on your next project.