One of the fastest growing SCADA/HMI platforms today is Inductive Automation's Ignition. In addition to the well-known Vision visualization module, Ignition contains Perspective, a web-friendly visualization module built from the ground up to work in any web browser — even on mobile!
Although most Ignition functions work the same across Perspective or Vision, there are some adjustments to work better in a web-friendly environment. This multi-part blog will serve as a guide to setting up dynamic Perspective screens that take full advantage of its powerful new features.
In this part, we will cover how to configure button presses to modify properties and tags in Perspective. Using Python scripting can be intimidating at first, but it is a key skill in creating HMI and SCADA systems that can send commands to other systems. This blog will teach you how to use button events to write to component properties and tags.
Example 1: Toggling a Boolean Property
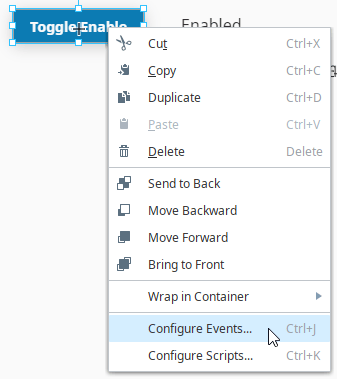
First, we will create a button and use it to toggle the enable/disable custom property that we created in the last Perspective blog. Drag a button from the component toolbox onto your view. Then change its text property to "Toggle Enable"
Right click your button and select "Configure Events" to open the event popup. You can also use the handy shortcut Ctrl+J.
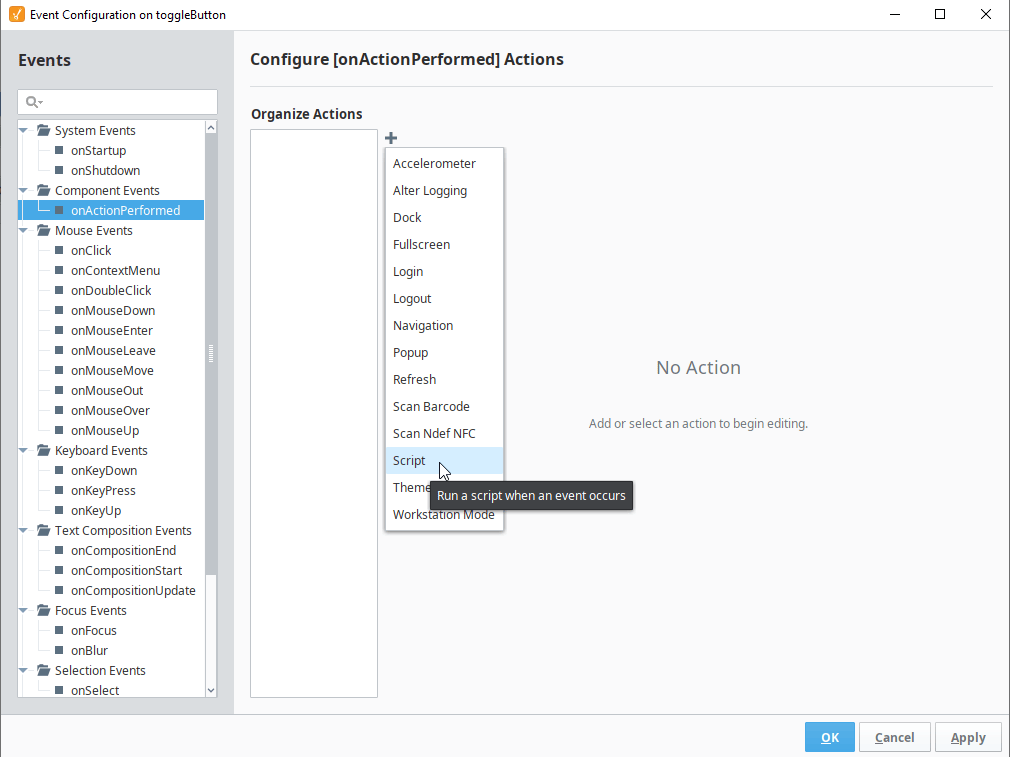
The left-hand list shows all possible button events. Select "onActionPerformed", which is triggered when the button is pressed. Then click the plus icon and add a script action for this event. There are many different actions, but scripts are used for manipulating properties and tags.
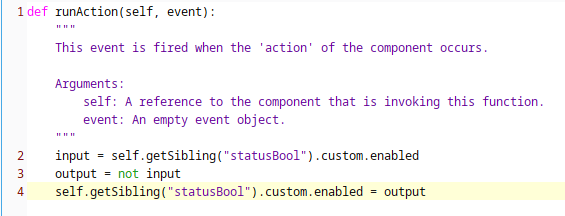
The runAction Python script is called when the button is pressed. We are going to write a short script to read the "enable custom property" value, toggle that value, then write back to the property. First, press the property reference button, find the property in the tree, and click Ok to add the reference to your script.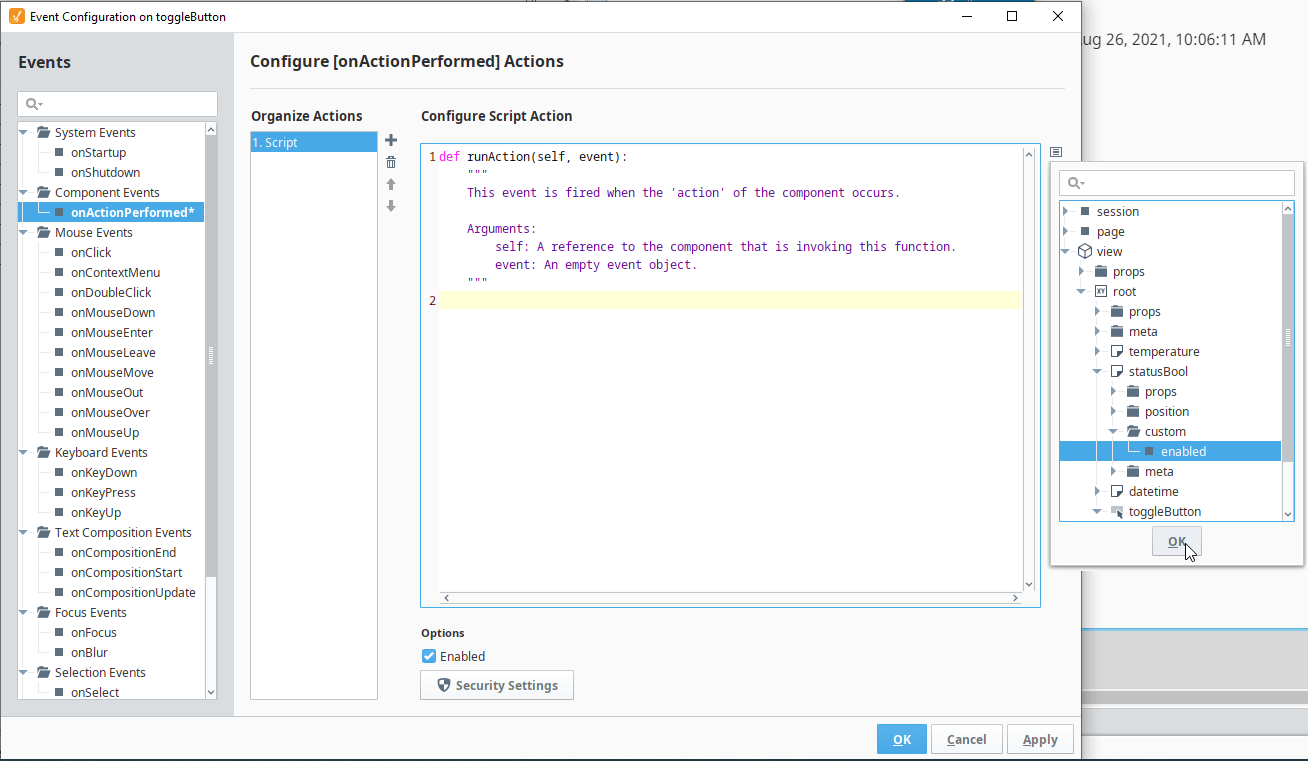
Next, write the following script. The exact reference may change depending on your object names. First, assign the property value to "input". Then, assign "output = not input" to toggle the bit. Finally, assign "output" back to the original property.
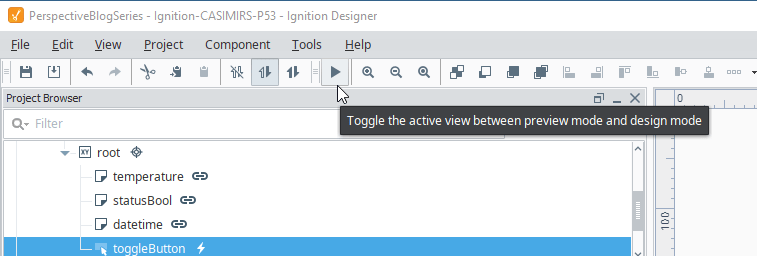
To test out your script, enter preview mode by clicking the Play Button icon. This simulates your view as it will run on the Ignition webpage. To exit preview mode and go back to editing, press the button again.
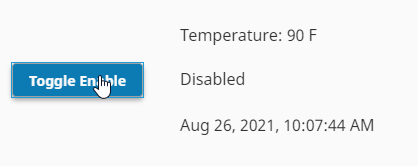
In preview mode, you can press the button to enable and disable the custom property.
Example 2: Incrementing a Numeric Tag
Next, we will learn how to use a button to update a tag value. The core workflow of using a script to manipulate a property is the same, but that property will now be bidirectionally bound to a tag.
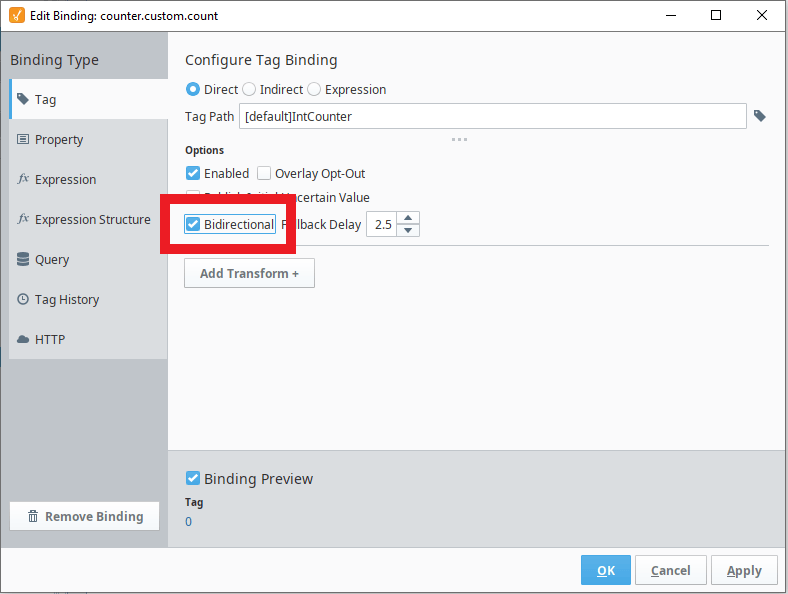
Create a new button, rename it "counter", then add a custom property "count" to it. Next, add a tag binding to the custom property and navigate to an integer or float tag on your gateway. Make sure to select the bidirectional checkbox. This makes sure that the property can write back to the tag. For help with these steps, see "Tag Binding" in the previous Prespective blog installment.
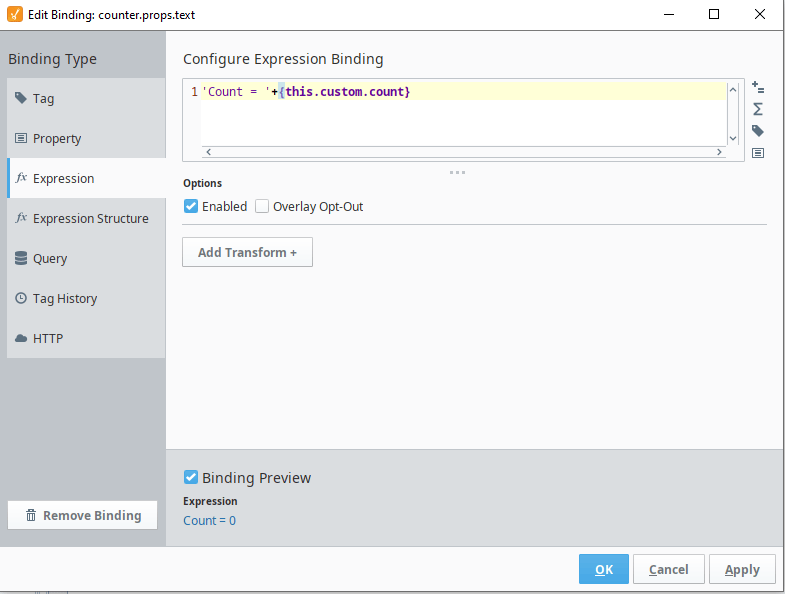
Next, we will update the button text to display the current counter value. Add an expression binding to the button's text property. Insert the expression shown in the screenshot below. You can use the property reference button on the right side to find your custom property.
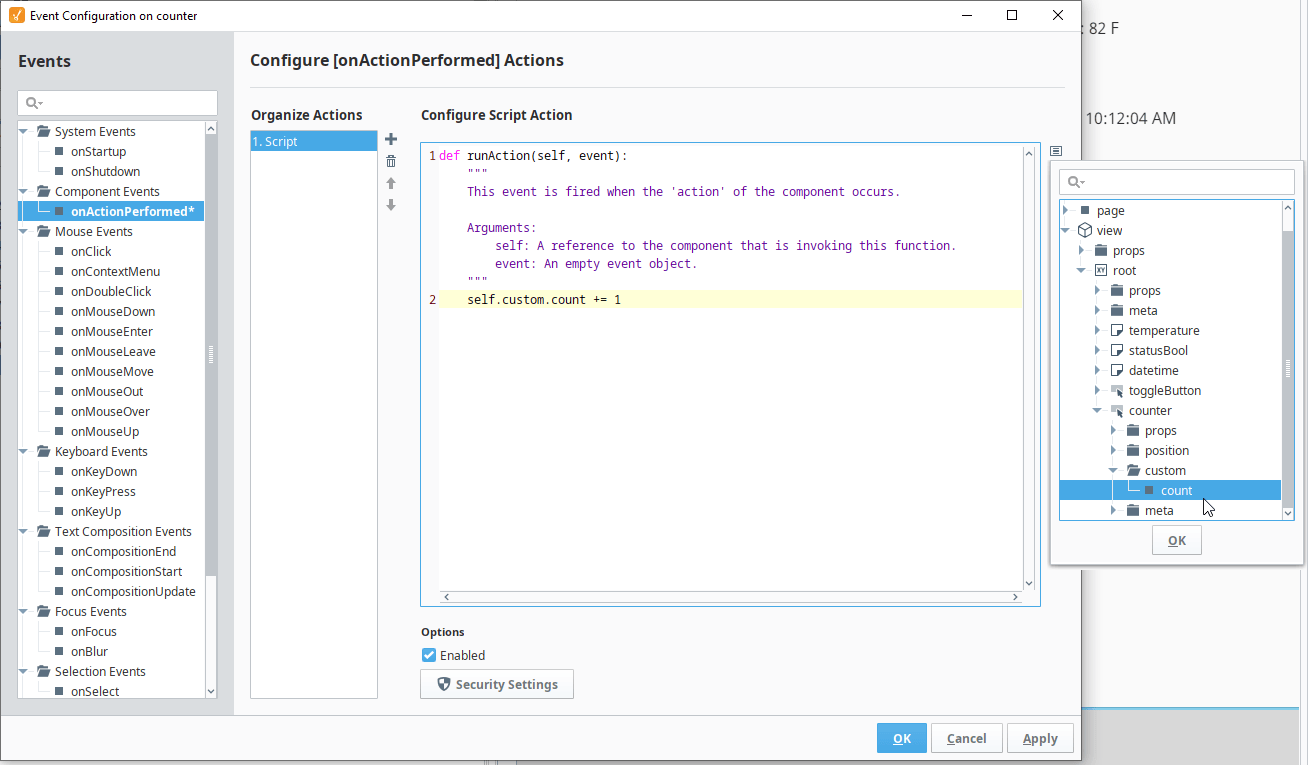
We will now add a script to manipulate the custom property that is bound to the tag. Like the previous example, create a script action on the button's onActionPerformed event. Next, insert the property reference to your custom property. This script is even simpler than the last. Simply add " += 1 " to the end of your property reference to increment the value by one.
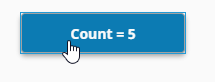
Enter preview mode and click your new button to watch the counter increment on each press. This basic technique of creating a bidirectional tag binding and an event action script can be used for simple and complex behavior.
Learn more about DMC's Ignition expertise. Contact us to get started on your next HMI, SCADA, or MES project.
See other blogs in this series: Creating Dynamic Ignition Perspective Projects
Part 1: Bindings and Transforms
Part 2: Button Event Actions
Part 3: Embedded Views and Flex Containers
Part 4: View Parameters, Indirect Bindings, and Flex Repeaters
Part 5: Flex Repeaters with Variable Number of Instances (coming soon)
Part 6: Changing Colors and Other Properties (coming soon)