Schneider Electric’s M-171 and -172 PLCs use the EcoStruxure Machine Expert - HVAC software (formerly SoMachine). The program includes a section for developing a web site. In this section, pages can be created from templates or as standard table pages.
Generally, all of the pages have a set style native to Schneider Electric; for instance, the standard table page’s program and its corresponding web view are shown below:
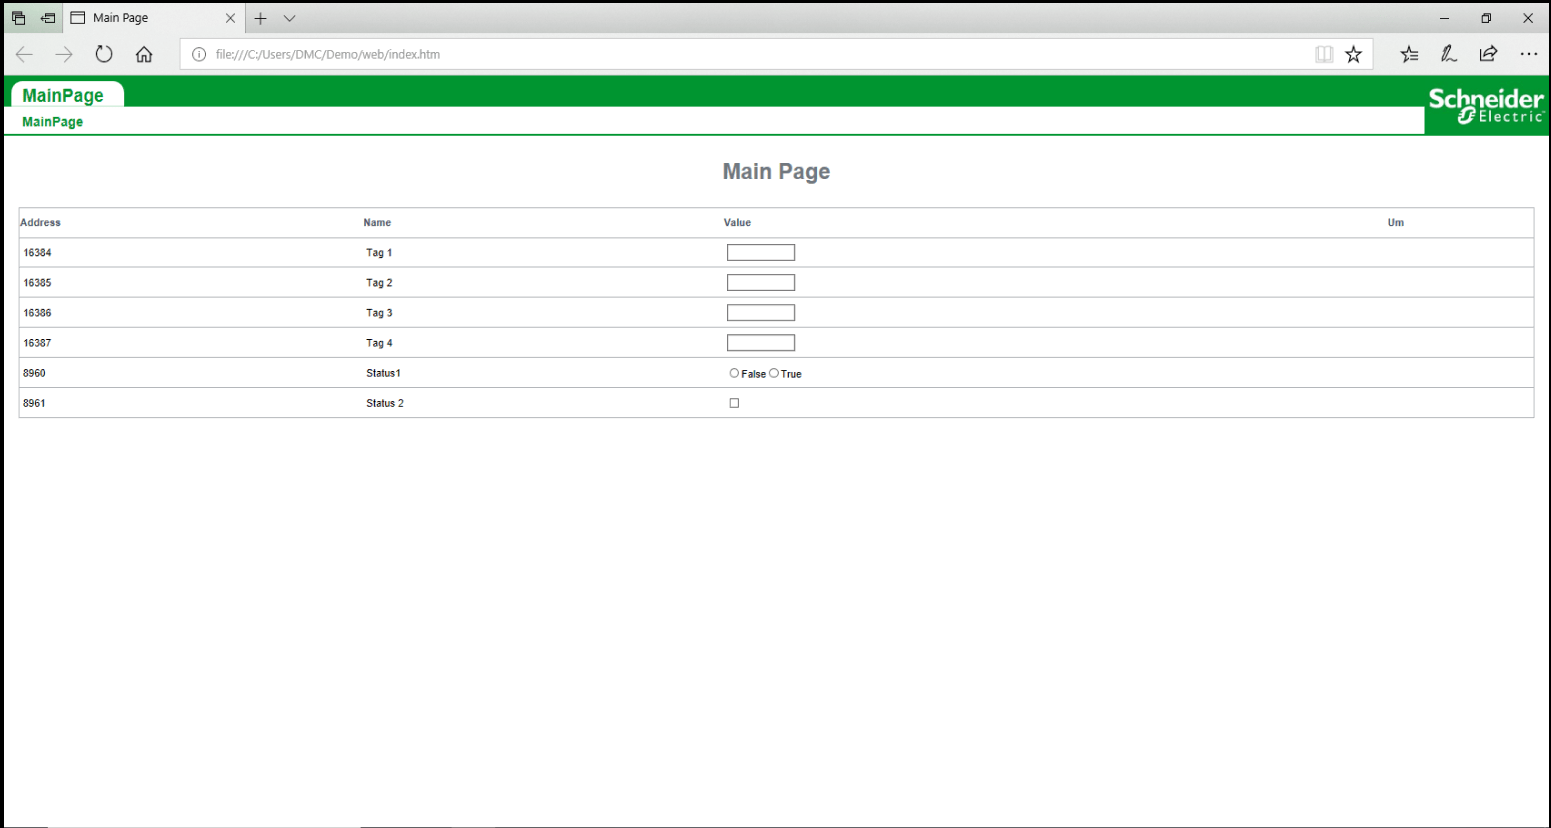
Figure 1- Standard Table Page (Web View)
Since this software produces webpage HMIs, it also has a feature that imports a custom page—essentially directing the software to an HTML file to be displayed as a webpage. Inherently, there is no option to pass PLC tags to this custom page, but this blog will explain how to display and dynamically update tags on a custom HTML page using JavaScript (JS) and custom configurations.
General Page Creation
To create web-based views of the web sites created in EcoStruxure ME, each page must be added to the ‘Web Site’ category and, once configured, the web site must be built. The image below shows the program view of the webpage above:
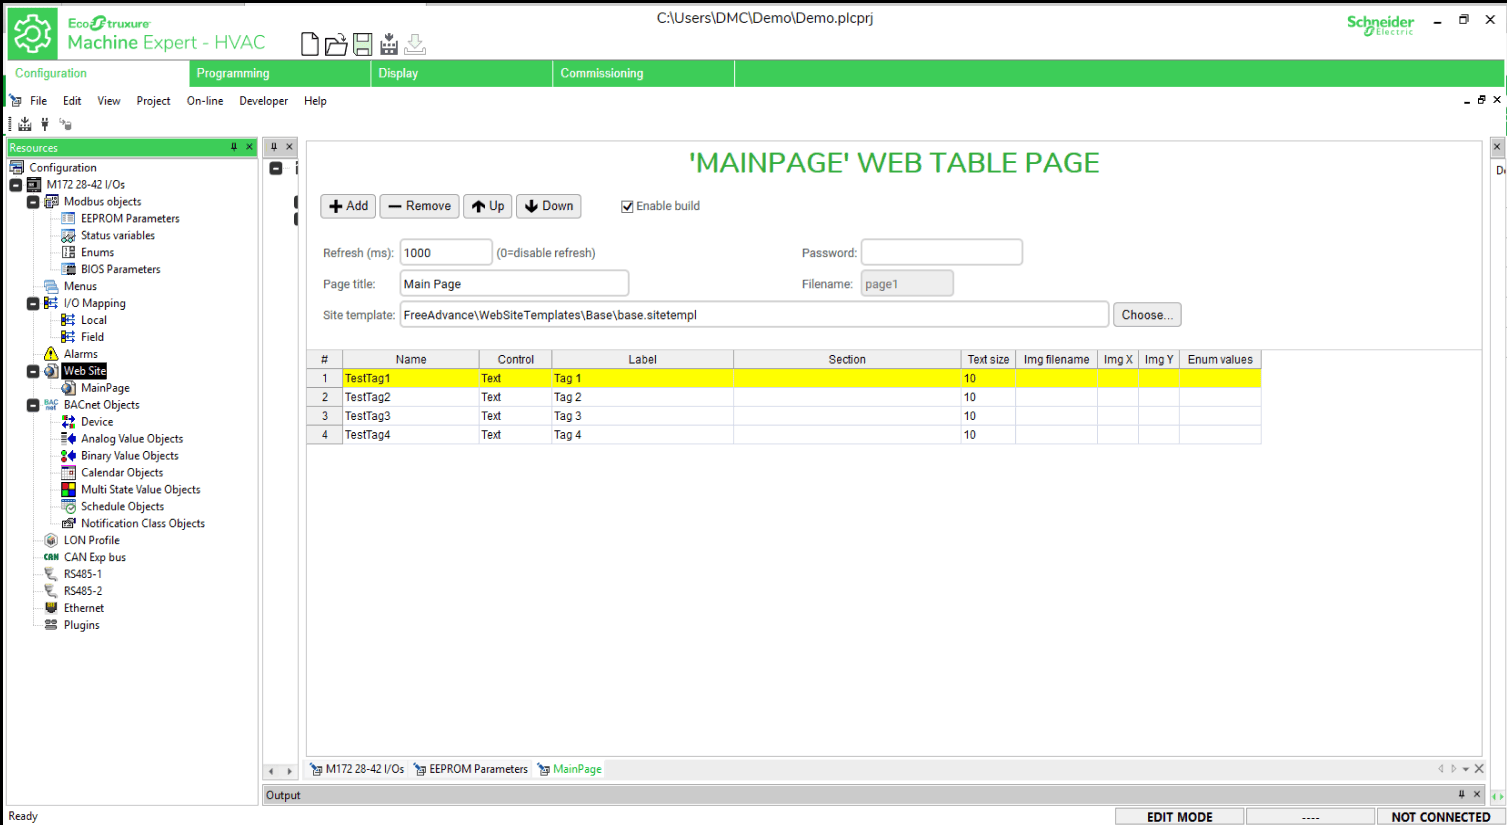
Figure 2- Standard Table Page (Program View)
Once all tags have been added to the table page, the website can be built as shown:
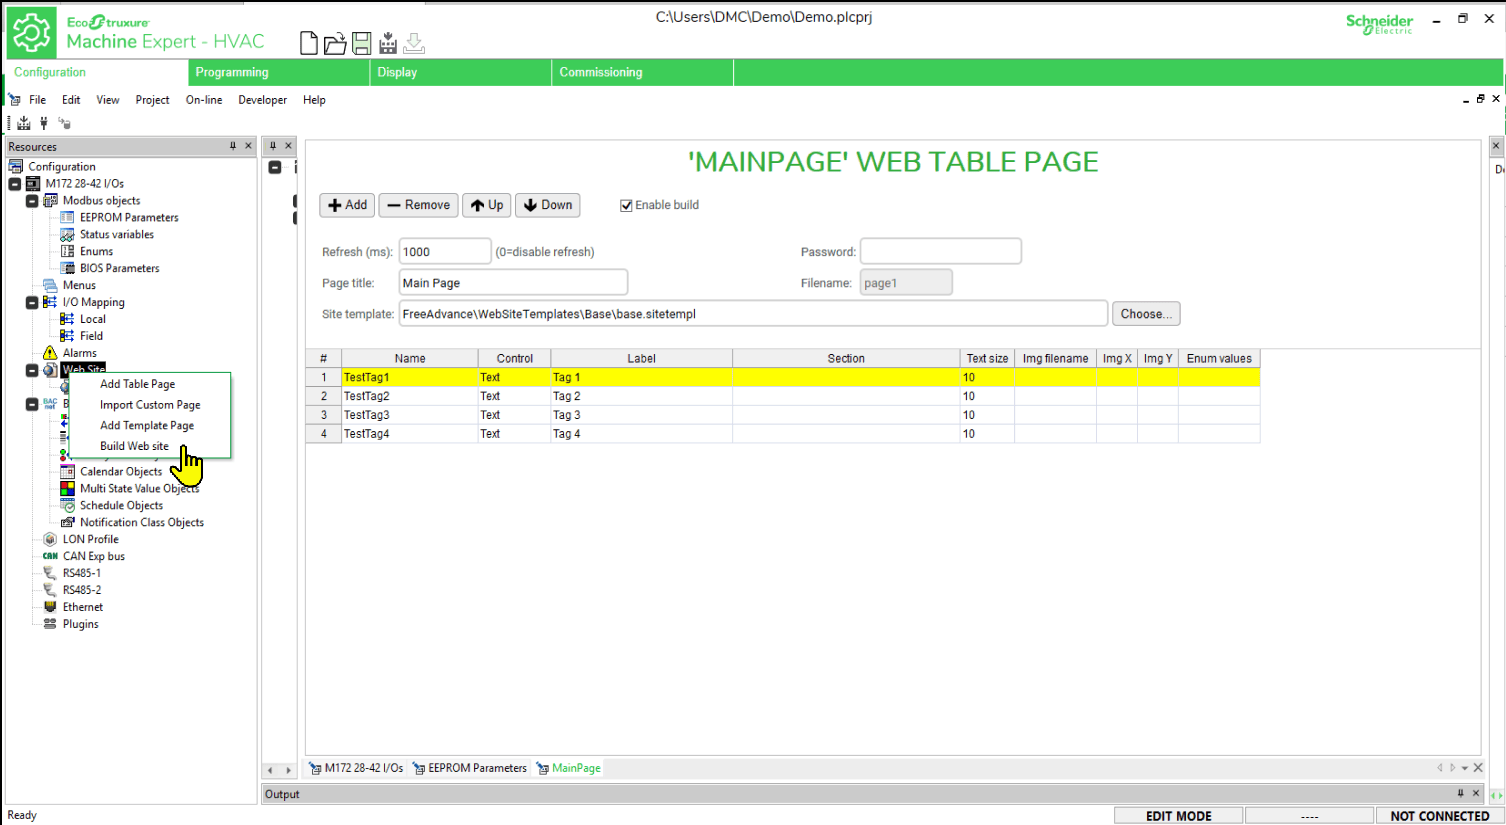
Figure 3 - Build Web Site Command
File Configurations
In general, every page that is added under ‘Web Site’ in EcoStruxure ME requires the website to be rebuilt as described above. When this build occurs, the software automatically creates an HTML file for the page and a corresponding CGX file in the ‘Web’ folder of the project. An example of the ‘Web’ folder’s contents is shown below:
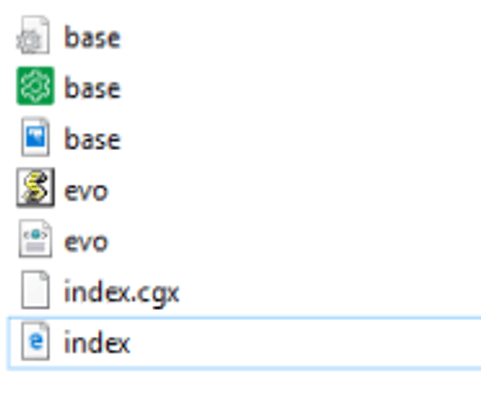
Figure 4 - Web Folder Example
Both of these files are required for the custom HMI page to interact with the desired tags. So, before any linkage can occur, a CGX file must be created for the custom page. We will use a copy of the original project file to do so.
CGX Creation
After the desired PLC tags are created and ready to be implemented on an HTML page, a temporary project must be created to establish the connection for the desired tags.
The first step is to make a copy of the project, delete all pages, and insert a single table page. Once a copy of the project is ready, all the tags that will be passed to the custom page must be added to the table page.
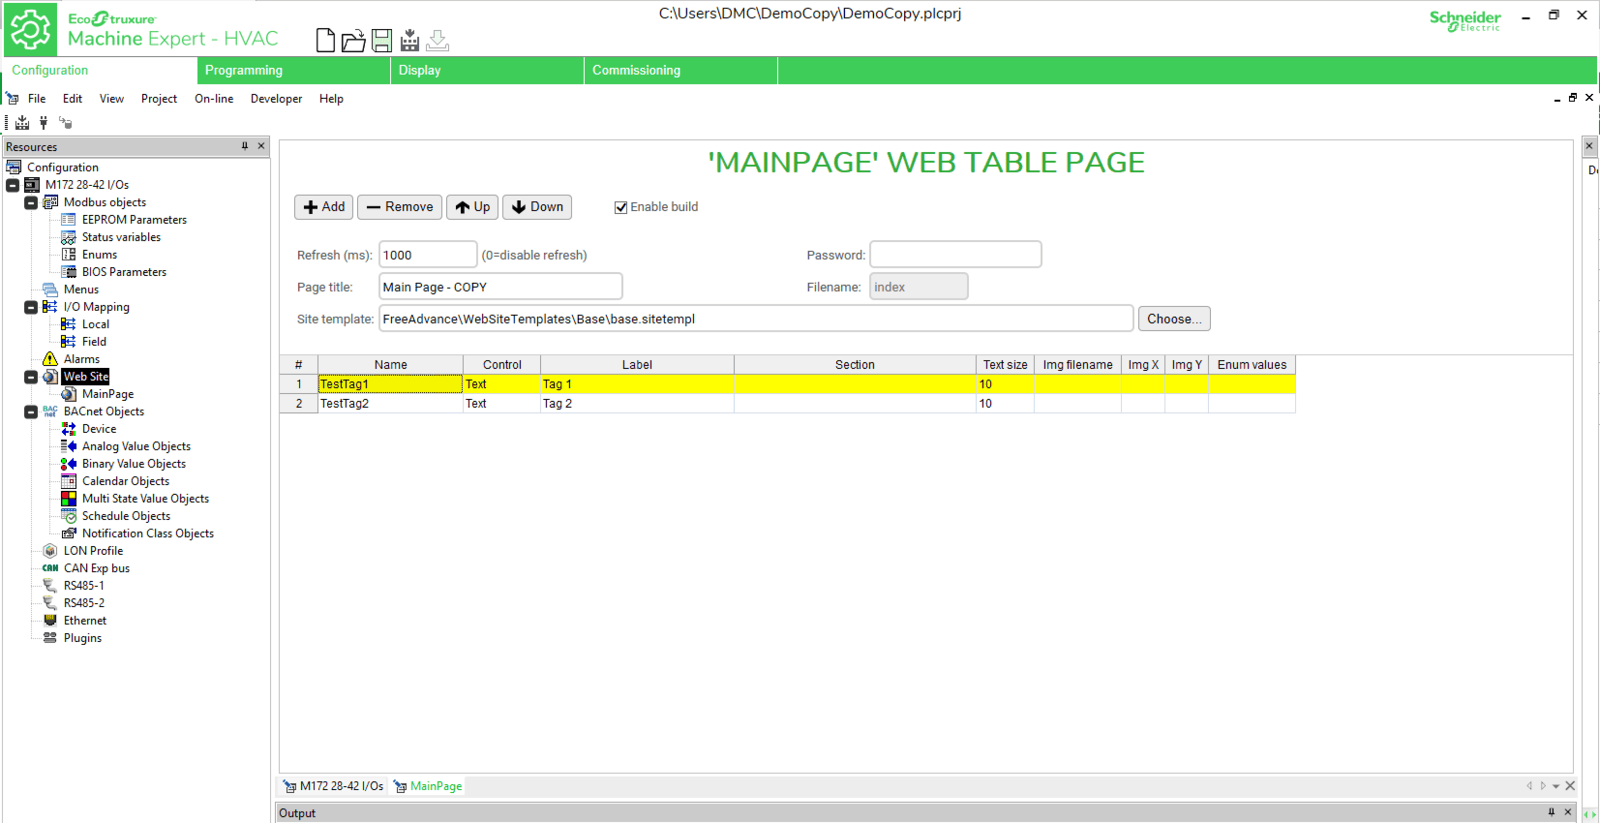
Figure 5- Copied File's Table Page Configuration
Now, when the website is built in this copy project, the table page containing all the tags will be referred to as ‘index’ and will have the HTML and the CGX file as shown below:
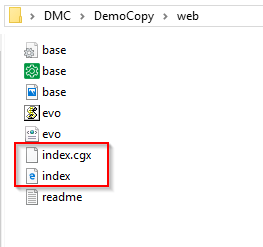
Figure 6- DemoCopy Web Files
The .CGX file must be renamed to match the name of the custom page in the original project.
Once the original project has been built, this new .CGX file must be copied into its web folder, and the contents of the copy’s HTML file can be added to the custom HTML file to ease tag identification. Below is the CGX file for two-tag table shown above:
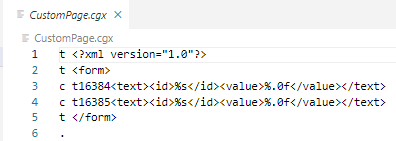
Figure 7- Custom Page’s CGX File
HTML File and Java Script
The EcoStruxure ME software creates a custom JavaScript file, evo.js, which contains functions for linking the webpages to tags from the PLC. To make use of this functionality, each tag is given its own ID, which corresponds to its tag-address. For example, these addresses correspond to tag IDs of ‘t16384’ and ‘t16385’:

Figure 8- Tag-Address Table
The HTML file that is created from the project copy contains the code for identifying these tag objects in the new custom page. Open the HTML file and add its contents to your custom HTML script, or simply customize the code straight from this document. While all of the code (excluding the ‘body’ section) from the copy’s HTML file is necessary for functionality, the most important part for tag-linkage is shown in the scripts below:
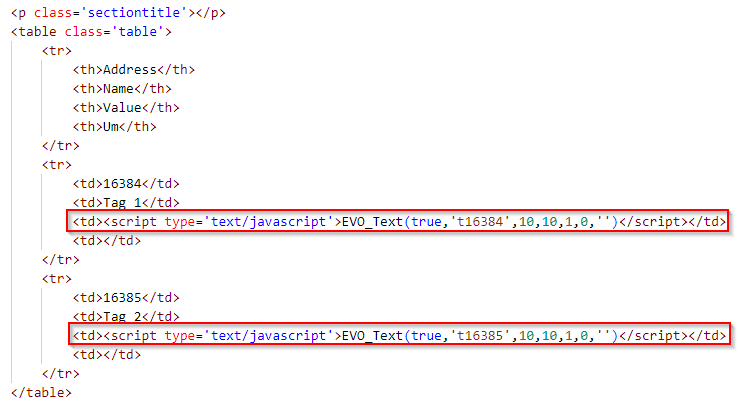
Figure 9- HTML Code for Tag Objects
These two highlighted lines above use the tag’s address with the evo.js functions to create an HTML object on the page. Once this object is created, JavaScript can be used to hide the table item and allows the contents to be used for any programing logic required.
Now, in the custom HTML file, a companion JavaScript file can be created to hold various functions including the declarations taken from the copied file above— just be sure to link it in the HTML head block!
Since these EVO_Text functions only pull the tag value at the time of the call, it is important that the JavaScript recalls any tag references at a set interval to refresh them occasionally. A simple method for handling this is ensuring all tag-value references (reading and writing) occur within functions in a custom JS script, which are called on the HTML page with the setInterval() JS function.
Beyond displaying these tags, their values can be evaluated by assigning the HTML object to a variable, providing endless possibilities for the custom HTML page— image toggling, background colors, displaying value-levels etc. Below are basic HTML and JS files for a custom page with tag references. These scripts produce a basic HTML webpage with a link back to the main page and a box whose color is tag-controlled.
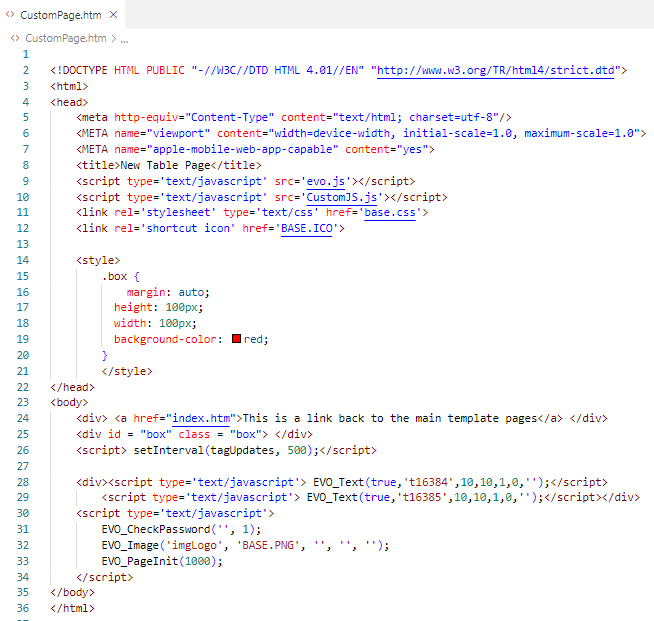
Figure 10-Basic HTML Example
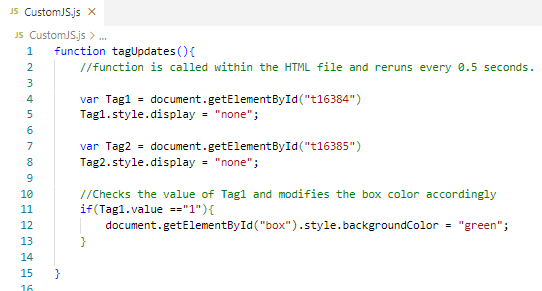
Figure 11- Basic JS Example
Writing to Tags
In addition to reading the tag values, JavaScript also allows these tag parameters to be written to. Writing to the tags is done by calling the functions: assignHidenValue() and writeParameter(). These can assign values to the tags to send information back to the PLC.
Below is an example of the modified custom JS script with this capability. This script not only modifies the color of a box, but also writes a value of ‘9’ to another tag when the If-Statement conditions are met.
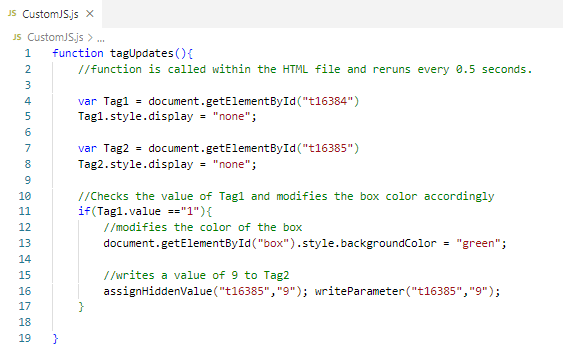
Figure 12- Basic JS Example with Writing Functionality
Final Webpage Variations
To implement this page, go back to the original project, add a custom webpage, and link it to the custom HTML file:
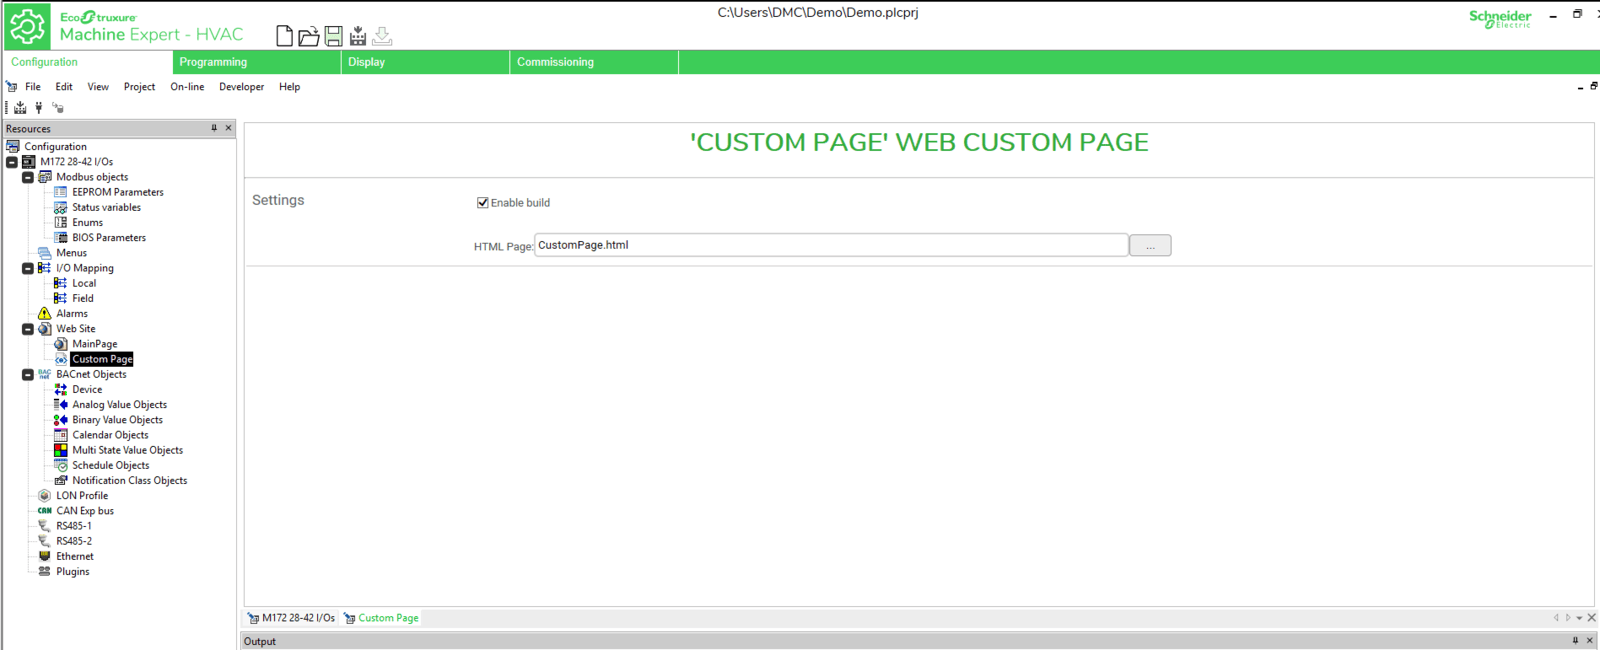
Figure 13 - Custom Page Configuration Screen
Build the project and manually copy the new HTML, CGX, JS files into the web folder, which should now resemble this image:
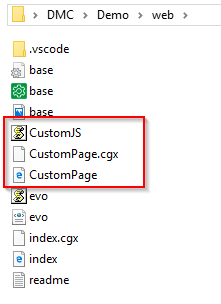
Figure 14-Copied Files in Web Folder
With all the new added functionality, the custom webpage can interact with PLC tags. Below are examples of the webpage states we designed above.
Final Main Page:
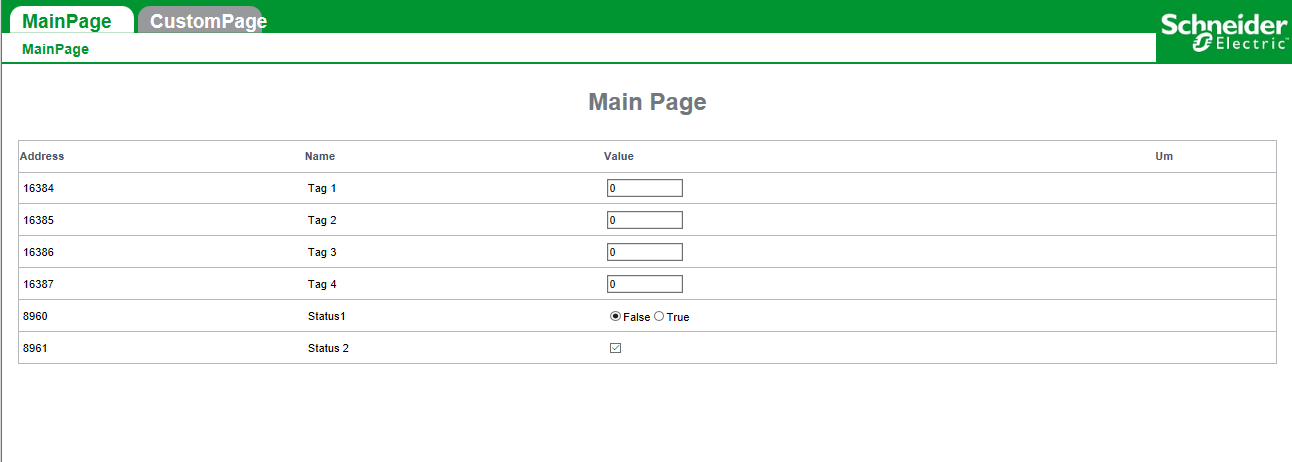
Figure 15: Final Main Page
Initial Custom Page:

Figure 16: Custom Page – Red State
Updating Tag to 1:

Figure 17: CustomPage – Green State
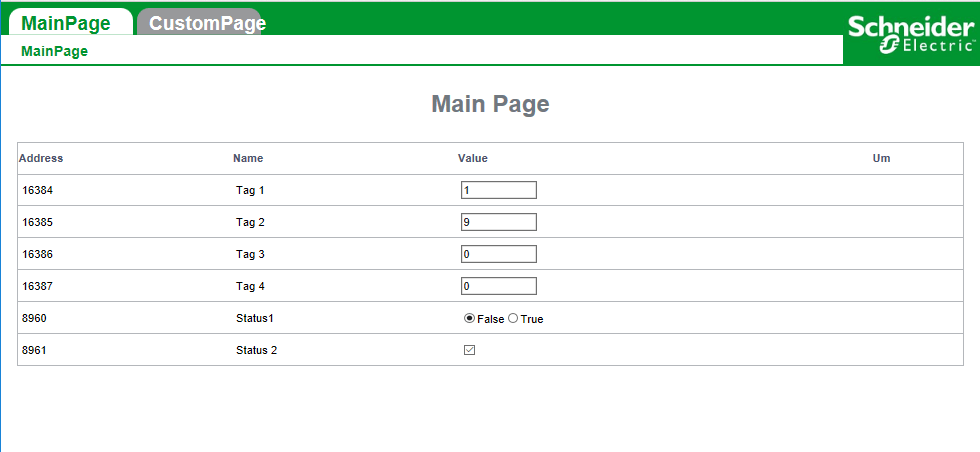
Figure 18:Final Main Page with Updated Tags
Learn more about DMC's HMI and SCADA Systems programming expertise and contact us for your next project.