The Siemens Open Library is a great resource that includes many commonly used Function Blocks and Faceplates. However, every project is different and customer requirements sometimes necessitate changes or the creation of new things. In the Dissecting the Siemens Open Library Series (this is the first post), I plan to break down some of the methods used by the Open Library to make configuration quick and easy.
One thing that the Open Library does really well is it allows for the configuration of a large number of items on a faceplate using a single User Defined Type (over 20 for the G120 faceplate). The documentation in the Open Library discusses how to make changes to the library, but this example will go over how to create one from scratch. The Function Block I make in this example is very simple, as that is not the main point, but the principles scale for larger user-defined types, more complicated logic, and bigger HMI Faceplates.
In this example, we will be making a new UDT, Function Block, and Faceplate. We are using a 1516-3 and a TP900, though the same principle applies to S7-300, S7-400, S7-1200, and S7-1500 PLCs. If using an S7-300 or S7-400, there are some extra steps, and this functionality is not supported on a Basic Panel.
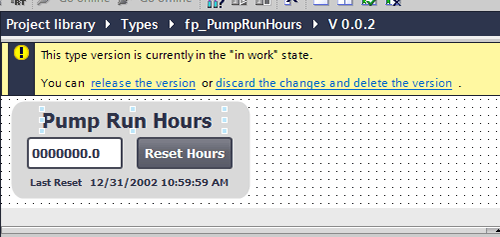
To demonstrate the methods, this blog will create a pump runtime hours counter with an HMI display. It will display pump runtime hours, allow a reset from the HMI, and display a last reset time. Overall this is fairly simple, but the concept applies to much larger items (like the Siemens Open Library G120 VFDs for example).
This is not a step-by-step guide, but rather an overview of the concepts. If anything is unclear, please leave a comment on the blog and I'll do my best to answer!
Step 0
Create your project with a PLC and HMI.
Step 1
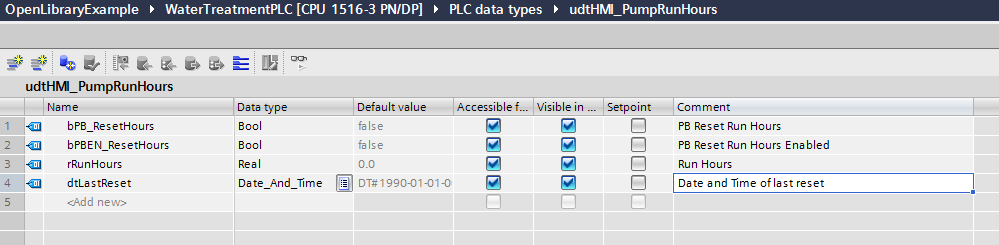
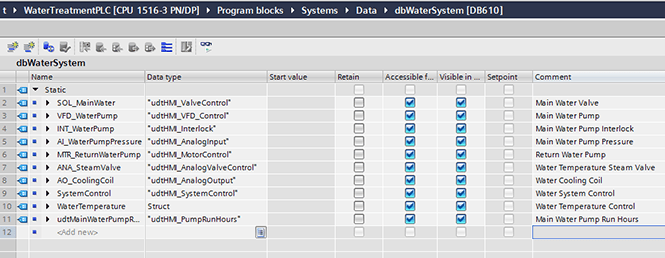
Create your UDT on the PLC. This should include all of the items you will need on the HMI.
If you are using an S7-300 or an S7-400, you should make this UDT on an S7-1500 PLC. To do this, just add in an S7-1500 PLC and create the UDT. You will put it into your S7-300 PLC later (after you added it to the project library). This is a really important step, as any UDTs created on a 300 or 400 cannot be used on an HMI, and it is a pain to figure out what is going on!
To keep with Open Library naming standards, we are calling this UDT udtHMI_PumpRunHours.
Step 2
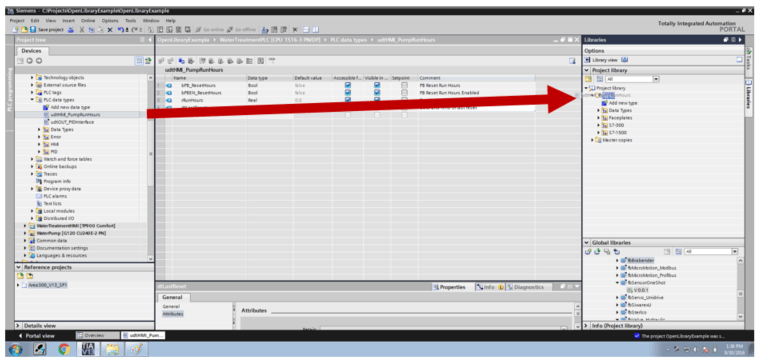
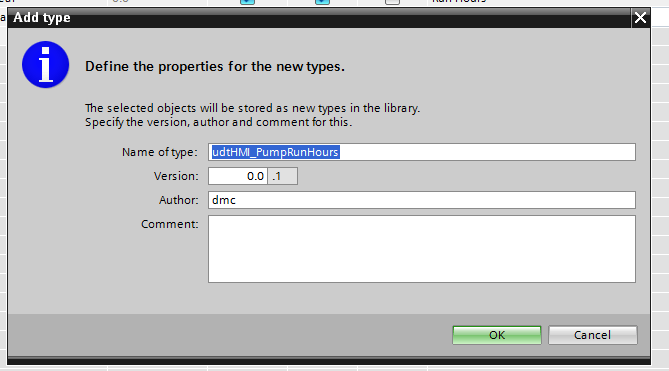
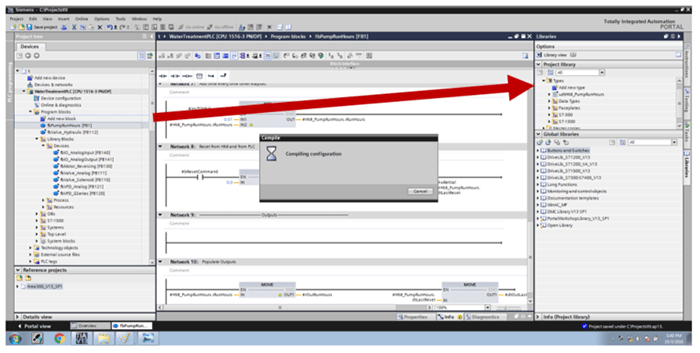
Add the UDT to the project Library Types. This is accomplished by dragging and dropping it from your project to the Project Library.
Step 3
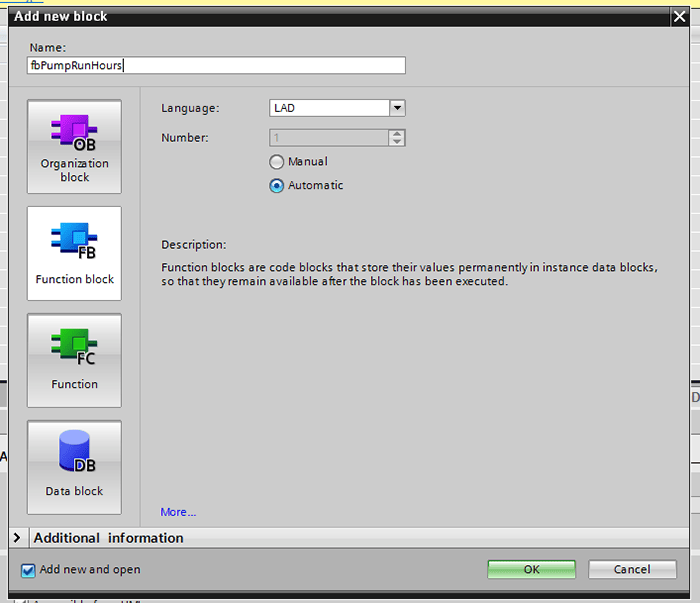
Add a new function block, and add the UDT to the IN/OUT section of the device (as well as any other inputs or outputs).
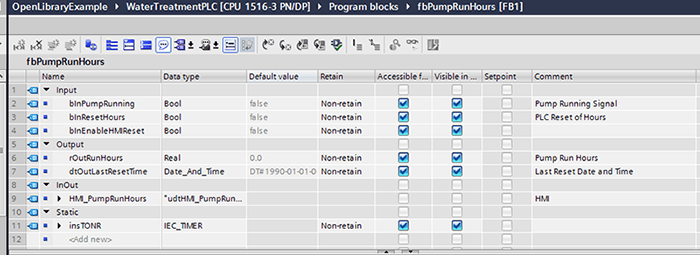
Step 4
Write your PLC logic.
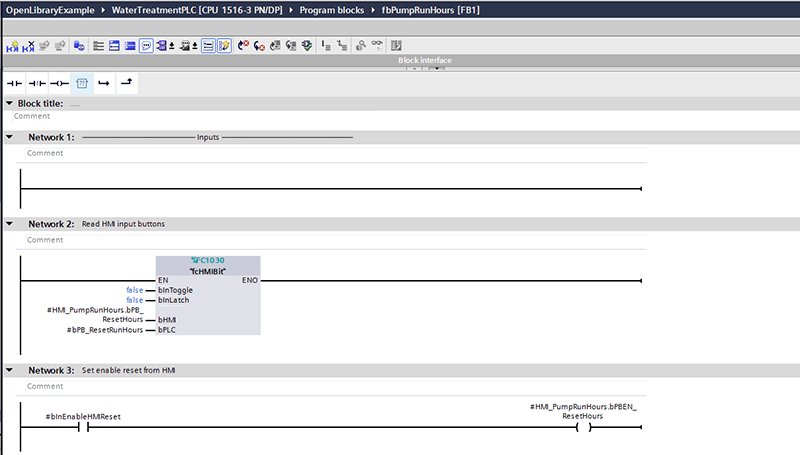
Network 1: Comment Rung
Network 2: Using fcHMIBit as provided by the Siemens Open Library to read an HMI bit (it is overkill here, but is done to maintain commonality)
Network 3: Using the FB input to control the Push Button Enable on the faceplate
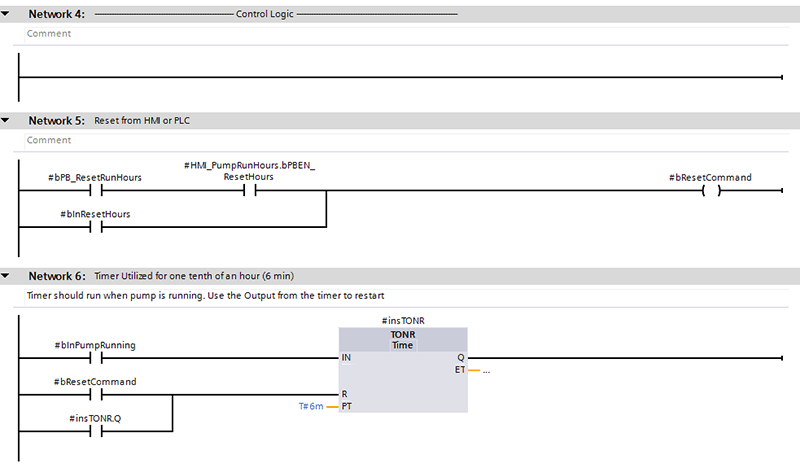
Network 4: Comment Rung
Network 5: Logic for resetting the time
Network 6: Timer used to elapse 1/10th of an hour (6 min)
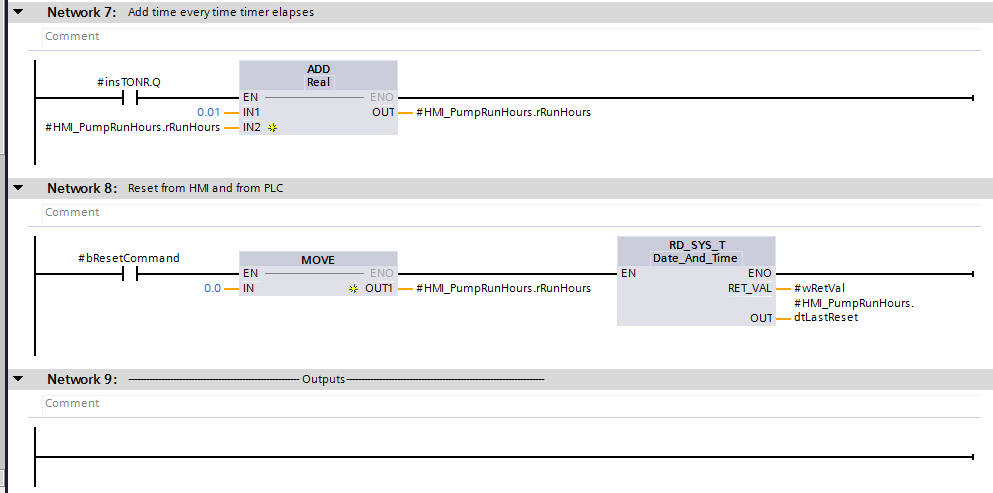
Network 7: Adding time to elapsed time every time the timer elapses
Network 8: Resetting time and last reset time
Network 9: Comment Rung
Network 10: Populating the Function Block Outputs

Step 5
Add your Function Block into your library by dragging and dropping it into the Project Library.
Step 6
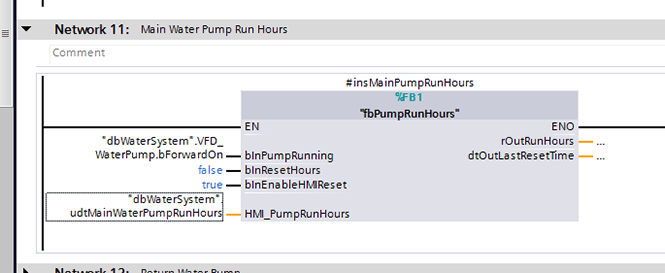
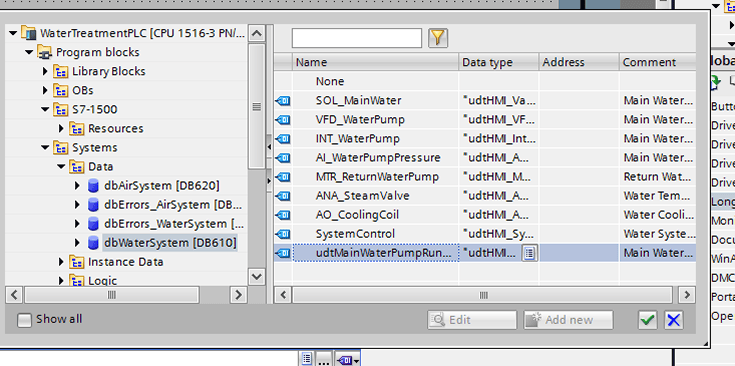
Call your Function Block and create a place to store the User Defined Type.
In this example, we will call our Function Block in FB510, which is the ‘Water System’ in the Siemens Open Library, and store our UDT in dbWaterSystem.
Step 7
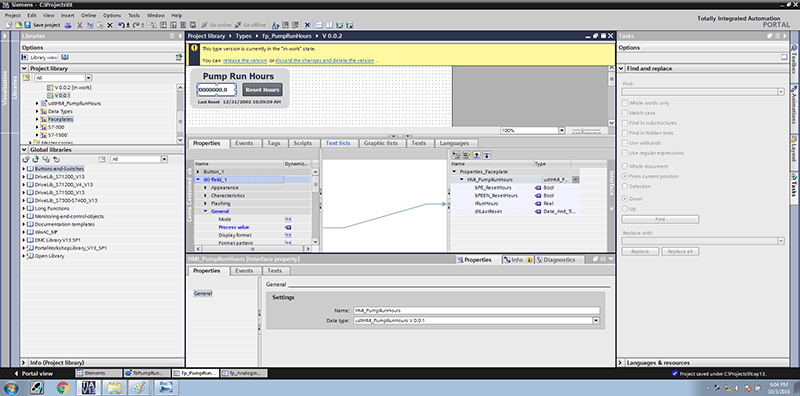
Create the look and feel of the faceplate on the HMI. There is no reason to map any tags at this point, but rather just get everything laid out the way you want.

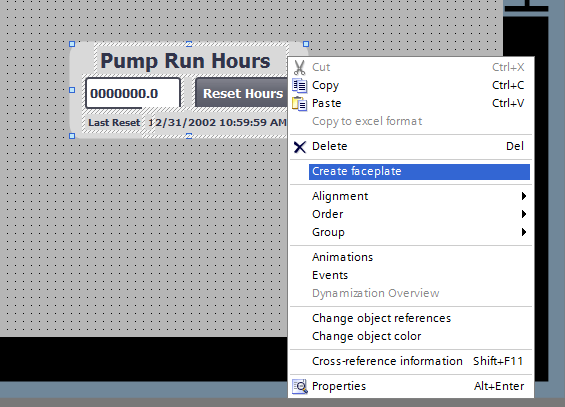
Step 8
Highlight all of the objects, right-click, and select "Create Faceplate." Give it a name (we are calling this one fp_PumpRunHours).
Step 9
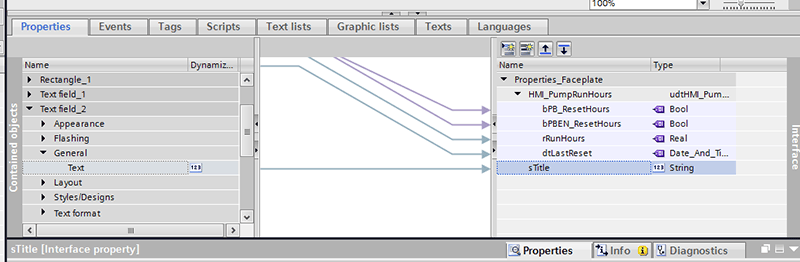
Add the User Defined Type to the Faceplate Properties.
a) Go to the properties tab of the faceplate configuration, right click on ‘Properties_Faceplate’, and select ‘Add new property’.
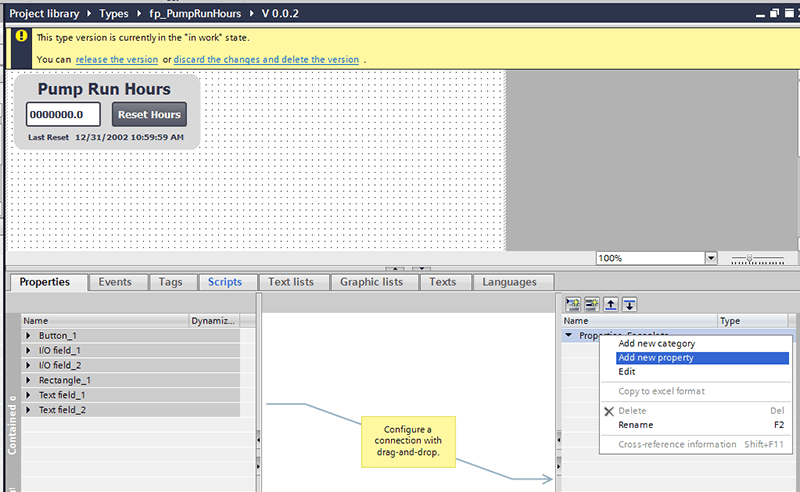
b) Right click on the property and select ‘rename’. Title it something appropriate (HMI_PumpRunHours in this example).
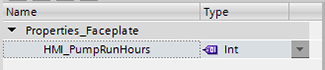
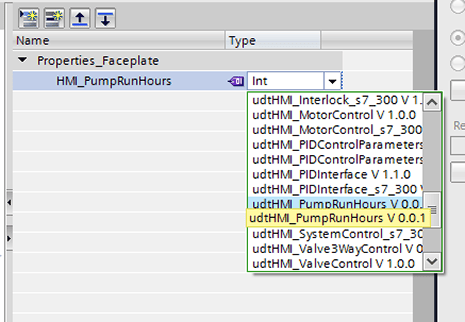
c) Click the drop-down menu on Type and select the UDT (even though the dropdown looks disabled, if you click it, it should give you all the options). If you don’t see it, make sure that the UDT was created on an S7-1500 or S7-1200 and that it has been added to the library. If you created the UDT on an S7-300 or S7-400, you need to recreate it (refer to step 1).
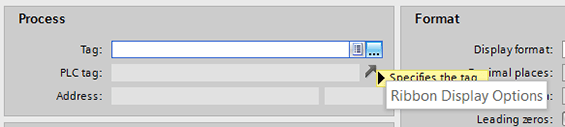
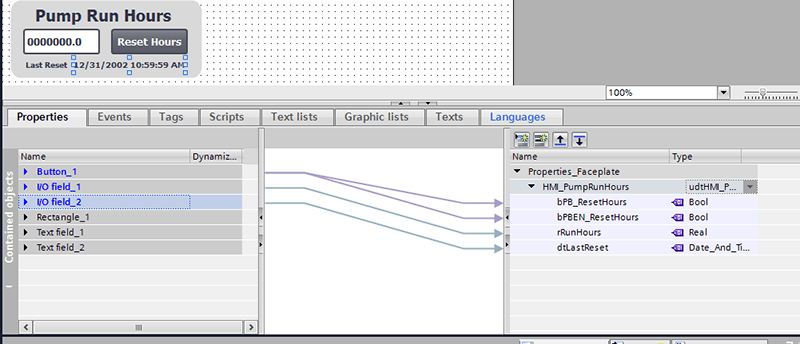
d) Open the properties for the faceplate individual controls. This is done by right clicking on the HMI item and selecting ‘Properties.’

e) You can use tags from the UDT by selecting the ellipses whenever there is a tag variable, then navigating to Properties and selecting the variable that is needed.
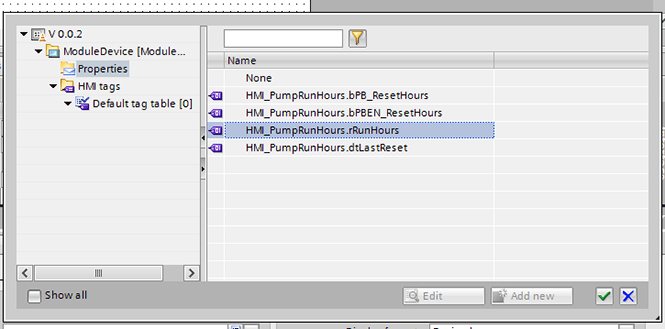
f) If you successfully mapped it, you should see an arrow drawn in the Faceplate Properties Window.
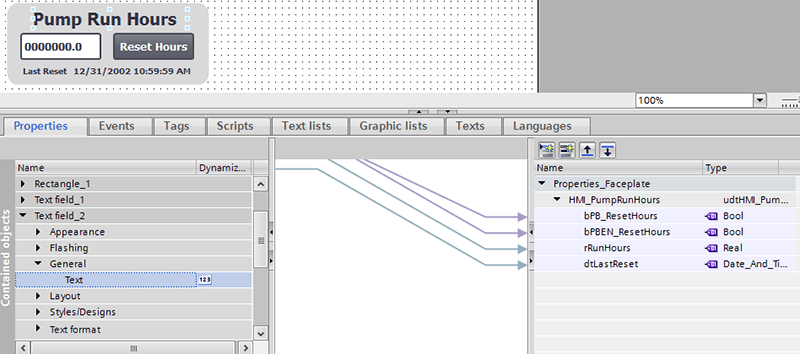
g) Do this for all tags (in this example we have the PB Control Enable, PB release event, Run Hours, and Last Reset Time).
h) To dynamically assign the name shown (to change ‘Pump Run Hours’), drag and drop the ‘Text’.
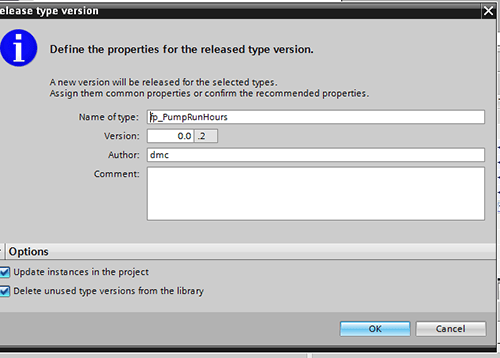
Step 10
Once you have finished mapping everything, select "release the version." (Don’t worry - you can always make more changes later). Select the checkboxes to "Update instances in the project" and "Delete unused type versions from the library".
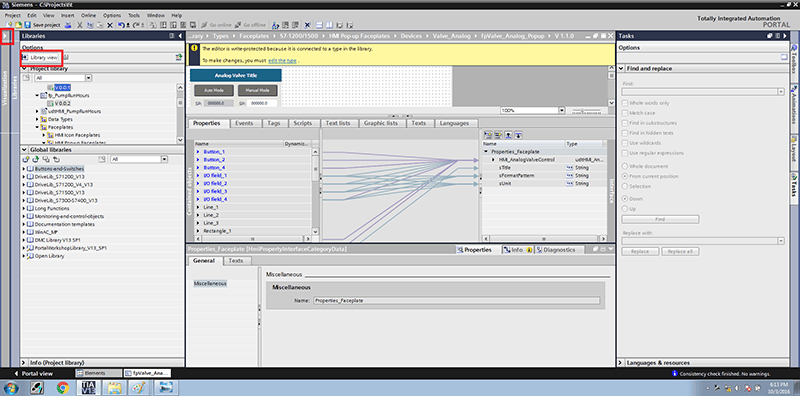
Step 11
Go back to your HMI by clicking the arrow that is above "Visualization" or "Library view."
Step 12
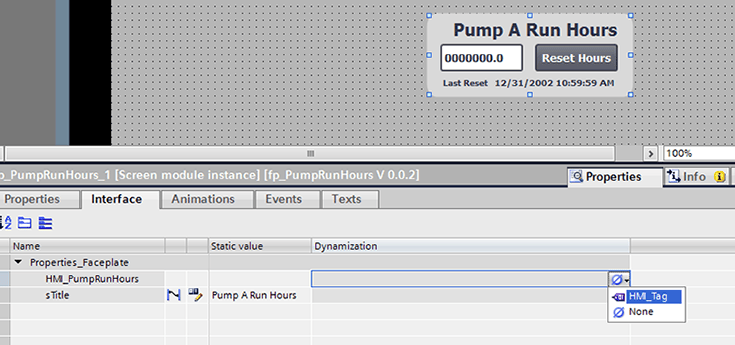
Map the UDT to the HMI, by selecting HMI_Tag in the Interface tag.
Step 13
Now you can call this function block and map all of the items on the faceplate with only that single User Defined Type. In this example, the benefit is fairly small (unless you had a ton of faceplates), but as objects get larger and more complicated, the amount of time saved can be greatly increased.
Learn more about DMC's PLC and HMI solutions.