Orginal author: Oliver Reed
DMC worked with a client who was automating their batch mixing process and wanted a way to schedule batches with specific recipes. The client requested we utilize the built in scheduler and recipe panels in WinCC OA as opposed to creating custom panels from scratch. Both of these panels are very robust and include many options and features. However, in order to accommodate what they needed, we had to create customizations to the built in panels. Some of the client requests included:
- The ability to add additional parameters for each scheduled recipe such as Lot Number or Trade Name.
- The ability to select which blend tank to use for the recipe and to limit the options to a pre-determined list of available blend tanks.
- The ability to design the recipes on a percentage amount rather than a fixed amount to accommodate different batch sizes of the same recipe
- The ability to implement error checking / validation on recipes and scheduled recipe
The recipe and schedule panels are found in the vision folder of the base WinCC OA project. Since making customizations to built in WinCC OA panels is an advanced topic, this blog will only focus on the process rather than code examples of the actual implementation.
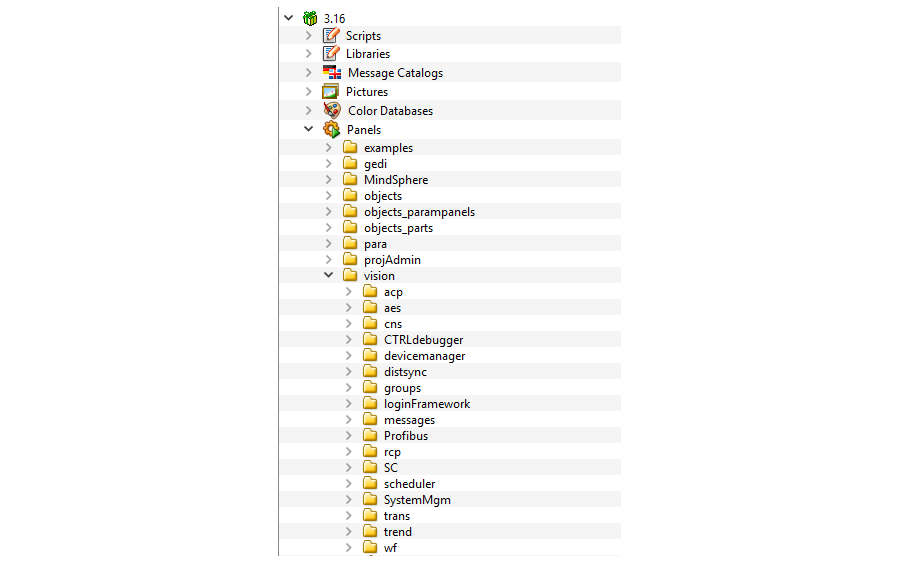
The tags where these panels store and utilize data are found in Internal Datapoints within Para. Scheduler will be labeled _Sc and recipe will be labeled _rcp and _rct (recipe and recipe type, respectively).
Note: Making changes to any built in WinCC OA panel can be very tricky. You can easily break scripts and panels without realizing it by making small changes to them, so do so at your own risk. Do thorough validation testing following any changes. Also, be aware that by modifying a built-in panel, you will be responsible for updating this panel and merging any features included in future versions of the WInCC OA distribution.
Creating and Customizing a Recipe:
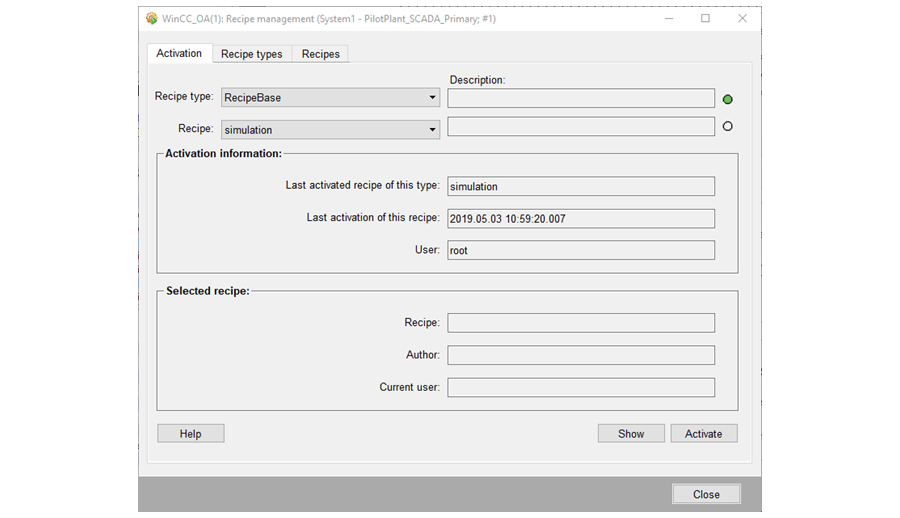
Recipes are stored internally in OA separately as recipes and recipe types. In order to create a recipe, you must first make a recipe type. The recipe management window is accessed through SysMgm->Settings->Recipes. The window looks like this:
To create a recipe type, navigate to the recipe type tab and select the icon that looks like a page with its corner folded over. 
A popup will appear prompting you to name the recipe type. In our example, it is called RecipeBase.
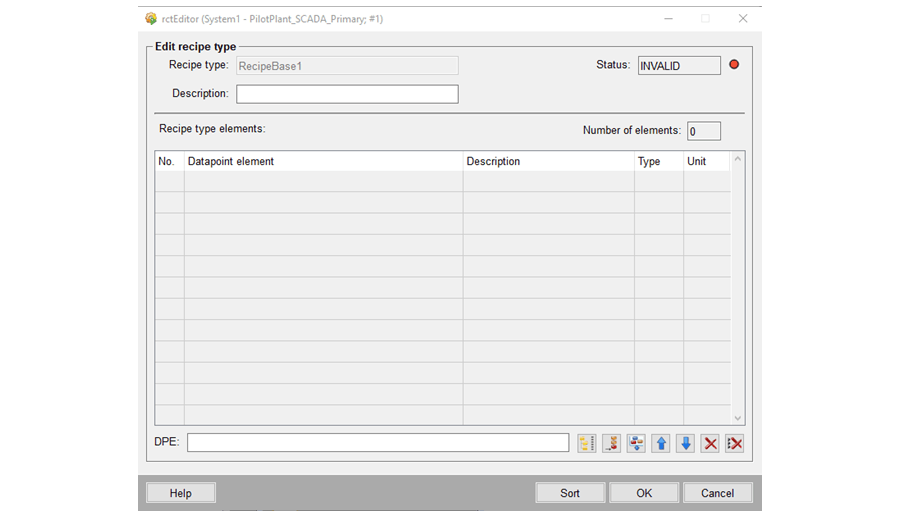
The image above is a generic shell of the structure of your recipe, and you can create as many recipe types as necessary for your application. For our application, we had recipes that could vary between 5-15 steps. To accommodate this, we added in a Boolean to our recipe schema that would indicate whether a step was to be used for that particular recipe. If the Boolean was false, that step, and the subsequent steps and step parameters, would be ignored. Alternatively, you could create 10 different versions of the recipe type, each with a varying number of steps.
Each recipe element must be linked to an existing DPE (Data Point Element). The status in the top right corner checks to verify if the DPE is properly defined. This status does not actively update and will only change to valid after closing the window, assuming what you have defined is a valid recipe type.
Once a recipe type is created, a recipe can be made by navigating to the recipe tab of the recipe management window. To create a new recipe, once again select the folded page icon. The actively selected recipe type in the recipe type dropdown is automatically assumed to be the type you wish to create, so make sure you have the correct one selected.
Next, you will be prompted to name your recipe before being redirected to the recipe editor window. Here, you will enter the values for each element of your recipe. Type, minimum, and maximum values are all pulled from the DPE configurations in Para and cannot be manually set here.
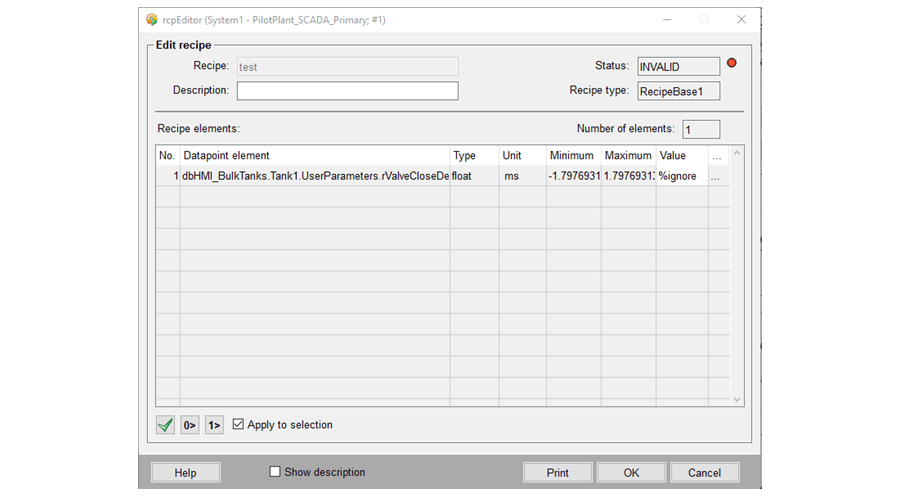
This window is also where you can alter how the elements are displayed. In our example, our client requested the recipe to be created in percentage values. To do this, we edited the panel script to sum the values of the elements with the word percent in them.
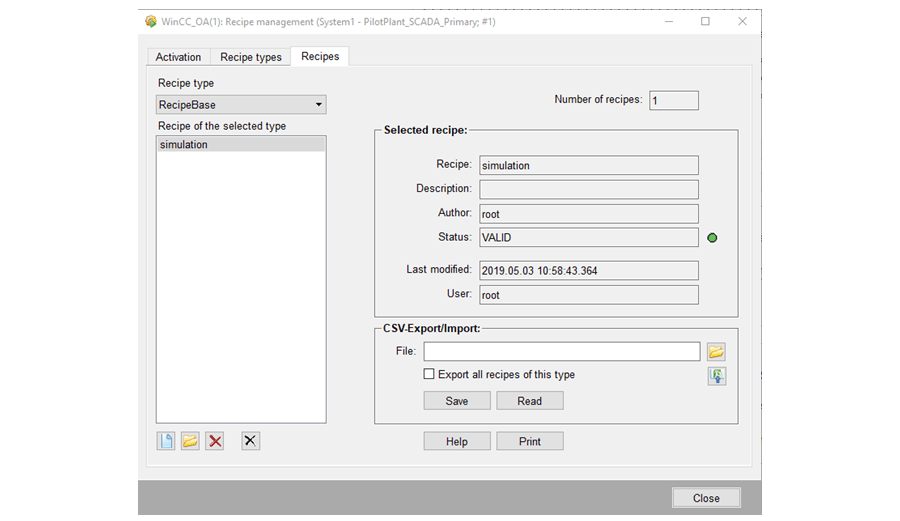
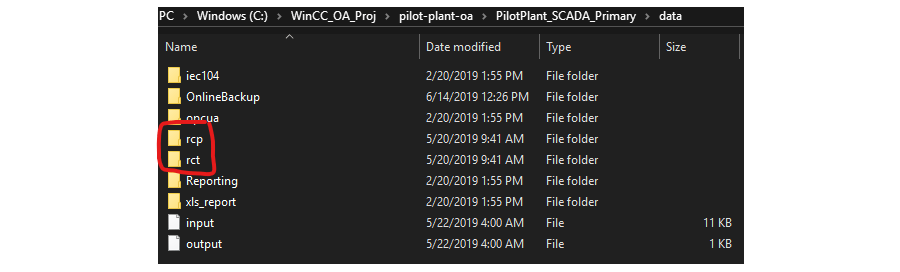
Note: Once recipe types (and recipes for that matter) are created, they can be exported and imported from Para using the CSV-Export/Import box. In order to do this, make sure you have the rct and rcp folders included in your project directory or you will get an ambiguous error that the file could not be created.
Creating and Customizing a Schedule:
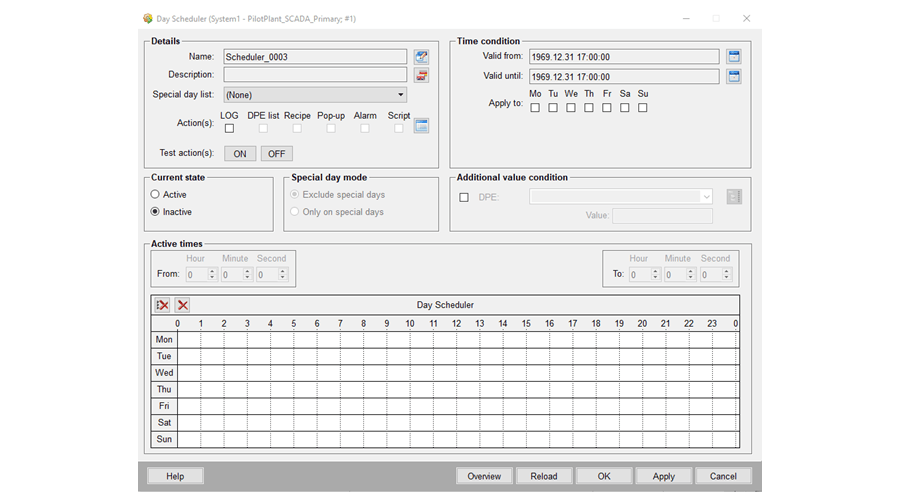
There are several different types of schedules available for use, including day, week, and free schedules. Within each schedule you have options as to what the schedule does when it is active. You may write to the LOG, set DPE values, activate a recipe, activate a popup, activate an alarm, or start a script running. Some actions can be utilized at the same time in a single schedule, while others can only be scheduled individually. Schedules can be set to occur sequentially as well. You can also set exceptions to schedules, such as a holiday when the schedule should not run.
For this project, we utilized the free scheduler since it was uncertain how long schedules (recipes) needed to be active. We set it up so that the PLC would tell WinCC OA when it was ready to activate and receive the next schedule/recipe.
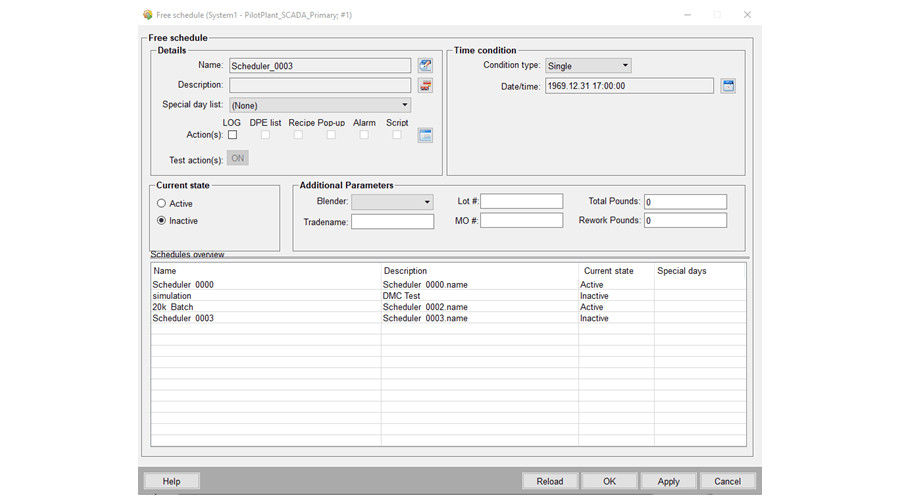
We customized the panel by adding additional fields for the parameters that needed to be included with each schedule. The blender dropdown looks at the fields within the recipe that were set to true or false based on which blenders were permitted for that recipe and then populates the list with those values. The recipe also takes the recipe pounds and multiply it by the percentages for each ingredient entry before passing that information to the PLC. The additional parameters are stored in a custom DPT that dynamically created and removed DPEs as schedules were created and completed.
We also added some additional validation on this panel when the OK or Apply buttons were pressed to check and verify that the selected blender was able to handle the total weight entered by the user.
Note: There are functions that are used in the panels that are very useful when making modifications. For example, sc_getAllPrograms(dyn_string_variable) returns all existing schedules. Other useful functions can be found in the sched.ctl file.
Note: There was some confusion over what the state “active” in scheduler means. Active does not indicate whether the schedule is executing within its allotted time period. Instead, it is essentially an enable of disable element that indicates whether the schedule is allowed to run or not