How to Set Up PC/IPC as NTP Server
Recently, a client reached out to DMC looking to improve their part traceability and simplify their future maintenance. Specifically, their Cognex camera timestamps were not synchronized with their Beckhoff IPC. This had the potential to cause traceability issues (inability to correlate a specific part to a specific picture) as well as make it more difficult for operators to determine where issues were occurring.
After trying different methods to solve this problem, I eventually realized that the simplest way was to set up an NTP server on the Beckhoff controller. When setting up the NTP server, I realized that this blog is fully transferable to setting up an NTP server on any PC/IPC, because the IPC is running a full version of Windows.
Below, I have laid out this process in Windows 10. Note: this should only be marginally different in older versions of Windows.
How to Set up an NTP Server
- Unblock UDP port 123 bidirectionally
- Why port 123?
- NTP implementations send/receive timestamps using port 123
- Remote into PC/IPC
- Typically, if you are networked to the PC/IPC, the easiest way to do this is to RDP into the PC/IPC. Alternatively, you can hook up a monitor and mouse to your PC/IPC.
- Navigate to Windows Firewall
- Click Inbound Rules
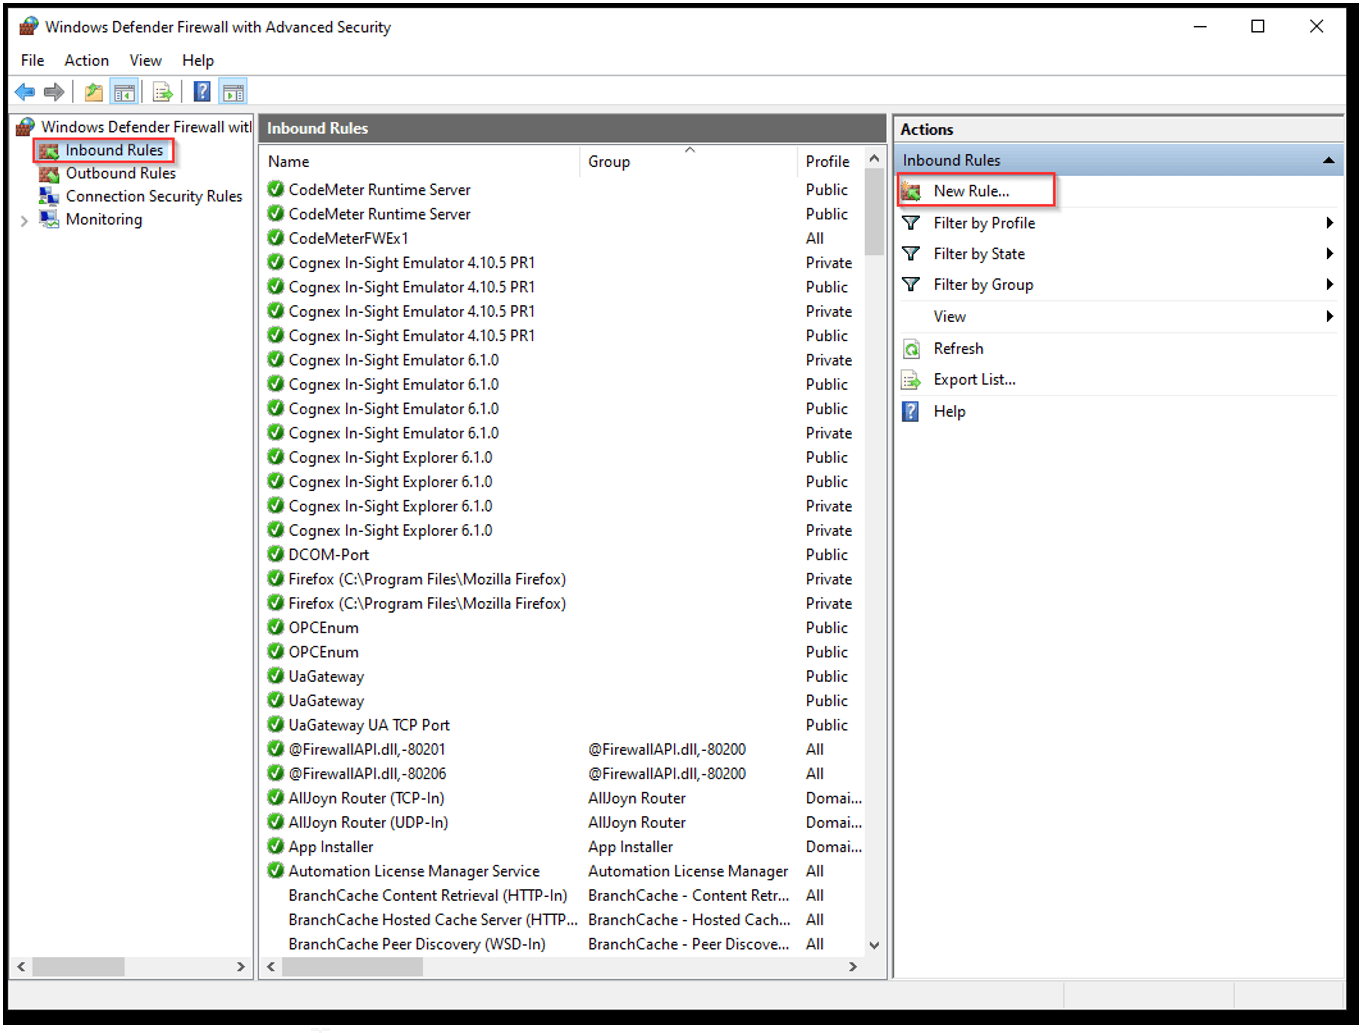
- Click New Rule
- Click Port
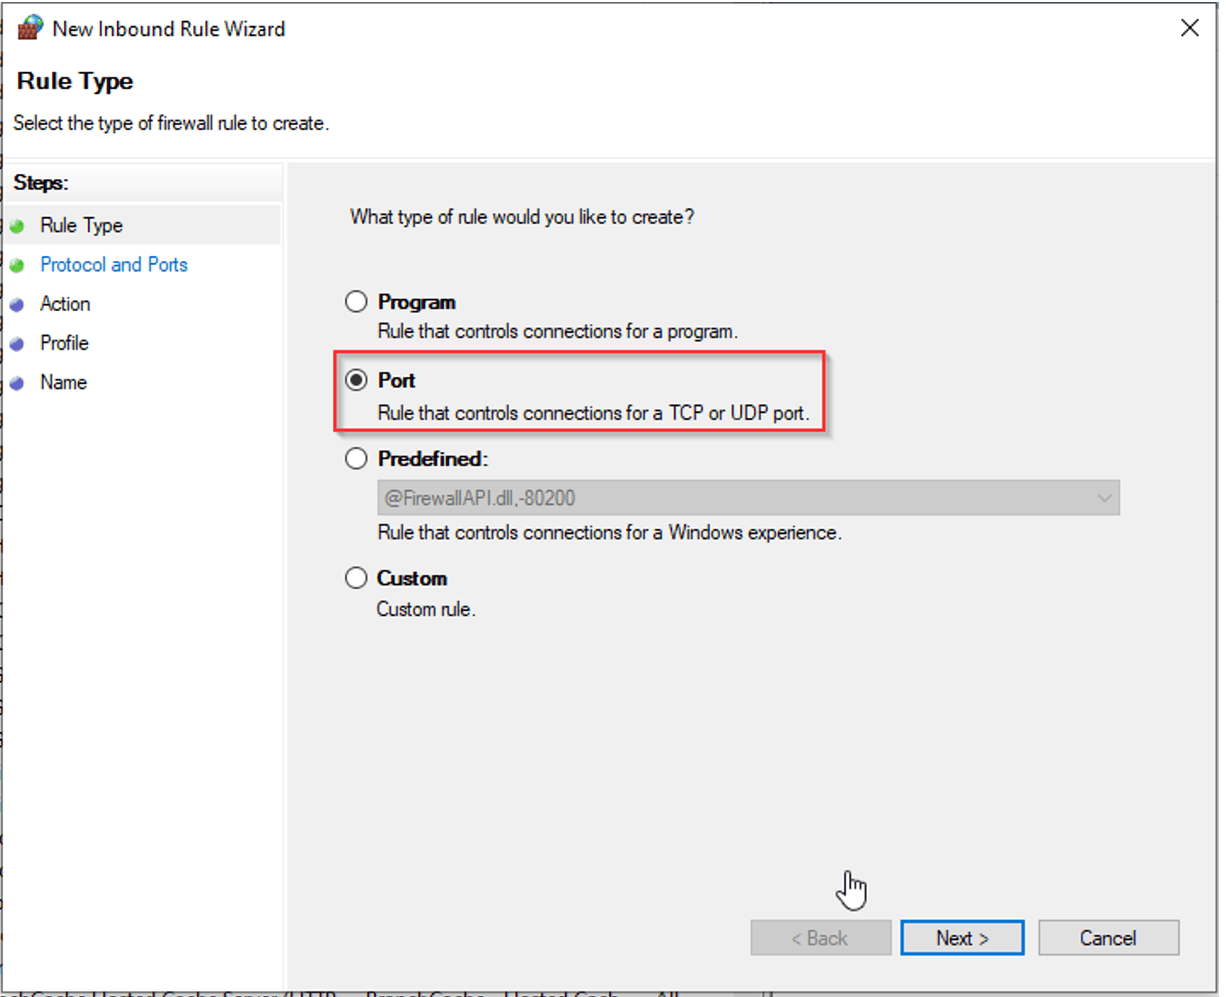
- Click Next
- Select UDP
- In Specific Local Ports: type 123
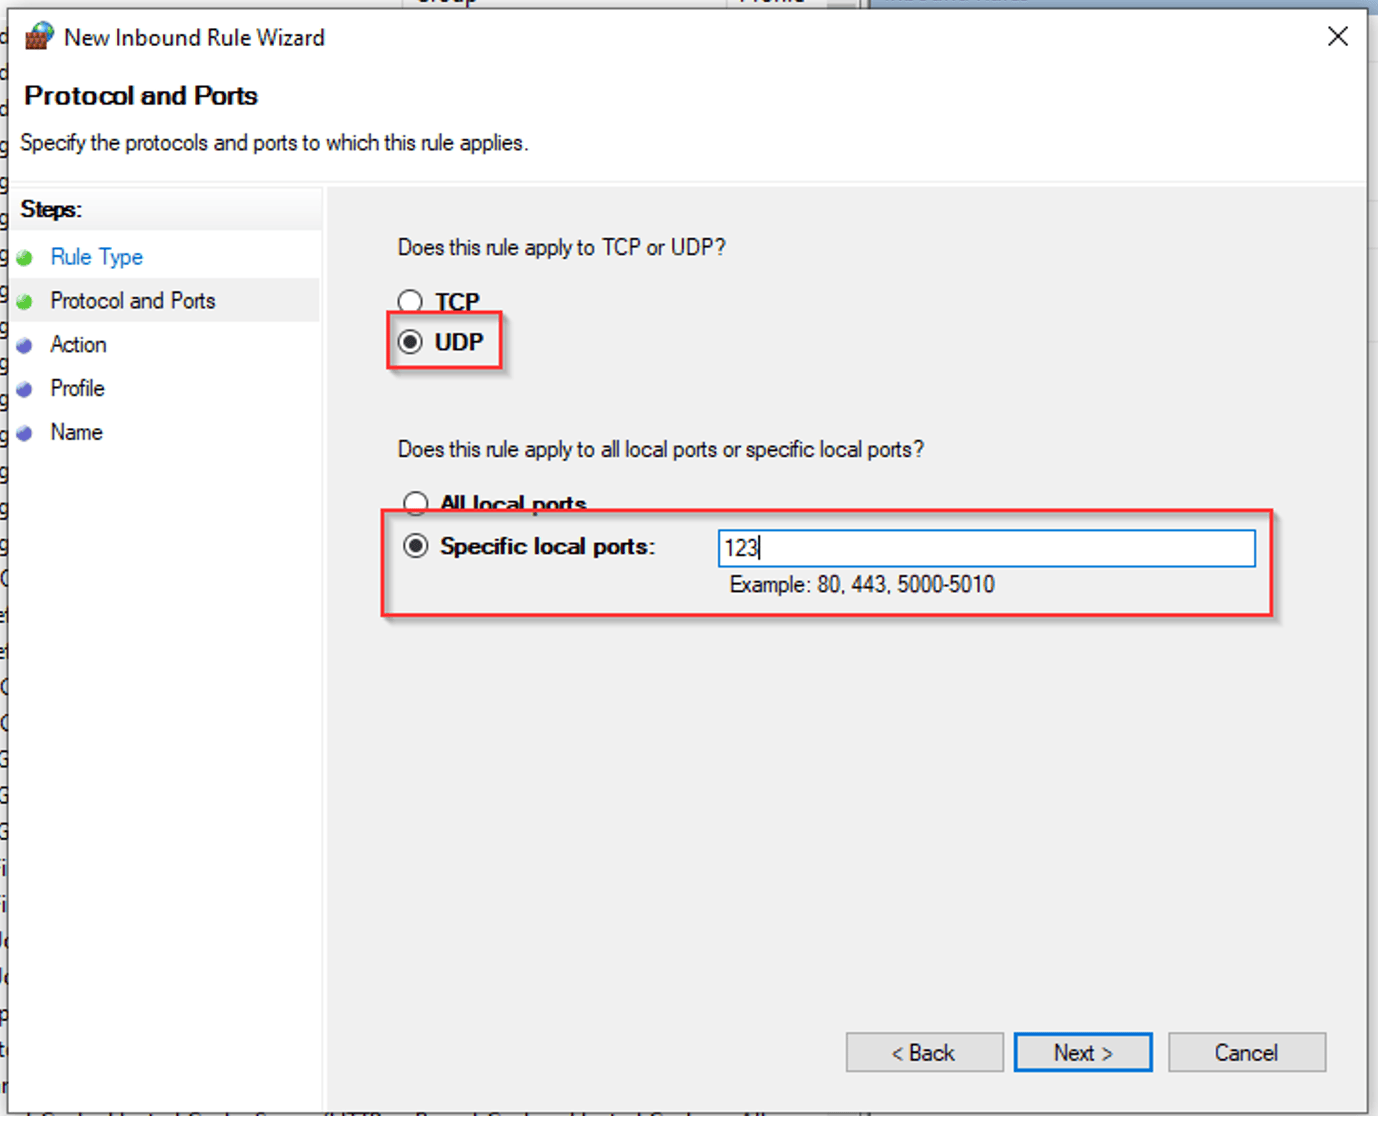
- Click Next
- Select Allow the Connection
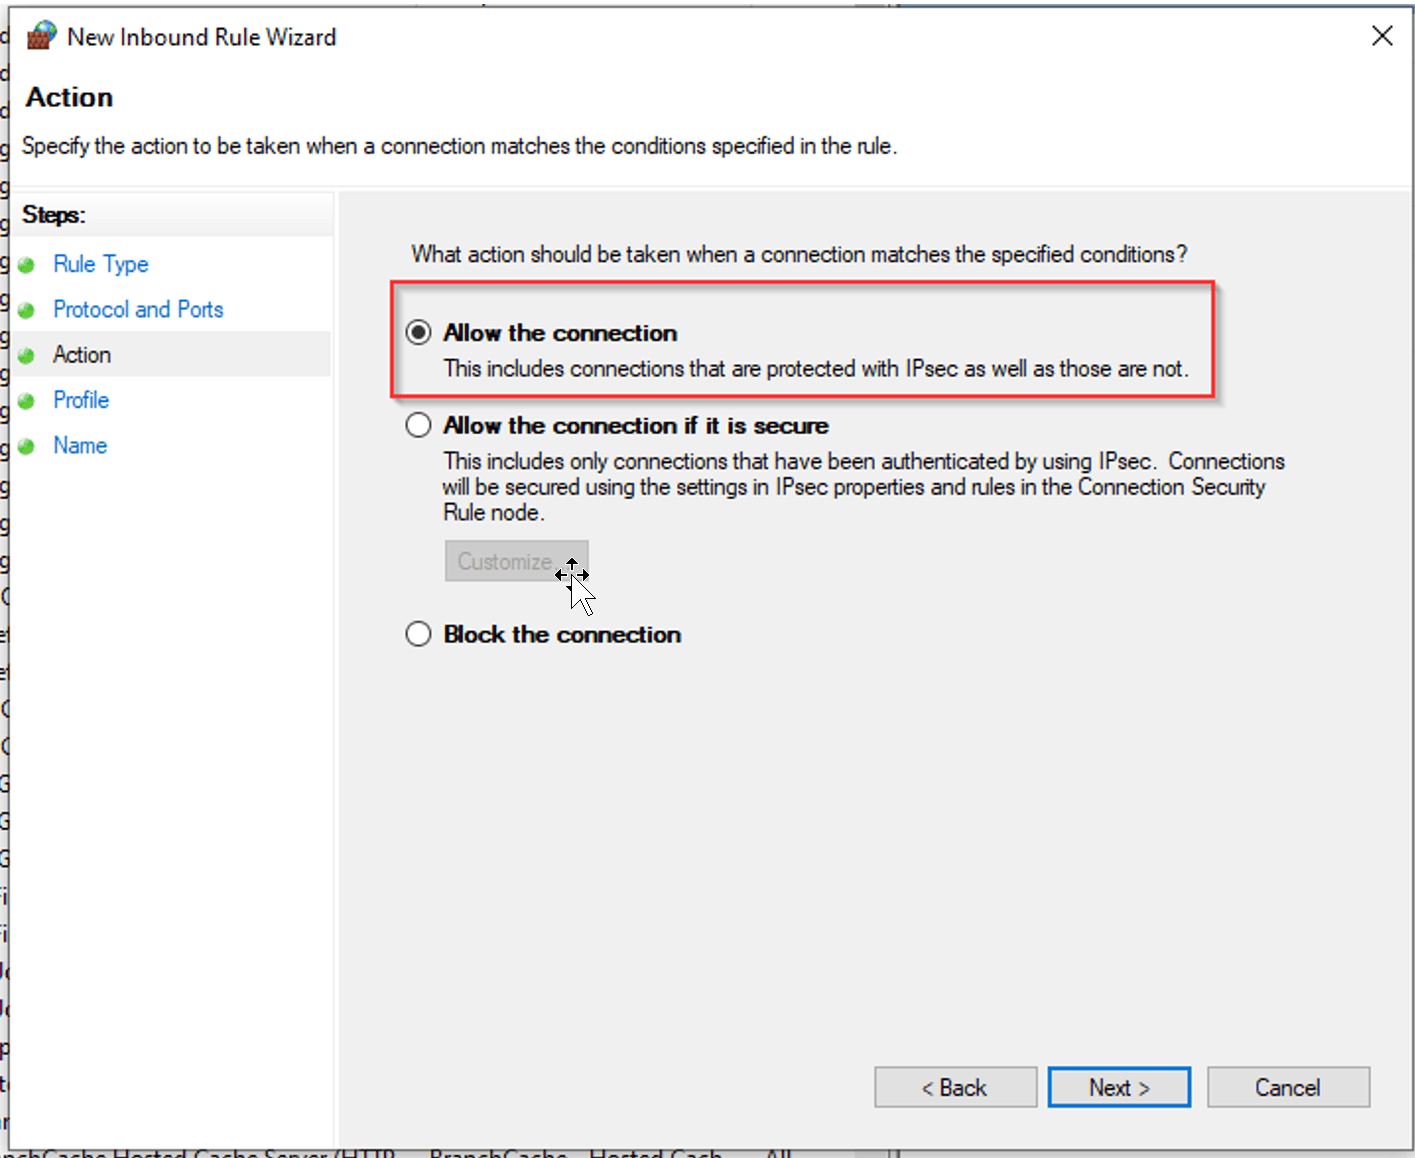
- Click Next
- Set up when the rule applies. For example, if you do not want the IPC to act as an NTP server when on a public network, you can deselect “Public.”
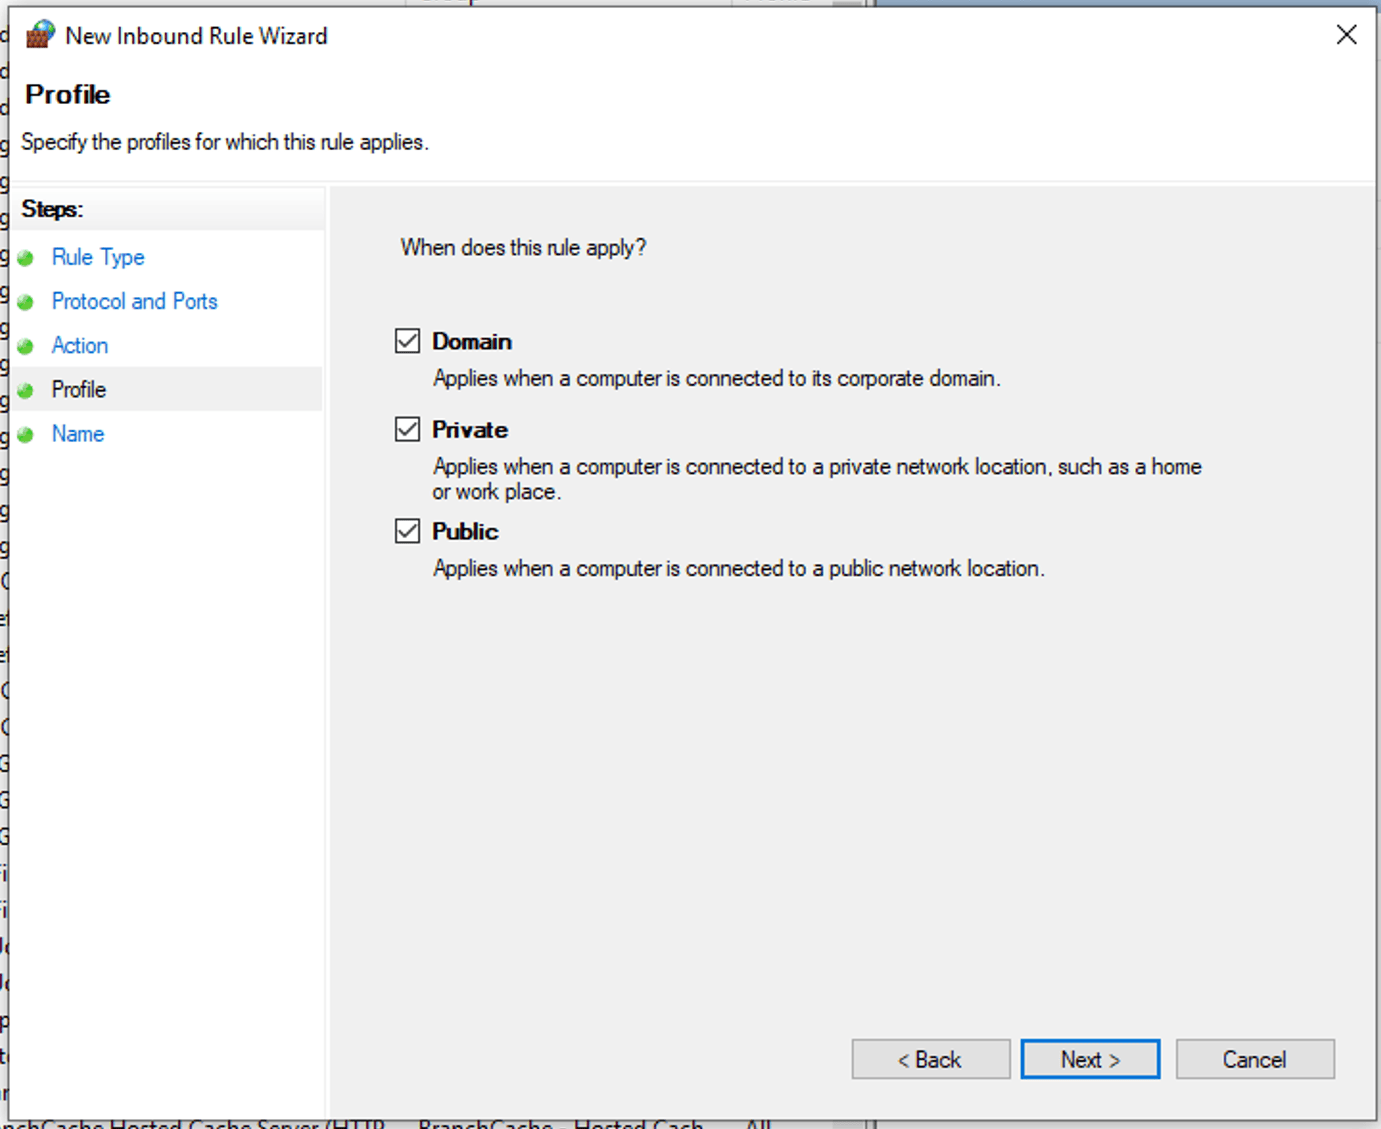
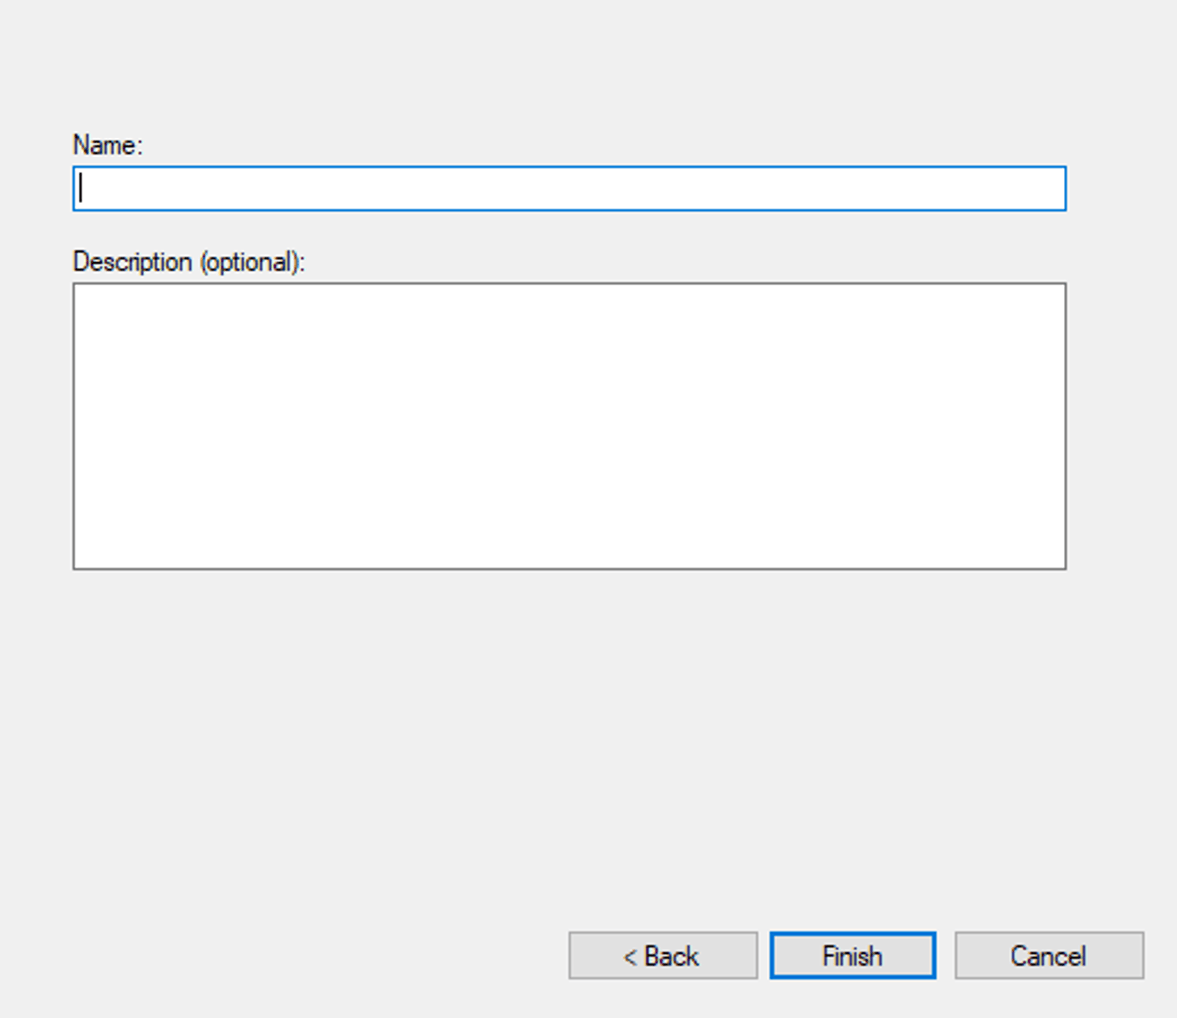
- Add a name and finish
- Note: it is important that we do the same thing for an outbound rule. Jump back to step C above and click Outbound Rules > New Rule
- Registry key change
- Update NTP service (W32Time) to be Automatic
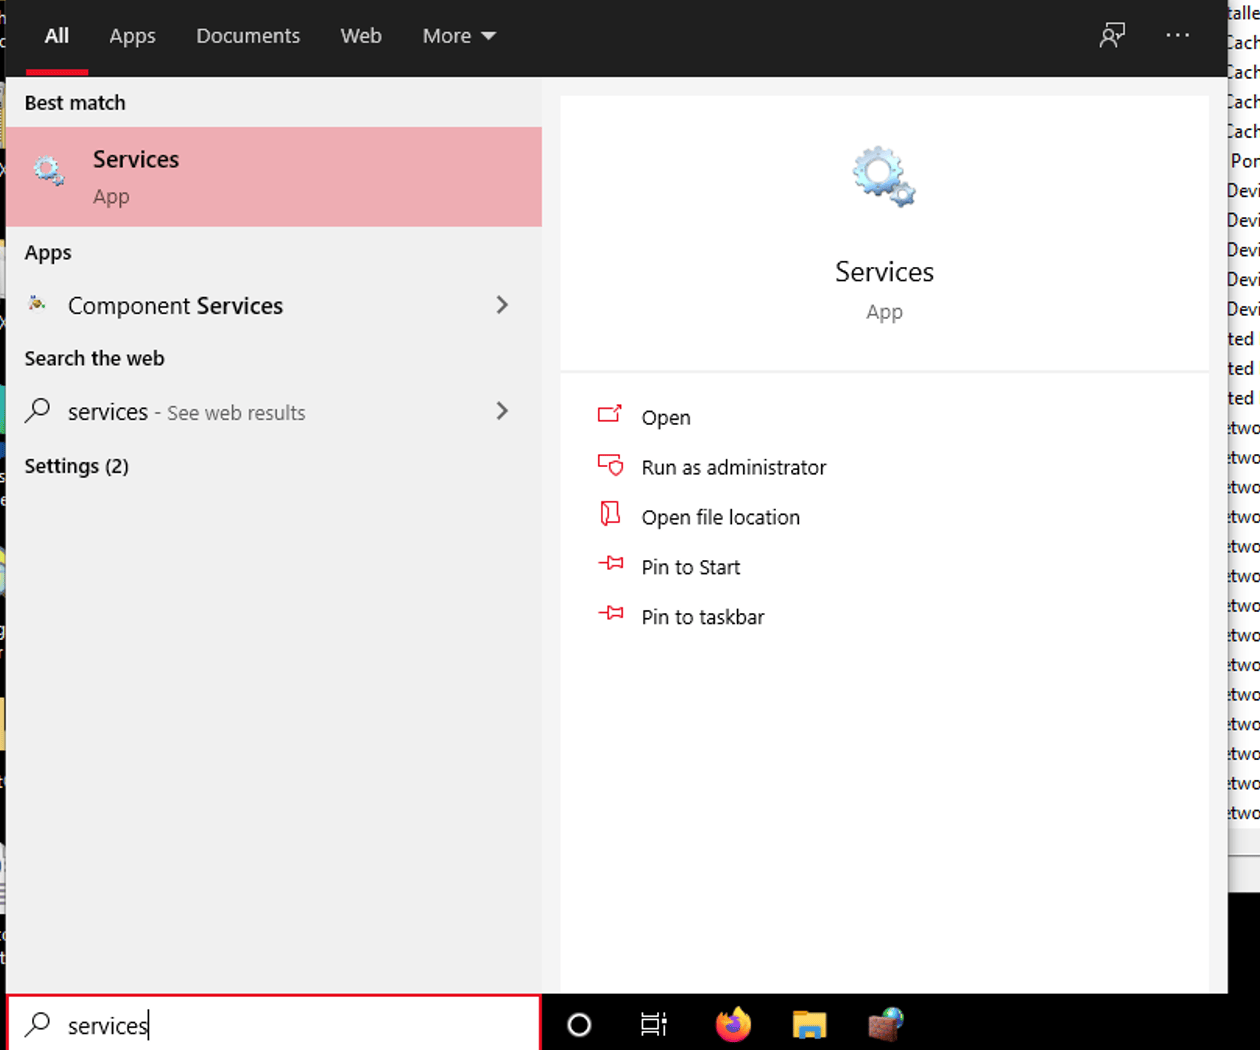
- Hit the Windows key and type in “services” in the bottom left search bar
- Navigate to the Windows Time service and change the startup type to Automatic
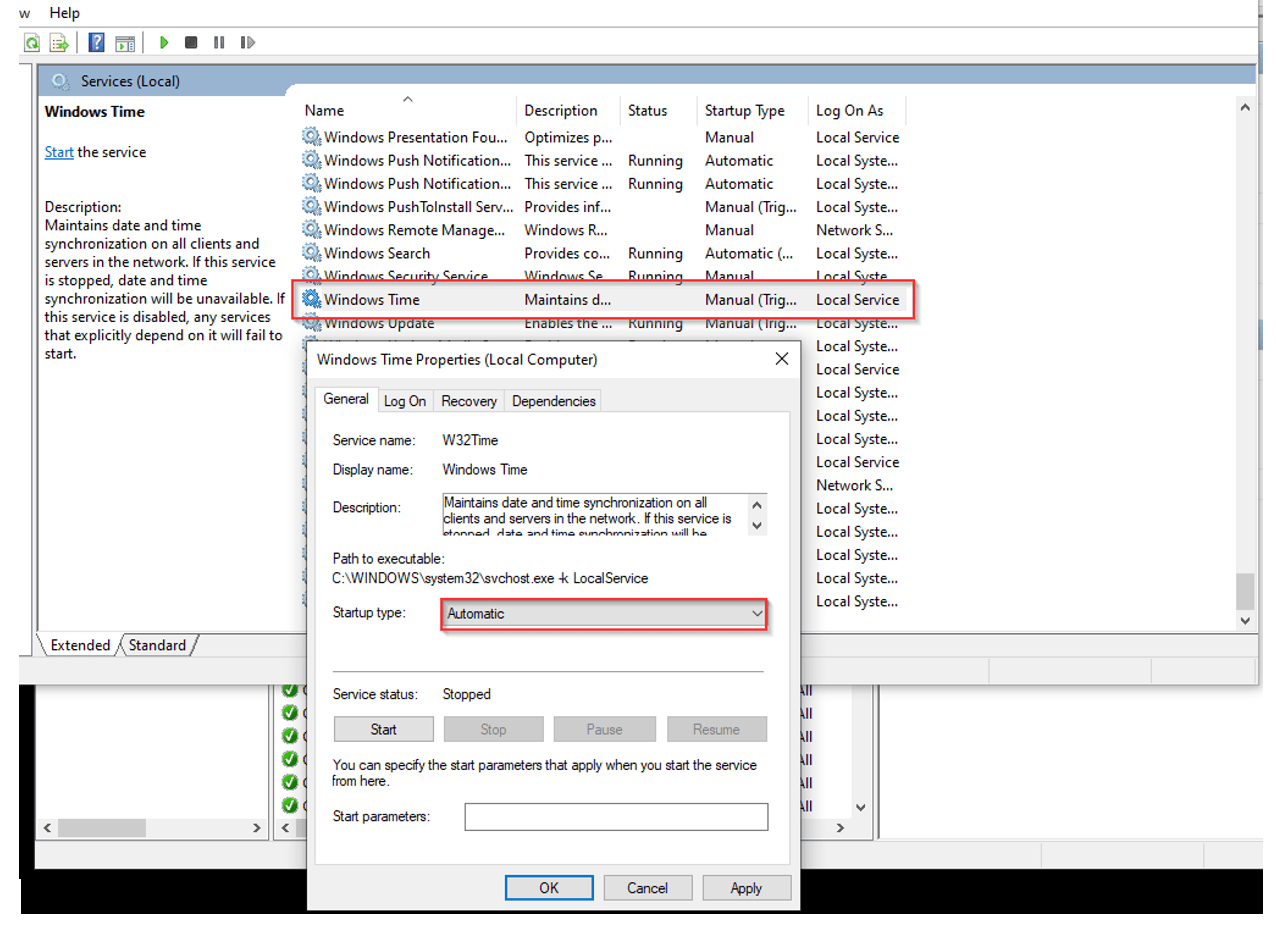
- Click OK and exit the application
- Check the registry to verify the service is enabled
- Navigate to the Registry Editor
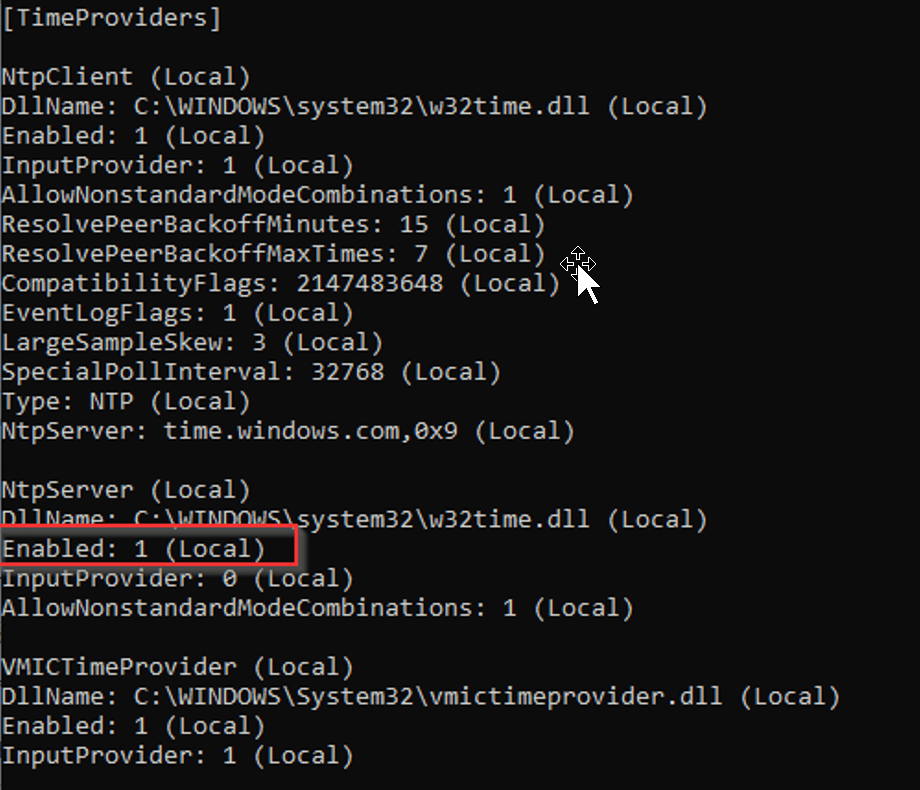
- Navigate to: Computer\HKEY_LOCAL_MACHINE\SYSTEM\CurrentControlSet\Services\W32Time\TimeProviders\NtpServer
- Go to Enabled
- Change Value data to "1"

- Command line update
- Open the command prompt as administrator and run w32tm /config /update
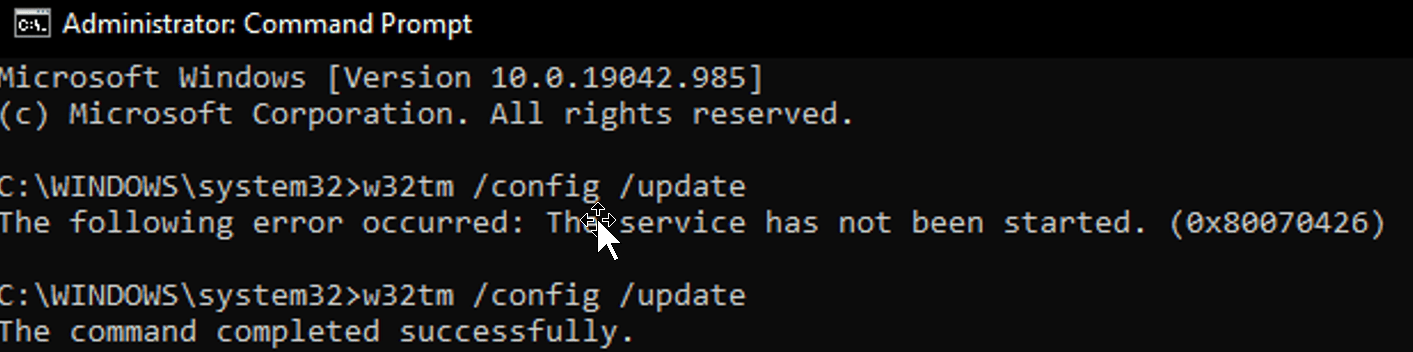
- Note: if the service has not been started, be sure to start the Windows Time service
- To verify this is working, open command prompt as administrator and run w32tm /query /configuration
Done! Now you can point your other devices at the PC/IPC IP address which will function as an NTP server.
Learn more about DMC’s expertise in Beckhoff programming and contact us today for your next project.
Comments
There are currently no comments, be the first to post one.