WinCC Unified is Siemens newest visualization system, offering a flexible solution for a wide range of applications.
As a web-based platform, this means that WinCC Unified's runtime environment can be accessed via any web browser, and clients do not need any special software. Additionally, the runtime environment can run on any system, from a simple machine control panel to a fully featured PC based solution.
Consequently, it provides a modern approach to machine visualization and will eventually replace many of Siemens existing HMI/SCADA solutions.
DMC is excited to have completed several projects utilizing WinCC Unified. This blog is the first of several to come, and it will outline tips and tricks from our recent experiences to serve as a “Getting Started” guide for WinCC Unified development.
The instructions below were generated using WinCC Unified V17 on a Windows 10 machine. There may be slight differences with different versions.
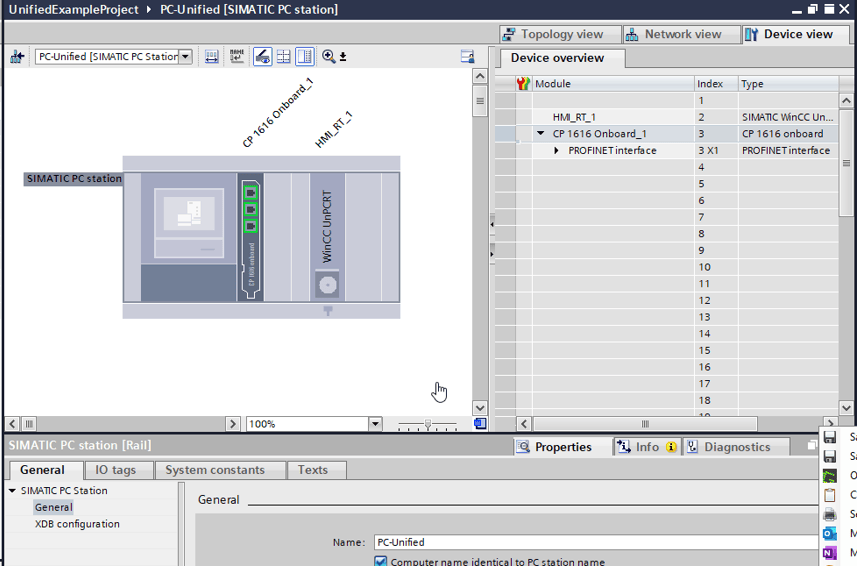
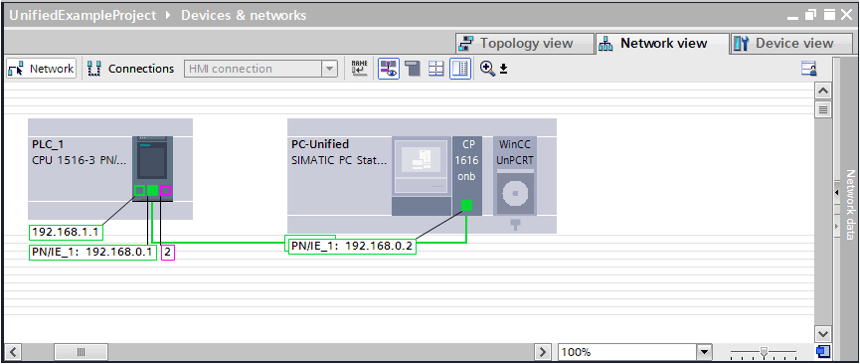
Hardware Configuration
After installing Unified and creating your project, the first step will be to add the relevant devices to your hardware configuration. This example uses a SIMATIC PC Station running Unified PC which is communicating with a Siemens S7-1516 CPU over Profinet.
Screens and Navigation
WinCC Unified facilitates the use of nested screen windows: enabling the user to create individual screen components and to reuse them in various arrangements.
For this example, we’ll use a basic layout including a header, navigation, and content panes. This can be adapted depending on the requirements of a given system.
To define the window structure, we create a base screen. This screen includes the individual Screen Window objects for the Header, Navigation, and Content sections of the page. Each Screen Window object is then linked to a separate content screen as shown in the figure below:
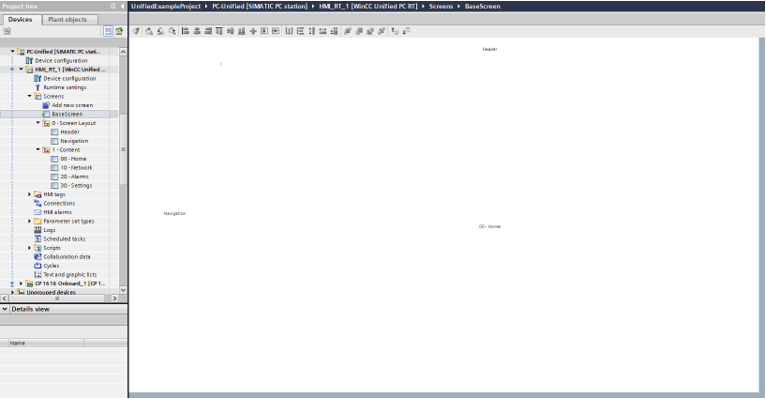
Buttons on the navigation pane are then used to update the active content screen. This provides the basic framework for the project.

WinCC Unified Configuration
Before deploying and testing your project for the first time, WinCC Unified requires a few configurations. These steps should be similar whether you’re deploying locally for testing or on your final runtime environment. First, run the WinCC Unified Configuration tool. If required, create a new certificate.
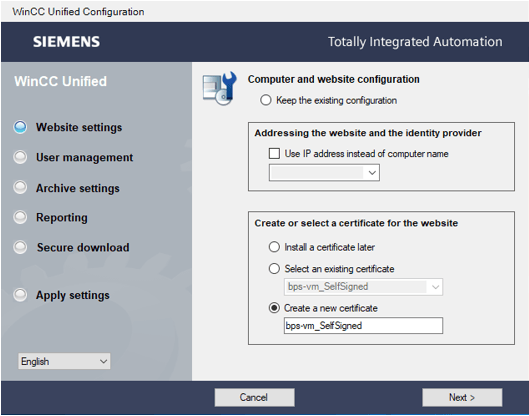
Unless you’re using an external UMC server, select the option to use the configuration downloaded via TIA portal.
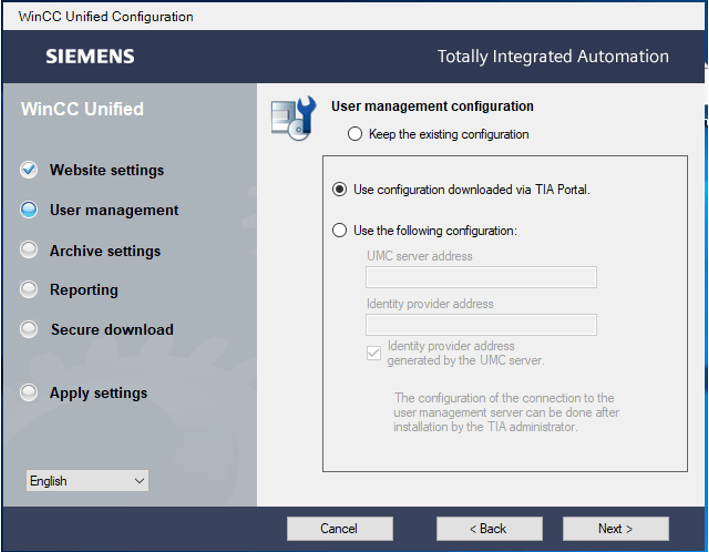
For most applications, the remaining settings can be left as defaults. Although, we do recommend that you activate secure download and assign a password before applying the settings.
User Management
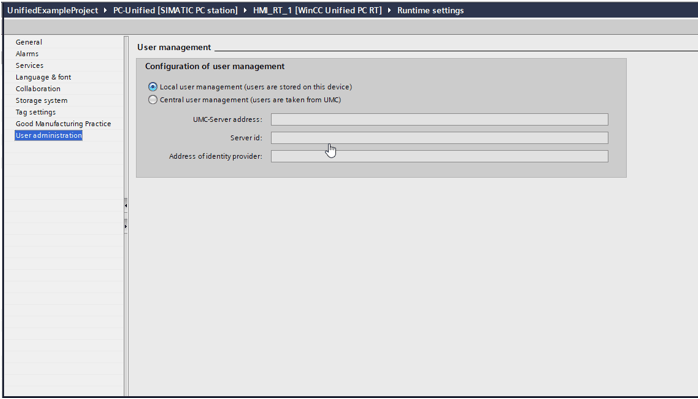
If you followed the steps above to define the user management configuration in TIA Portal, you’ll need to create at least one user before deploying. First, double check the runtime settings on the Panel to ensure it’s configured to use local user management in the project.
Then, navigate to the project security settings and create a new local user with your preferred credentials. At least one user must have the ‘HMI Administrator’ role selected. These settings will be deployed to the runtime environment after downloading the project.

Downloading Project
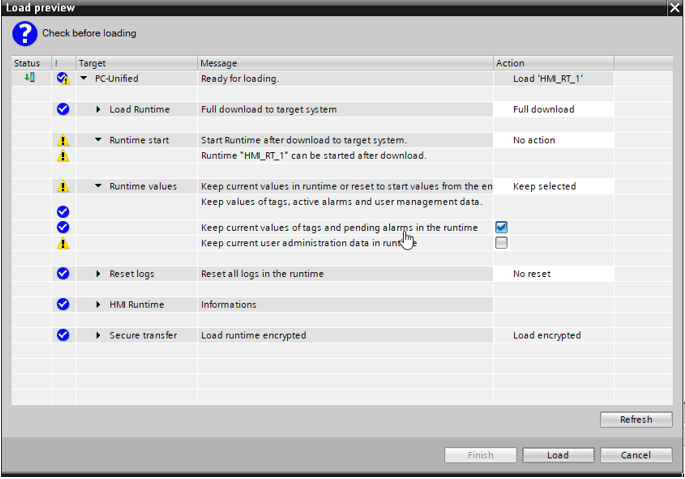
When you’re ready to test, download to the runtime environment from TIA Portal. On the initial download, uncheck the selection to keep the current user administration. This will ensure the new user data is transferred.
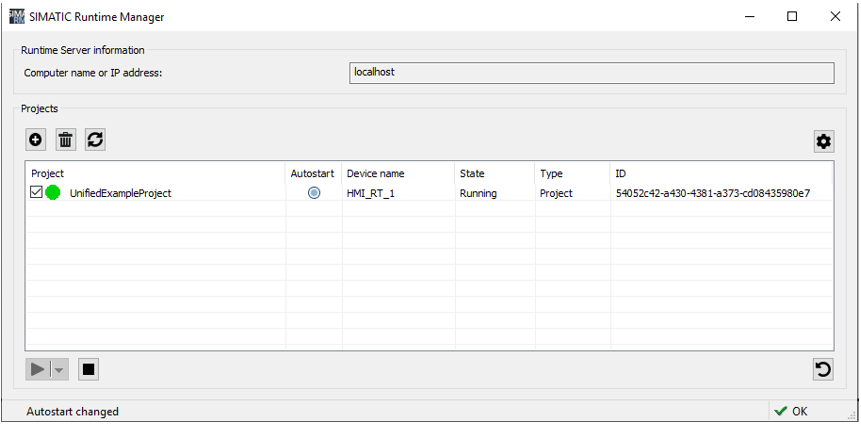
After the download, the new project should appear in the project list in SIMATIC Runtime Manager. This tool is used to start and stop projects on the Runtime Server and can also be used to access various administrative settings, including auto-starting a particular project after a power-cycle.
Accessing Runtime
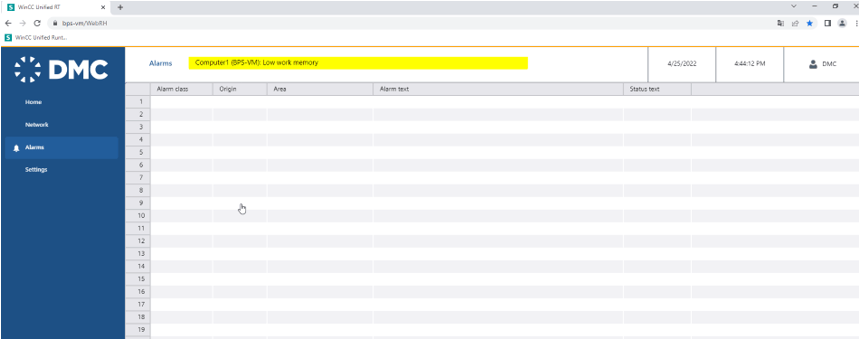
After the project is downloaded and running, it can be accessed via web-browser. Open a browser and navigate to the associated server address. In this case, the server is running on my local host. The project can be accessed via the home screen or by navigating directly to “server/WebRH.”
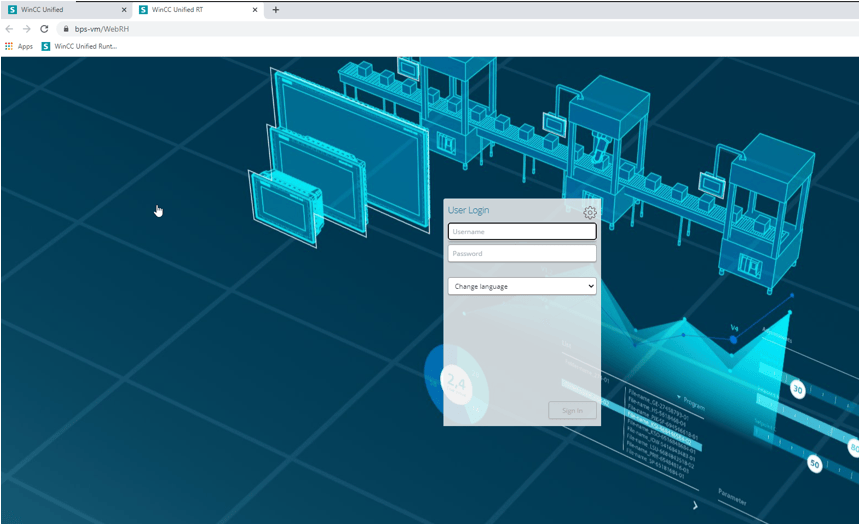
Login using the credentials you defined in the previous step, andmake sure you test that your project is functioning as desired. Congratulations, you did it!
Troubleshooting
If you’re having issues accessing the runtime environment following deployment after completing the steps outlined above, here are a few additional troubleshooting tips.
Enable Windows Features
WinCC Unified runtime utilizes several dependencies — which should be installed as part of the installation process. Check that the relevant features are enabled by following this Siemens support note.
Certificate Installation
A root certificate is used to allow users to establish a secure connection to the WinCC Unified runtime environment. To enable connections, this certificate needs to be installed and configured as a trusted authority. The specific steps vary, depending on the browser being utilized, and Siemens provides some additional details in the runtime manual.
DMC has been recognized as a Siemens WinCC Specialist. Learn more about our WinCC expertise and contact us for your next project.