WinCC OA - How to Create a Microsoft SQL Server Install for NextGen Archiving
This two-part blog series is intended to be a step-by-step overview on how to set up and utilize a MS SQL Server and WinCC OA's NextGen Archive (NGA). Information for a general setup exists via the WinCC OA Documentation (see Further Reading/Links), but this walkthrough aims to be more detailed and explicit in the necessary steps.
- How to Create a Microsoft SQL Server Install for NextGen Archiving
- How to Configure NextGen Archiving in WinCC OA to use a Microsoft SQL Server
Table of Contents:
- Notes/Prerequisites
- MS SQL Server and Database
- MS SQL Server and Installation
- Basic Installation
- Custom Installation
- MS SQL Server Configuration
- SQL Server Configuration Manager
- Microsoft SQL Server Management Studio
- Database Creation
- Further Reading/References
1. Notes/Prerequisites
Required programs:
- Microsoft SQL Server (Installation instructions in part 2a)
- Microsoft SQL Server Management Studio
- Microsoft SQL Server Configuration Manager (installed alongside Microsoft SQL Server)
This demo was implemented using:
- WinCC OA 3.18 P006
- Microsoft SQL Server 2022 Express
- NOTE: Other versions of MS SQL may work with NGA, but it has not yet been verified by DMC.
- Microsoft SQL Server Management Studio 18
- Windows 11
Assumptions:
- Proper licensing for NGA is configured
- The OS user has Windows administrator privileges
2. MS SQL Server and Database
Back to Table of Contents
- Begin the SQL server installation
- Download Microsoft SQL Server setup application from Microsoft's SQL Server Downloads page
- Run the application and proceed with the Basic or Custom installation.
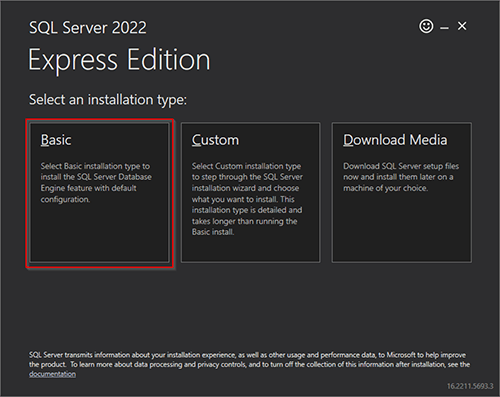
Basic Installation
If implementing the basic installation:
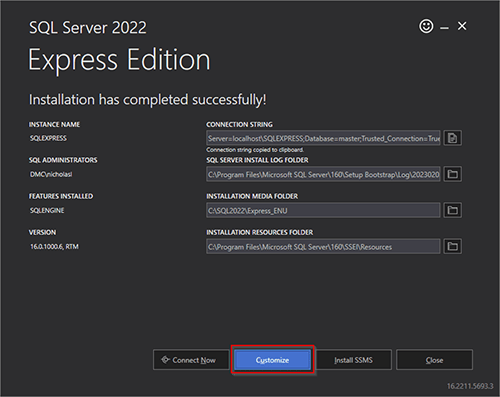
2. On the installation confirmation screen, select the Customize option
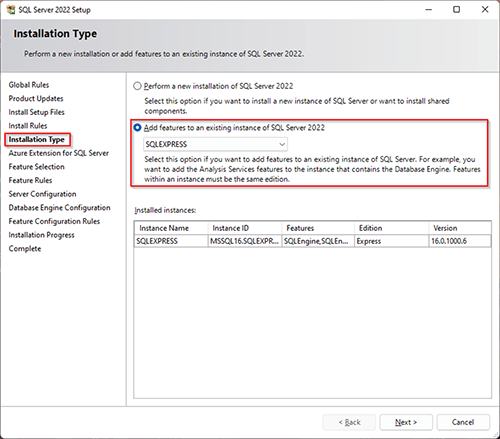
3. Configure the “Installation Type” Window properties
- Select the Add features to an existing instance of SQL Server <Year> option
- Select the server you wish to use for NGA connection
NOTE: If a specific server setup window is not specified, feel free to use the default options
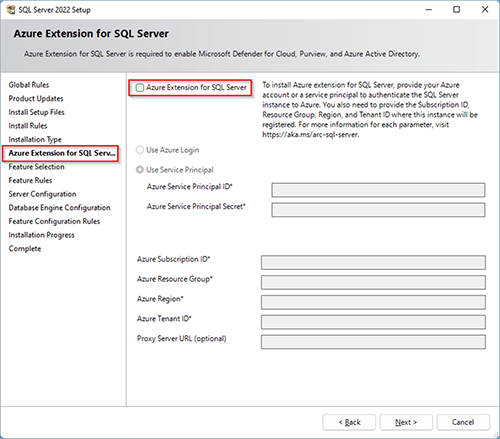
4. Configure the “Azure Extension for SQL Server” Window properties
- Un-check the Azure extension for SQL Server option
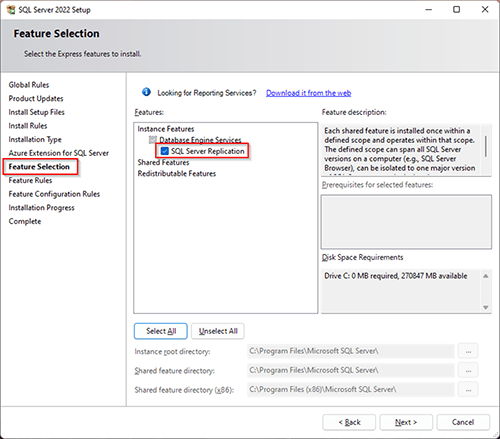
5. Configure the “Feature Selection” Window properties
- Select the SQL Server Replication option
- NOTE: Installing this option is the primary purpose of customizing the server
- Click Next to begin installation
Custom Installation
If implementing the custom installation, follow the steps outlined in the WinCC OA MS SQL® Server Installation documentation.
Back to Table of Contents
Steps for configuring the SQL server will take place in both the SQL Server Configuration Manager and Microsoft SQL Server Management Studio programs (installed in 2.1 MS SQL Server Installation)
SQL Server Configuration Manager
Within the SQL Server Configuration Manager…
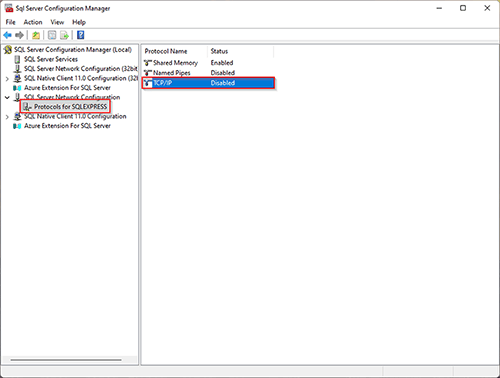
- Configure the Server’s TCP/IP Properties
- Navigate to “SQL Server Network Configuration/Protocols for <SERVER NAME>”
- Double click the TCP/IP item in the “Protocol Name” column to open the “TCP/IP Properties” window
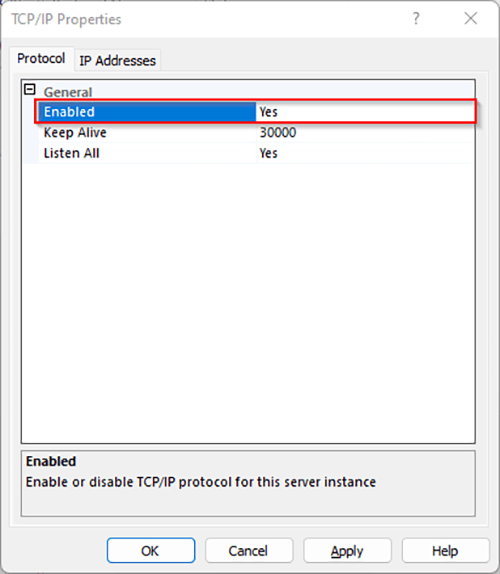
- In the “Protocol” tab, toggle the Enabled option to Yes
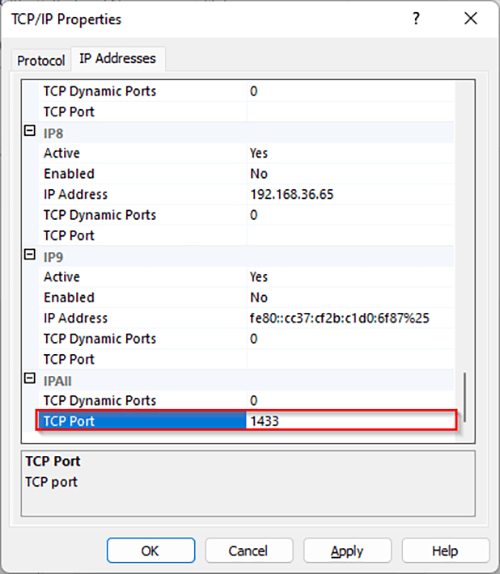
- In the “IP Addresses” tab, specify 1433 for the IPAll/TCP Port option
- Click OK to apply and close the window
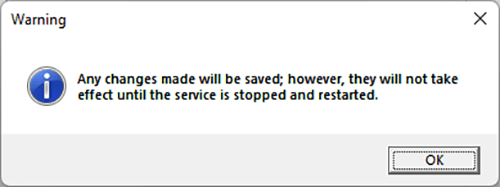
NOTE: A warning will appear indicating that changes will be applied only after the server is restarted
2. Restart the SQL Server
- Navigate to “SQL Server Services”
- Right click the “SQL Server (<SERVER NAME>)” row and click Restart

- Download Microsoft SQL Server setup application from Microsoft’s SQL Server Downloads page
- Run the application and proceed with the Basic or Custom installation
Microsoft SQL Server Management Studio
Within Microsoft SQL Server Management Studio…
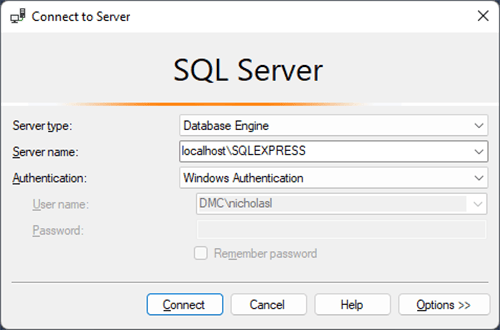
1. Connect to the SQL Server
- Click the “Connect Object Explorer” icon within the “Object Explorer”
- Specify the following parameters in the “Connect to Server” window and click Connect
|
Parameter
|
Value
|
|
Server type
|
Database Engine
|
|
Server name
|
<host>/<SERVER NAME>
|
|
Authentication
|
Windows Authentication
|
NOTE: If the “Custom” SQL Server installation was implemented, then connection can be made using the “SQL Server Authentication” method and the specified credentials

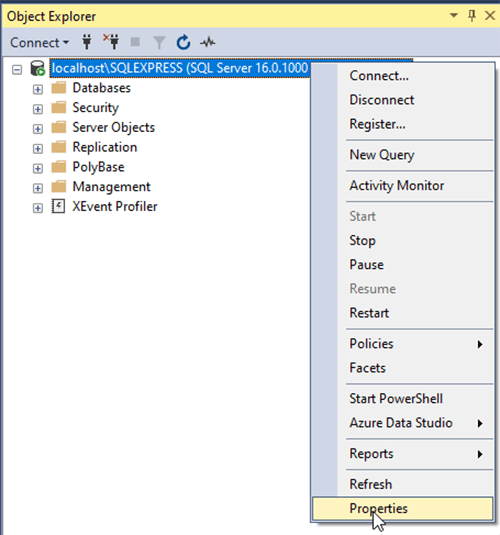
2. Enable dual authentication mode
- Right click the server name in the “Object Explorer” and select Properties
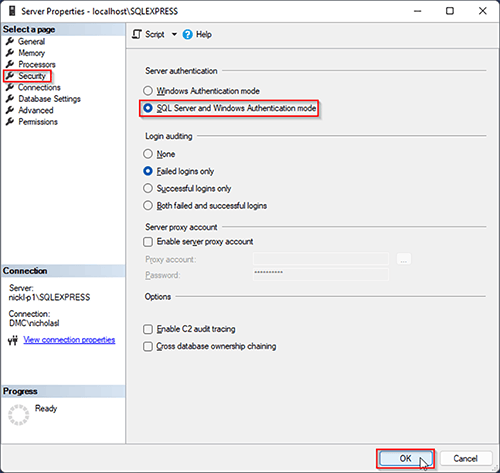
- Navigate to the “Security” page in the “Select a Page” menu
- Under the “Server Authentication” section, select SQL Server and Windows Authentication Mode option
- Click OK to apply changes
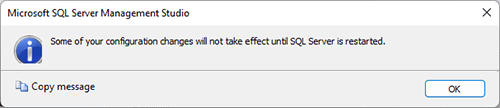
- NOTE: A warning will appear indicating that changes will be applied only after the server is restarted
- Restart the SQL Server via the SQL Server Configuration Manager using the steps outlined in Step 2 of the SQL Server Configuration Manager instructions
3. Configure the System Administrator credentials
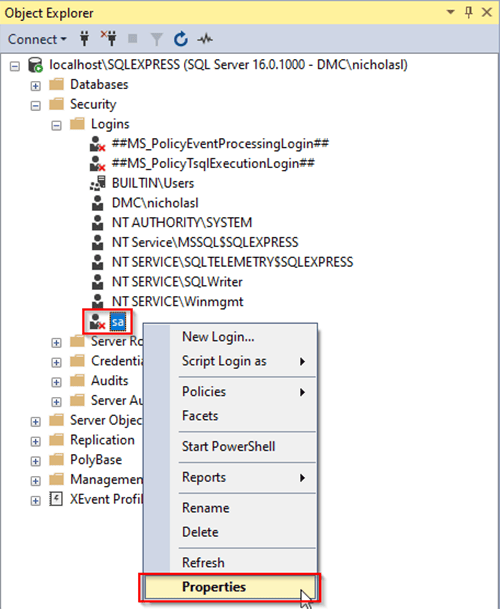
- Under the “Object Explorer”, navigate to “<Database Name>/Security/Logins”
- Right click the sa (System Administrator) option and select the Properties option
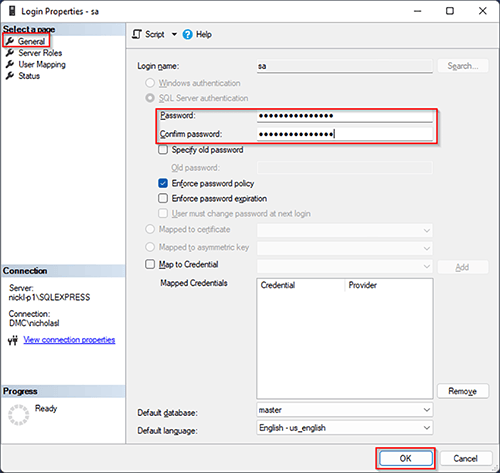
- Under the “General” page of the Login Properties window, specify a password in the Password: and Confirm password: fields
- For this demonstration, I’ll use the password $martPeople3xpertSolutions
- Optional: Toggle the other general properties as needed or deemed necessary by your security need
- Click OK to apply changes
4. If a red “X” appears next to the sa user in the “Object Explorer” , then enable sa (System Administrator) login
- Within the “Login Properties” window from step 3, navigate to the “Status” page
- Under the Settings/Login: option, select Enabled
- Click OK to apply changes
- NOTE: You may need to refresh the Object Explorer to see the red “X” disappear


5. Optional: Create a WinCC OA user account
NOTE: This step can be done now, or the user can be automatically created upon database generation (recommended)
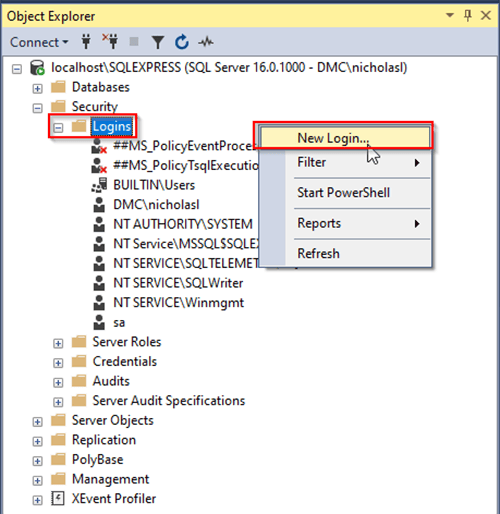
- Under the “Object Explorer”, navigate to “<Database Name>/Security/Logins”
- Right click the “Logins” folder or any of its elements and select the New Login… option
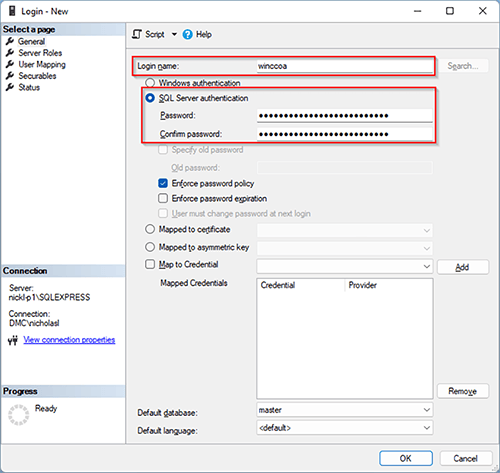
- Within the “General” page
- Click the SQL Server authentication radio button
- Specify the user’s name in the Login name: field
- For this demonstration, I’ll use the username winccoa
- Specify the user’s password in the Password: and Confirm password: fields
- For this demonstration, I’ll use the password $martPeople3xpertSolutions
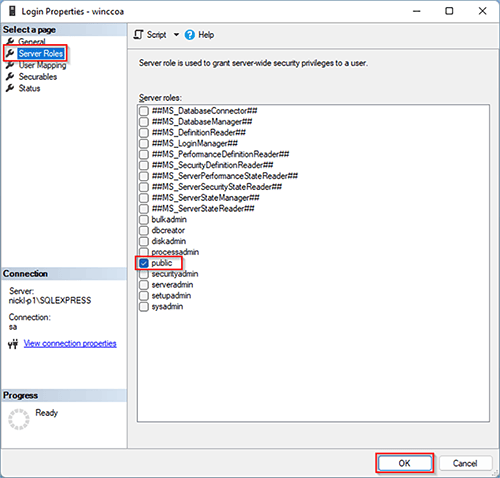
- Within the “Server Roles” page
- Check the public server role
- Click OK to apply changes
Back to Table of Contents
The database used for NGA will be auto generated using files that can be found in OA’s base project
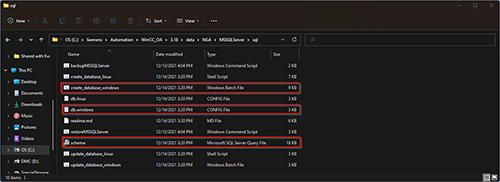
1. Locate and copy the required database generation files
- Navigate to the “<winccoa>/data/NGA/MSSQLServer/sql folder” within Windows Explorer
- Where <winccoa> is the base WinCC OA project
- The default install location of the base project is typically “C:\Siemens\Automation\WinCC_OA\3.18”
- Therefore, the path I’m using is “C:\Siemens\Automation\WinCC_OA\3.18\data\NGA\MSSQLServer\sql”
- Copy the relevant files
- schema.sql
- db.windows.config
- create_database_windows.bat
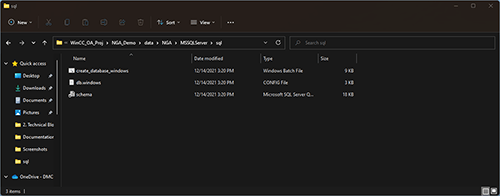
- If your NGA project already exists, copy the relevant files into the same directory in your project
- You may need to manually create the relevant folders for “<project>/data/NGA/MSSQLServer/sql”
- It should be noted that the files can be copied anywhere, but it’s organizationally preferable to use the location specified above
- If you haven’t created a project yet, copy the files into a temporary location and move said files into your project upon project creation (outlined in the 2a. Project Setup instructions)
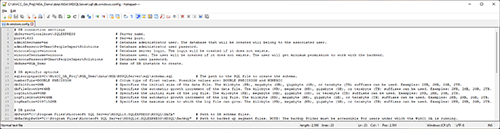
2. Modify the config file parameters
NOTE: The db.windows.config file will be used to specify the parameters needed to auto generate the appropriate database
- Open the db.windows.config file and with your favorite text-editing tool like Notepad or Notepad++
- Modify the parameters as needed.
|
Parameter
|
Modify?
|
Description/Notes
|
|
dbServer
|
YES
|
This should match the name of the server as specified in the MSSMS’s “Connect to Server” window and the Object Explorer.
|
|
Port
|
MAYBE
|
The default MS SQL server port is 1433. If you specified a different port during the MS SQL Server Configuration (step 1d), then use that value here
|
|
adminUsername
|
|
If using the “sa” user as the system administrator, this field should not change
|
|
adminPassword
|
YES
|
Modify this field using the System Administrator password specified during the MS SQL Server Configuration (step 3c)
|
|
winccoaLogin
|
MAYBE
|
If desired, modify the winccoa login/username. If already configured, then specify the name here. If not yet configured, then a user will be auto generated.
|
|
winccoaPassword
|
YES
|
If desired, modify the winccoa password. If already configured, then specify the password here. If not yet configured, then a user will be auto generated.
|
|
dbName
|
MAYBE
|
This will be the name of the to-be-generated database. You can use the default name or specify something a bit more descriptive.
|
| |
|
|
|
sqlscriptpath
|
YES
|
This will be the file path of the schema.sql file duplicated in steps 1b and 1c. If the file was not duplicated, you may reference the corresponding file in the base OA project (i.e. <winccoa>/data/NGA/MSSQLServer/sql/schema.sql)
|
|
numberType
|
MAYBE
|
Can be left as default. Change if desired.
|
|
dbInitSize
|
MAYBE
|
Can be left as default. Change if desired.
|
|
dbFileGrowth
|
MAYBE
|
Can be left as default. Change if desired.
|
|
logInitSize
|
MAYBE
|
Can be left as default. Change if desired.
|
|
logFileGrowth
|
MAYBE
|
Can be left as default. Change if desired.
|
|
logMaxSize
|
MAYBE
|
Can be left as default. Change if desired.
|
| |
|
|
|
dbPath
|
YES
|
This will be the physical location where the database is stored. The folder location specified must be created if it is not so already. You may opt to use the standard SQL database storage location or locate it in a more accessible location.
|
|
dbBackupPath
|
YES
|
This will be the physical location where the database backup is stored. The folder location specified must be created if it is not so already. You may opt to use the standard SQL database storage location or locate it in a more accessible location.
It should be noted that, according to the db.windows.config file comments, “The backup folder must be accessible for users under which the WinCC OA is running.”
|
3. Generate the SQL database
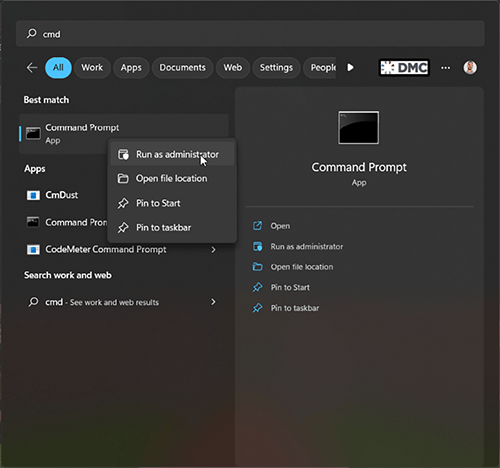
- Run the Windows Command Prompt as administrator
- In the Windows search bar, search “Cmd”
- Right click the Command Prompt application and select “Run as administrator”
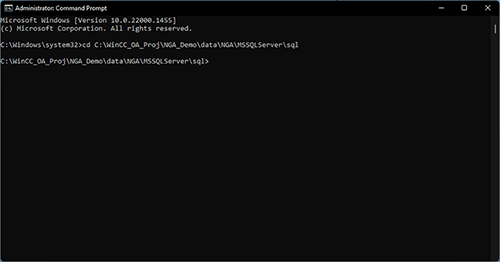
- Navigate to the location of the create_database_windows.bat file (in the “<project>/data/NGA/MSSQLServer/sql” folder)
- Use cd <folder> in the command prompt to navigate to the appropriate directory
- Run the create_database_windows.bat file
- Run the create_database_windows prompt to generate the appropriate database
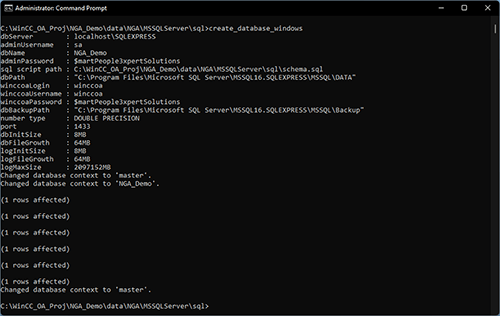
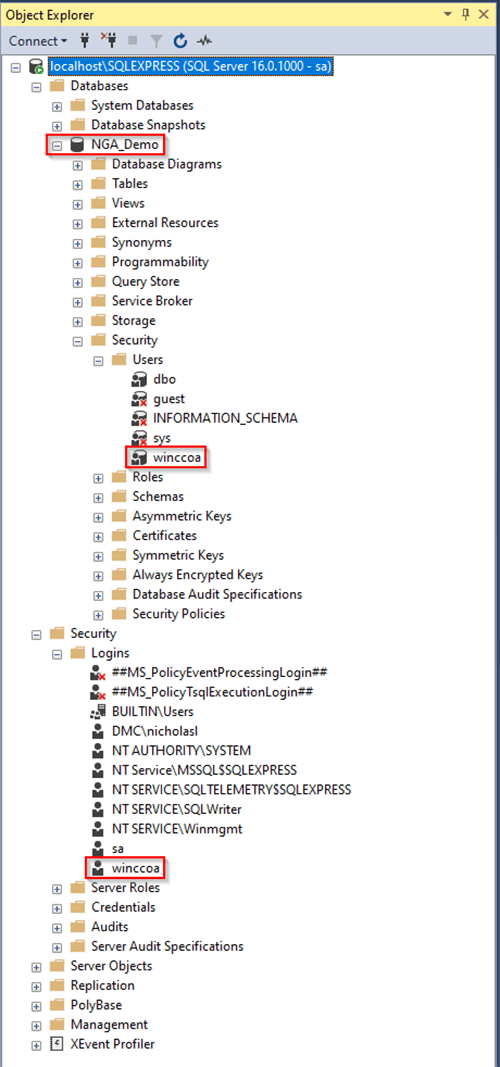
4. Verify that the appropriate database and users were created
- Within Microsoft SQL Server Management Studio, you should see:
- The newly created database
- The generated server-level winccoa user (if it did not already exist)
- The generated/mapped database-level winccoa user
3. Further Reading/References
Learn more about our Manufacturing Automation and Intelligence expertise and contact us for your next project.
Comments
There are currently no comments, be the first to post one.