When working on-site recently, I was challenged with configuring translations for several Siemens PLC & HMI projects. After many rounds of trial and error, I was finally able to track down every location where text was being stored in my project. Eventually, I was able to not only display all of my translations appropriately, but also eliminate all the default “Text” boxes that kept reminding me I still had some mysterious untranslated text lists.
The following guide walks through all the steps required to configure your Siemens project for language translations and reveals several locations that text lists may be hiding on your PLC and HMI.
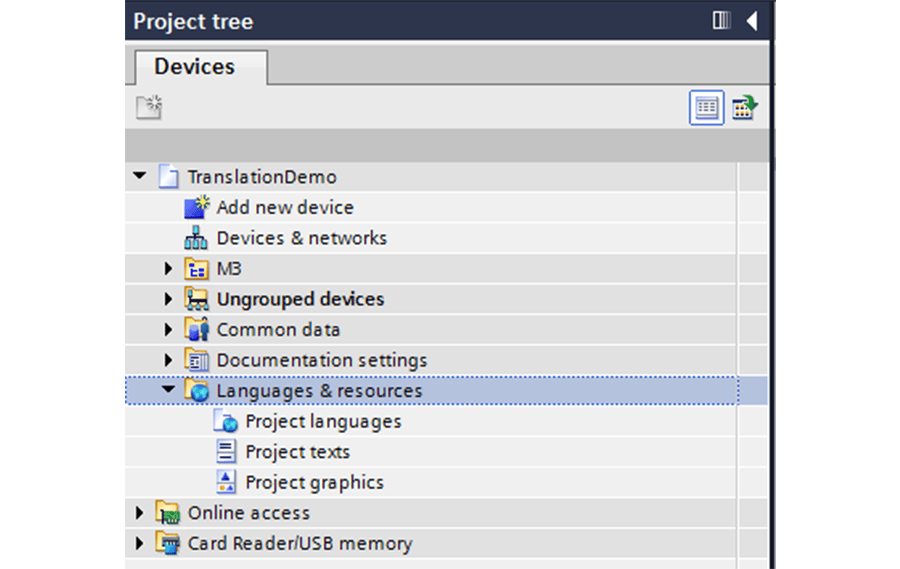
Configuring Global Project Languages
The first step to adding multiple languages to your project is to configure the global project language. In your project tree, you should have a “Languages & resources” folder.
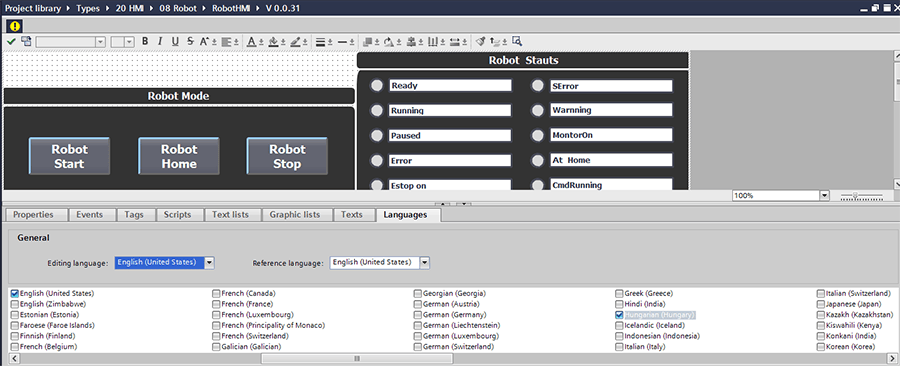
Double-clicking on “Project languages” will bring up all the available project languages. For this example, my editing and reference languages will stay in English, but I want to add Hungarian to my project.

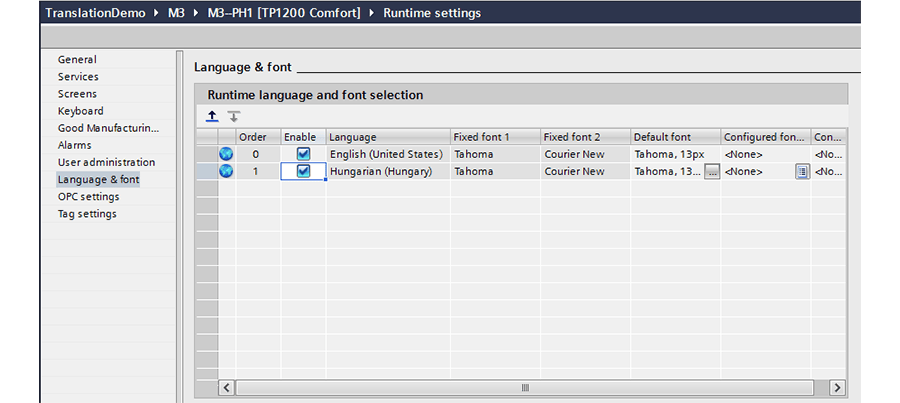
Configuring Runtime Language (HMI)
Now that Hungarian is one of my project languages, I can add it to my HMI. In the HMI portion of the project tree, navigate to the runtime settings, and make sure all your desired languages are selected and enabled.
Exporting Project Texts
Unfortunately, there is no auto-translate feature. The next step to configuring our translations is to track down every piece of text that needs to display in the new language and give it an accurate translation. Let’s start with our HMI.
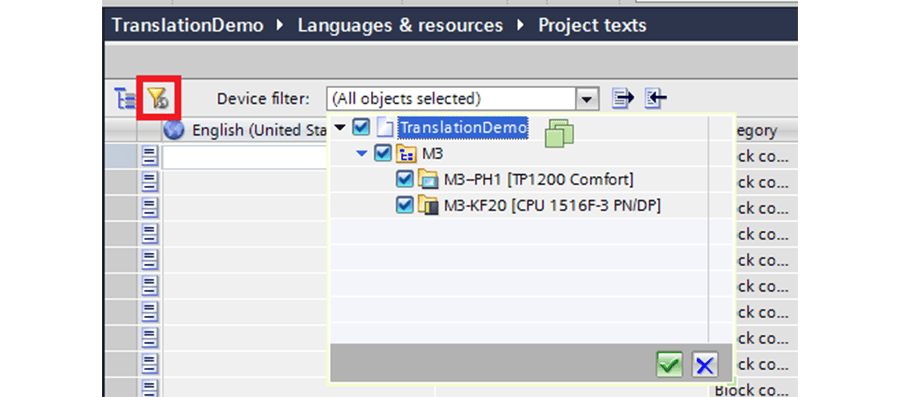
In the global “Languages & resources” folder, navigate to your project texts. Filter for just your HMI (deselect the PLC in the dropdown, then click the green arrow). While you’re at it, filter out any empty entries by clicking the filter icon on the left as well.
You could type all your translations directly into Portal from this view. However, texts can also be exported as an Excel spreadsheet where they can be edited and re-imported later. Click on the export arrow.

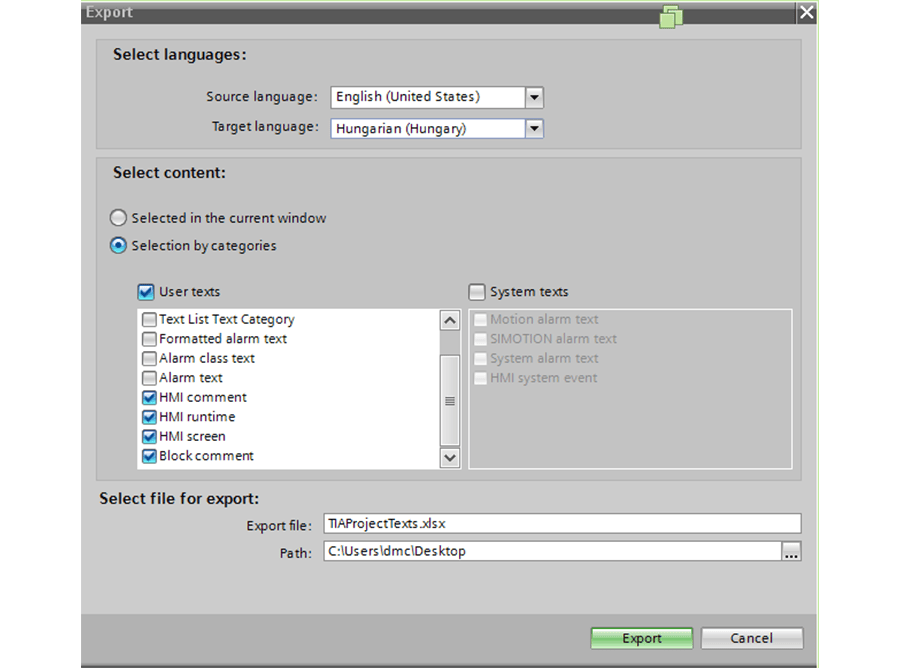
A window will pop up that will allow you to filter your texts even more. For this project, my alarm texts all live on the PLC side, which will be exported separately. Therefore, all I need to export from the project texts is what will be displayed on the HMI.
This text list will include button text, help text, text boxes on your HMI. Make sure your source (existing) and target (desired) languages are configured before hitting export!
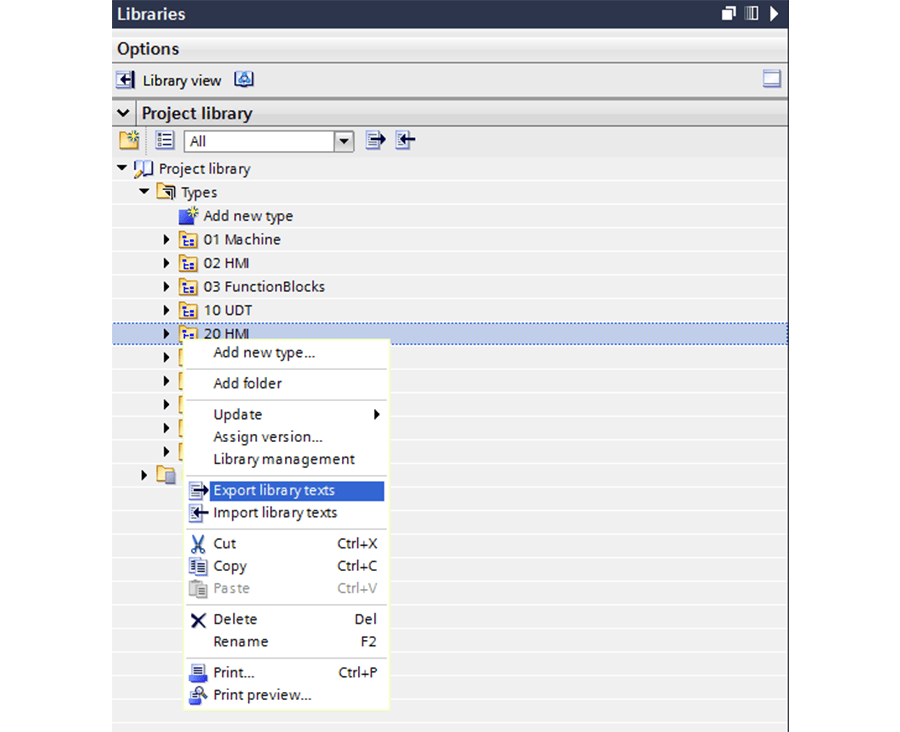
Faceplate Translations
If your HMI uses any faceplates that have text, these will not be included in the project texts that you just exported. First, we need to edit each faceplate to add the language configuration! I have not found a better way of doing this than going through each faceplate, adding a language, and releasing the new version.
Be sure to select the option to update all faceplate instances when you release the new one. Translations cannot be completed if any faceplates are still "in test" (unreleased).
Once all your faceplates have the correct language configuration, you can export your library texts for easy translation in Excel.
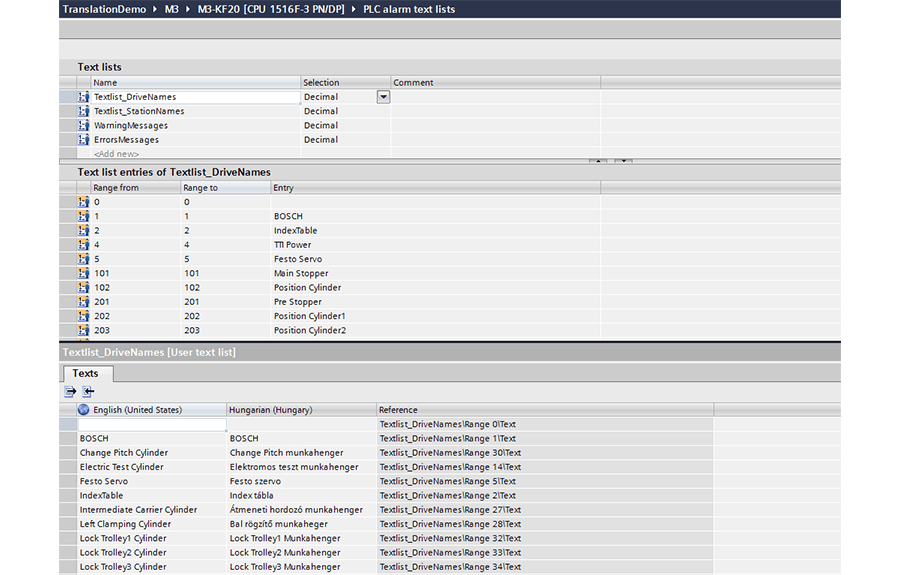
Alarm/Warning Message Translations
In my project, I am using program alarms and building the alarm message strings on the PLC. Therefore, these texts will not be included in previous text exports from the HMI project. I have four text lists on the CPU, and each one must be exported, translated, and re-imported individually.
Editing Text Lists in Excel
Editing the text lists in Excel is straightforward. Add or modify entries in your target language column, but don’t touch anything else on the spreadsheet!

Importing Text Lists
Once you complete the translation column, the next step is to import your text lists back into your project. Importing text lists may be as simple as selecting the import arrow, selecting your translated Excel sheet, and pressing “Import.”
In some cases, however, it may not be so straightforward. For instance, I got the warning message below during one of my imports, and none of my translated texts showed up:
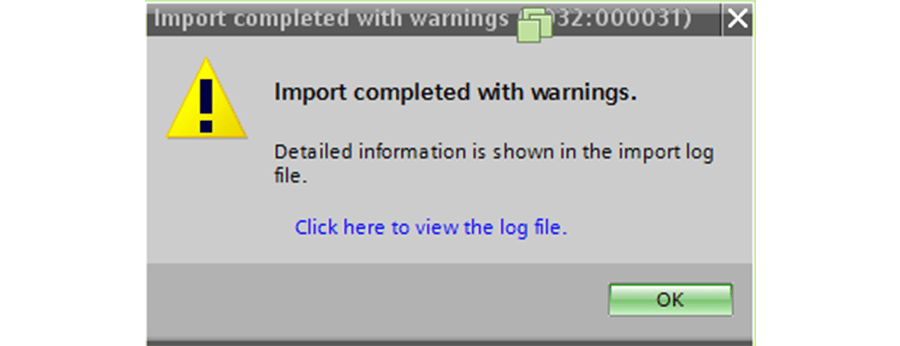
I viewed the log file to find a bunch of warnings the internal ID of my imported texts did not match my current project. This warning was indicating that I had exported text from an older version of my project and it no longer recognized the translated file when I tried to import.
This is most likely to happen if you’ve made numerous changes to your project texts since your original export or if you’ve changed the name of your project.
My solution was to re-export all the text lists from my project so that the project data captured in the excel sheet was up-to-date. I then manually copied over the translation column from the old Excel sheet into the new one (without modifying any other columns on the spreadsheet), and it imported with no issues.
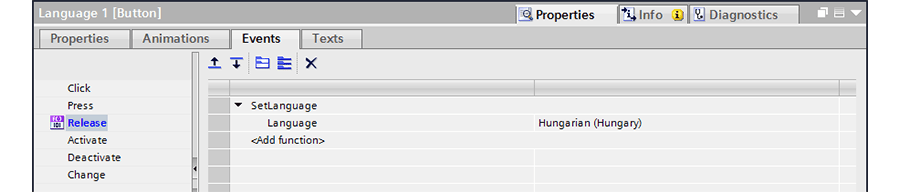
Changing Languages from the Operator Panel
Now that we have all our HMI texts translated and imported, let’s test it out! Add two buttons to a screen on your HMI with a click event to set the language. One button is for your new language and one is to switch it back to your primary language!
Compile your HMI – best to do a “Rebuild All” at this point – and download!
Learn more about our Siemens PLC Programming and HMI & SCADA services. We are Siemens Solution Partners with extensive Siemens expertise. Contact us with any questions or project inquiries.