MindSphere and WinCC OA are two powerful tools offered by Siemens that can allow for streamlined aggregation, processing, and visualization of massive volumes of data. Now thanks to some in-built functions within WinCC OA, you can, with a bit of setup and planning, easily pass your data from your OA application up to your MindSphere tenant. In this blog, I’ll walk you through the steps of setting up this connection, and I’ll offer some added commentary and advice to make your experience easier.
Setup: WinCC OA Manual Generation
The first thing you need to do is create your assets in both the WinCC OA project and the MindSphere tenant. I’ll start with the WinCC OA project. Open Gedi in your project and from the top toolbar navigate to ‘SysMgm’ < ‘Settings’ < ‘MindSphere Configuration.’ This will open a window like the one shown below.
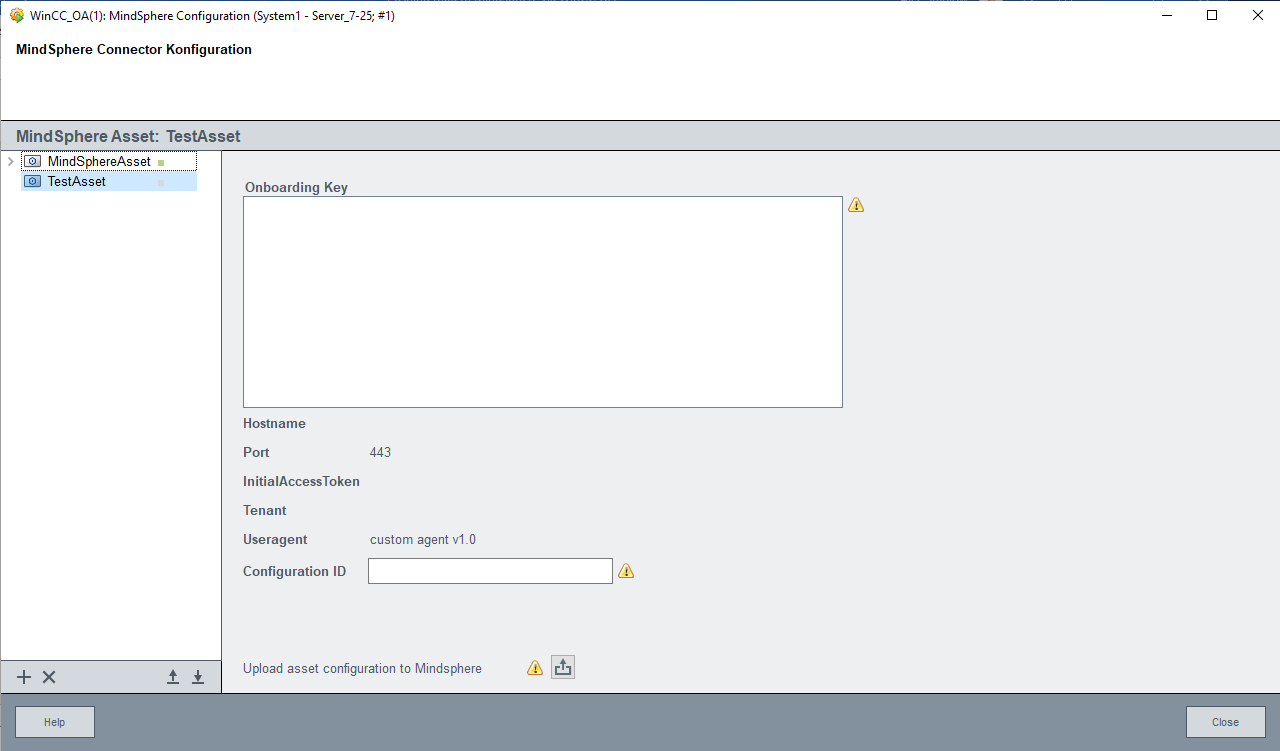
Within here you can manually instantiate datapoints for you MindSphere application. There are three levels of organization to your MindSphere data. At the highest level are assets, then within an asset, there are data sources, and within those data sources, there are datapoints.
What exactly defines an asset or data source within your project is up to you. For instance, an asset could represent one of several lines on a factory floor, and each data source could be a machine or PLC used within that line. It is up to you to decide how best to structure your data.
To create an asset, simply right click the whitespace in the column on the left and select ‘Create MindSphere Asset.’ You can right-click that asset to add a data source and right-click that data source to add datapoints. When creating assets and data sources, all you really configure is the name. When creating datapoints, you must also select a datatype and enter the units. Datatype selection is limited to ints, longs, double, Booleans, and floats, so be aware of this when creating your application. It is also crucial that you do not leave units blank.
To map your OA data point to a data point in an asset in MindSphere, the units on the two data points must match exactly. We’ll touch more on this later.
Setup: WinCC OA Scripted Generation
If you are working with a large volume of datapoints, then manually entering them all, as I showed above, can be impractical. Fortunately, there is a way to script the generation of these points. Whenever an asset, source, or point is created in the MindSphere Configuration menu, an internal datapoint is created in Para of the type _MC_Asset, _MC_Datapoint, or _MC_Datasource respectively.
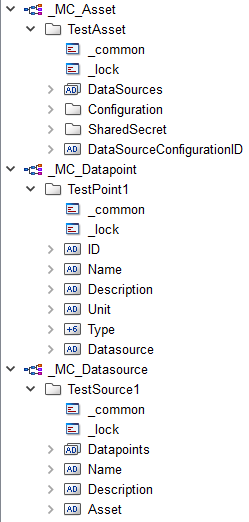
What this means is that you can write a script that uses the dpCreate and dpSet functions to create your data structure and populate some necessary fields. You must be careful when doing this, though, to set up your data correctly. Make sure your asset’s DataSources is populated with the names of all associated data sources.
Do the same for making sure the data source has its associated points and assets entered and that the points have their associated data source. Don’t forget to set your points’ unit and type as well. Type is represented by an integer from 1 to 5, where each number equates to one of the datatypes mentioned earlier. Try first making a simple data structure as I did here and dig around the generated internal points, so you understand how it’s all supposed to be set up.
Setup: MindConnect Lib Asset
Next, we will create our MindConnect Lib asset. The MindConnect Lib assets are what your assets in OA are going to establish a connection with an upload data to. There is a one to one relation between MindConnect Lib assets in the tenant and assets in your OA project so you will need to make one MindConnect Lib asset for each asset in your OA project.
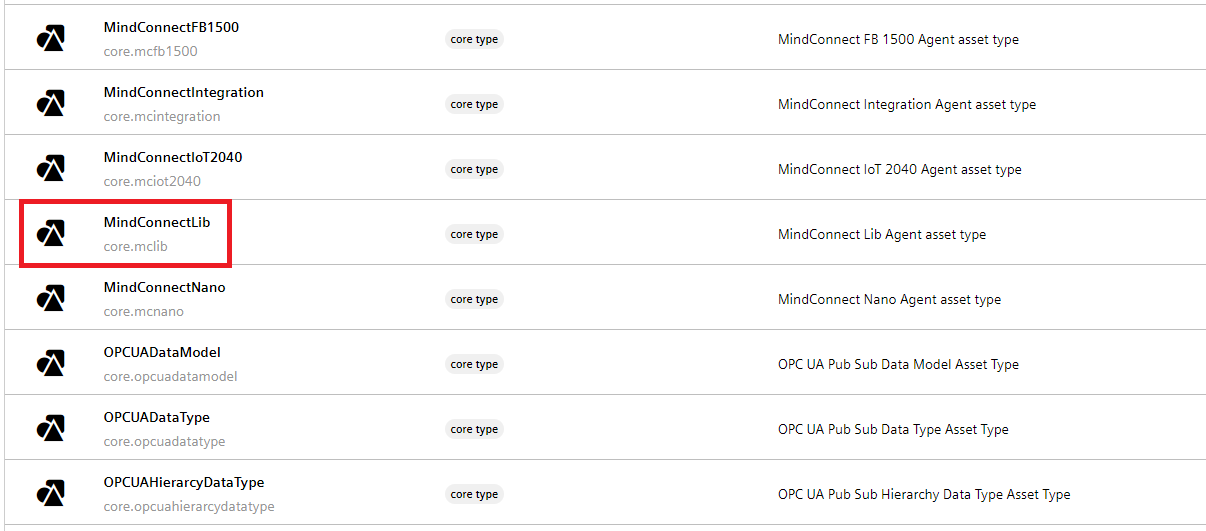
From your home page in MindSphere, go to the asset manager and select ‘Create asset.’ Select MindConnectLib and give your asset a name.
Next, we’ll set up our connection to the OA asset. Click the large button with the puzzle piece on it and select your preferred security profile.
I’ve used SHARED_SECRET for all of my applications. After hitting continue, you’ll be taken to another screen with the boarding configuration. Click the buttons to generate a boarding key and copy it to your clipboard.
Now go back to the OA MindSphere configuration menu, click on your asset, and paste the onboarding key into the white box then hit the upload button at the bottom.
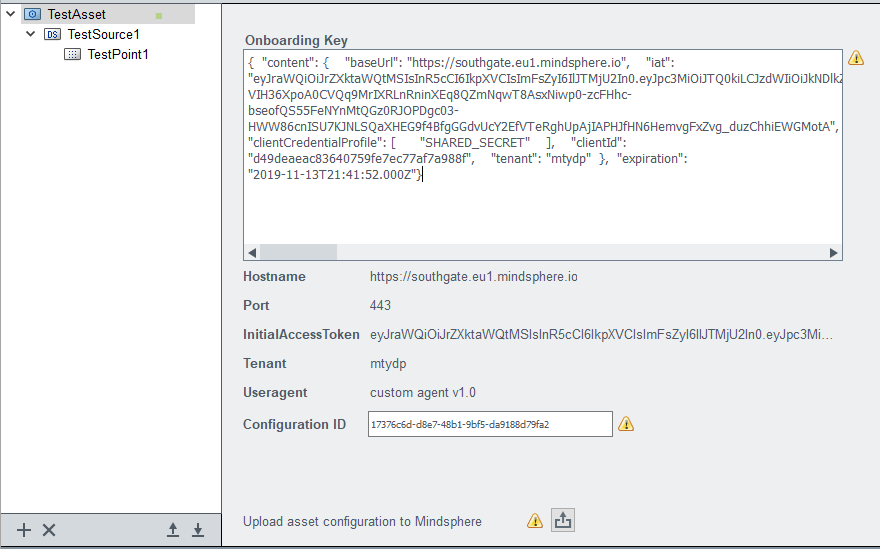
Your assets in the OA project and tenant are now connected. You’ll notice that the Configuration ID has been filled in for your asset and all associated datapoints. Now, if you go back to your asset in the MindSphere tenant and click the button with the puzzle piece on it, you’ll be taken to a new screen.
Here you can see the configuration of your asset and its data mappings. The configuration shown should match exactly with what you set up in OA.

Setup: MindSphere Assets for Data Mapping
To actually work with and visualize the data that you’re sending to you MindConnect Lib asset, you need to create assets to map that data to. To do this, you will need to create some aspects and types. Both aspects and types are configurable data structures. A type will contain aspects, and you’ll create instances of types in the assets menu like how you create the MindConnect Lib asset.
Similar to the structure of the MindSphere configuration in the OA project, it’s up to you to decide how best to structure your data. To make an aspect, go to your tenant’s asset manager, select ‘Aspects’ from the menu on the left, and select ‘Create aspect.’ Add at least one variable to make a valid aspect and make sure to set a ‘Unit’ value that exactly matches the units you set up in OA for the data point you intend to map to it. You will not be allowed to map your data points if the units don’t match.
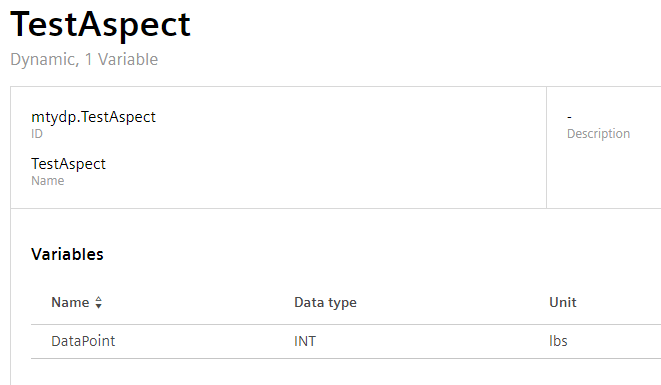
Similar to how you created an aspect, you will now create a type. Types are just another layer in the data hierarchy of MindSphere. Types can contain variables, aspects, and have an associated image for an organization. Additionally, an instance of a Type is an asset, whereas you cannot instantiate aspects as assets.
Add whatever aspects and variables seem sensible for your type, but be aware that you cannot map your OA data points to the standalone variables in a type. They must be mapped to a datapoint in an aspect in that particular type.

Now go back to assets and create an instance of the type you just created. Go to the Configuration/Data mappings page for your MindConnect Lib asset and go to the Data mappings tab. If you expand the data structure you should see a button that says ‘Link variable’ for each data point. Click on that and navigate to the appropriate data point in the instance of the custom type that you created.
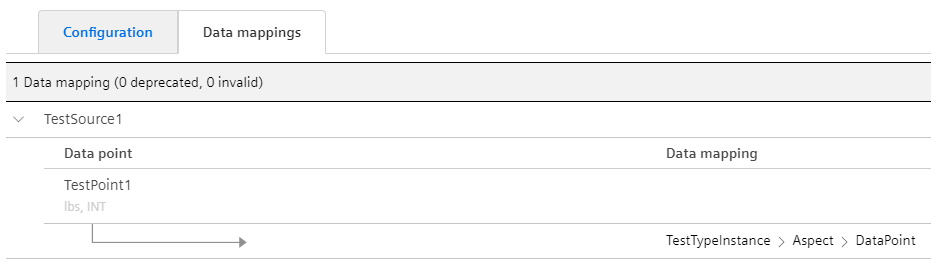
Once mapped, it should look something like the above image. Something significant to note is that these datapoint mappings are somewhat fragile, and any changes made to your OA assets, like adding points or sources or changes units, will undo these mappings. For that reason, you should try to finalize your data structure as much as possible before going through the effort of mapping points.
Pushing Data to MindSphere
You have now made all the necessary arrangements and are ready to push that data up to MindSphere from your OA project. I’ve made a straightforward script that goes over all the essential actions that must be done to upload data.
#uses "classes/mindSphere/MindSphereAsset"

// Example script on how to push data from OA to MindSphere
main()
{
  // Instatiate your MindSphere asset within the script
  MindSphereAsset asset = MindSphereAsset("TestAsset");

  // Generate some sample data to send to MindSphere
  dyn_int testValues = makeDynInt(13, 67, 89);

  // Create some time values to send up with your data points
  time currentTime = getCurrentTime();
  dyn_time times = makeDynTime(currentTime - 2, currentTime - 1, currentTime);

  // Prepare your values to be uploaded
  int err = asset.prepareValues("TestPoint1", testValues, times);

  // Upload values to MindSphere
  err = asset.uploadPreparedValues();
  if (err == 0) {
    DebugN("Upload Successful!");
  }
}
Note the steps in the above script. You must first instantiate your asset within your script via the MindSphereAsset function. The string inputted here must be identical to the name of the asset you created earlier in the configuration menu.
Next, I make an array of sample data to upload. You can also upload points one at a time, but it will be more computationally intensive. For every bit of data that you create, you also need a timestamp. Here I take the current time then have offsets by one and two seconds. Before you upload your values, you must prepare the values for upload.
The first input here is the name of the datapoint you’re uploading to, and it must match exactly with the name of the intended datapoint. After you’ve prepared your values, call asset.uploadPreparedValues to upload all values that have been prepared for that asset since the last successful attempt to upload values. You can call asset.prepareValues as many times as is necessary before executing the upload, and uploading data in large batches rather than small chunks will be a lot faster computationally.
If the upload was successful, then the value of err, the output from the upload function, should be equal to zero.
Viewing Your Data in MindSphere
There’s a ton that you can do with your data once it’s in MindSphere, but that’s a whole different discussion, so here we are simply going to view the time series of our data. To view your data, go back to the home page of your MindSphere tenant and navigate to the Fleet Manager. Search for the instance of your custom Type that you created and click on it. The page should then show all the aspects associated with your type in the central window. Click on an aspect to see the time series of incoming data. To view data that cannot be graphed, like strings and Booleans, click on the checkerboard looking button in the bottom right corner under the graph.
As you can see in the figure below, there are two instances of the three values I sent with my simple script because I ran the script twice.

Final Tips
- Take time to plan out your data organization in advance.
- The systems of aspects, types, and assets and points, sources, and assets can seem convoluted at first, but if you take the time to plan out your project, then these organizational layers can prove very useful.
- Be careful of breaking your tag mappings in MindSphere.
- Remember that making any changes to your OA asset configuration will break all of your tag mappings, and you will have to delete and reestablish those mappings manually. This is another reason to have a good organization plan in mind before digging into things.
- One call to Upload 1000 datapoints is a lot faster than 1000 calls to upload one datapoint each.
Learn more about DMC's WinCC OA services and our Siemens expertise. Contact us with any inquiries.