If you have not checked out our previous blog on sending emails with a Siemens 1500 PLC, be sure to read that before reading this addition.
We know how difficult it can be to do something as simple as sending an email from a PLC, especially when considering all the different issues that can arise. If you are having trouble sending emails, do not give up. This blog is going to fill you in on what you can do with a Siemens 1200 PLC for sending emails, and hopefully give you insight into additional troubleshooting techniques for getting them working correctly.
Starting from the beginning, let’s make sure that you have everything set up accordingly.
Hardware
When using a PLC to send out emails you must know what type of emails you are sending out. If you are sending emails through a secure protocol (SSL or TLS), then you are going to need additional hardware for either the S7 1500 or the S7 1200 Siemens PLCs.
These secure protocols typically communicate using ports 465, and 587. Port 465 if you are using SSL, and port 587 if you are using TLS. For the PLC to communicate through either of these ports, then you will need the addition of a communications processing module. This is typically done when trying to send emails through a public SMTP server like Gmail, or Yahoo.
If you are looking to send emails to a local SMTP server, then you can use port 25 for SMTP relay and you do not need an additional communications processing module. Note, this must be done behind a firewall because most firewalls block any traffic on port 25. The configuration for sending emails using port 25 can be more difficult, due to the lower security protocols.
For our example, we sent emails to a Gmail account and used a CP1243-1 communications processor (CP) with an S7 1214c PLC. The CP1243-1 can be configured to any of the S7 1200 PLCs. These are configured as follows.
Connect the CP module to the PLC via the terminals on the side of the PLC. There is no need to connect them to each other through their ethernet ports as they can communicate through their back-plane connection. Connect the CP module to the router/modem via a short ethernet cable. Finally, connect the computer that is being used to access the PLC through one of the ports available on the PLC, and it should all be good to go.
Hardware Troubleshooting
Verify that the CP module and the PLC are set up in the TIA portal with the same version that matches the physical hardware. Without doing this the CP module and PLC will not compile correctly. Typical troubleshooting for this is straight forward, and there are many different online resources available to help.
Software
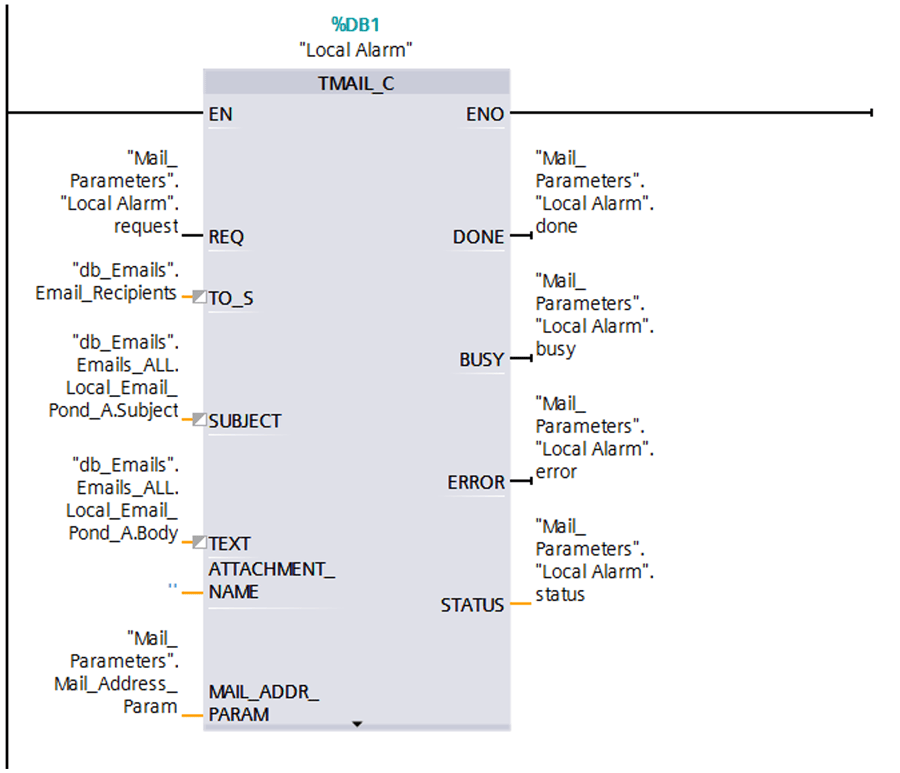
Refer to the previous blog (Sending Emails with a Siemens 1500 PLC) for information on how to set up the TMAIL_C function block, Gmail application settings, obtain trusted certifications, and enable security clearance.
The entire process is the same for setting up an S7 1500 PLC and an S7 1200 PLC except for the address parameter input.
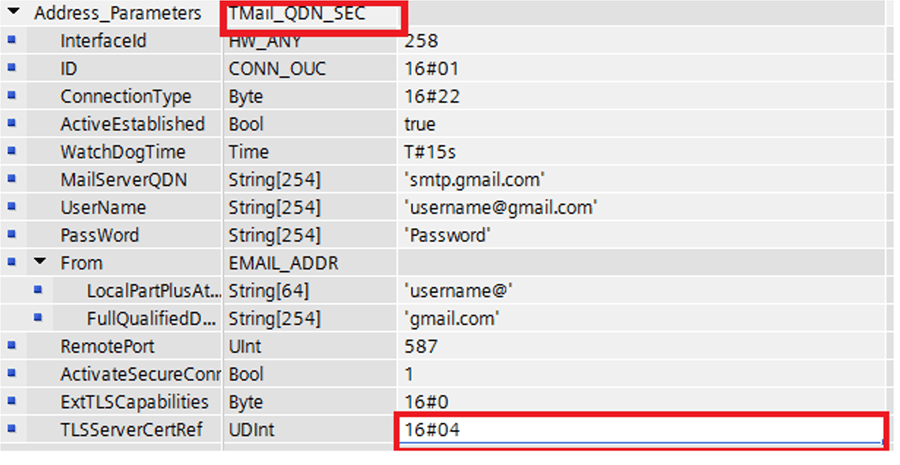
For the address parameters in the TMAIL_C function block, you will be using a TMAIL_QDN_SEC system data type instead of the TMAIL_V4_SEC system data type. The QDN stands for Qualified Domain Name, which allows you to use domain name servers instead of IP addresses. The settings for the Address_Parameters can be set up as seen below.
It is important to note that sometimes the TMail_QDN_SEC will not autofill as you type out the data type. Typically, if you type it correctly, all the additional parameters will appear after pressing the enter key.
One thing that may differ is the TLSServerCertRef. The TLSServerCertRef refers to the index at which your encryption certification resides and can be changed accordingly. In our example, we had our encryption certification in index 4.
Troubleshooting
Status Codes
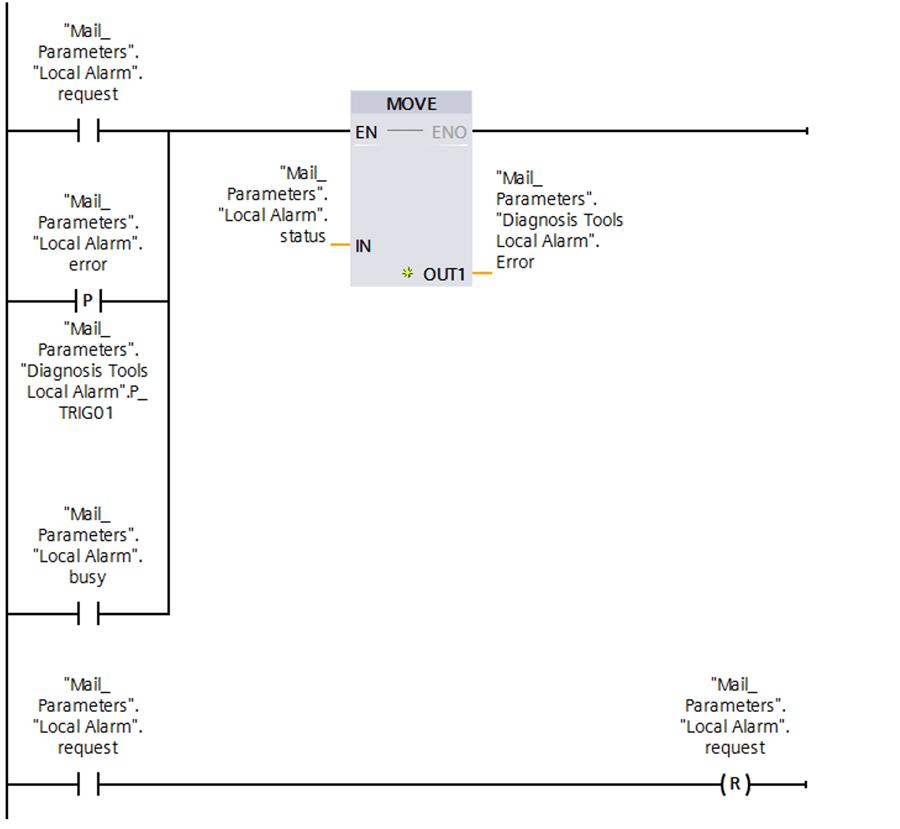
Be sure to latch any of the status codes you have for diagnostic purposes. Here is an example of how we latched our statuses and sent them to another variable for diagnostics purposes.
Error Code #8420
When trying to send an email with a PLC you may get the error code #8420 (SMTP error code 420). This is a timeout connection error which typically results in there being a problem with the firewall, an issue with the PLC and CP modules onboard time, or an issue with the router or modem.
Time Synchronization
Be sure that the time on both the CP module and the PLC are up to date. Without doing this you will likely get a timeout error. To change the time of your PLC and CP module you need to first go online with the PLC and CP module. Once online with the PLC and CP module, go to the Online and Diagnostics settings for each device. First, check that the time is in sync for the PLC, the CP module uses the PLC to update its time.
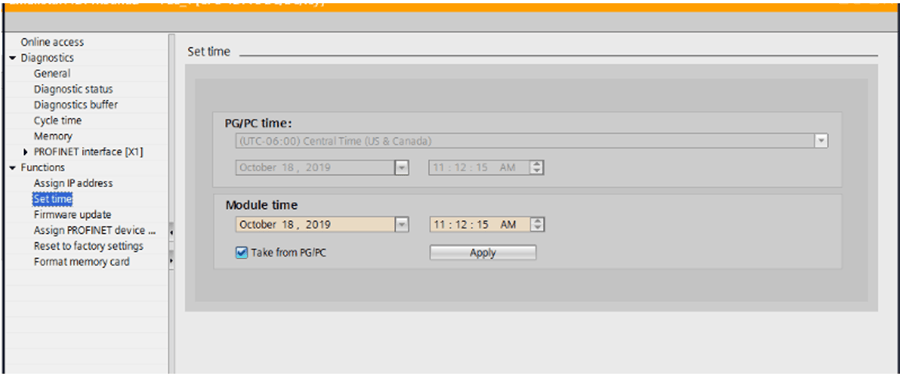
For the PLC, go to Online and Diagnostics>Functions> Set time. Select the checkbox for “Take from PG/PC” and then hit apply. From here you can check the time on your CP module and see if it synced up or not.
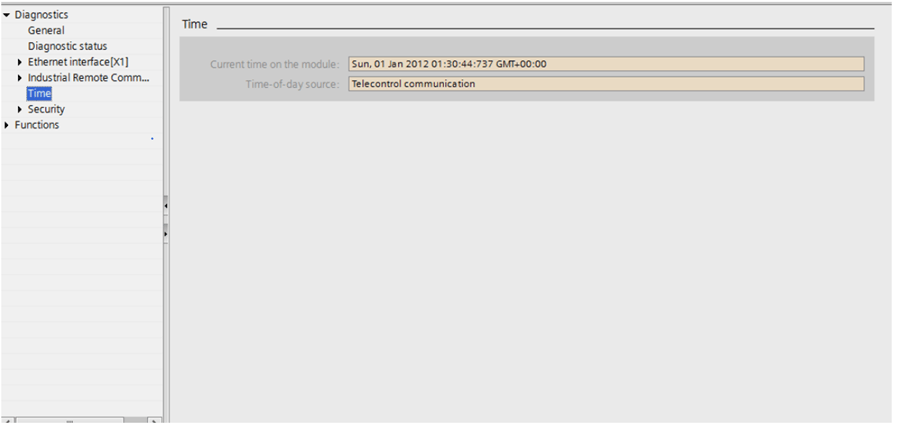
To access the time for the CP module, go to the online and diagnostics for the CP module located at the bottom of the project tree under local modules. As you can see below, the time on the CP module did not sync up accordingly. This is common when setting the time for the first time on the PLC and will require a full power cycle of the PLC and CP while connected.
Be sure to select “Enable time-of-day synchronization” if it has not already been selected for the CP module.
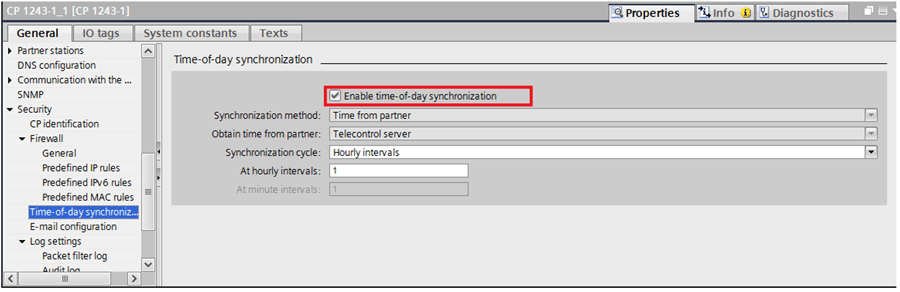
Afterward, the CP modules time should update with a full power cycle if the CP module and PLC remain connected upon booting up.
Router/Modem Configuration
Be sure to look through the router and modem configuration settings. Most of the time you will be able to connect to the router/modem via ethernet and access the settings by typing in the gateway IP in your web browser. Try other web browsers if the first one does not work. Verify that the IP address of the gateway in the PLC properties is consistent with that of your gateway. If your computer is on the same network as the PLC, you can determine what the IP address of your router/modem is by doing an IP configuration in your command prompt.
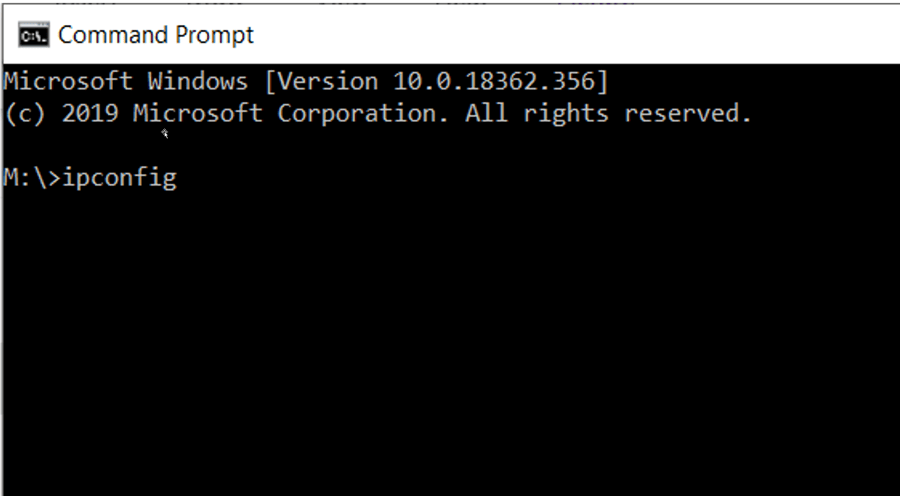
Command prompt command ipconfig will pull up all the connections associated with your computer.
This is an example of a default gateway that you are trying to search for in IP configuration. It is common for this IP address to be configured as 192.168.1.1, especially if the PLC you are using is operating with its own router/modem.

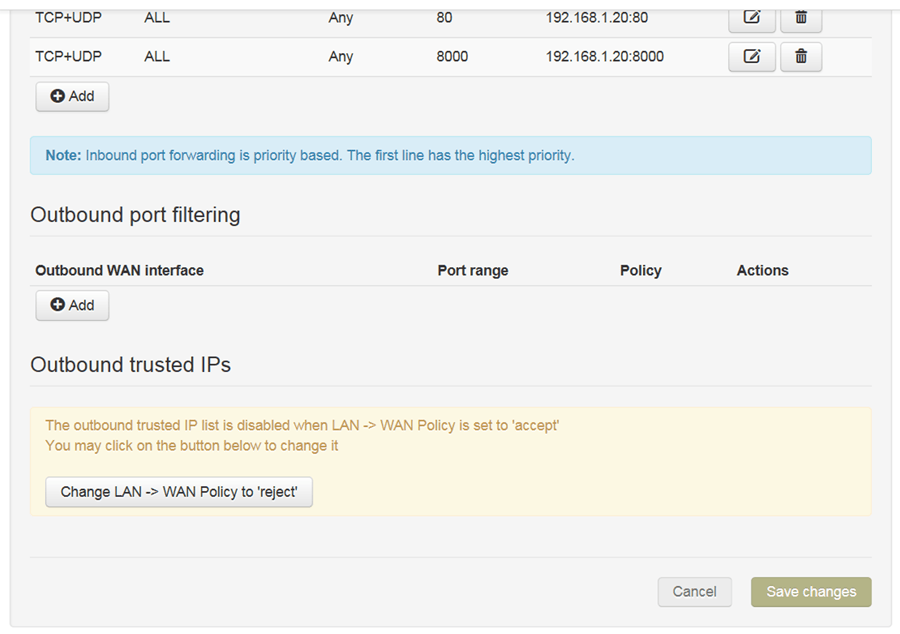
In our example, the gateway that my computer was using was different than the gateway of the PLC. Be sure to troubleshoot the settings in the appropriate gateway. Below is an example of accessing the settings to our router/modem.

Be sure that there are no limitations on the trusted IP or edit the limitations to allow for the IP address of your CP module. As seen here, outbound port filtering settings can be configured to limit the access of your PLC from sending emails effectively.
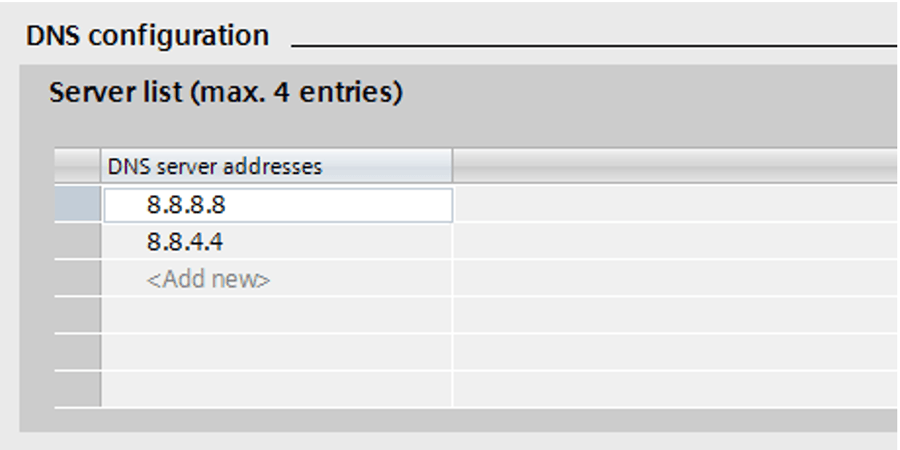
DNS Configuration
Sometimes your DNS configuration may be the cause of a potential error. Especially if you are trying to use the qualified domain name for your emailing server. A typical fix for this could be to switch your DNS server to the basic google DNS server. In the CP modules, general properties adjust the DNS configuration as follows.
Device Configuration
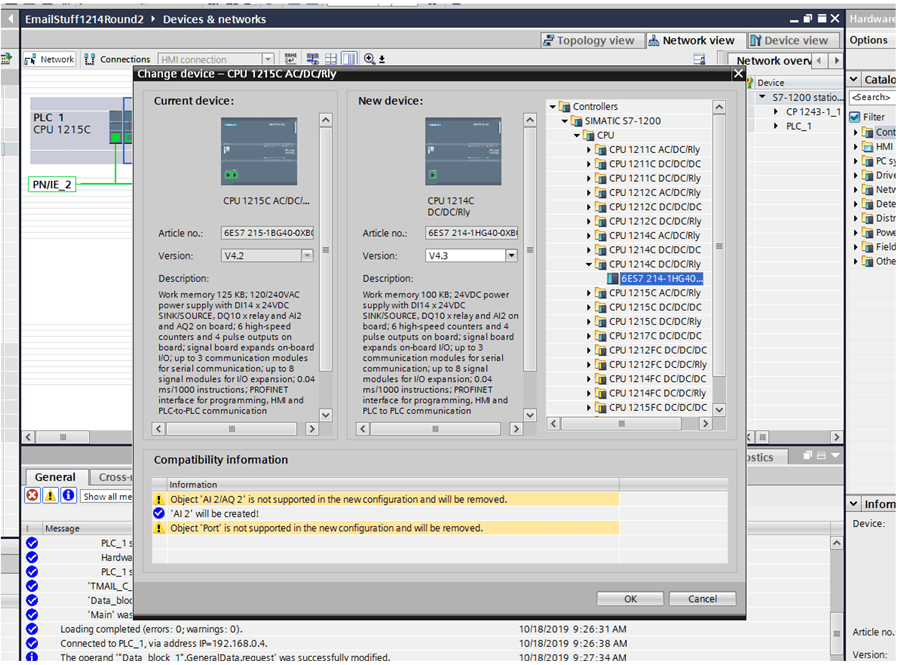
Your device configuration needs to match your physical hardware. Double-check all the firmware as well as model numbers on every device such that they match the physical hardware. You can check this by going online with the PLC and going to Online Diagnostics> Diagnostics> General> Firmware.
Once you verify the version of the PLC or CP module are different you can change them accordingly in the Device View by right-clicking the PLC/CP module and selecting Change Device.
Error Code #8530
Error code #8530 (SMTP error code 530) typically indicates an authentication problem. Solutions to this error code typically involve your Address Parameters. Verify that these are correct to your specific setup. Make sure you acquired the correct encryption certificate.
Also, verify that the Email Configuration settings for the CP module match the settings in the TMAIL_C function block. These settings can be found in the Device Configuration> Properties> General> E-mail Configuration.

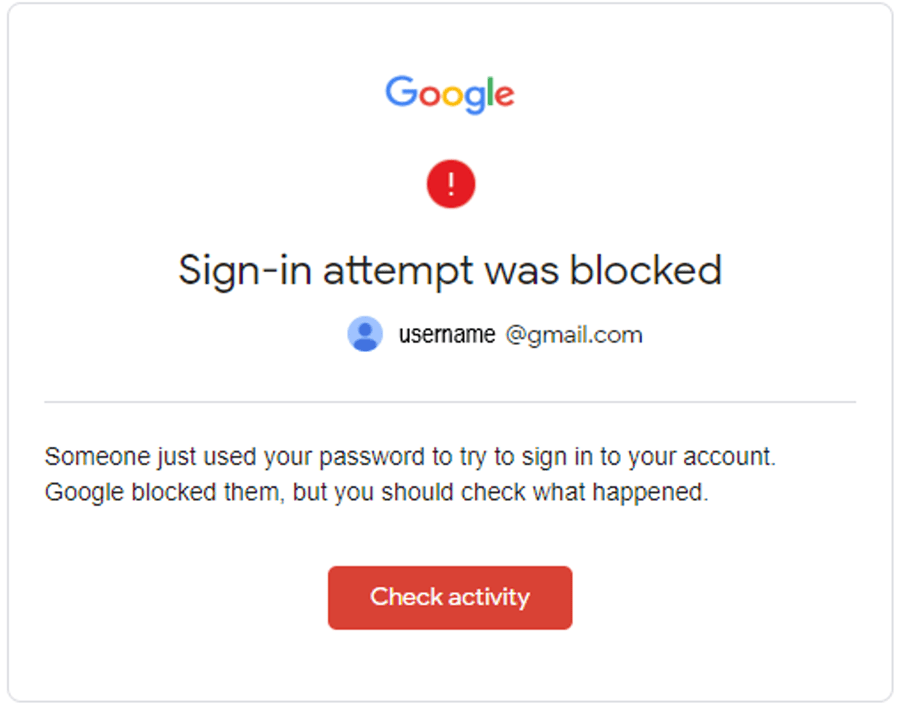
Lastly, check your Gmail/email server settings. Sometimes whenever you think you have done everything correctly; you will get one last error. Be sure to check your email account settings. You will likely get a notification asking for verification about suspicious activity on your account. If you got this notification, then you should be one step away from success.

Status Code #7002
This is not an error, you did it! Today is a glorious day! It is time to celebrate! You successfully sent an email with a PLC and a CP module. People told you that it couldn’t be done but you proved them wrong. Time to kick back and enjoy this moment.
Learn more about DMC's PLC Programming expertise and contact us with project inquiries or questions.