This is the first installment of a three-part blog series covering all you need to know about getting started with a Beckhoff PLC/HMI. In this blog, we'll be covering how to initially set up your Beckhoff IPC to run PLC code and a TCHMI server.
Recently I was working on a project with several Beckhoff IPCs. Since we had multiple IPCs to get out to our customer, the DMC team compiled a list of the steps needed to take a basic IPC with no programs installed to a fully functioning Beckhoff PLC/HMI. This blog series has compiled those steps into a general format for anyone who might need to do the same, from Basic Device Setup to PLC configuration, and to HMI configuration.
Note: if you’re not using the TC3 HMI, you can disregard the steps involving it.
The screenshots in the instructions below are from Windows 10, but I will include Windows 7 instructions if they differ.
Other Installments in This Series:
Steps
- Beckhoff Device Manager
- Changing NIC Settings
- (Optional) Rename PC
- Download TwinCAT Runtime, HMI Server, and Google Chrome
- Install TwinCAT Runtime, HMI Server, and Google Chrome
- Install the Beckhoff Real-Time Ethernet Driver
- Run win8settick.bat
- Set Firewall Settings
- Change AMS Net ID
Term Definitions
Throughout this blog series, I refer to two devices repeatedly. For clarity, those devices are as follows:
- "Beckhoff IPC" - the hardware, likely obtained from Beckhoff, that will run the PLC and HMI server. Device configuration will occur on this device.
- "Programming Computer" - a computer, such as an engineer's laptop, where the TwinCAT XAE development environment is installed. Programming happens on this device, as well as some of the configuration of the Beckhoff IPC.
1. Beckhoff Device Manager
Back to Step List
If your device is a Beckhoff IPC, Beckhoff Device Manager will probably run on startup. For a basic setup, you can step through the wizard with default options, and on the last page uncheck the box that says “Run Beckhoff Security Wizard on next startup” so it won’t run on future startups.
2. Changing NIC Settings
Back to Step List
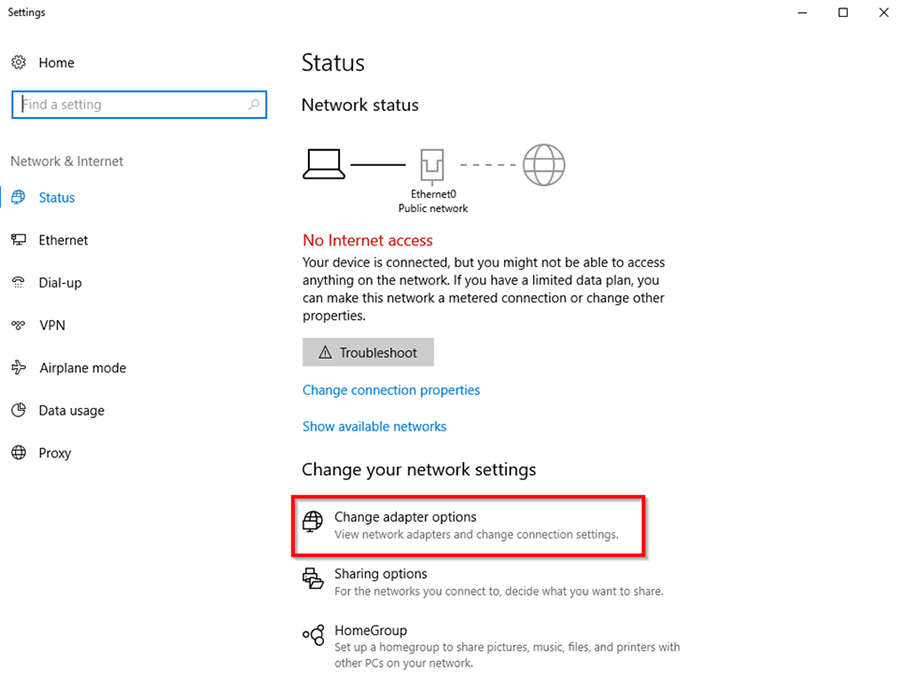
To get started with the setup, first, we need to do some basic network setup. First, open up the IPC’s adapter settings by right-clicking on the Network Icon in the system tray and selecting “Open Network & Internet settings” (or “Open Network and Sharing Center” (Windows 7)).
From this window, select “Change adapter options” (“Change adapter settings” on the left side of the window in Windows 7).
This window should display the Network Interface Connections (NICs) available on your Beckhoff IPC. There are often two (though there may be more or less) - one that you can use to connect a programming computer and another that can be used to connect to IO racks/devices. Before you proceed, identify which NIC you will be using for each purpose and the IP addresses that you’d like to assign to these NICs. A helpful (but optional) step is to rename each NIC to describe its purpose.
To do this, right-click on a NIC and select Rename. In this example Programming Port will be used for programming and EtherCAT Master will be used to connect to IO.
To change IP addresses for these NICs, right-click on them and select Properties. Then navigate to Internet Protocol Version 4 (TCP/IPv4) and select Properties. You can then input your selected IP addresses.
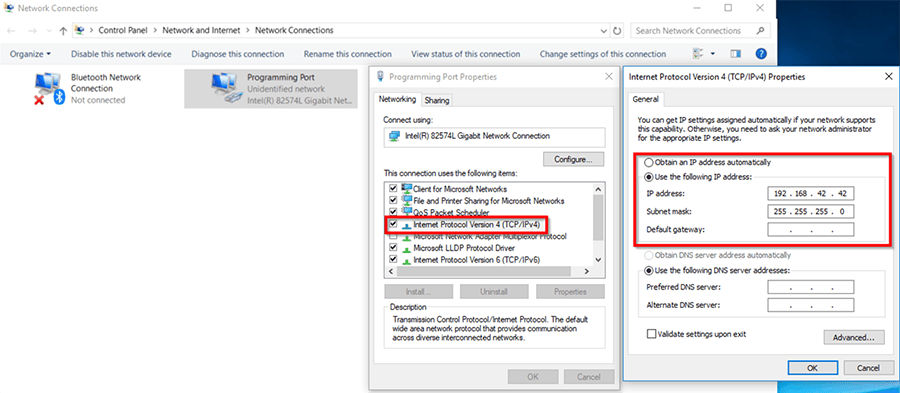
For this tutorial, we will be using:
Programming Port: 192.168.42.42
EtherCAT Master: 192.168.43.43
3. (Optional) Rename PC
Back to Step List
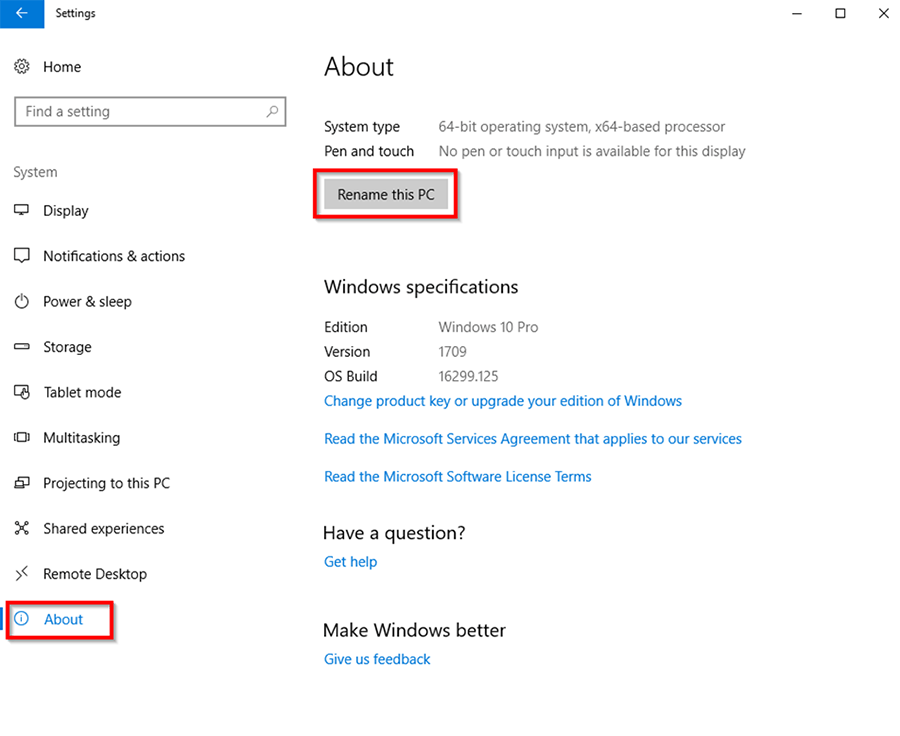
While this step isn’t necessary, it can be helpful to rename your PC so if it’s connected to a network in the future, it can be easily identified. To do so navigate to Start Menu > Settings > System > About > Rename PC.

(In Windows 7: Start Menu > Control Panel > System, then choose Change Settings in the Computer name, domain, and workgroup settings section and click the Change button in the Computer Name tab.)
After you rename your IPC, it will prompt you for a restart. You may want to wait on this since there will be several items that will require a restart in the following steps.
4. Download TwinCAT Runtime, HMI Server, and Google Chrome
Back to Step List
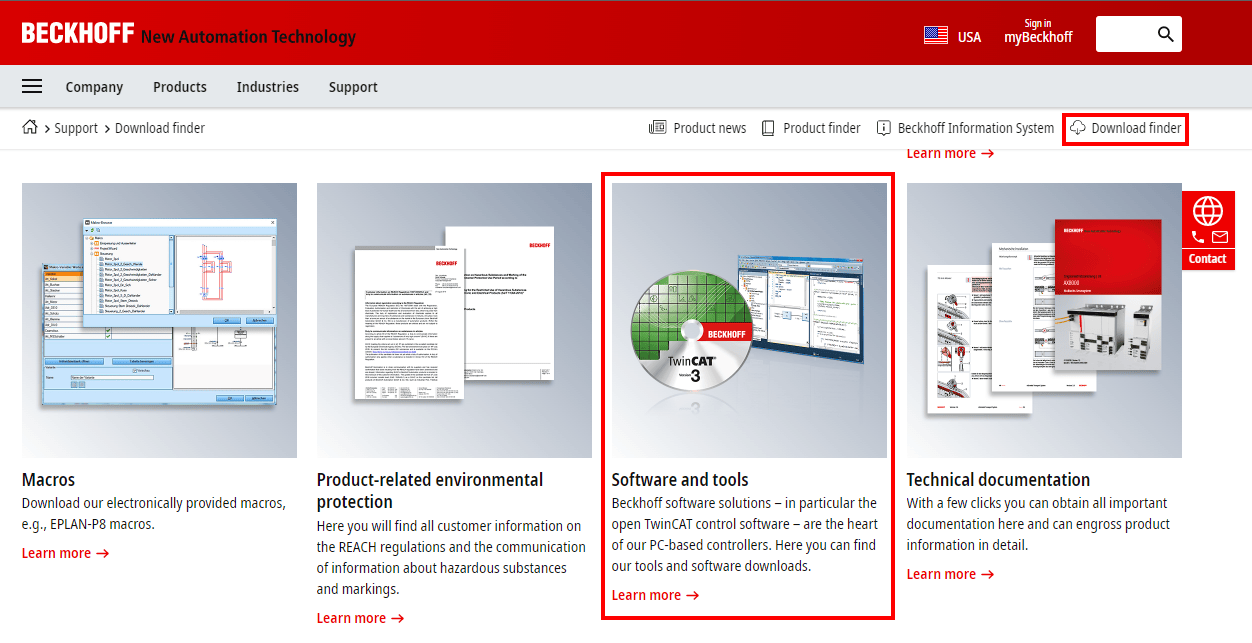
The first step to installing the TwinCAT runtime on your IPC is determining and downloading the correct build. You can find the most recent build by visiting https://beckhoff.com/.
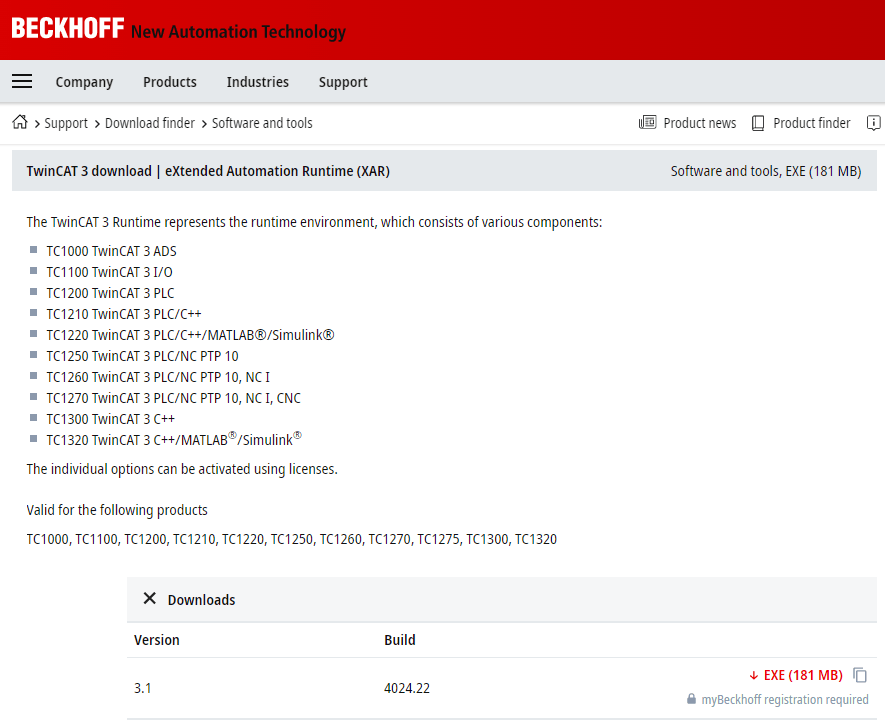
As of 2/3/2022, you can find the proper runtime download by clicking on Download finder > Software and tools.
Scroll down to the eXtended Automation Runtime (XAR) section and expand Downloads to find the most recent build. You'll need an account on Beckhoff's website to download.
The process for downloading the TF2000 HMI Server is similar. Just search TF2000 in the Download Finder to find the most recent builds.
Google Chrome and Mozilla Firefox work well with TwinCAT 3 and we’ve seen issues with other browsers in the past. So it’s recommended you use these browsers if you’re going to be setting up an HMI with TwinCAT 3 HMI. Oftentimes the IPC you’re installing it on does not have an internet connection, even during setup. In that case, the easiest way to install Chrome is via the standalone installer, found here. You can download a similar installer for Mozilla Firefox here. We'll be using Google Chrome in this tutorial.
5. Install TwinCAT Runtime, HMI Server, and Google Chrome
Back to Step List
If you’ve downloaded the installers to a separate computer, use a USB device or other method to transfer them over to the Beckhoff IPC. From there you can unzip and install all three items. For a basic setup, just step through the corresponding installation wizards with their default settings. Some will prompt you to restart your IPC – you can still defer the restart for now.
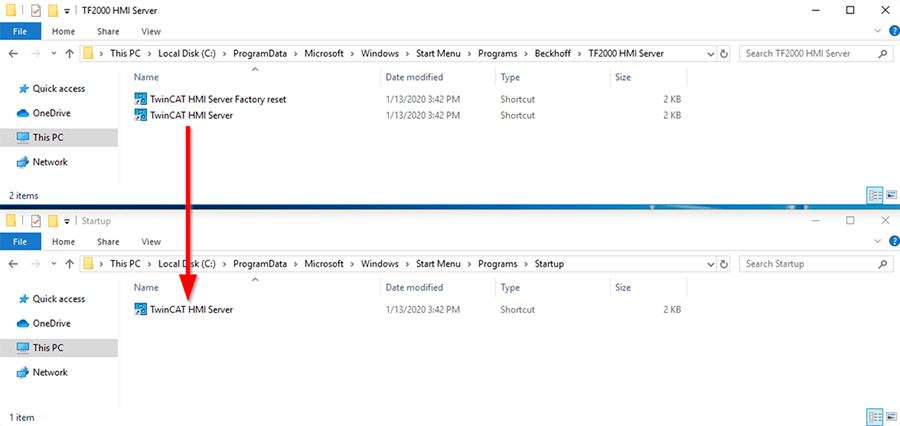
Once you’ve installed the HMI Server, Versions 1.8, 1.10, and up of the HMI Server will auto-start as a service on IPC boot. However, if this isn’t working or you’re working with an older version of the software, you’ll want to drag a shortcut to the HMI server into the Beckhoff IPC’s startup folder. To do this, navigate to:
C:\ProgramData\Microsoft\Windows\Start Menu\Programs\Beckhoff\TF2000 HMI Server
and copy the TwinCAT HMI Server shortcut to:
C:\ProgramData\Microsoft\Windows\Start Menu\Programs\StartUp
You may want to pin this startup folder to Quick Access in File Explorer, as you will access it again.
Note: you can also use the user-specific startup folder for this:
C:\Users\YourUsername\AppData\Roaming\Microsoft\Windows\Start Menu\Programs\Startup
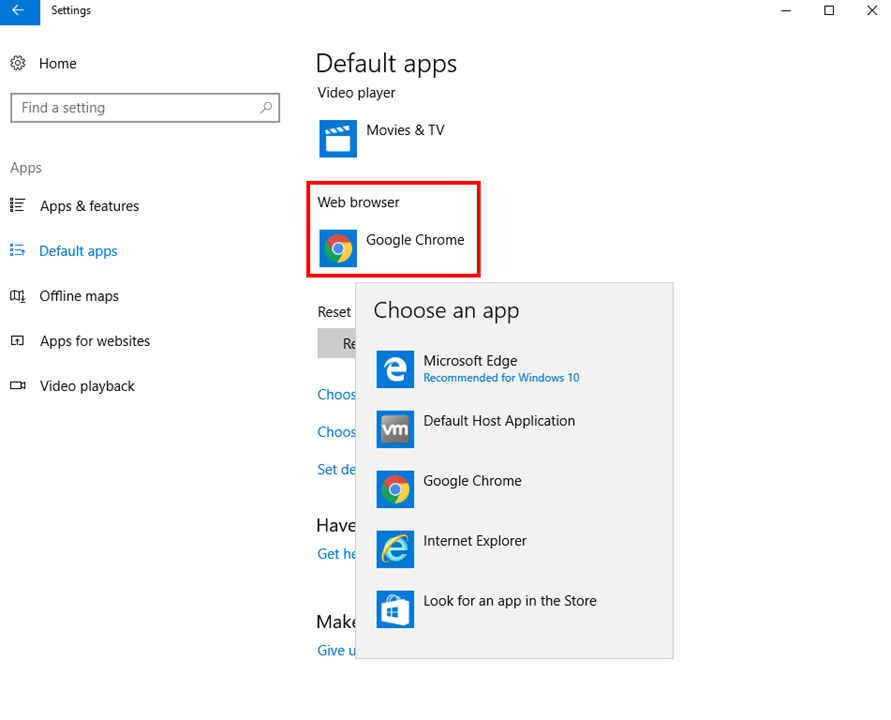
Finally, after installing, open Google Chrome and follow the prompts to make it the default browser. Alternatively, you can navigate to Start Menu > Settings > Apps > Default apps > Web browser and select Google Chrome.
6. Install the Beckhoff Real-Time Ethernet Driver
Back to Step List
Next, you will need to install the Beckhoff Real-Time Ethernet Driver on the NIC to which you plan to connect your IO. This will allow the Beckhoff IPC to communicate with said IO.
Navigate to C:\TwinCAT\3.1\System and run TcRteInstall.exe.
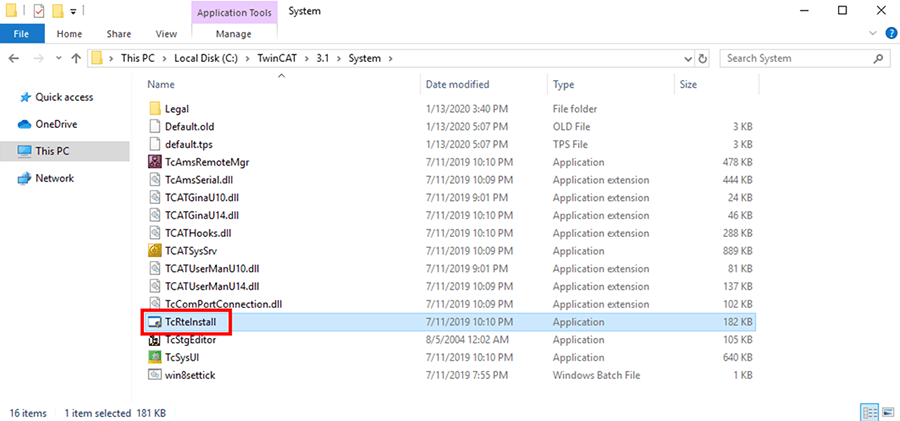
In the Compatible devices section, select the NIC that you will use for IO (EtherCAT Master in this example) and click Install.
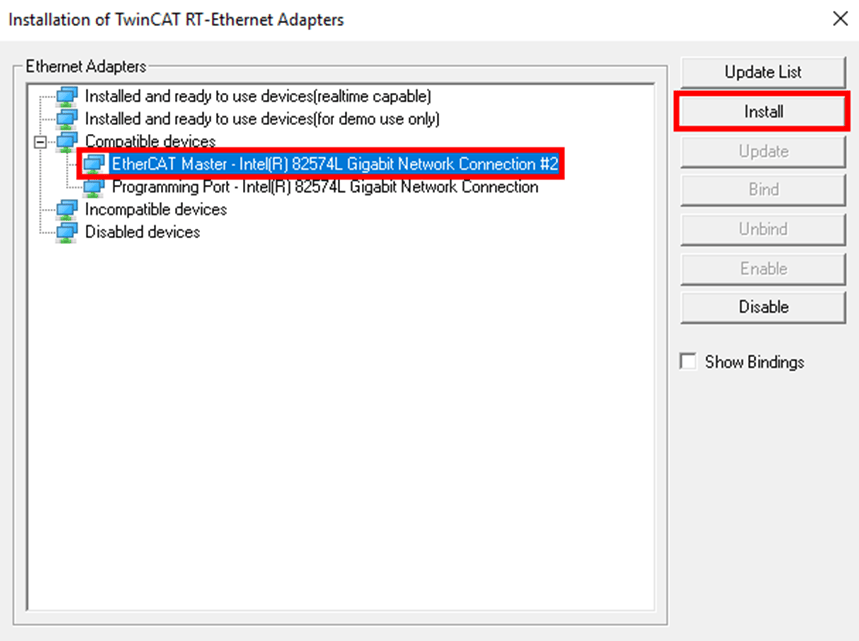
After the process is completed, the NIC should move to the Installed and ready to use devices (realtime capable) section. You can close out of the application.
7. Run win8settick.bat
Back to Step List
Often when setting up Beckhoff IPCs we’ve run into the following error message when trying to put the PLC into Run Mode:
Init4\RTime: Start Interrupt: Ticker started >> AdsWarning: 4115 (0x1013, RTIME: system clock setup fails).
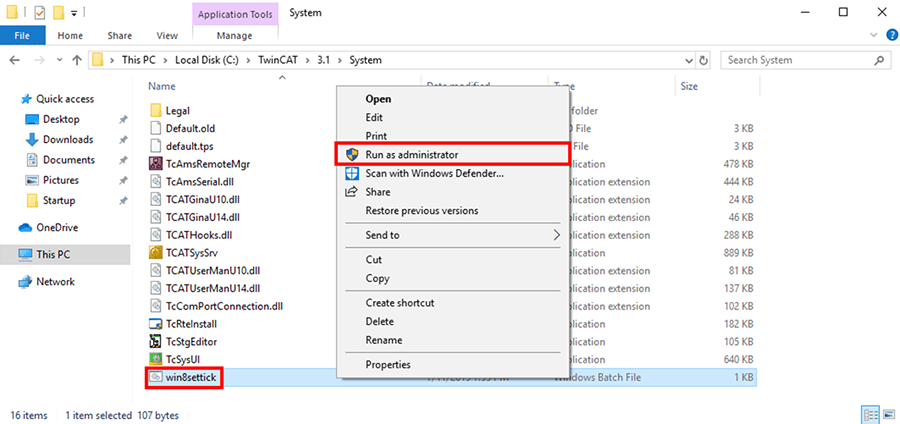
The solution to this, which has become part of our setup process, is to navigate to C:\TwinCAT\3.1\System and run win8settick.bat as administrator. This sets some clock settings that TwinCAT needs and resolves this error.
8. Set Firewall Settings
Back to Step List
It’s important to maintain secure firewall settings on industrial devices to avoid allowing unwanted access to an industrial network, especially if said devices will be connected to the internet. That being said, we will need to be able to communicate to the TwinCAT runtime/HMI server via a programming computer to download code. To do this, we will enable a few rules within the firewall.
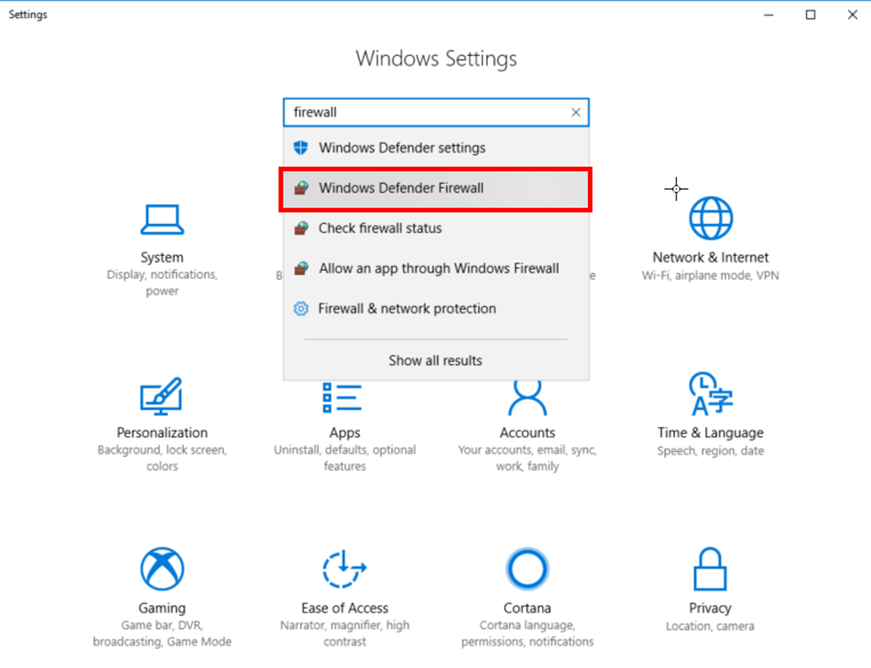
Navigate to Start Menu > Settings. In the search bar, search “firewall” and open Windows Defender Firewall.
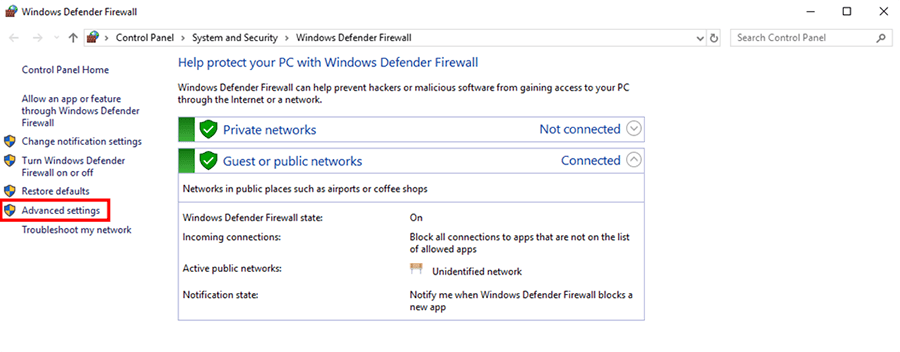
In the window that appears, select Advanced Settings on the right.
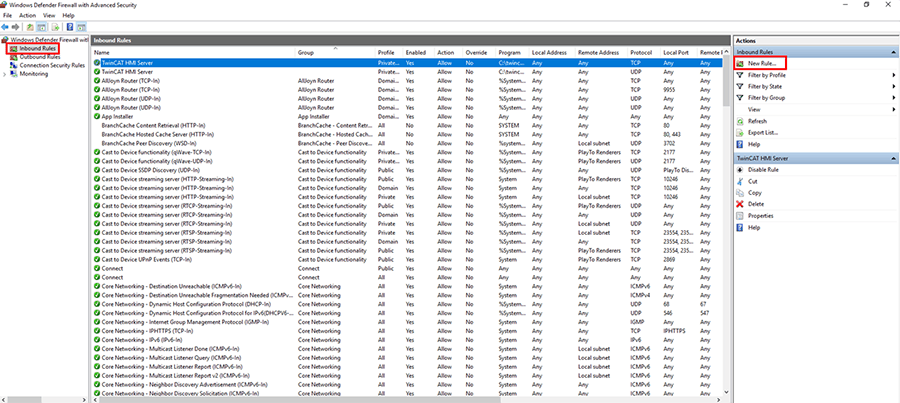
In the Windows Defender Firewall with Advanced Security window, select Inbound Rules on the left and click New Rule on the right.
First, we’ll add rules for the TwinCAT runtime. Details are here.
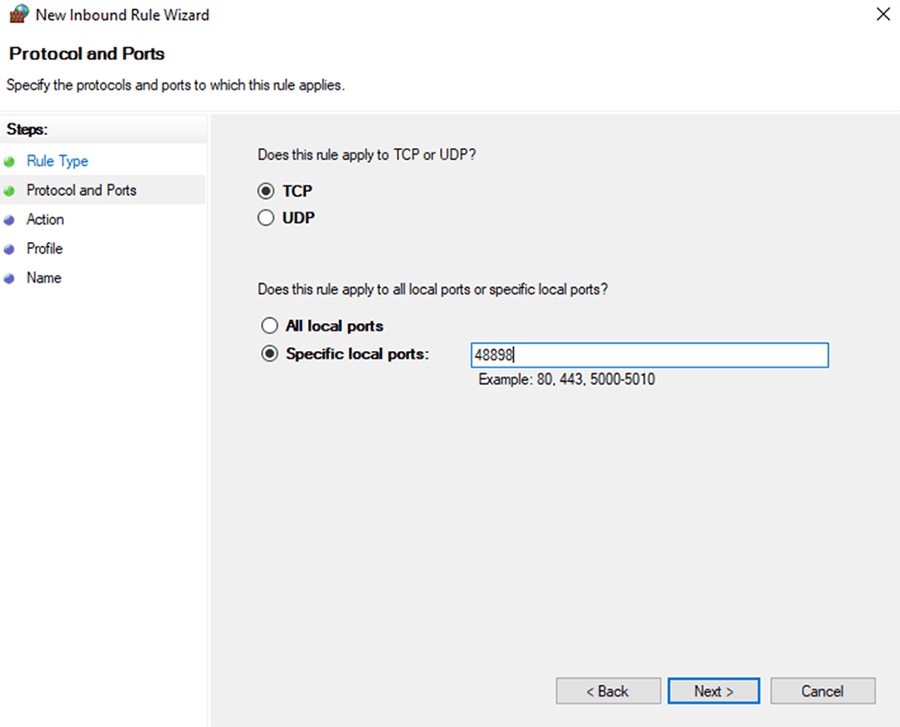
Step through the wizard, using Port as the rule type, TCP as the protocol, and 48898 as the specific local port. You can leave all other settings as default and name this rule TwinCAT ADS Not Secure (TCP).
Repeat this process using UDP as the protocol, 48899 as the specific local port, and TwinCAT ADS Discovery (UDP) as the name. With these two rules, we should be able to connect to the Beckhoff IPC for PLC programming.
If you’re using Secure ADS, you may also need to open up TCP port 8016 as TwinCAT ADS Secure (TCP).
For TwinCAT HMI, you may also need to open TCP communications for the incoming port you will be using to publish the HMI project (which we will do in the last blog in this series). The default port for this are 1010 and 1020, but the installation of TF2000 may take care of this for you.
For a full list of ports related to Beckhoff devices, see section 6.2 in this PDF from Beckhoff.
Optional: To allow pinging to test the connection via the programming computer, find the two rules named File and Printer Sharing (Echo Request – ICMPv4-In) and enable them (Right Click > Enable Rule).

9. Change AMS Net ID
Back to Step List
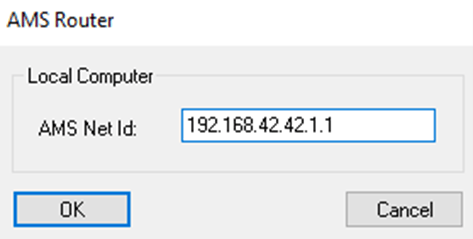
The AMS Net ID is used by the TwinCAT XAE programming suite to connect to the IPC's PLC runtime from the programming computer. At DMC we usually set the AMS Net ID to be the same as the IP address of the programming port of the Beckhoff IPC, followed by “.1.1”. This makes it easier to remember, rather than using an entirely different number – though you can do so if you want.
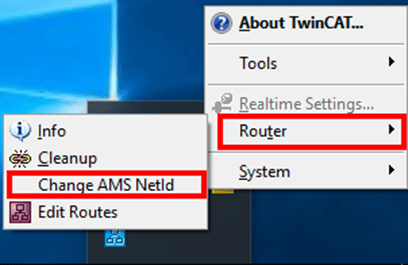
Click on the TwinCAT gear icon in the system tray and select Router > Change AMS Net ID:
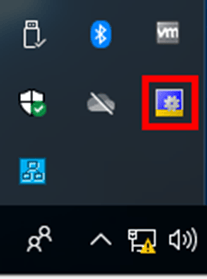
If this gear icon does not appear in the system tray, you may need to restart your IPC first.
After typing in your selected AMS Net ID and confirming, you will be prompted to restart. Now is a good time to do so.
At this point, you’ve completed the necessary steps to get your IPC ready to run TwinCAT projects! In part two of this series, we will cover configuring/licensing the PLC to run your code.
Thanks to Carl Remler for contributing to the creation of this article.
Learn more about DMC's Beckhoff expertise and contact us today to get started on your next project.