Whether you are migrating from Machine Edition or working with FactoryTalk View for the first time, triggering displays or popups from the PLC in Site Edition is non-trivial. In this blog post, we are going to discuss how to use Visual Basic to our advantage to trigger both display changes and popup displays.
Common questions that may have led you here:
Why can I do this in Machine Edition but not Site Edition?
One major difference between ME and SE is the Client-server model employed by SE. While ME has one instance of the HMI, SE can have multiple clients connected to the same server that the PLC is connected to. Each of these client instances will appear as its own HMI programming and can be operated independently of the others. This behavior is contrary to ME’s.
Why can't I use events to trigger the "Display" command?
FactoryTalk View Site Edition operates on a Client-server model. When you run a .cli file, you are running a client connected to a server. When an event triggers, it is done on the server, not the client. The FactoryTalk server is configured to ignore Display commands run on it.
The Basics
In this section, we will cover how to do the minimum viable work to get display changes working. This process will cover the basics and allow you to get working on your own, but feel free to stick around if you want to improve your coding and architecting skills.
Creating a Trigger
In this section, I am going to explain how to create a global trigger. This just means that we are going to set up a display such that the trigger is always being updated so you can initiate a change from any display.
That is too vague. Give me the technical description!
In order to create a “global trigger,” we are going to employ the assistance of an event-driven VBA subroutine on a screen loaded into cache and being constantly updated.
We will create an event-driven VB subroutine by using the Change event on a numeric input component. This numeric input will be put on a screen that is developed specifically to be loaded into cache and constantly updated so that the Change event can be seen at any time. This will be achieved by calling the Display command with the /ZA parameter (see the Rockwell Docs for more specifics on the behavior of this command) from a macro run on startup.
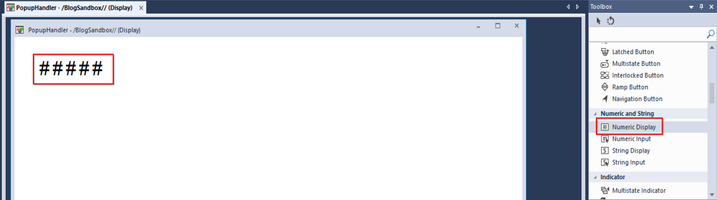
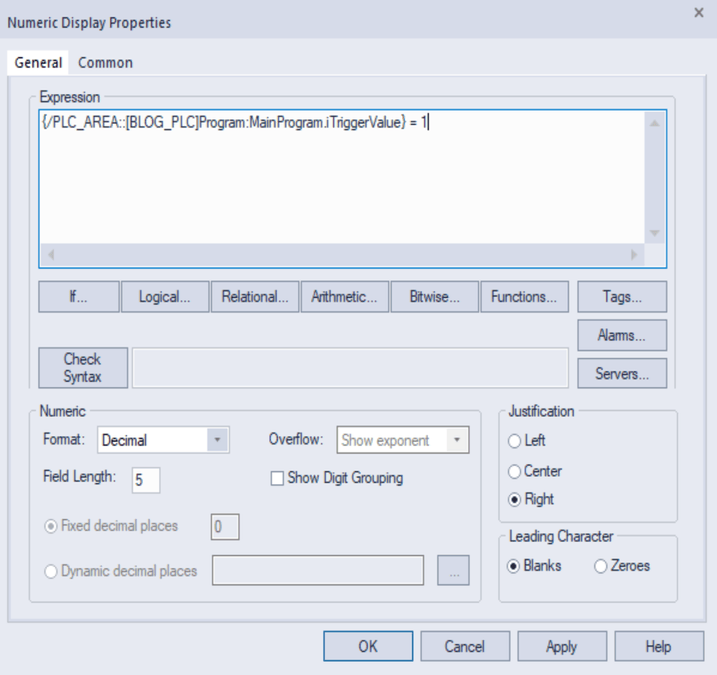
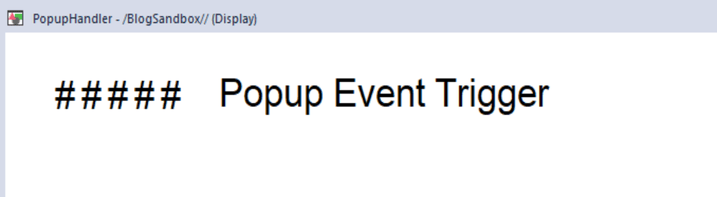
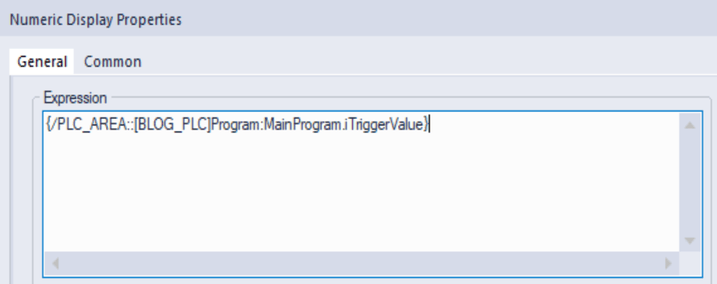
Firstly, we are going to create a new display. You can call this display PopupHandler if you want it to be sufficiently descriptive. On this display, we are going to add a numeric input. Set the expression to be your trigger condition.
Multistate Triggers
The observant eye might realize our expression is not limited to a 0 or 1; therefore, neither is the behavior of our triggered event. If you have a more multistate tag that you want to link here, feel free to do so. We will address how to change the event by value later in the blog when discussing architecture improvements.
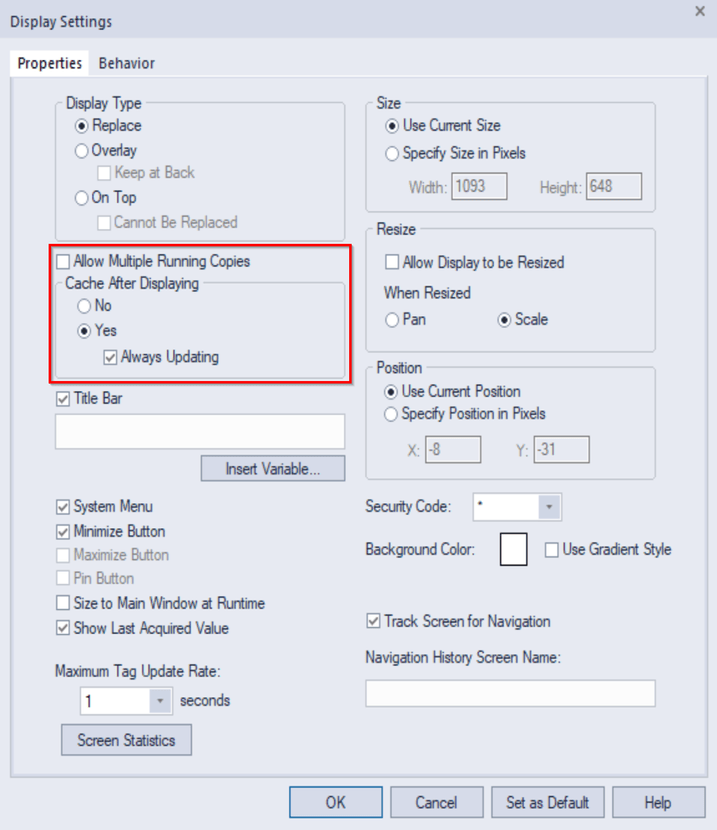
Once you’ve got the numeric input set up, right click the background of the display and select Display Settings... . Make sure the following properties match between your displays:
Now, we are going to make the PopupHandler silently load and stay cached and updated so the numeric input we have created is always loaded. Create a macro and call it startup. When the macro opens, add the following command on a new line:
Display PopupHandler /ZA

What does this command do?
This command will load this display into cache and continually update its values. This is important as it will make sure the numeric stays loaded and updated as the client runs.
What if I already have a client-side startup macro?
If you already have one, just append this command to the end of the existing macro.
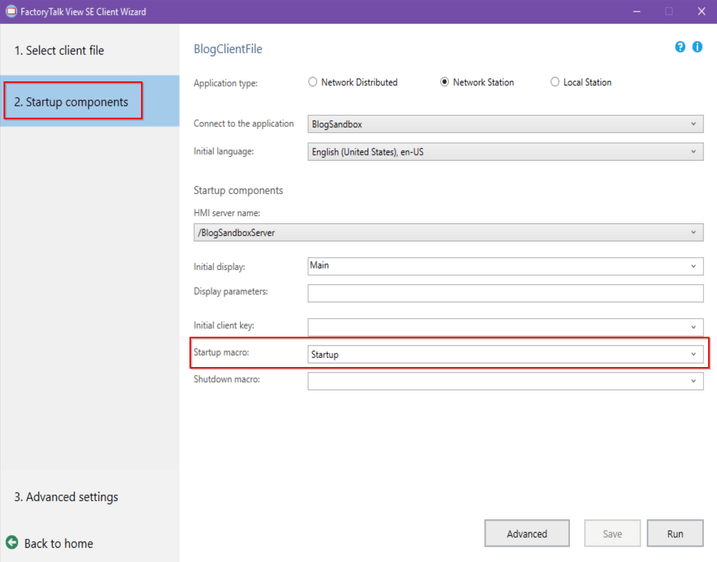
Now that we have the macro ready, we are going to add it to our client runtime. Edit your .cli file and make sure you’ve got the startup macro selected to run on startup. Once this is done, the macro should execute on startup and load the PopupHandler display into our cache.
Using VB to Set a Display
Now that we have the trigger ready, we are going to add the corresponding VB Script. Select the numeric input on your PopupHandler display, right click, and select VBA Code... . You should see the following:
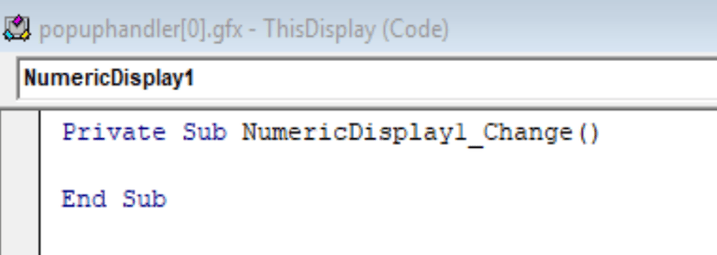
The subroutine (sub) you see of the form NumericDisplayName_Change is the script that is going to run when our condition changes. To trigger our display change, we are going to add the following line of code inside the subroutine (replace “DisplayName” with the display you want to appear).
ExecuteCommand ("Display DisplayName")
With that, you should be ready to go. Go ahead and restart your client and try triggering your condition. Ideally, you should see the popup or display you specified appear when the condition changes. If you do, you’ve got the minimum viable product and should proceed to the "Let's Make it Better" section to refine your implementation.
Let’s Make it Better
We can do better and you know it. If you want to impress the future engineers who will look at your work, then I suggest you get to the end of this section.
Better Naming Practice
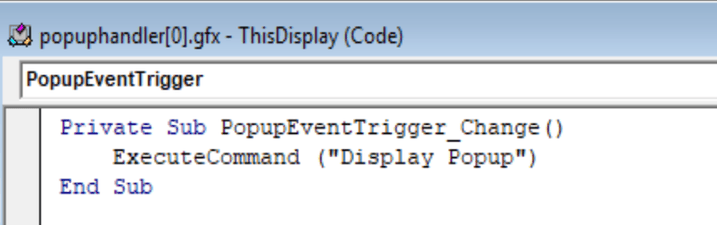
Let’s start by changing the name of our component. Go into the component properties and set the name to something more descriptive — in this case, we will use PopupEventTrigger. If we observe the VB Script again, then we will see the name of the subroutine has been changed to reflect what was done in FactoryTalk View Studio.
Let’s also leave a clear visual indication of the work we have done. Next to the numeric input you are using, go ahead and add a text box and describe what is happening here. This will make it readily apparent to other engineers that there is VB Scripting going on behind the scenes.
Case-By-Case Events
Instead of triggering any time we see the value change, let's consider the value we are seeing. In this case, we are going to nest another condition that checks if the value of our trigger is "1". With this new implementation, we should only see our change when we have a rising edge signal.
Private Sub PopupEventTrigger_Change()
    ' If trigger value is rising '
    If PopupEventTrigger.Value = 1 Then
        ' Change Display '
        ExecuteCommand ("Display Popup")
    End If
End Sub
Working with popup displays?
If you are working with popup displays, you may want to use triggers to close the popup as well as open it. Well, as luck has it, implementing this functionality is a breeze. In the simplest terms, we need only execute the command Abort DisplayName from our Visual Basic script; however, if we want to get clever, we can reuse our existing condition, closing the popup on a falling edge signal in addition to opening it with a rising edge signal!
Private Sub PopupEventTrigger_Change()
    ' If trigger value is rising '
    If PopupEventTrigger.Value = 1 Then
        ' Change Display '
        ExecuteCommand ("Display Popup")
    ' If trigger value is falling '
    ElseIf PopupEventTrigger.Value = 0 Then
        ' Close Display '
        ExecuteCommand ("Abort Popup")
    End If
End Sub
Notice that I chose to use an Elsif here instead of an Else. This was intentional, as the value of the numeric display is not limited to 1 nor 0. When deciding how to handle your code, consider what makes the most sense for you based on your intended behavior.
Error Handling
Let's prevent errors from interfering with our operation. If there is an issue with the connection to the PLC, then the numeric display may have an error value. Unfortunately for us, this change to an error value counts as a value change and will trigger our display change subroutine. To avoid this, we will wrap our logic in an if statement that checks if there is an error value in our component.
Private Sub PopupEventTrigger_Change()
    ' Make sure there is no error '
    If Not IsError(PopupEventTrigger.Value) Then

        ' If trigger value is rising '
        If PopupEventTrigger.Value = 1 Then
            ' Change Display '
            ExecuteCommand ("Display Popup")
        End If

    End If
End Sub
Alternatively, we could exit the subroutine early if there is an error.
Private Sub PopupEventTrigger_Change()
    ' Make sure there is no error '
    If IsError(PopupEventTrigger.Value) Then
        Exit Sub
    End If

    ' If trigger value is rising '
    If PopupEventTrigger.Value = 1 Then
        ' Change Display '
        ExecuteCommand ("Display Popup")
    End If
End Sub
Let’s Make it Scalable
While this solution works great for changing to one specific display, it doesn’t work great at scale. Imagine, for a moment, having to repeat the process of creating a new numeric input and writing the Visual Basic subroutine for every display you want to change to. Needless to say, this proposition elicits feelings of dread.
To avoid this monotonous task, we are going to discuss a couple possible architecture changes to support additional display changes.
Potential Architectures
There are, of course, more options than the two I will address here; however, they should generate some considerations for designing the architecture that fits best for your uses.
Custom Display Indexing
The numeric display we have been using to trigger our subroutine is not limited to a 1 or 0, so let’s make use of it. Change the expression to read an int on the PLC, and let's move to a display based on what int is shown.
Private Sub PopupEventTrigger_Change()
    ' Make sure there is no error '
    If IsError(PopupEventTrigger.Value) Then
        Exit Sub
    End If

    Select Case PopupEventTrigger.Value
        Case 1
            ExecuteCommand ("Display Popup1")
        Case 2
            ExecuteCommand ("Display Popup2")
        Case 3
            ExecuteCommand ("Display Popup3")
    End Select
End Sub
This approach is handy as it allows you to map integer values to displays, similar to how the process works in ME. All the display changes are handled here in this subroutine; however, you will have to manually add each new display you want to transition to. To avoid this, we can have the PLC pass a string indicating a destination display.
Passing Strings from the PLC
By setting a string on the PLC for the HMI to read, we can indicate any display we want to transfer to! For simplicity, let's create a string display on our PopupHandler screen to reference in our VBA. There, we can change our command to display whatever display is referenced in the string. Make sure that the string display has plenty of characters, as it will trim the PLCs string to the specified character amount. Additionally, make sure to expose the string display to VBA from the property panel with the option "VBA Control".

Private Sub PopupEventTrigger_Change()
    ' Make sure there is no error '
    If IsError(PopupEventTrigger.Value) Then
        Exit Sub
    End If

    ' If trigger bit rising '
    If PopupEventTrigger.Value = 1 Then
        ' Trigger display change based on the value of the passed string '
        ExecuteCommand ("Display " & DisplayNameString.Value)
    End If
End Sub
If you want help with your FactoryTalk View SE project or PLC development, contact us today for your next project — we would love to help!