Welcome back to “Getting Started with WinCC OA”! If you aren’t familiar with the series’ previous topics, it’s recommended that you read the respective installments before proceeding:
db Folder Recap
Before we dive into Para, let’s review the db folder. In Part 2 of the “Getting Started with WinCC OA” series, we described the db folder as:
“The db folder contains all of OA’s user-defined datapoints and internally-used datapoints. These datapoints, analogous with PLC “tags,” hold and retain values that can be used by OA as well as connected PLCs. The user interface for these datapoints is called ‘Para’.”
What is Para?
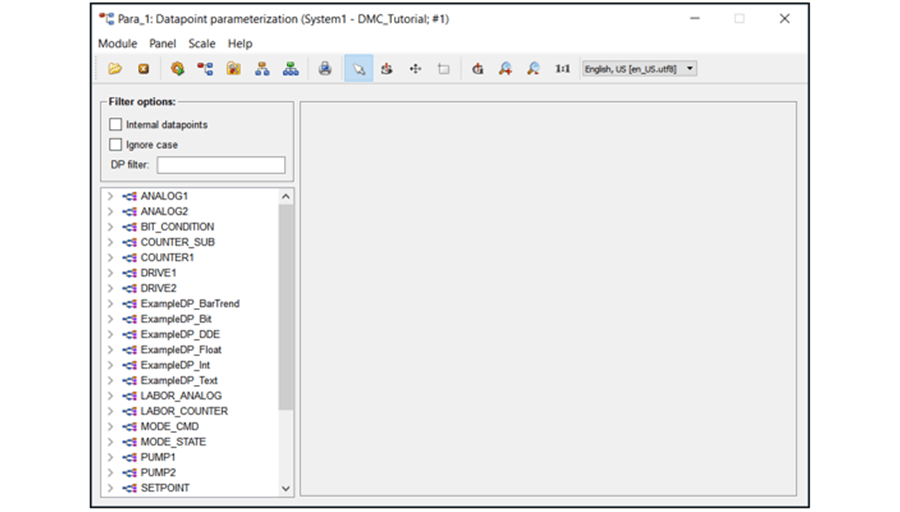
Para is a graphical interface in Gedi used to view, create, and edit datapoint types, datapoints, and datapoint elements that are stored in the db folder. “What are datapoint types, datapoints, and datapoint elements?” you may ask.
- Datapoint type (dpt): A datapoint type is a defined structure consisting of variable types, substructures, and/or other data point types.
- Datapoint (dp): Data points are instances of a specified data point type. These data points physically hold the information outlined by their respective types.
- Datapoint element (dpe): Data point elements are the components of a specific data point. Data point elements and data points are fairly synonymous and can often be used interchangeably.
If this only makes partial sense, fear not. Things will become more clear as we walk through the following example:
Creating a Datapoint Type
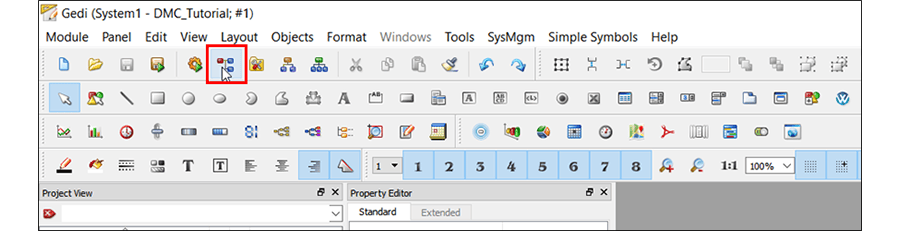
- To access Para, simply click the “Para” icon located within the project toolbar.
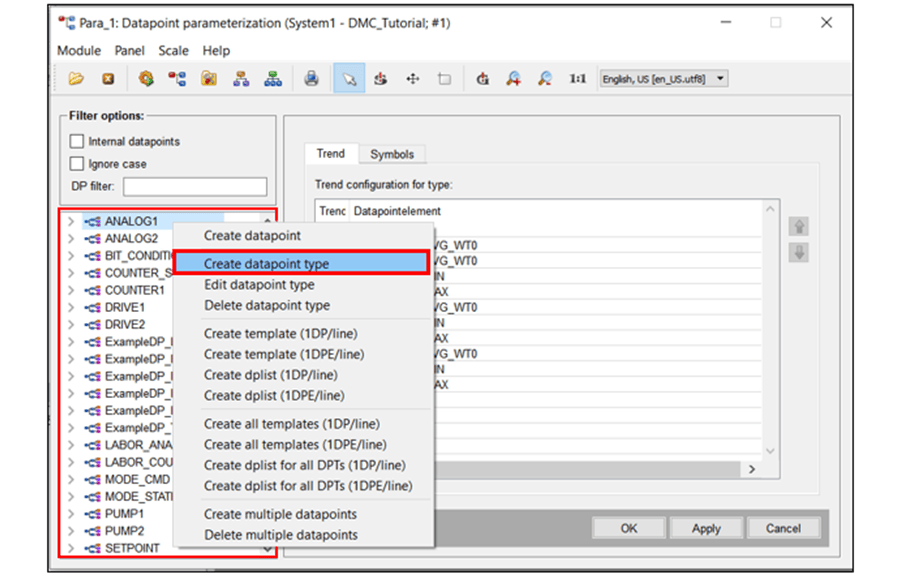
- To create a data point type, right-click the Para Tree and select “Create datapoint type.”
- The first “folder” structure in the Dp-Type Editor will be the name of the datapoint type, so name it accordingly.
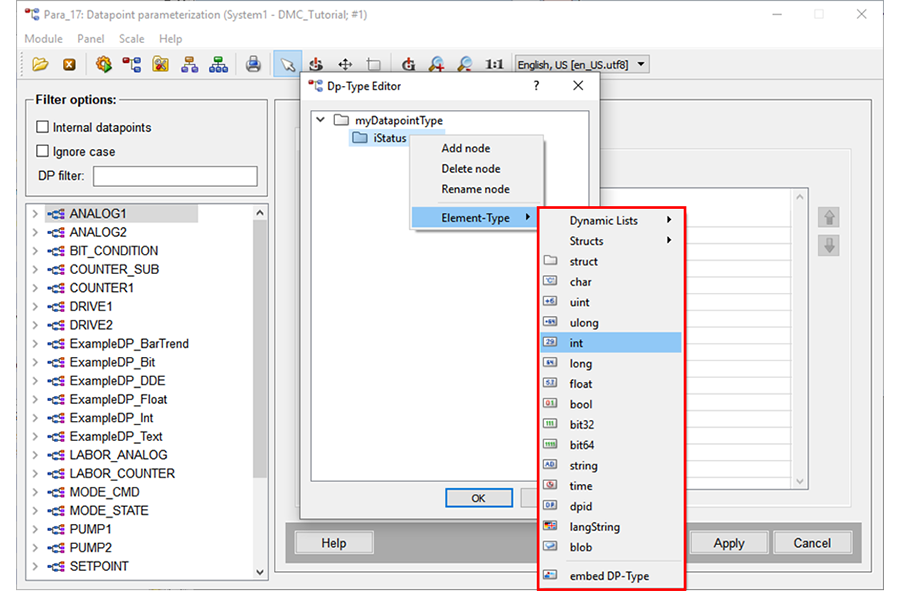
- To add elements to the data point type, right-click the dpt and select “Add node.”
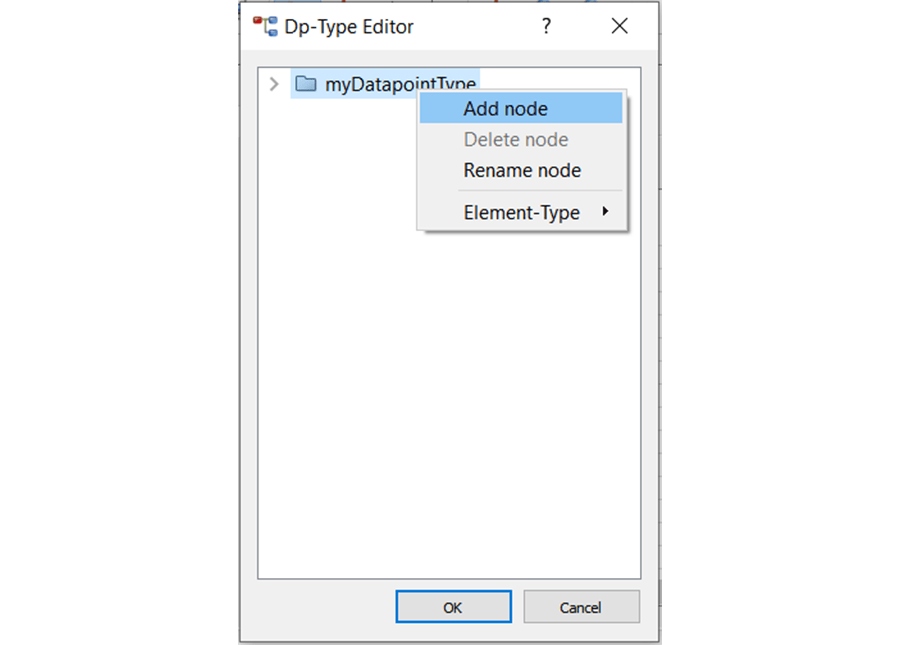
- Added nodes, by default, take the form of a structure. By right-clicking on a node and hovering over “Element – Type”, the user can configure each node to take on a desired variable type or even another datapoint type.
- Through adding, renaming, and re-typing nodes, the following datapoint type can be configured:
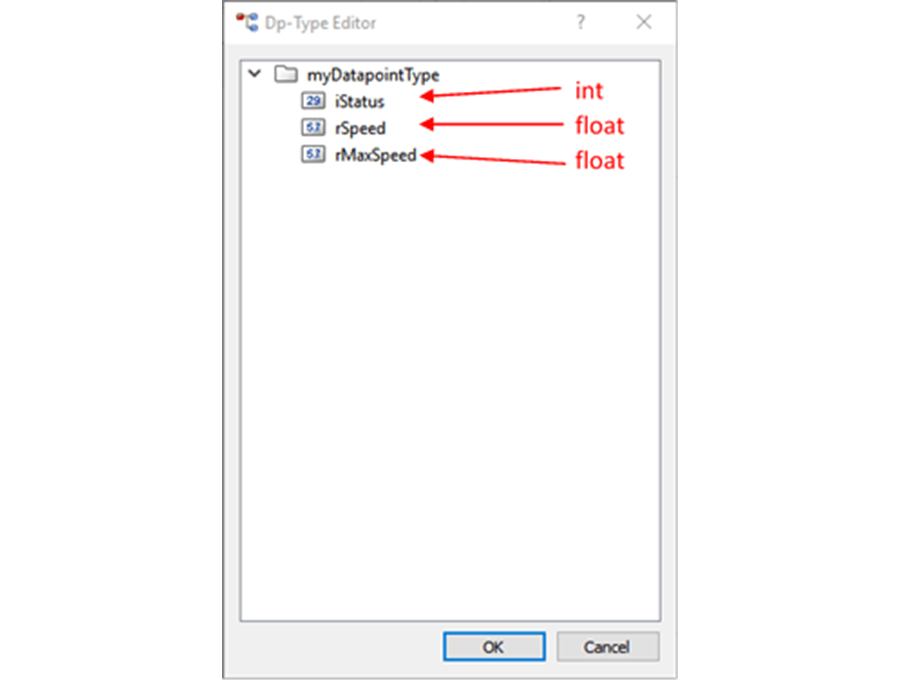
We’ve successfully made a datapoint type! However, this structure doesn’t physically exist as a usable entity to store data. For that, we must create a datapoint.
Creating a Datapoint
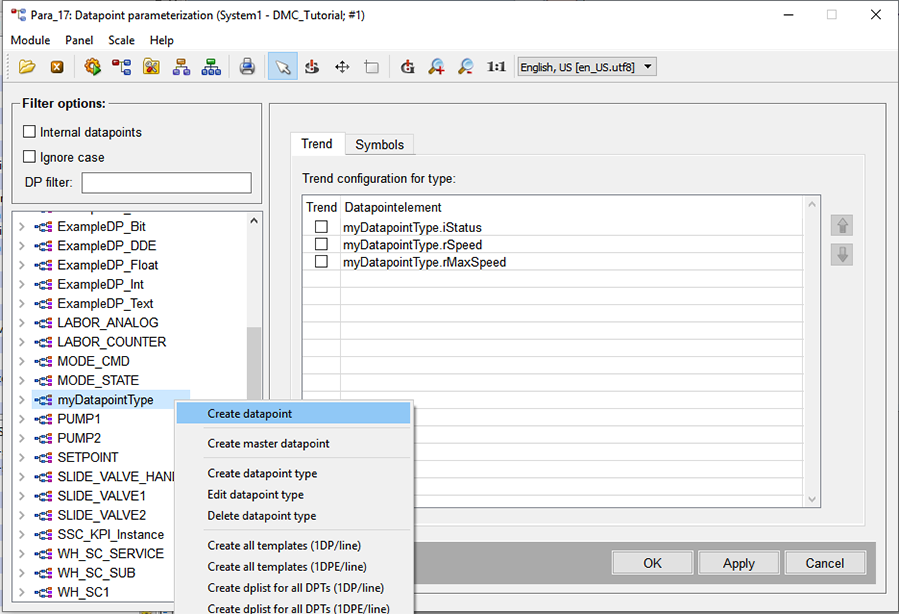
- To create a datapoint, simply right-click the datapoint type and select “Create datapoint”
- Once named (our example names the datapoint “myMotor”), a new datapoint will appear underneath its respective datapoint type.
Note that the datapoint contains all the elements defined in the datapoint type. These elements of a specific datapoint are called datapoint elements.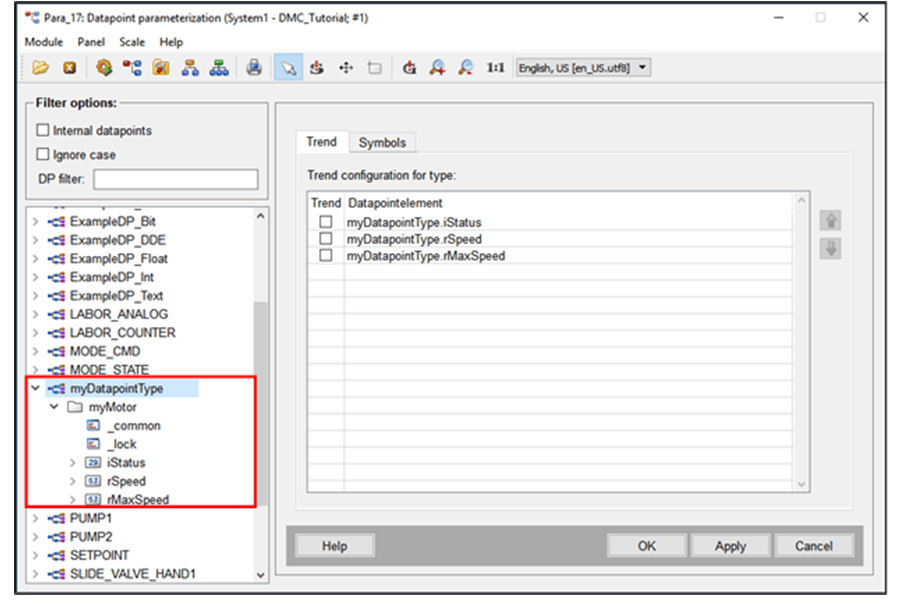
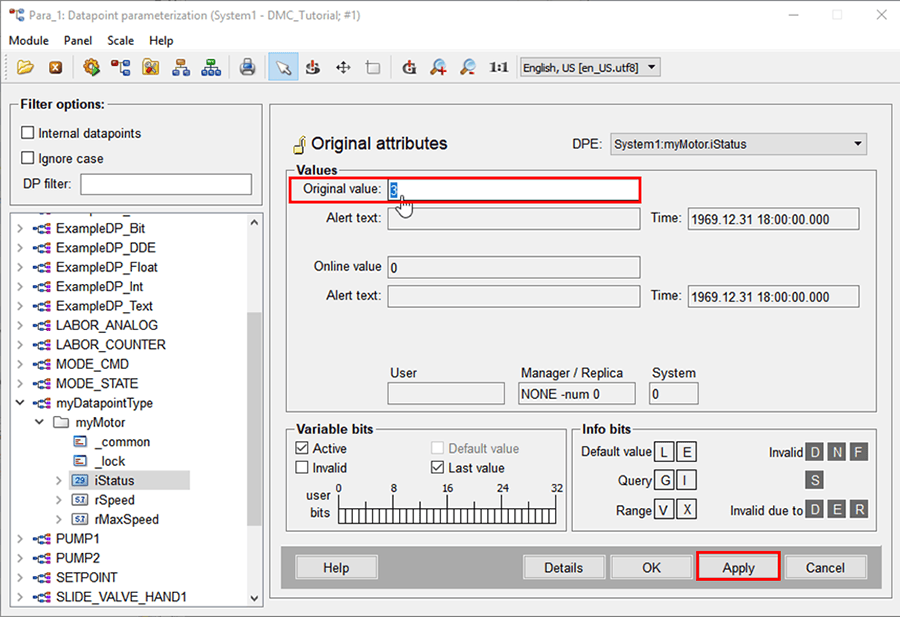
- To manipulate a datapoint element’s value, simply click on the dpe, change its “Original value”, and click “Apply”.
Datapoint Configuration
Once created, datapoints and their respective elements can be configured to have specific user-defined properties such as units, ranges, and descriptions, addresses, trending archives, etc. To get started with OA, most of these configurations will not be covered. However, it’s beneficial to note their existence and how to change datapoint properties. For this blog series, we’ll look simply at unit configuration as a relevant example.
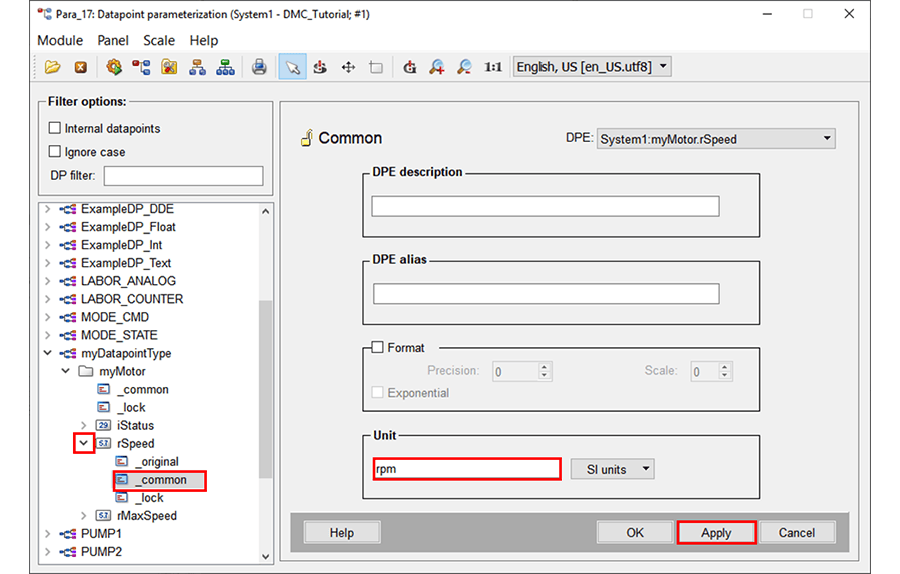
- Under rSpeed’s dropdown, click “_common”
- Under the “Unit” field, type in “rpm” and click “Apply”
- Repeat for rMaxSpeed
NOTE: The underscore in “_common” or any other config/datapoint signifies that the item is an internal, non-user-defined datapoint.
WinCC OA Import Tag Tool
For WinCC OA projects that communicate with and use tags of PLCs, it becomes extremely tedious to create, edit, and link OA tags in the manner outlined above. Luckily, DMC has created a WinCC OA Import Tool that aids in importing tags from a TIA Portal project into WinCC OA. Find more info on it in our Siemens Open Library.
Now that we have a few datapoints configured, it’s time to utilize and manipulate them within our scripts! We’ll explore interacting with datapoints in the next installment of “Getting Started with WinCC OA.”
Topics to look forward to in this series:
Contact DMC to get started on your next WinCC project and learn more about our Siemens SIMATIC WinCC Programming as well as our WinCC Open Architecture Development.