Mitsubishi GX Works3 is a platform for programming Mitsubishi PLCs, and it is possible to directly integrate the PLC's tags into Ignition with the recent release of the Ignition Mitsubishi driver.
Ignition offers native support for Mitsubishi devices through its new Mitsubishi TCP Driver, allowing direct communication between the PLC and the SCADA system. Ignition has a published guide for setting up connection from the Ignition side.
In this blog we will focus on the configuration of a Mitsubishi PLC project in Gx Works3 to connect to an Ignition server as well as some basic troubleshooting tips. Additionally, we will go over the concept of a useful tool DMC developed DMC to quickly convert assigned labels within global label lists to Ignition addresses in a .csv file and that can be directly imported into the Ignition Gateway.
Configuring a Mitsubishi PLC for Connecting With Ignition:
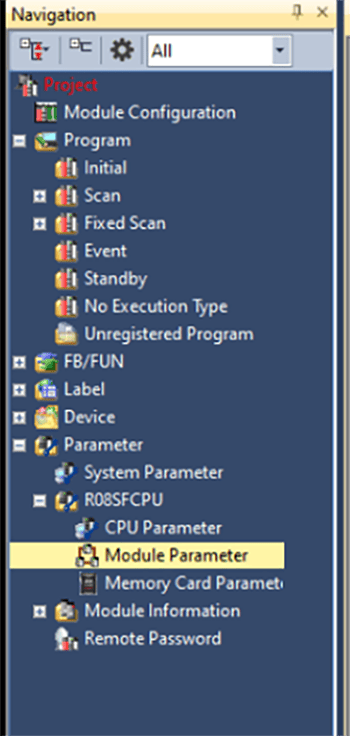
After you’ve added your PLC to a Gx Works3 project, navigate to the Module Parameter of your PLC.
In the “Own Node Settings,” first make sure your PLC is on the same network as your Ignition Gateway, and then make the following changes:
- Enable/Disable Online Change > Enable All (SLMP)
- Communication Data Code > Binary
Then press “Apply” at the bottom right corner.
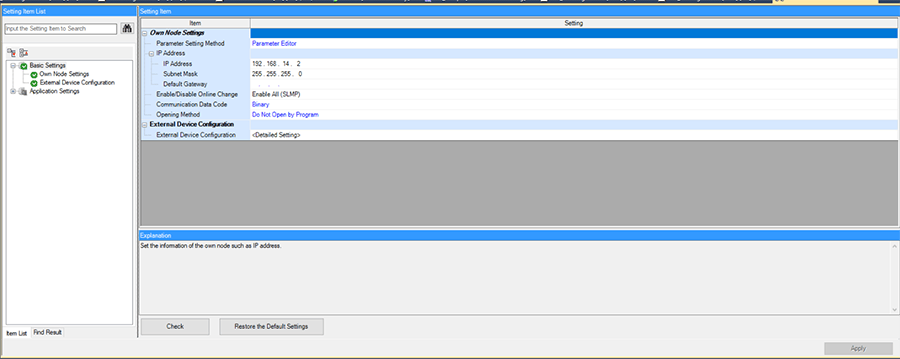
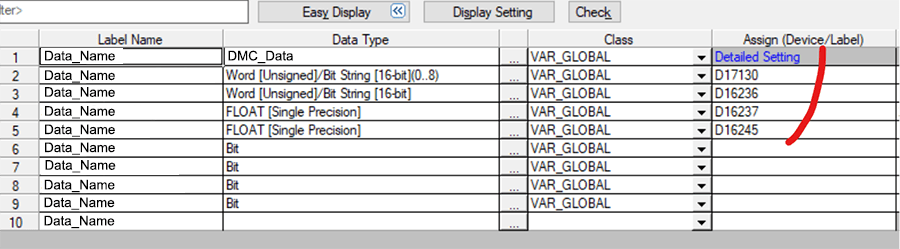
Next, double click on the “<Detailed Settings>.”

A new window will pop-up labeled “Ethernet Configuration.” Navigate to the right of the window and click on “Ethernet Device (General).” Next, click and drag a “SLMP Connection Module” to the table portion of the window. A new SLMP Connection Module will be added.
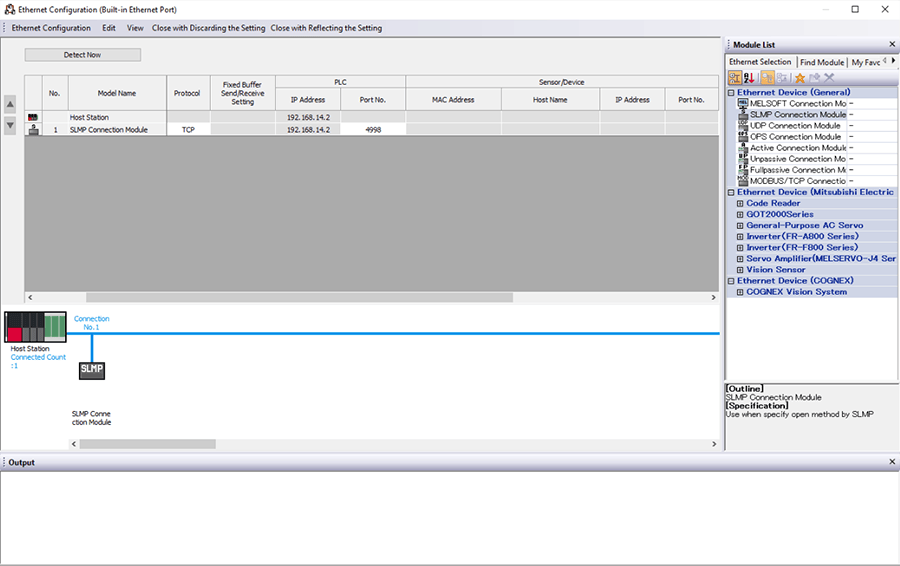
Set the Protocol to “TCP” and then set the Port Number to the same port number that was chosen in the Ignition Mitsubishi Driver.
Press “Close with Reflecting the Setting” at tool bar located at the top of the window. Finally, write the new configuration changes to the PLC and do a power cycle.
Troubleshooting Connection Issues:
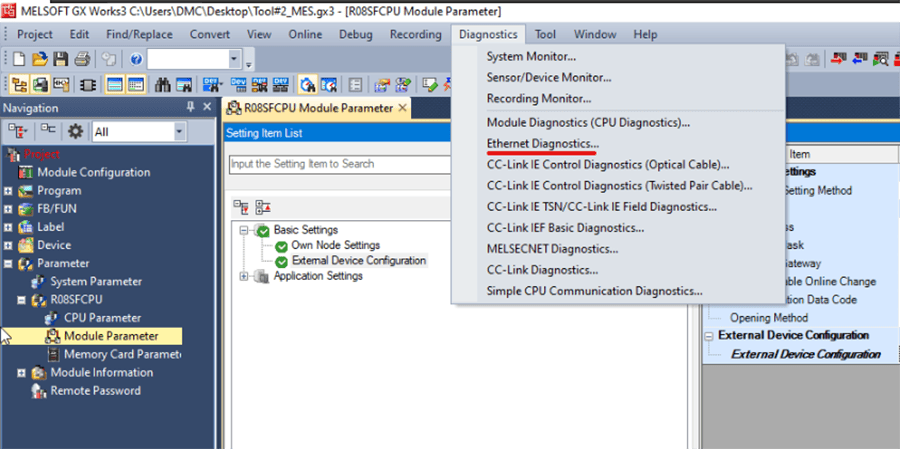
In the tool bar at the top, navigate to “Diagnostics” > “Ethernet Diagnostics” to troubleshoot any connection issues. Here you can see any error codes or statuses. You need to be connected to the PLC to use this.
Converting Gx Works3 Global Label Lists to Ignition Addresses:
Quick reminder that, for your tags to be seen by your Ignition project, they need to have device assignments. Here is an example where the labels are assigned to D devices:
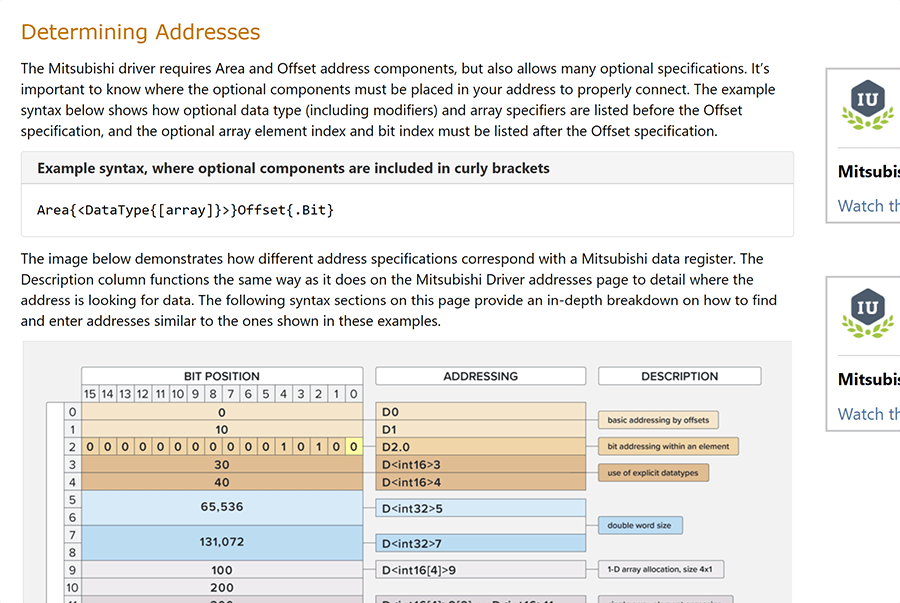
For the Ignition side, you can find the formatting for these addresses in the “Determining Addresses” section in the Ignition document linked at the top of this blog.
If your project has a lot of tags, it can be worthwhile to create an automated script/program to convert the label list exports from Gx Works3 to Ignition addresses and compile them into one .csv file to import into the Mitsubishi driver on the Ignition gateway. This will be much faster than manually adding in one tag at a time.
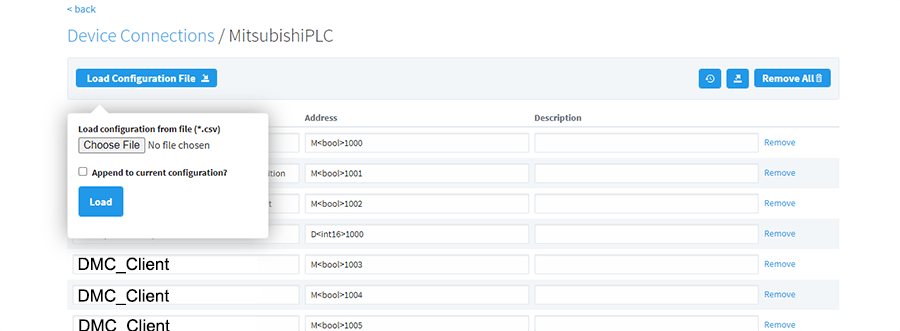
You can choose to use one .csv file to keep track of all your PLC tags or append new .csv files each time you add new tags.
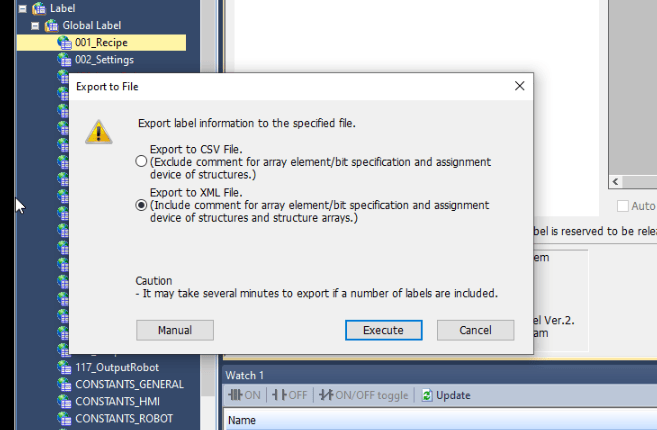
On a recent DMC project, we designed a Python tool to help us automate this task. Our Python tool would read the exported .xml files from Gx Works3, pull out the tag names, data types, and assigned device numbers, and then use that information to construct the Ignition addresses.
Our tool was custom made for a particular project, but here is the overall workflow for our tool for guidance if you are looking to create your own:
- Right click on HMI tag lists from Gx Works3 project and export as XML.
2 . Move them into the designated folder where our Python script is accessing unprocessed tag lists.
3. Run Python script.
4. Grab converted .csv file and import (without appending) into Mitsubishi Driver in Ignition gateway.
5. Repeat process if new tags/lists were added to the unprocessed tag folder.
In this project, we changed the mapping for our tags often during development due to changing scope/issues we were encountering. It was beneficial for us to re-run our Python conversion script on all the .xml HMI tag list files and import a new converted .csv file each time instead of appending an additional file. It was easier to keep track of changes and to update any tag mappings that might have changed as we just needed to export and overwrite the same tag list in the unprocessed tag list folder.
Learn more about our Manufacturing Automation and Intelligence and PLC Programming expertise and contact us for your next project.