Siemens RFID Card Reader Setup, User Administration, and Auto-Login
This blog is an instruction guide to installing the necessary Comfort Panel HMI software for interfacing with a Siemens RFID card reader. Additionally, the guide will demonstrate the necessary setup elements in the PLC project, as well as instructions for getting started with user administration and auto-login.
Definitions
- UID - Unique Identifier, tied to an individual card
- SOAP - Simple Object Access Protocol, Protocol specification for exchanging structured information in the implementation of web services
HMI Panel/Project Setup
Install PM-LOGON Basic Runtime for Panels
-
Install PM-LOGON software on an engineering computer.
- This installs the option "PM-LOGON Basic Runtime for Panels V1.1" into SIMATIC ProSave.
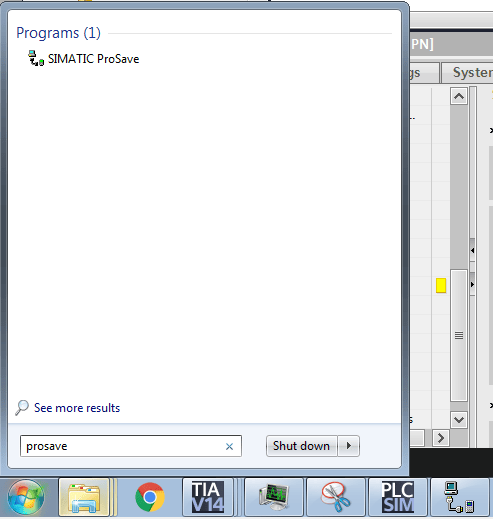
- On engineering computer, open SIMATIC ProSave.
- In the general tab, configure IP address of panel.

- Go to Options, select PM-LOGON Basic Runtime for Panels V1.1.
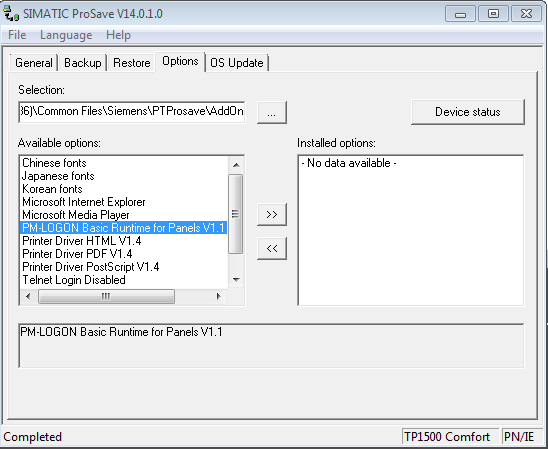
- Press the right arrow to begin the transfer to the HMI.
- After this happens, the panel will be restarted.
Configure PM-LOGON
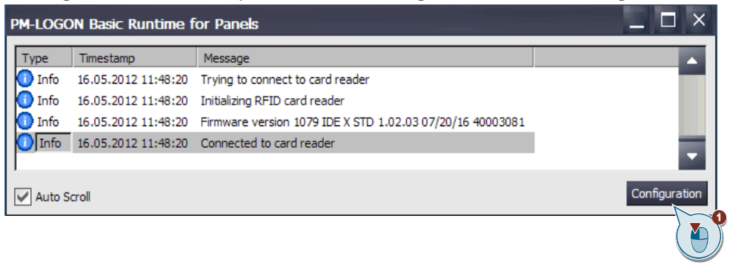
- Open PM-LOGON Basic Runtime on the panel and select Configuration.
-
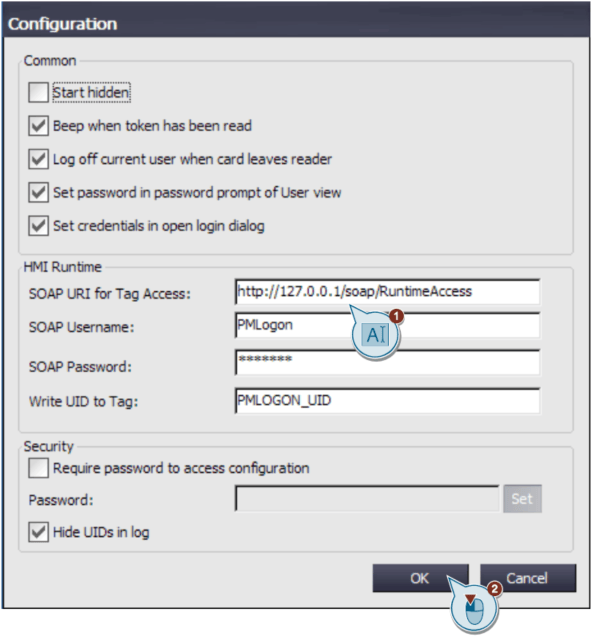
- In the configuration, configure settings as desired.
Key settings
- Log off current user when the card leaves reader - This will log off the user as soon as the card is removed. If the card will remain at the reader, this can be checked, otherwise, this should remain unchecked.
- SOAP URI for tag access - Leave this as the default value.
- SOAP Username/Password - Select this and write it down, as you will need it for the next step. For simplicity, I recommend using PMLogon for the username and password.
- Write UID to Tag - This determines the tag in the HMI that the UID will be written to. This is necessary if you are running any scripts based on the tag.
- Hide UIDs in the log - This option will determine if the card UID's will be displayed in the log (see 2b above). Check this if you want to hide the UID.
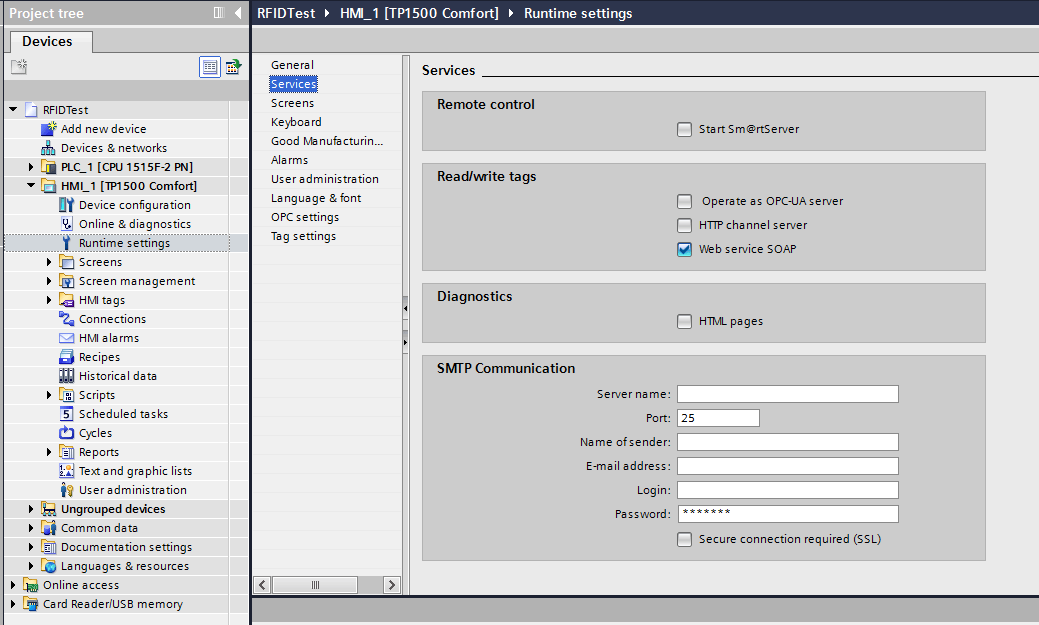
TIA Portal - Enable SOAP, Log In With Password Only
- HMI > Runtime Settings > Services > Check "Web service SOAP"
- This allows for the auto-login functionality that will be discussed later.
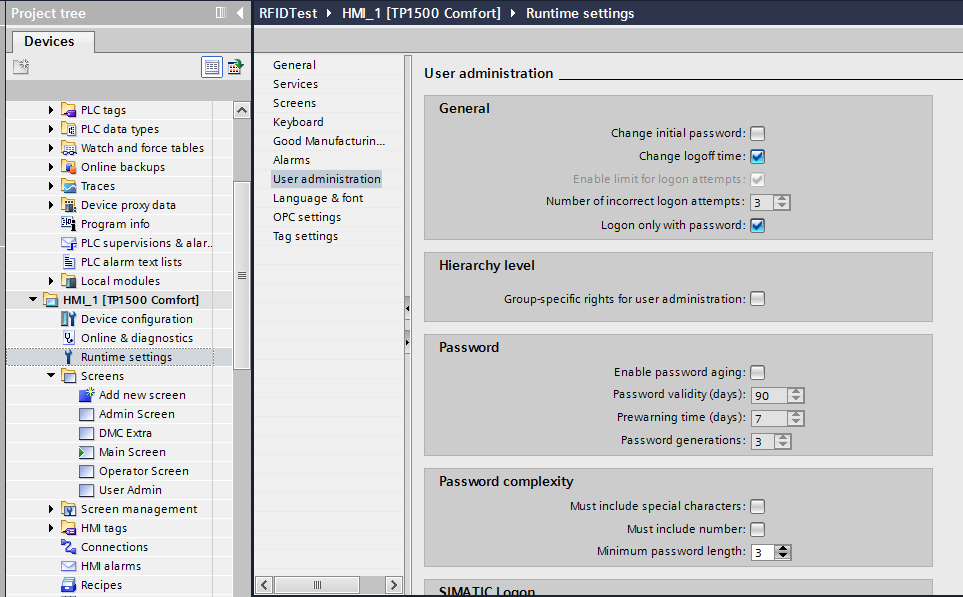
- Logon with password only (HMI > Runtime Settings > User Administration > Check "Logon only with password").
4. Panel Settings - Enable Web Service for Auto-Login (Page 19 Card Reader PDF)
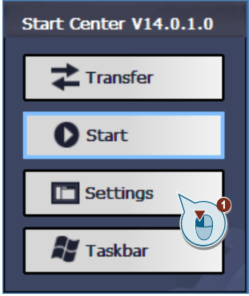
- Navigate to Start Center > Settings.
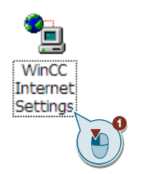
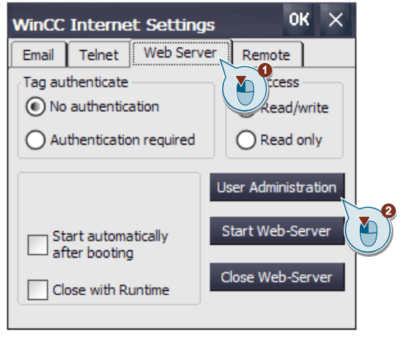
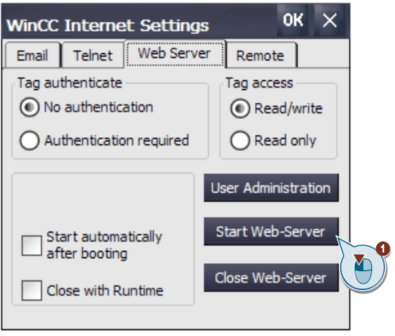
- Select WinCC Internet Settings.
- Navigate to Web Server > User Administration.
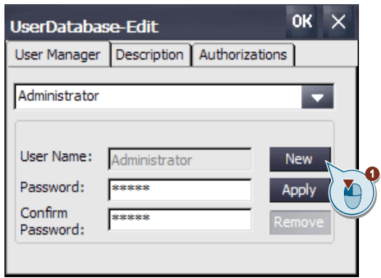
- Add a new user.
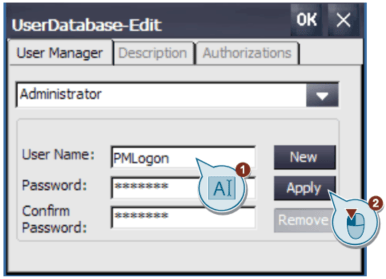
- Add user and password (use Username/Password from 3d above). Apply settings.
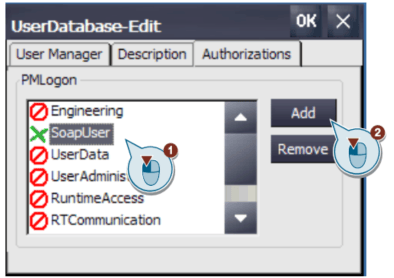
- Add SOAP user authorization for the newly created user.
- Exit using the OK button.
- Start Web Server.
Setting Up New Users
At this point, all basic setup has been completed. Based on what has been set up, the tag PMLOGON_UID in the HMI (once it is created) will be automatically populated by the card reader as soon as the card hits the card reader. Before that, however, it’s important to review how to set up new users with the RFID card reader.
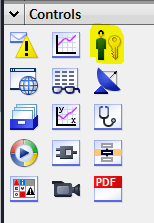
- In the HMI project, add a user view to a screen to customize user administration.
- In Runtime, navigate to this screen, and click the box under the user.
- Add a username for the desired user (the username needs to be added, even though it won’t be used during logins).
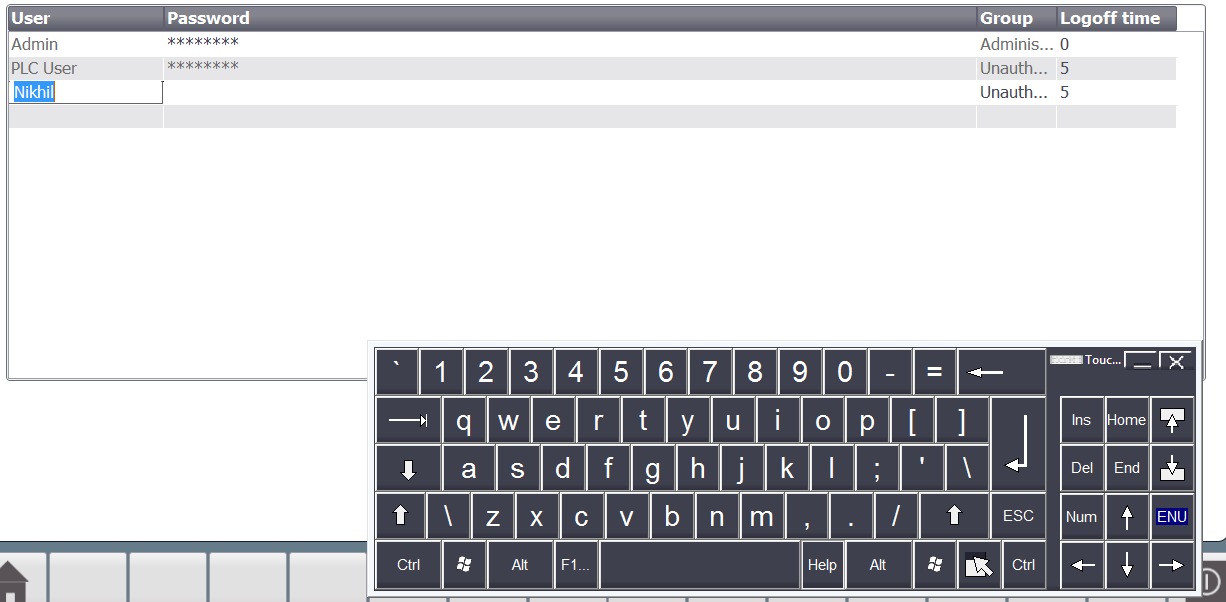
- Click the associated password box for the user.
- Touch your card to the RFID card reader - this should populate the password field.

- Add any other user information (group, log off time) as necessary.
Auto-Login
Now that setup is complete, and users have been added, the HMI is prepped for auto-login. Below is what is needed for auto-login. An extra tag has also been added (GroupNumber), which can be useful for displaying user access levels on the HMI.
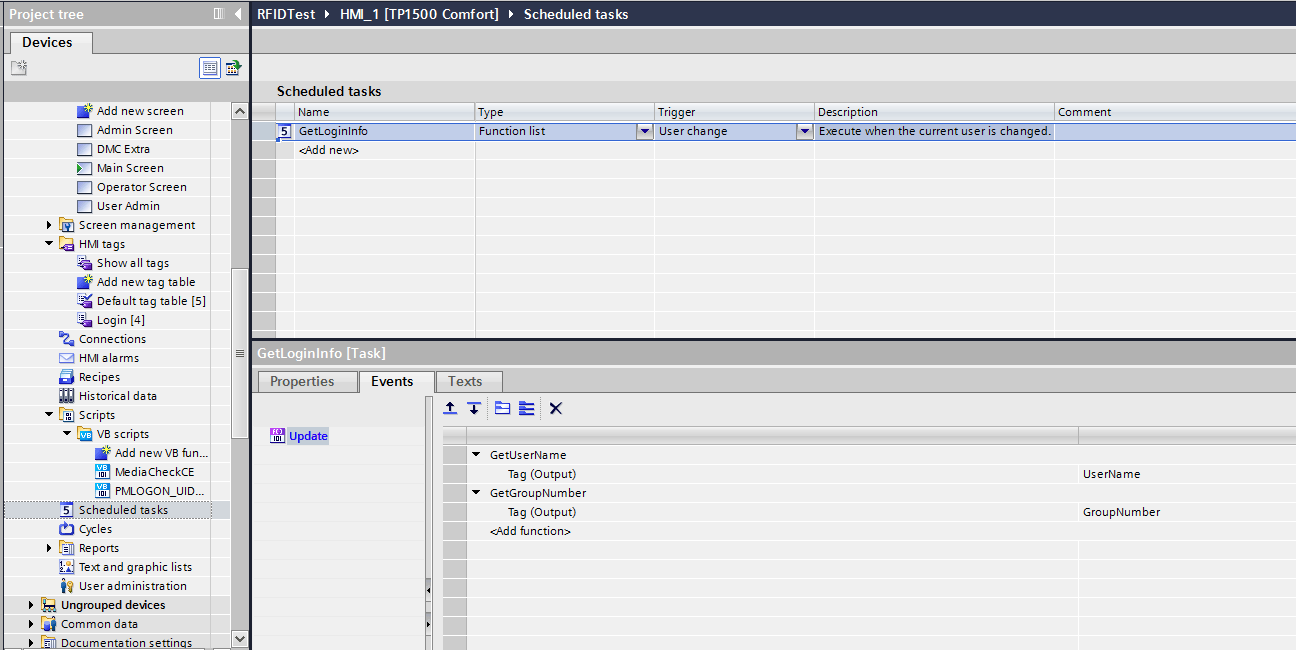
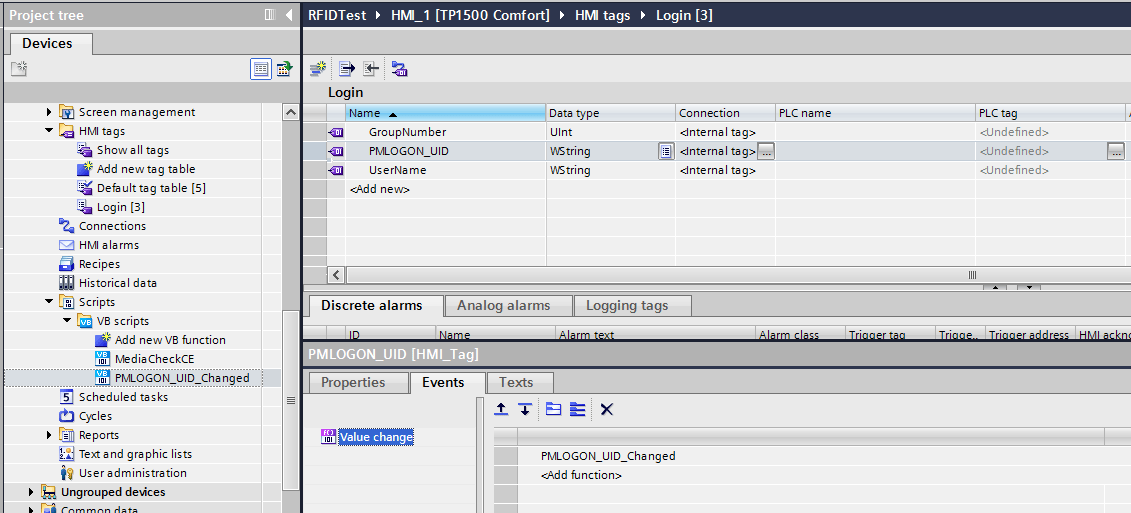
- Add HMI tags for GroupNumber, PMLOGON_UID, and UserName.

- Create a scheduled task to get the UserName and GroupNumber - this will update the UserName and GroupNumber when the user changes.
- Create a script that checks when PMLOGON_UID changes, and logs in the new user.
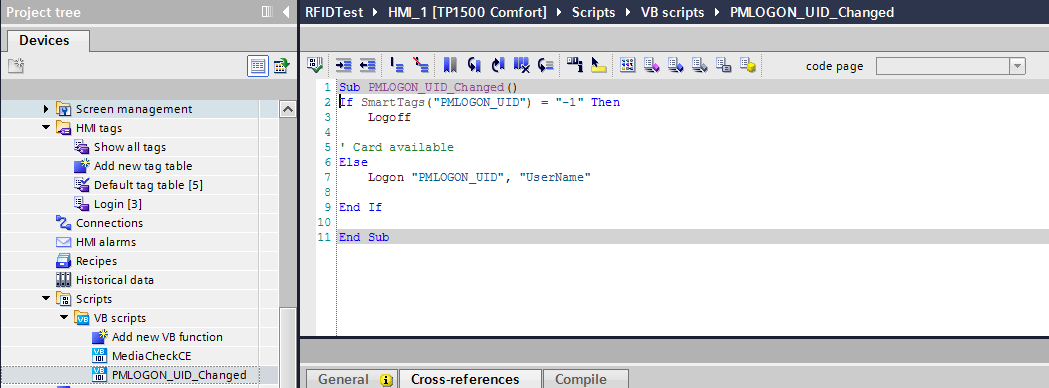
- In the PMLOGON_UID tag, trigger the script you just created on value change.
That's it! From here, users can be added using the RFID card reader (in a user view), and auto-login can be performed by just tapping the card reader with your card.
Learn more about DMC's Siemens expertise.
Comments
There are currently no comments, be the first to post one.